Vintage Breathing

Lots of rust and a few dents to clean up on the replacement air cleaner.

Since I posted last, the T-Bird has been running problem free reliably and I’ve been able to put about 1,000 miles on the odometer. A year ago this time, I had serious doubts that I would ever see a month with no need to get under the hood.

With warm weather here, I’ve had the windows down and driven pretty much anywhere I need, the furthest distance being a 45 mile round trip. Summer is going to be a blast.

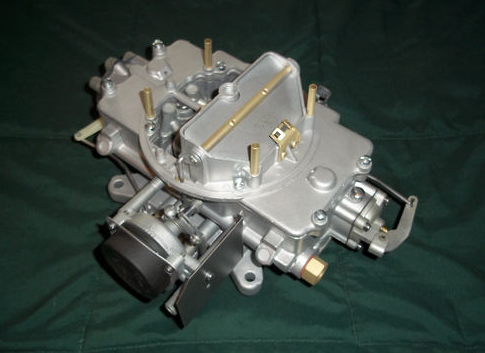
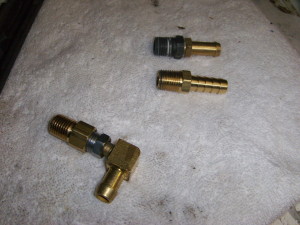
During the lull I’ve been assembling all the parts I need to install the “correct” vintage Ford carburetor. An air cleaner assembly has been secured, cleaned and painted, as have the various accouterments for the choke. In addition, I picked up a new PCV valve and a new heater hose.

I used a Dremel tool to cut the baffle off the top lid of the air cleaner.

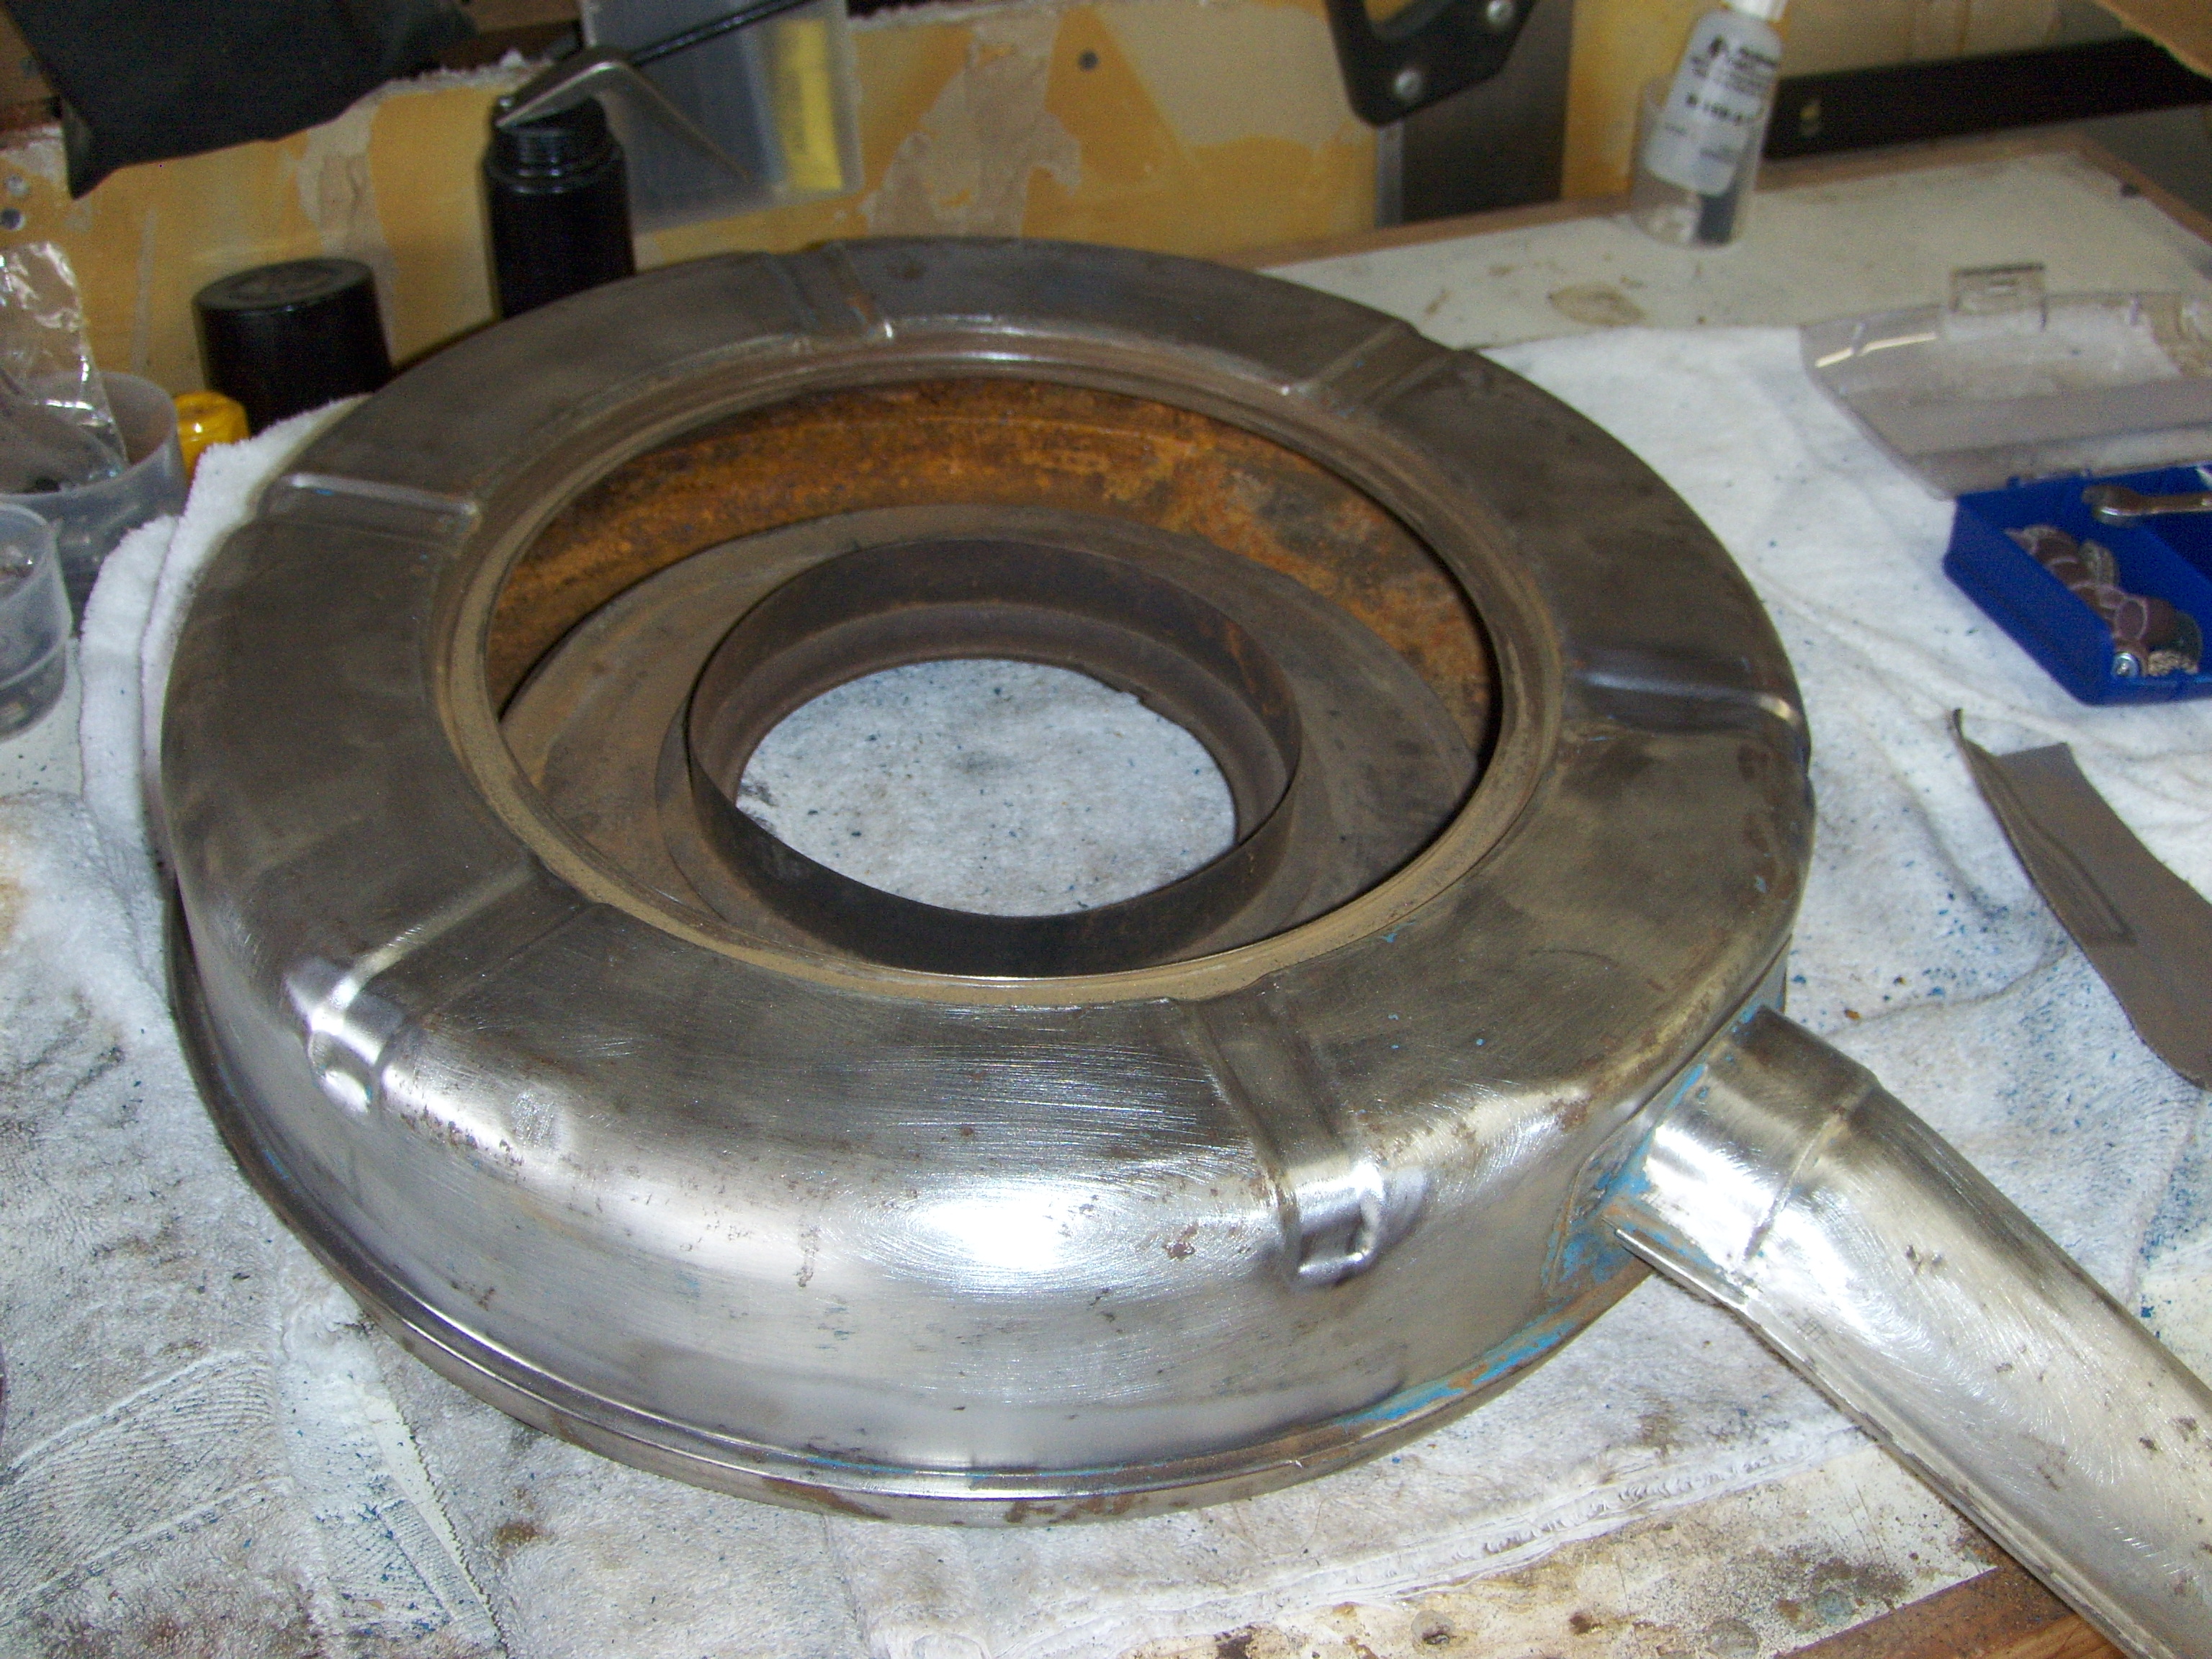
The air cleaner has been a bit of an adventure. There are no part numbers stamped on them, and a wide variety were produced every year. For a California car, I need one with two fittings, one for the choke heater and another for the crankcase breather. I found one that fit the bill, but it is a slightly lower profile than the original.

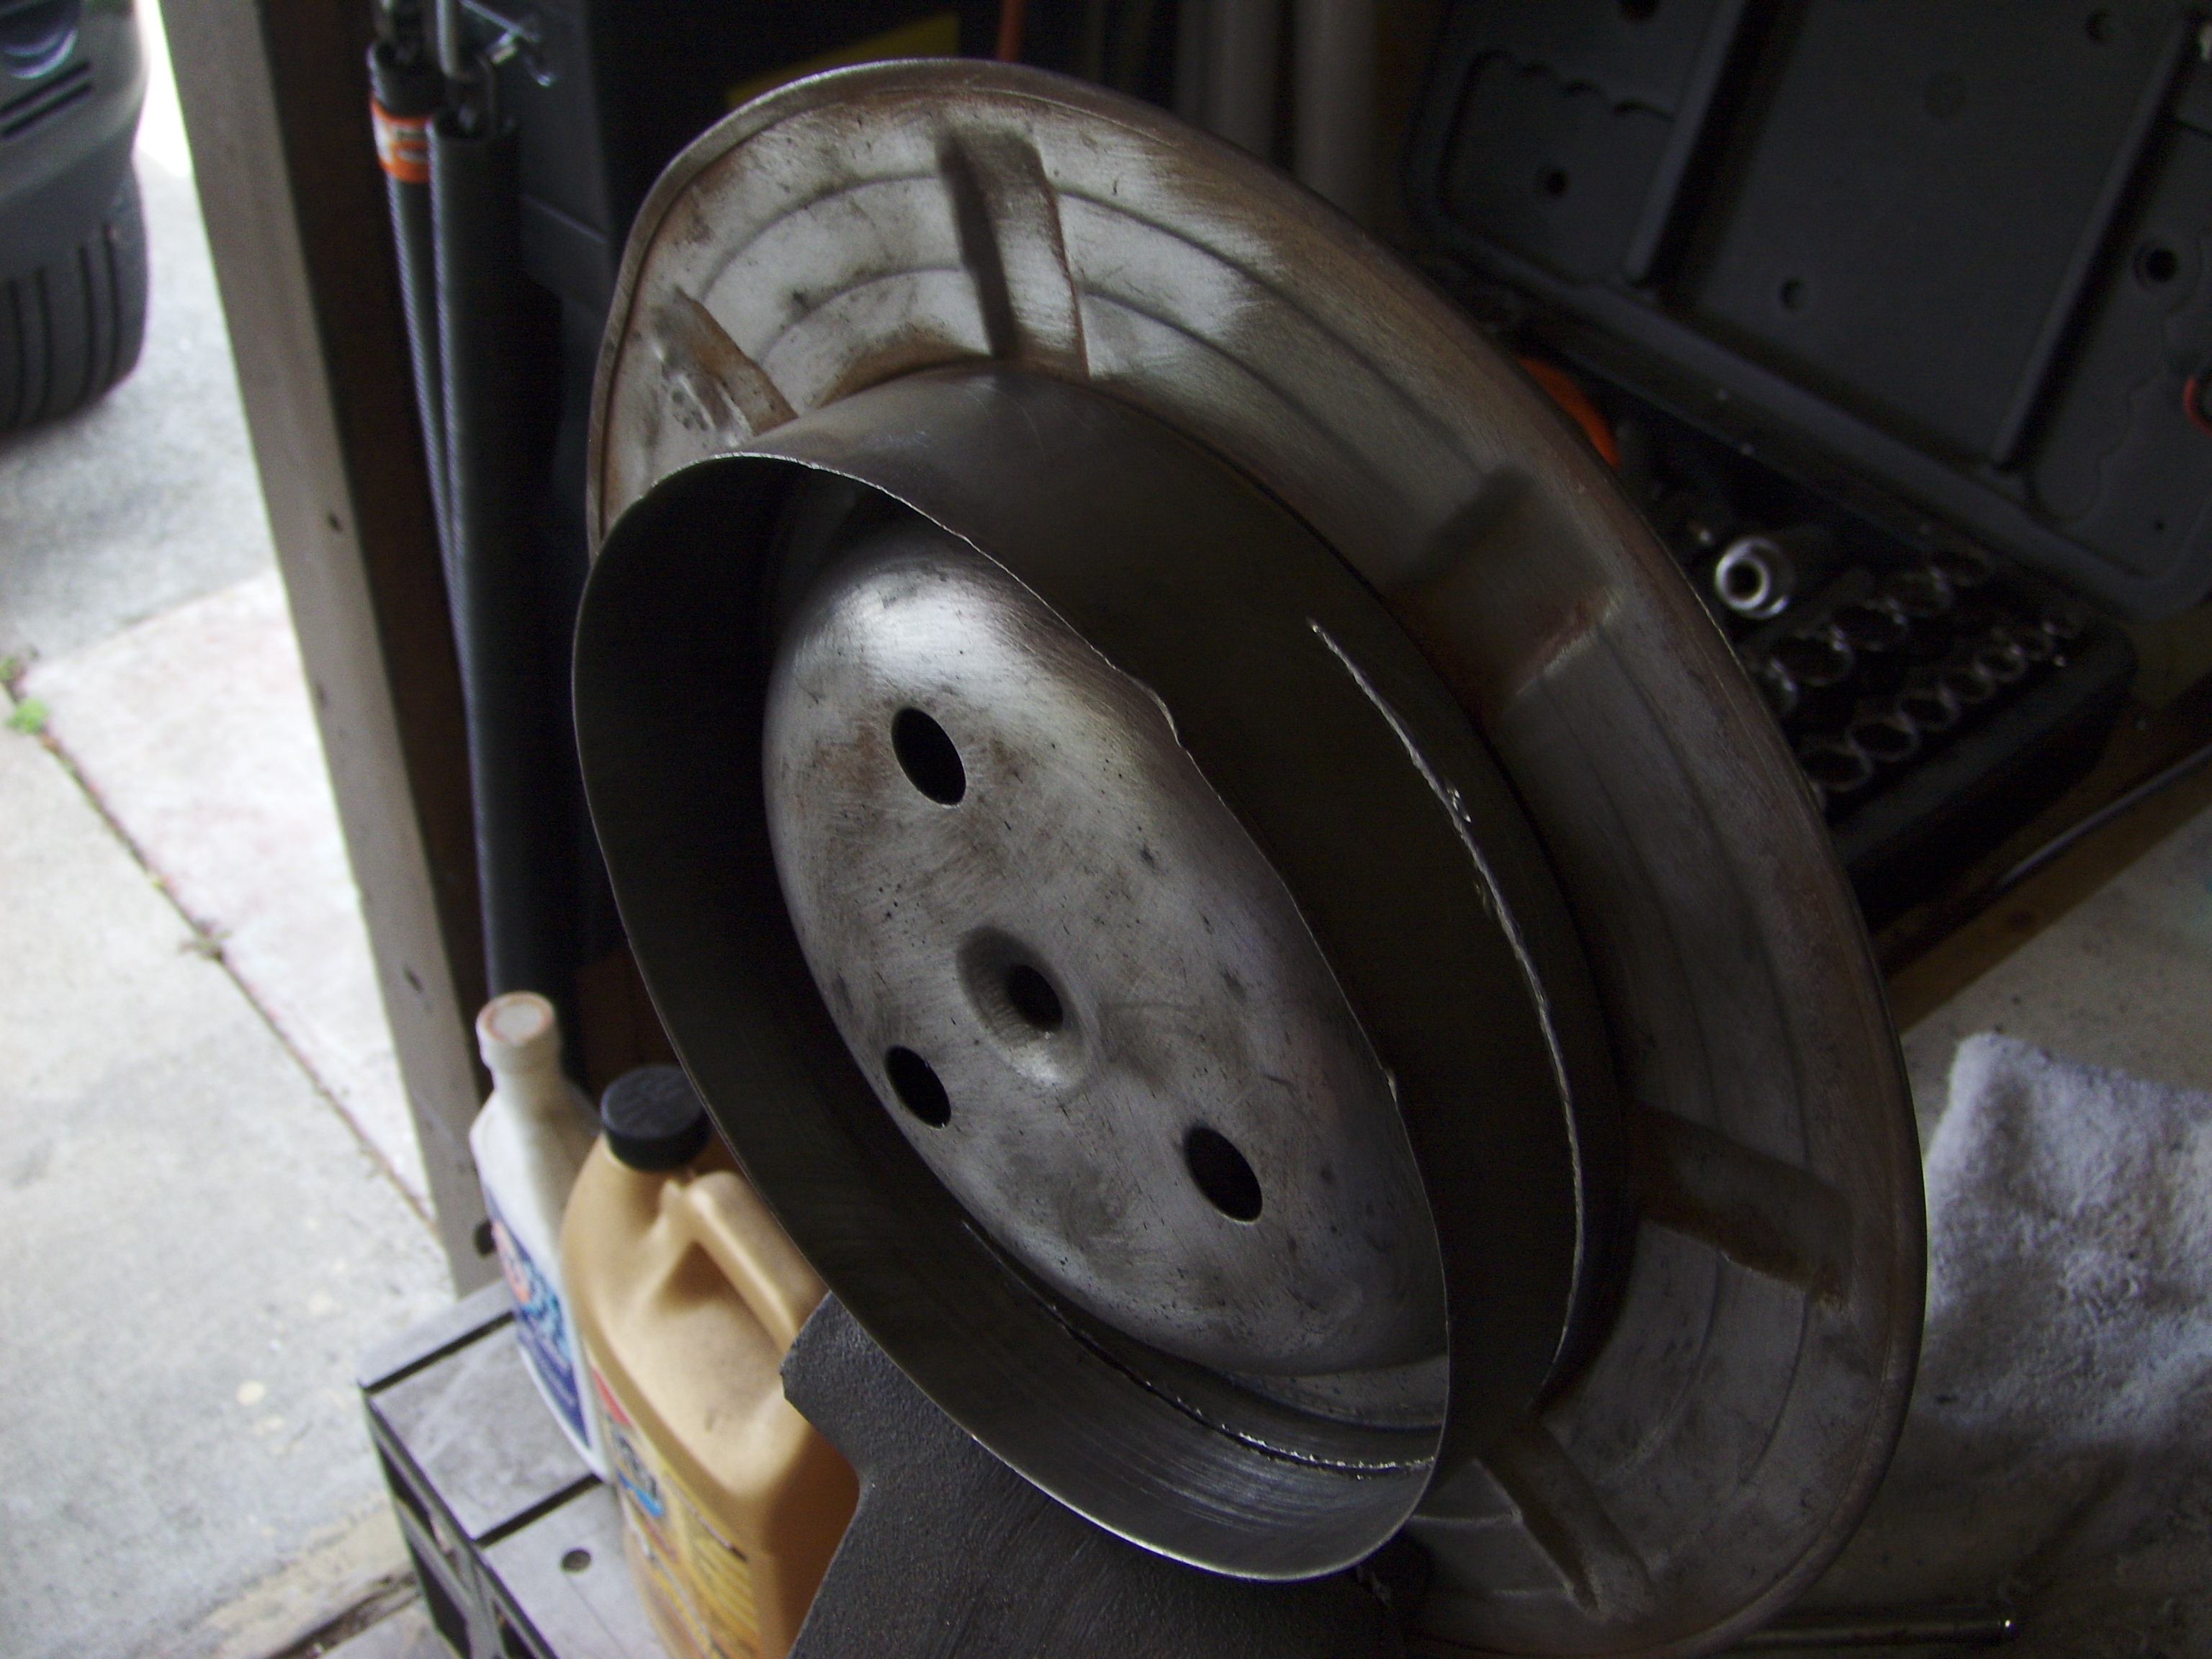
Inside, there is a series of baffles that serve no discernible purpose. In fact, they look like they would impede airflow pretty well. I cut one of them off, and may remove the other if I get a chance in the next few days.

Cleaned up, it looks pretty good; I suspect it will do the job until the right piece comes along.

Next weekend, I should have a day free to swap out the existing Edelbrock for the new/old Autolite. After that, cruising is on the agenda.

Back from the Dead

It was a little over a year ago that I came to the realization that my Bird was further gone than I expected–sadly, more of a restoration work than a rolling project (where I could simply fix things as they broke). Back than, I decided to work through the major areas of concern to ensure that the mechanicals were sound.

Some time in the last few weeks, the ‘Bird passed out of that phase. The engine is running strongly, brakes are reliable and the running train from the transmission to the rear wheels has been completely overhauled.

Resurrection!

It’s not to say that the car is perfect. The clunky old suspension could use some bushings and the steering box leaks Type F so fast I often wonder where it’s all going. But, the Thunderbird is ready to fly again. A drive to the beach, local shows and evening cruises are definitely in our future this summer–all completely out of the question last year at this time.

I replaced the old light switch. Corrosion on this one kept the interior lights from working properly.

Still, “back from the dead” is a tenuous position. So, work continues–big and small. Digging into the center console last weekend, I reattached some loose trim and silenced a nasty rattle. Also, I got the seat belt warning light working again, fixed the cigarette lighter (power for cell phones and navigation units these days) and reattached the lamps that illuminate the glove box.

That all worked well, but something must have gone wrong, as the dashboard lights are now dead.

Sigh.

Under the hood, I’m getting ready to install my new (old) carb. An air cleaner is in the works and most of the parts for the choke heater are on the shelf and ready to go. I would like to do the swap in a single day, so am biding my time until everything I need (including the necessary time) is on hand.

Miles to Go

This is getting to be a routine: make some repairs, push the envelope a bit more, find more issues . . . rinse and repeat.

I did some fairly lengthy freeway driving this week with the Bird and it was pretty cool tooling down the road under sunny skies. I discovered that right around 65mph most of the vibrations smooth out and the ride is relatively comfortable.

C4SF-B--the carburetor that came with the car originally.
C4SF-B–the carburetor that came with the car originally.

It is, however, hardly the epitome of luxury at that speed. Suspension bushings are probably the second order of business. First, there is a vibration in the engine–felt mostly in the steering wheel at certain rpm’s–that I haven’t been able to figure out. Guesses range from the harmonic balancer to fouled plugs to a burned valve.

Also clear now is that the aftermarket carburetor I have on the car is not suited for the type of driving I’m doing. (It would certainly work better in a performance-oriented setup.) I’m still seeing difficult hot starts, some surging at speed and poor mileage, so I ordered a remanufactured carb, correct for my year and model, from a vendor on eBay.

Interior view of the old courtesy light relay.

On one of my trips this week, I stopped by a shop that specializes in new old stock parts. There, I picked up a “good used” relay for the interior lights. Plugged it in, and they are working normally, which really helps to bring life to the car.

Yesterday, I also installed the stock throttle linkage, including the transmission kick-down, which has been missing this past year. Today, I’ll be working to refurbish the center console: reattaching a chrome trim element that has broken free (and rattles like crazy) and bringing the “Fasten Seat Belt” reminder light back to life.

You Joint

I dropped the ‘Bird at a transmission shop that specializes in vintage cars last Monday, where the transmission was removed, torn down, rebuilt and reinstalled over the course of the week. Once we got the unit out, we could see why everything associated fit oddly or worked poorly.

The transmission itself is correct for the car, a medium case Cruise-O-Matic, but mine was originally intended for a 1961 full-sized Ford. The shift linkage and speedometer gear are both wrong for the Thunderbird. Someone had welded an extra length of metal to the shift lever, but it was not enough to make it work right. Fortunately, my mechanic had the parts in stock to bring it all back to spec, including a new rear mount, which was shot (and not even bolted in properly.)

Installing the new u-joint. Yep, this is how the manual says to do it. Three hands are handy for this job.

While he had the car, I picked up the drive shaft to install new universal joints. I was able to get both removed using the two-sockets-and-a-vice process outlined in the manual. The new rear joint went in just fine. In front, though, the new u-joint bound up tight every time I got it clipped into place, as if the bracket on the yoke was slightly bent or misaligned. I took that one back to the shop to have it straightened and the installation completed.

The ‘Bird is back in my driveway–the tranny was reinstalled and working late Friday. There are still some minor tweaks to be made–it’s not shifting quite right and there’s a vibration at low speed. But, having it with me means I can do some more work on the map lights and perhaps get the horn working over the three-day weekend. Tuesday, we’ll get the transmission work wrapped up.

Shocking

Installed shock absorbers all around this weekend and it was the smoothest, if one of the most strenuous jobs I’ve tackled. I used Monroe shocks, which I found for sale, sealed in the box, but second-hand on Craigslist. Despite some chatter on-line about the front shocks not fitting correctly, mine went in just fine after only a little head scratching.

Old vs. New: Front
Old shock on the right, new on the left. No telling if the old ones were designed for the T-bird.

The front shocks in the car looked nothing like the shocks I bought. To make matters worse, the instructions and diagrams in the manual didn’t look like either one. After double-checking the item number online (and confirming it was correct), I followed the instructions that came with the new units. Once I got that figured out, the installation went smoothly.

In the rear, the old shocks came out easily. To get the new ones in that space, I had to compress them–but the Monroes must have a spring in them, ’cause they didn’t want to stay compressed for long. Getting them installed was a muscle-building isometric  exercise of holding the shock completely compressed while trying to guide it into place. What a relief it was to see them finally snap in!

Three Studs
These 3 studs hold the lower end of the front shocks to the A-arm. Best part of this project? All the nuts and bolts could be reached with a socket wrench.

I expected a softer ride with the new shocks, but what I got was better control and a little more firmness. Not complaining–the ride is very nice.

Unfortunately, the nasty squeak in the front end was not significantly improved–something I was hoping for. For that, I’ve got a can of special grease on the way.

Leaks, Coming and Going

Ever since replacing the fuel pump some weeks back, I’ve been troubled with a small but persistent fuel leak. The first pump I put on actually developed a crack in the housing. Removed, returned and replaced that one, only to have the next one drip, probably from one of the fittings.

The 90 degree fitting is flared, so I can return to a stock-like steel line if I like.

Replacement pumps available from the national chains are pretty generic and come with no fittings installed. To get the right inlet and outlet, it seems inevitable that you’ll end up with a stack of adapters, each a potential leak point. Gasoline is pretty clear and it was impossible to see exactly where the leak originated.

Tightening the connections while the pump was in the car didn’t help much, though I did discover that if the car is parked nose up on an incline, the leak will stop. Apparently, it only needs the pressure of the gas in the tank to start dripping.

Yesterday, I took the pump down to Royal Brass (a local specialist in fittings and hydraulics in general. They have rescued me more than once in the past.) In this case, I explained the problem and they came up with a couple of fittings that eliminated the need for adapters. Total cost, $4.

New exhaust manifold heat shield, bolts and washers, fresh from Bird Nest.

Today, I’ll put the pump back together and reinstall it. Yep, getting pretty good with this task, too.

At the other end of the system, the engine has at least one exhaust leak. I ordered a couple of heat shields (gaskets), new bolts and lock washers for the exhaust manifolds, but this is a job I’m not going to attempt myself. Next week, the plan is to drop it at a local shop and let them seal up the manifold and inspect the rest of the exhaust tubing.

Remount

Installation of the new mounts was slightly easier than expected; though I was expecting it to be nearly impossible, especially on the left side. The engine leaned a little to the left, so I started with the more accessible right, holding the insulator against the block and threading in the bolts. The lower stud, which is attached to the crossmember on the frame didn’t line up exactly with the hole, so I left some slack in the bolts for adjustment when I lowered the engine. As the engine came down, though, everything lined up nicely and dropped into place

Hovering Mount
Right mount, attached to the block and hovering over the crossmember. I lowered the jack slowly to ensure I could guide it into place.

On the left side, there’s no way to get two hands up there and still see what you’re doing. With a little luck, I was able to get both bolts into the block on the first try. On this side, the lower stud did match up with the hole on the frame rail, so there was less wiggle room installing the insulator, creating some friction on the bolts. I got them started, but they needed wrenching almost immediately. Unfortunately, swinging a wrench in there is challenge. I got the lower bolt tight and the upper bolt half way in.

With darkness closing in, I switched over to the right side and tightened up both bolts as well as the lower stud. Tomorrow, in daylight, I can get the last bolt snugged up. The goal is to be back on the road by Sunday–looks like I can make that date.

Dismounting

I got a couple of new motor mounts from The Bird Nest. They arrived just before Christmas, but circumstances have kept me away from the car until today. I jacked up the front end of the car as high as I could get it and removed the left front wheel for access.

Wrench on the left mount
This is the lower insulator bolt on the driver’s side. The upper is out of sight, above.

The mounts are in two parts: insulators attached to the motor are bolted to an angle bracket, which is then bolted to a frame member. Getting to the lower nuts (those holding the angle bracket to the car frame) is easy. I couldn’t see a way to separate the bracket from the insulator in the car, but was able, with some effort, to get the insulators removed from the engine block. (Those on the driver’s side are especially inaccessible due to the steering components.)

With the mounts disconnected, I jacked up the motor–had to remove the fan shroud to get it up high enough. The passenger side mount came out easily. I couldn’t get the driver’s side mount and bracket assembly out of the car until I removed the oil filter adapter, which was a little unexpected. The fuel pump was already out (and the coil removed) just by chance. I don’t know if these would need to be removed as well for clearance.

Old vs. New
The old mounts are not only hard and cracked, but twisted and distorted as well.

All the nuts and bolts associated with the mounts were snug, but not tight, which I found a little odd. The engine was out of the car for a rebuild some years back and it’s a simple matter to assemble the mounts before reinstallation. In my case, it will be a little more difficult to cinch everything up.

I will post a photo journal of the whole process once I have the new mounts installed. Should I ever buy another ‘Bird, this will be an item I’ll plan on replacing right off the bat.

Mounts

The “scraping” I heard “in the back of the car” crystallized in my last drive, turning into a very clear rattling noise that I could reproduce at will. I shot this video where the noise is very clearly audible at about 12 seconds in.

poster
Motor Mount Noise
00:00
--
/
--

With more help from the folks at the VTCI forum, I was able to locate the source of the problem: bad motor mounts.

Yep, both of them.

You can see the cracks in this mount, as well as the displaced bolt–beat out of place by the rocking engine.

Broken Motor Mount


New mounts are on the way, along with a few other goodies from the Bird Nest.

Plumbed

New Fuel Line
Looking back at the new fuel line.

Got a new line fabricated on Monday and installed it the same day. Hardest part of putting it in was getting the inner fender reinstalled. Once in, the fuel pressure didn’t come up (though the gauge fluctuates a little more) and after a short trip, the pressure was back down to zero. With everything new now from the tank to the carb, the only possible culprits could be a clogged filter (either in the tank or the pump) or a bad fuel pump. I have another pump on the bench and will have a chance to install it this weekend.

In the meantime, the brake lights went out on me (again!). I traced the problem to a replica relay I installed earlier this year. Instead of dropping another $100 on a replacement, I found a generic at a local auto parts store that I could wire into place. Problem solved, permanently this time.

Brake Relay
Modern brake light relay installed in place of the old.

As of this moment, though, the ‘Bird is grounded–this time for an undiagnosed scraping noise somewhere in the back of the car. Something–probably something made of sheet metal–is rubbing against a wheel or the driveshaft, especially when the car is turning right. My bet is that part of the exhaust system is loose, but I won’t know until I get it off the ground and crawl underneath.

So . . . it’s been a year. Last December I had a car that wouldn’t run, couldn’t stay in park and couldn’t stop. Sitting in the driveway, water leaked into it and fluids leaked out of it. Twelve months later, the car normally runs and stops reliably and can generally be counted on for around town errands. In twelve months, I drove it about 1,100 miles, and it’s just about to tick over to 190,000.

In the coming year, I have four areas to work on:

  1. Exhaust: the leaks need to get fixed and at the very least the hangers need to be replaced. In all likelihood, the whole system needs to be re-done. It will be nice to drive with the windows up once and a while.
  2. Rear suspension: the original springs are shot, as are the shocks back there. The springs need to be replaced or rebuilt.
  3. Transmission: The current transmission works, but it’s at the end of its service life. I’m searching for a correct replacement that I can rebuild myself.
  4. Differential: Like the transmission, it’s due. Just a matter of time before the whine back there turns into a howl.

There are some aesthetic issues with the car, like carpet and trim, as well as some minor rust issues. Those would be nice to do, but in 2013 I’ll be focused on getting all the mechanicals to reliable running order.