If You Give a Mouse a Cookie

Mission creep: starting out wanting to change the spark plugs and ending up pulling the whole motor for a rebuild.

The clock pod, at the end of the disassembly process

Yep, I extended the scope of this project once again, this time adding new sheet metal for the rusty floorboards and new carpet to cover it all up. Parts are ordered and UPS is set to deliver them this week.

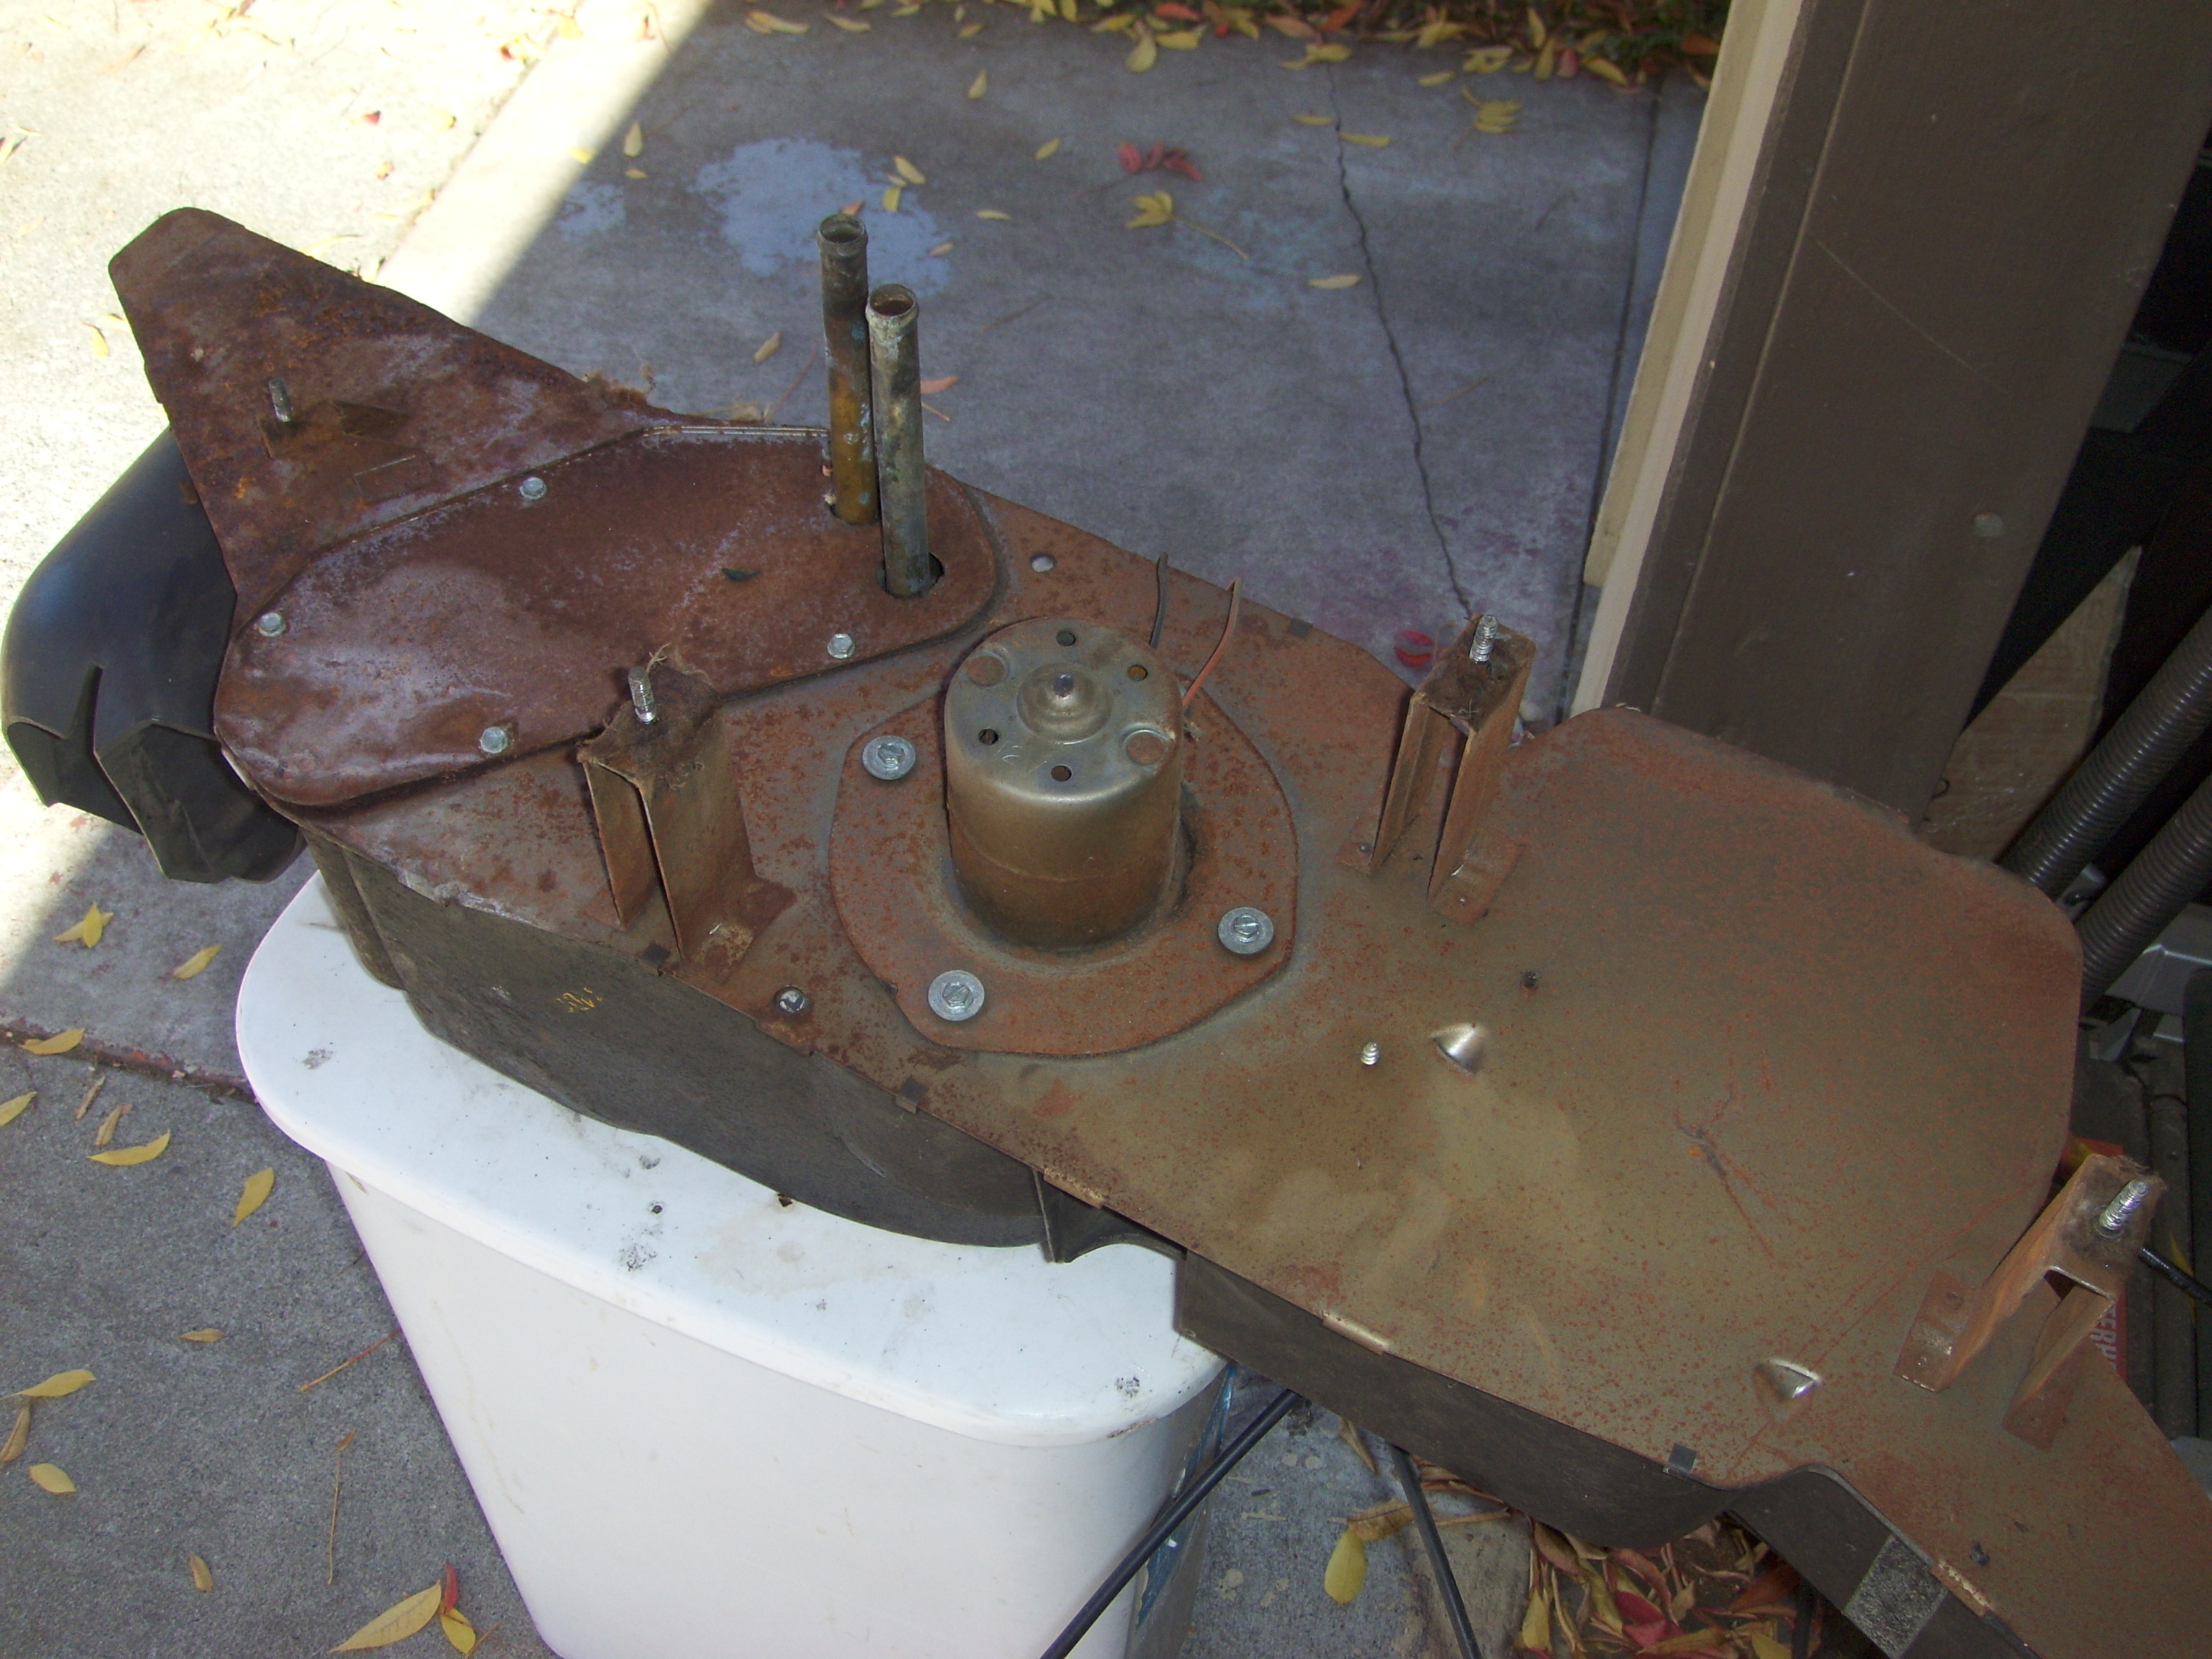
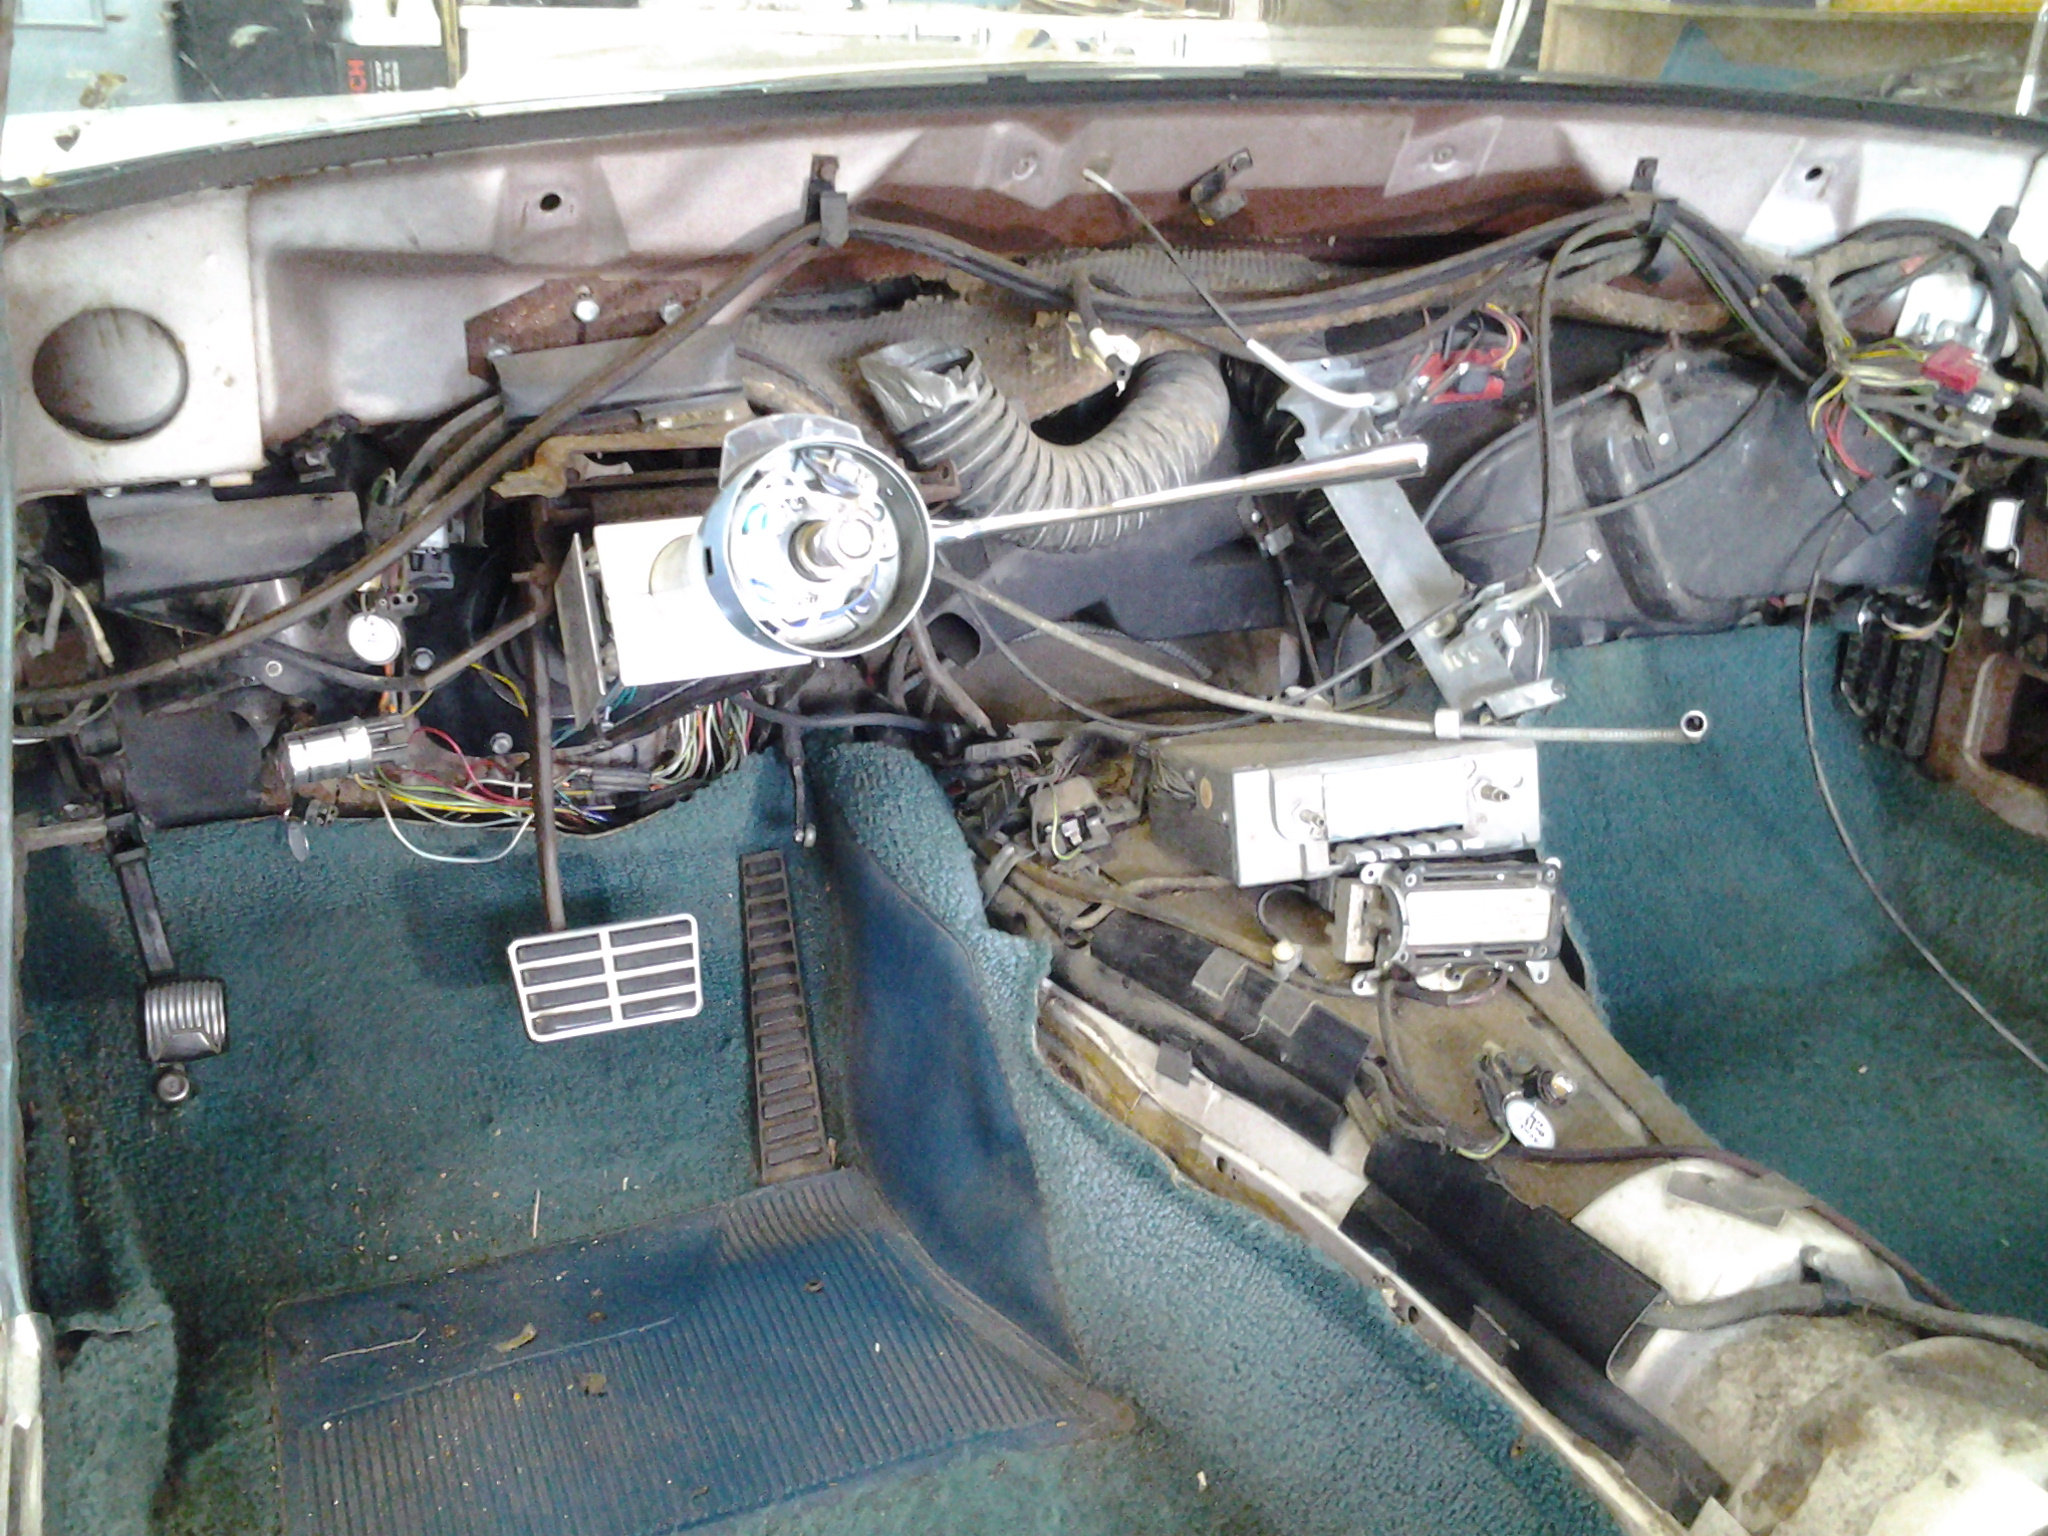
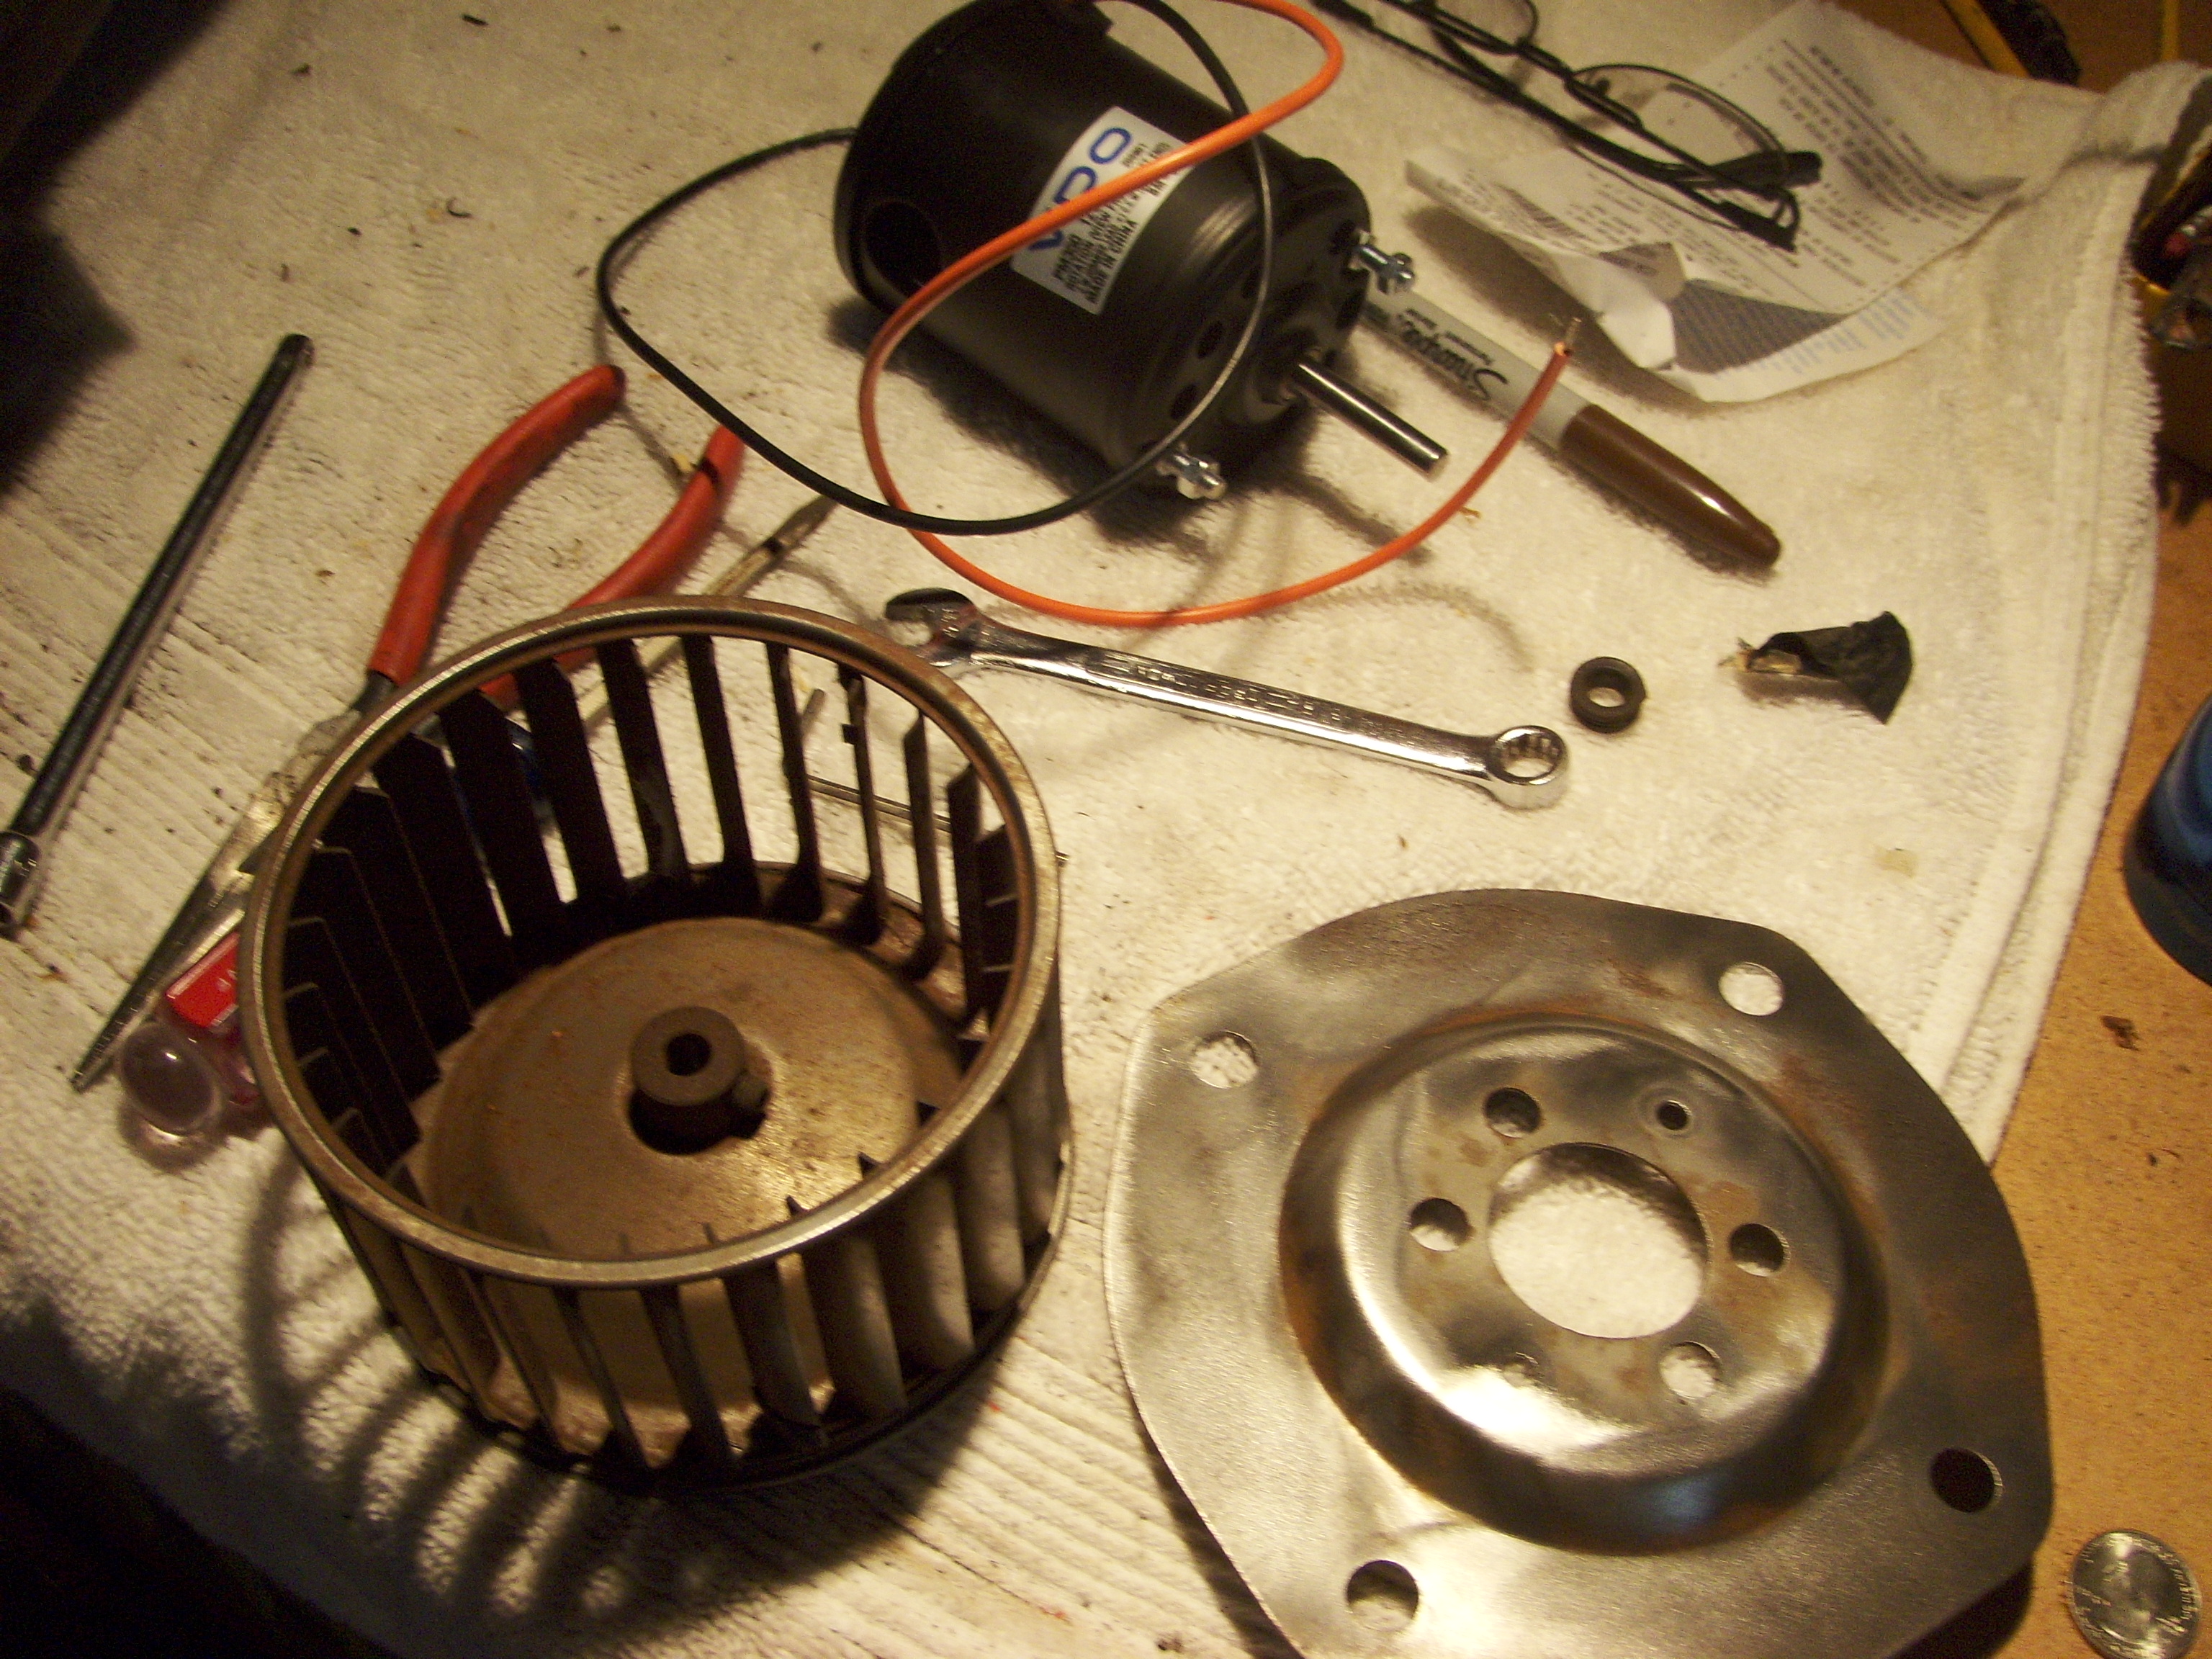
In the meantime, I’ve been running around town trying to track down locally available parts. A radiator shop quoted me a price to rebuild the heater core far more expensive than it costs to buy one new, and I completely gave up on getting a custom paint match to touch up the pot metal dashboard pieces. I was successful in tracking down a new blower motor for the heater (still available over the counter at O’Reilly’s!).

I have two clock pods and both a pretty dinged up, with bends at the flanges where they attach to the dash and scuffed paint from, well, who knows what? The bent flanges mean that the pod does not fit tight against the dash, which looks sloppy. By night, light leaks out the joints and it looks even worse.

Cleaning up the blower motor assembly. The motor in the background is a new replacement unit.

Pot metal is brittle, and despite assurances that others had managed to pound theirs back into alignment, I was a little worried about breaking them in an attempt to straighten them out. As I mentioned above, paint suppliers could only give me a “close” color match in a spray bottle, but they told me that the finish would be s0-so and almost certainly not match the flat matte necessary for the interior pieces. In the end, I ended up at a body shop to both straighten the pod and repaint it to match the new dash. It’s a pricey option for a small piece, but it is the focal point of the dash and should look nice.

The blower motor assembly came apart easily, despite all the rust. I’ve scraped off most of the scale and will give it a once-over with some primer to try keeping the rust at bay in the future. If the new heater core comes this week, as promised, I could have the heater assembly back in the car this weekend, which would be great.

Of course, with new carpet, those door panels are going to look a little ratty . . . hmmmm.

Reheat

The dashboard project is turning into serious restoration work. When all is said and done here, I’d like to have a clean dash and steering column, a finished brake system (still have two lines to replace) and a working heater/defroster.

Also, since I’ve come this far with the interior already, it seems logical to pull the carpet now, fix the rusty floorboards and install some sound insulation.

The heater, removed. This is the back of the unit.

In any event, disassembly is proceeding. With some difficulty, I pulled the heater unit from the dash (there were some stubborn nuts) and took out the heater core. I can’t tell for sure, but it appears that I’m not the first to tackle this job either. The core was packed in foam rubber, which I doubt was the factory solution. It gets hot in there (duh) and the foam had melted or otherwise disintegrated over time.

I never got heat out of this unit, so I assume the core is blocked. The blower motor spins, but squealed and didn’t produce a lot of flow. When I pulled it out, there was no surprise that it is pretty rusty after 50 years. Still trying to decide if repair is more economical that replacement.

The heater core coming out. Ick.

My focus this week is to refurbish the heater parts and start prepping the new dash for installation.

Removed parts are starting to overflow out of the garage, so the heater really needs to be reassembled before I pull out the next unit, which will probably be the brake master cylinder and booster.

Took longer to get around to this than I thought, mostly because the car has been running so well, and I was so reluctant to take it out of service.

Finally, though, the small, annoying problems started to add up. Most of my gauges were out. There’s an odd squeak in the brake pedal (and they feel a little mushy). There’s no heat (and it’s almost winter again). The neutral safety switch is just a tiny bit out of adjustment.

The twin exhaust cleared the leaves off the driveway when pulling the car into the garage.

Not to mention, I’ve got this replacement dash kicking around my garage and I’ve tripped over it more times than I’d care to admit.

So, finally, I pulled out the manual, found the relevant instructions and set to work. The first item is pulling out the seats, something I did in the driveway–I have room to work in the garage, but can’t open the doors widely enough to get the seats out.

With the seats out and the car in the garage, I began digging into the dash far enough to get to the six bolts that hold it to the firewall. The center console has to come out, as do the visors and the headliner trim all the way to the rear windows. The clock pod, with its cables, vacuum lines and wiring, need to come out. And so does the cowl–that louvered piece of sheet metal at the base of the windshield (easier than it sounds).

The view inside with the dash out.

Those six bolts? Took a while to find them, and we needed the replacement dash as a reference before figuring it out.

At the end, the eight or so electrical plugs that connect the dash wiring to the car stood between me and a dashless car. Those things aren’t meant to come apart, and they put up a struggle.

In the end, I was triumphant, and the old dash is now resting uncomfortably in the driveway.

Tomorrow, I’ll be digging down to the heater core and measuring out a mile of vacuum line to replace.