New Mindset

I’ve come, reluctantly, to the conclusion that the ‘Bird falls solidly into the category of restoration project for the foreseeable future. For the past few months I’ve been playing catch-up, letting the car decide what I work on. That’s a valid strategy for a car that’s mostly working–just fix what’s broken, right?.
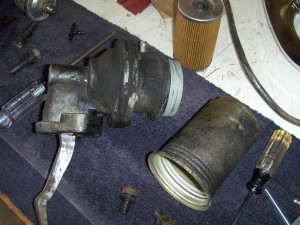
Fuel Pump
One dirty fuel pump. That's the filter in the background.

This Bird has just been sitting ignored too long; things are breaking faster than I can repair them, even with just occasional driving. From here on, I’ll be working through each individual system, making sure it’s sound, then moving on.

I can already check the shifter and starting system off the list–those have both been completely overhauled. Next on the list are the fuel system, ignition system and the suspension, front and rear. With those complete, the car should be safe and comfortable to drive and I can turn my attention to more aesthetic details, like the interior trim and carpet. (One positive note–the records from the original owner-just discovered–indicate that the transmission was replaced about 60,000 miles ago. It, like the engine itself, should be sound for some time.)
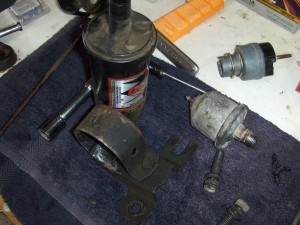
Coil and Oil Pressure Sender
Coil is likely still good. The oil pressure sender is likely dead.

I finally just replaced the old Edelbrock carburetor. Even after rebuilding the one that came with the car, it still performed poorly. It’s likely that there is still dirt and corrosion in some of the interior passages. I replaced it with an exact duplicate, an off the shelf item from Pep Boys, of all places. (They actually have a cool store not far away that specializes in speed parts. Lots of stuff there for people still driving big V-8’s!)

I installed it, no issues, then tried to start the car. Lots of starting fluid and about 30 starting attempts, but no go. Looking at the glass fuel filter, I could see that there was just nothing in the gas line leading up to the carb. Checking the fount of all Thunderbird knowledge, I discovered that the fuel pump ought to be delivering fuel even when the car is only being cranked over by the starter. Here is where I had my revelation–this car is too far gone to just fix what is broken.

I pulled the fuel pump off–it has a built in filter that probably hasn’t been changed in decades. While I was there, I pulled off the coil and the oil pressure sending unit. All were in the same place and all needing clean up or renewal.

Next, the ONO phase: fuel pump, oil pressure sender, this time.

What a Turn-Off

I picked up a new starter on Tuesday. Turns out, the starter I custom ordered was nothing like the one the came out of the car. The folks at Napa Auto Parts had the starter I needed

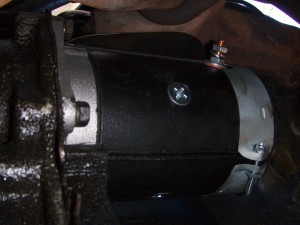
New Starter, Installed
New starter, installed.

in stock, however, and they also helped me gather together new cables, other bits and pieces and–yes–another solenoid.

The new starter went in this afternoon, no trouble at all. I followed the advice I got from the guys at the Vintage Thunderbird forum, rewiring the ground cables properly and installing the cable to the starter in a way that will allow me to strap it up properly. (Still need some clamps to finish that job.) I also took time to wash off some of the grease and dirt from the inner fender wells while the battery and cables were out.

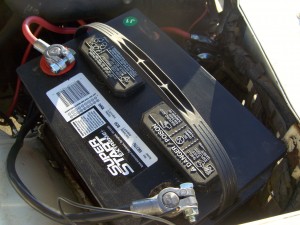
New Cables, New Solenoid
New cables, new solenoid

With everything connected, the car started right up. I let it get warmed up, then took it for a quick spin, even though the interior is still in pieces. All went well, and I pulled into the driveway, put it in park and . . . turned off the key.

Yes! The engine stopped. Yet another evolution has been completed. Now to re-assemble the interior and move on to the next item.

The Starter

It’s always fun to jack up the car and crawl around underneath. You see all kinds of new things.

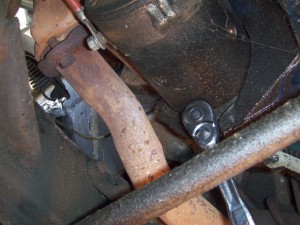
The lower bolt
This is the lower bolt. Easy to reach. Take it out last.

Say, those floor pans really have rotted away, haven’t they? And what’s this, power steering fluid? Wonder where that’s coming from. Hey, look–the transmission cooler lines have been tied up with zip ties back here. Well, more stuff to add to the list.

The starter came out pretty easily. I remember doing this job many times on a 71 Cougar I used to own. I had headers on that car and they were a pain to work around; the bolts on the t-bird were a lot easier to get to.

The only thing that slowed me down was removing the lower bolts first. The top bolt is much harder to get to and easier to remove if the lower bolts are still in. The last bolt to come out will bind as the starter begins to fall out, so make the last bolt the easiest one to reach. I had to put a lower bolt back in to get the top bolt out.

I made a photojournal of the removal process.

The rebuilt starter is due at the store Tuesday. Look for the follow up post (and hopefully a running car) that evening.

Somebody Stop Me!

So, I have a half hour free after work, and I’m thinking, perhaps I’ll take a look at that starting problem on the ‘bird. Open the hood, hop in, and crank it over. I can see that the choke didn’t close (the ongoing issue with cold starting), so I close it manually. Try again, and it starts right up!

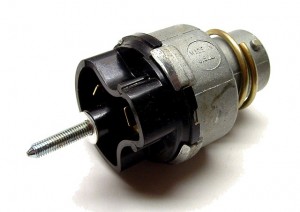
Ignition Switch
Yep, I need a new one of these.

Well, that’s cool! I have no idea why the choke won’t close normally, but I’m leaning in favor of installing a manual choke, at least for the time being. Since it started so easily, and I’ve still got time to kill, I figure, let’s go get a manual choke cable and maybe even stop at the hardware store afterwards.

At the auto parts store, I turn the key off and hop out. But wait. The motor is still running. I look in my hand. Yep, still holding the key. But the motor is still running.

Get back in the car, put the key in. Turn on. Turn off. Turn on. Turn off. Motor is still running. I am perplexed and decide to drive home rather than shop while the car is running in the parking lot.

Ultimately, I pulled a primary lead off the coil to stop the car. Chances are, the ignition switch has failed. Plan: order a new one.

How We Roll

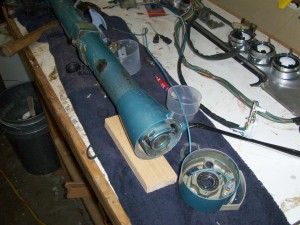
The evolution of a project. First, car dies at the post office, victim of a $20 part failure. Then, tow truck driver (thankfully) breaks the steering coupler, so I jump into the entire steering column / rag joint / shifter / turn signal project.

Cleaned up Car
Cleaned up after a long sit in the driveway.

That’s a lot of work, it turns out. We finished the under hood work this morning, hooked up the battery and (just for fun) tested the turn signal wiring. Incredibly, every signal with every possible permutation (brakes on, lights on, brakes and lights on . . .) worked, with the exception of the front left, which may have a burnt out bulb. Very satisfying, and a little shocking.

I spent not a little time cleaning and polishing the dashboard pieces before they went back into the car. There’s still a lot of clean up to do in the interior (especially the dash) but this was a good start.

With the dash in place, the steering wheel and horn ring went on. Without any further ceremony, I dumped most of my tools on the driveway, started her up and went for a test spin.

Driving in the correct gear(!), it turns out the transmission is behaving normally. With bearings and stuff all installed properly in the steering column, the steering is more precise and not as light to the touch as it was–a vast improvement. With the new shifter parts, the swing away mechanism also works as designed:

There was only one disappointment: the new turn signal assembly catches internally against the steering wheel–probably the self-canceling mechanism is slightly off. There’s no way to adjust it, so I may have to live with it.

Next up, a tune up (now that it’s safe to stand in front of the car while it’s running), and a transmission rebuild.

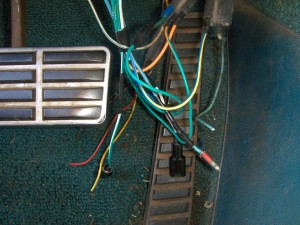
Turn Signal Spaghetti

Newly painted valve covers installed . . . check.

It's Crystal Clear
See how simple wiring can be?

Steering column boot installed . . . check. (Minus one bolt, which just plain vanished.)


Turn signal wiring complete . . . uh . . . maybe.

I followed what was a pretty vague wiring diagram (supplied by the folks that sent the new switch) and am pretty sure that they are plugged into the right places. Not quite ready to hook the battery up and test (and, hey, it’s cocktail hour again.)


Whoo Hoo, It Works!

Got over the hump with this project with the shift column and steering shaft in. Everything seems to be working normally and all that’s left is reassembly of everything that came off to get to the column. (That’s a lot, but it’s always nice when you’re tightening screws, not loosening them.)

Celebration . . . and Frustration

I finished up the last elements of the steering column this afternoon. Attached the neutral safety switch. (The holes were stripped for the stock screws; spent an hour finding and modifying a bigger screw to fit without interfering with the shift column.) Also put on the new shift boot. In retrospect, the rubber boot needed to go on first, long before anything else, but no manual or forum tip mentioned this. Once everything else is in place on the column, a new boot will not stretch far enough to fit over all the appendages. I had to cut it to put it on, which really defeats the purpose of buying a new one.

However, those difficulties were forgotten when the column went back into the car. A twist and a wiggle and it all fell into place. I was able to insert and tighten the nearly inaccessible screws at the bottom of the column with little difficulty. The steering shaft even fell right into its socket. What appeared to be difficult turned out easy!

But, what appears to be easy is often difficult. Thinking I was on the downside, of this project, I slid into the driver’s seat and did a test shift; but the shifter was stuck. I immediately thought that there was something wrong with the detente and shifter I put in, so I began, once again, to disassemble the upper steering column. (Breaking a C-clip in the process, of course. Sheesh, I thought they were unbreakable!) Getting it partly disassembled, I could see that there was something else wrong. It was getting dark, but I think part of the swing-away mechanism is jammed up under the dash.Too dark to work on it now, and hell, it’s cocktail hour anyhow.

Photos, and more, tomorrow.

Almost Ready to Steer

Coming Together
The steering column is beginning to come together.

Yesterday saw the beginning of the reassembly process as the steering column started to come together and the repaired coupling went back into the car. Putting it all back together is sometimes a memory puzzle, especially if there are a lot of pieces. It stands to reason the part you can’t put back together is always the bit the manual skips over. (Luckily, there’s usually some help in the forums from those who have been there before.)

So far, the trickiest part has been the replacement turn signal switch. The ’64 switch is unique, so the one I got is only a “close match.” It came with a wiring diagram and instructions on grinding down the steel bearing retainer plate to fit–not a task for the inexperienced. I was able to test fit the switch itself, so I know that will work. The next step is figuring out the rat’s nest of wires under the dash, which I’m sure will entail a lot of head scratching.

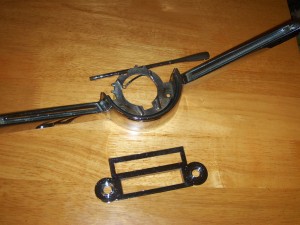
 Cleaned up Chrome
Horn, turn signal stalk and radio face plate, ready to roll again.

I polished up the chrome pieces that came out of the car. They are better, but far from perfect; time has taken it’s toll in minor pitting and rust. Stripping and plating them seems a bit extreme right now, so back in the car they go.

Clean and Paint

Perhaps the best part of restoration work is cleaning up an old, rusty part, giving it a fresh coat of paint and reassembling it. It doesn’t always look as good as new, but it’s (almost) always better than it was.

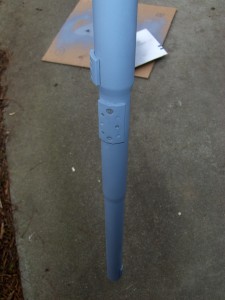
Shift Tube
The shift tube, freshly cleaned and primed.

Long gone are the days of sheet metal interiors, but the T-Bird was built at the end of that era. I suspect she spent some time with the windows down, stored out in the elements–much of the interior is rusty, especially the unpainted portions.

Inside the steering column, the shift tube was a rusty mess with an accumulation of grease at the bottom. I put it on the wire wheel to shine it up and gave it a coat of primer to keep it clean. It’s mostly invisible inside the steering column, but in the off chance that the next guy to disassemble the unit is me, it’ll be nice to know it’s protected in there.

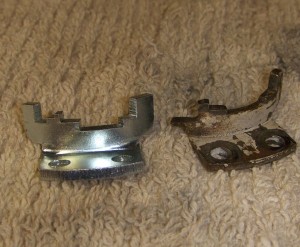
From the crap-previous-owners-do file, I’ve uploaded a shot of the old shift detente next to the new one. (The detente plate has the teeth the keep the shifter in gear–much like the

The Shift Detente
The old detente is almost entirely gone in the "park" position.

gates you move a shift lever through on a modern car.) The old unit looked ok until I compared them. Up close, I noticed that the groove for “park” (on the left side of each piece in this photo) has been deeply ground away, probably in a failed effort to keep the car in gear without buying new parts. Odd, really, because the repair pieces cost less than $30 in today’s money.

Tomorrow, reassembly of the shift tube into the steering column commences. I’m hoping to be back on the road this Sunday.