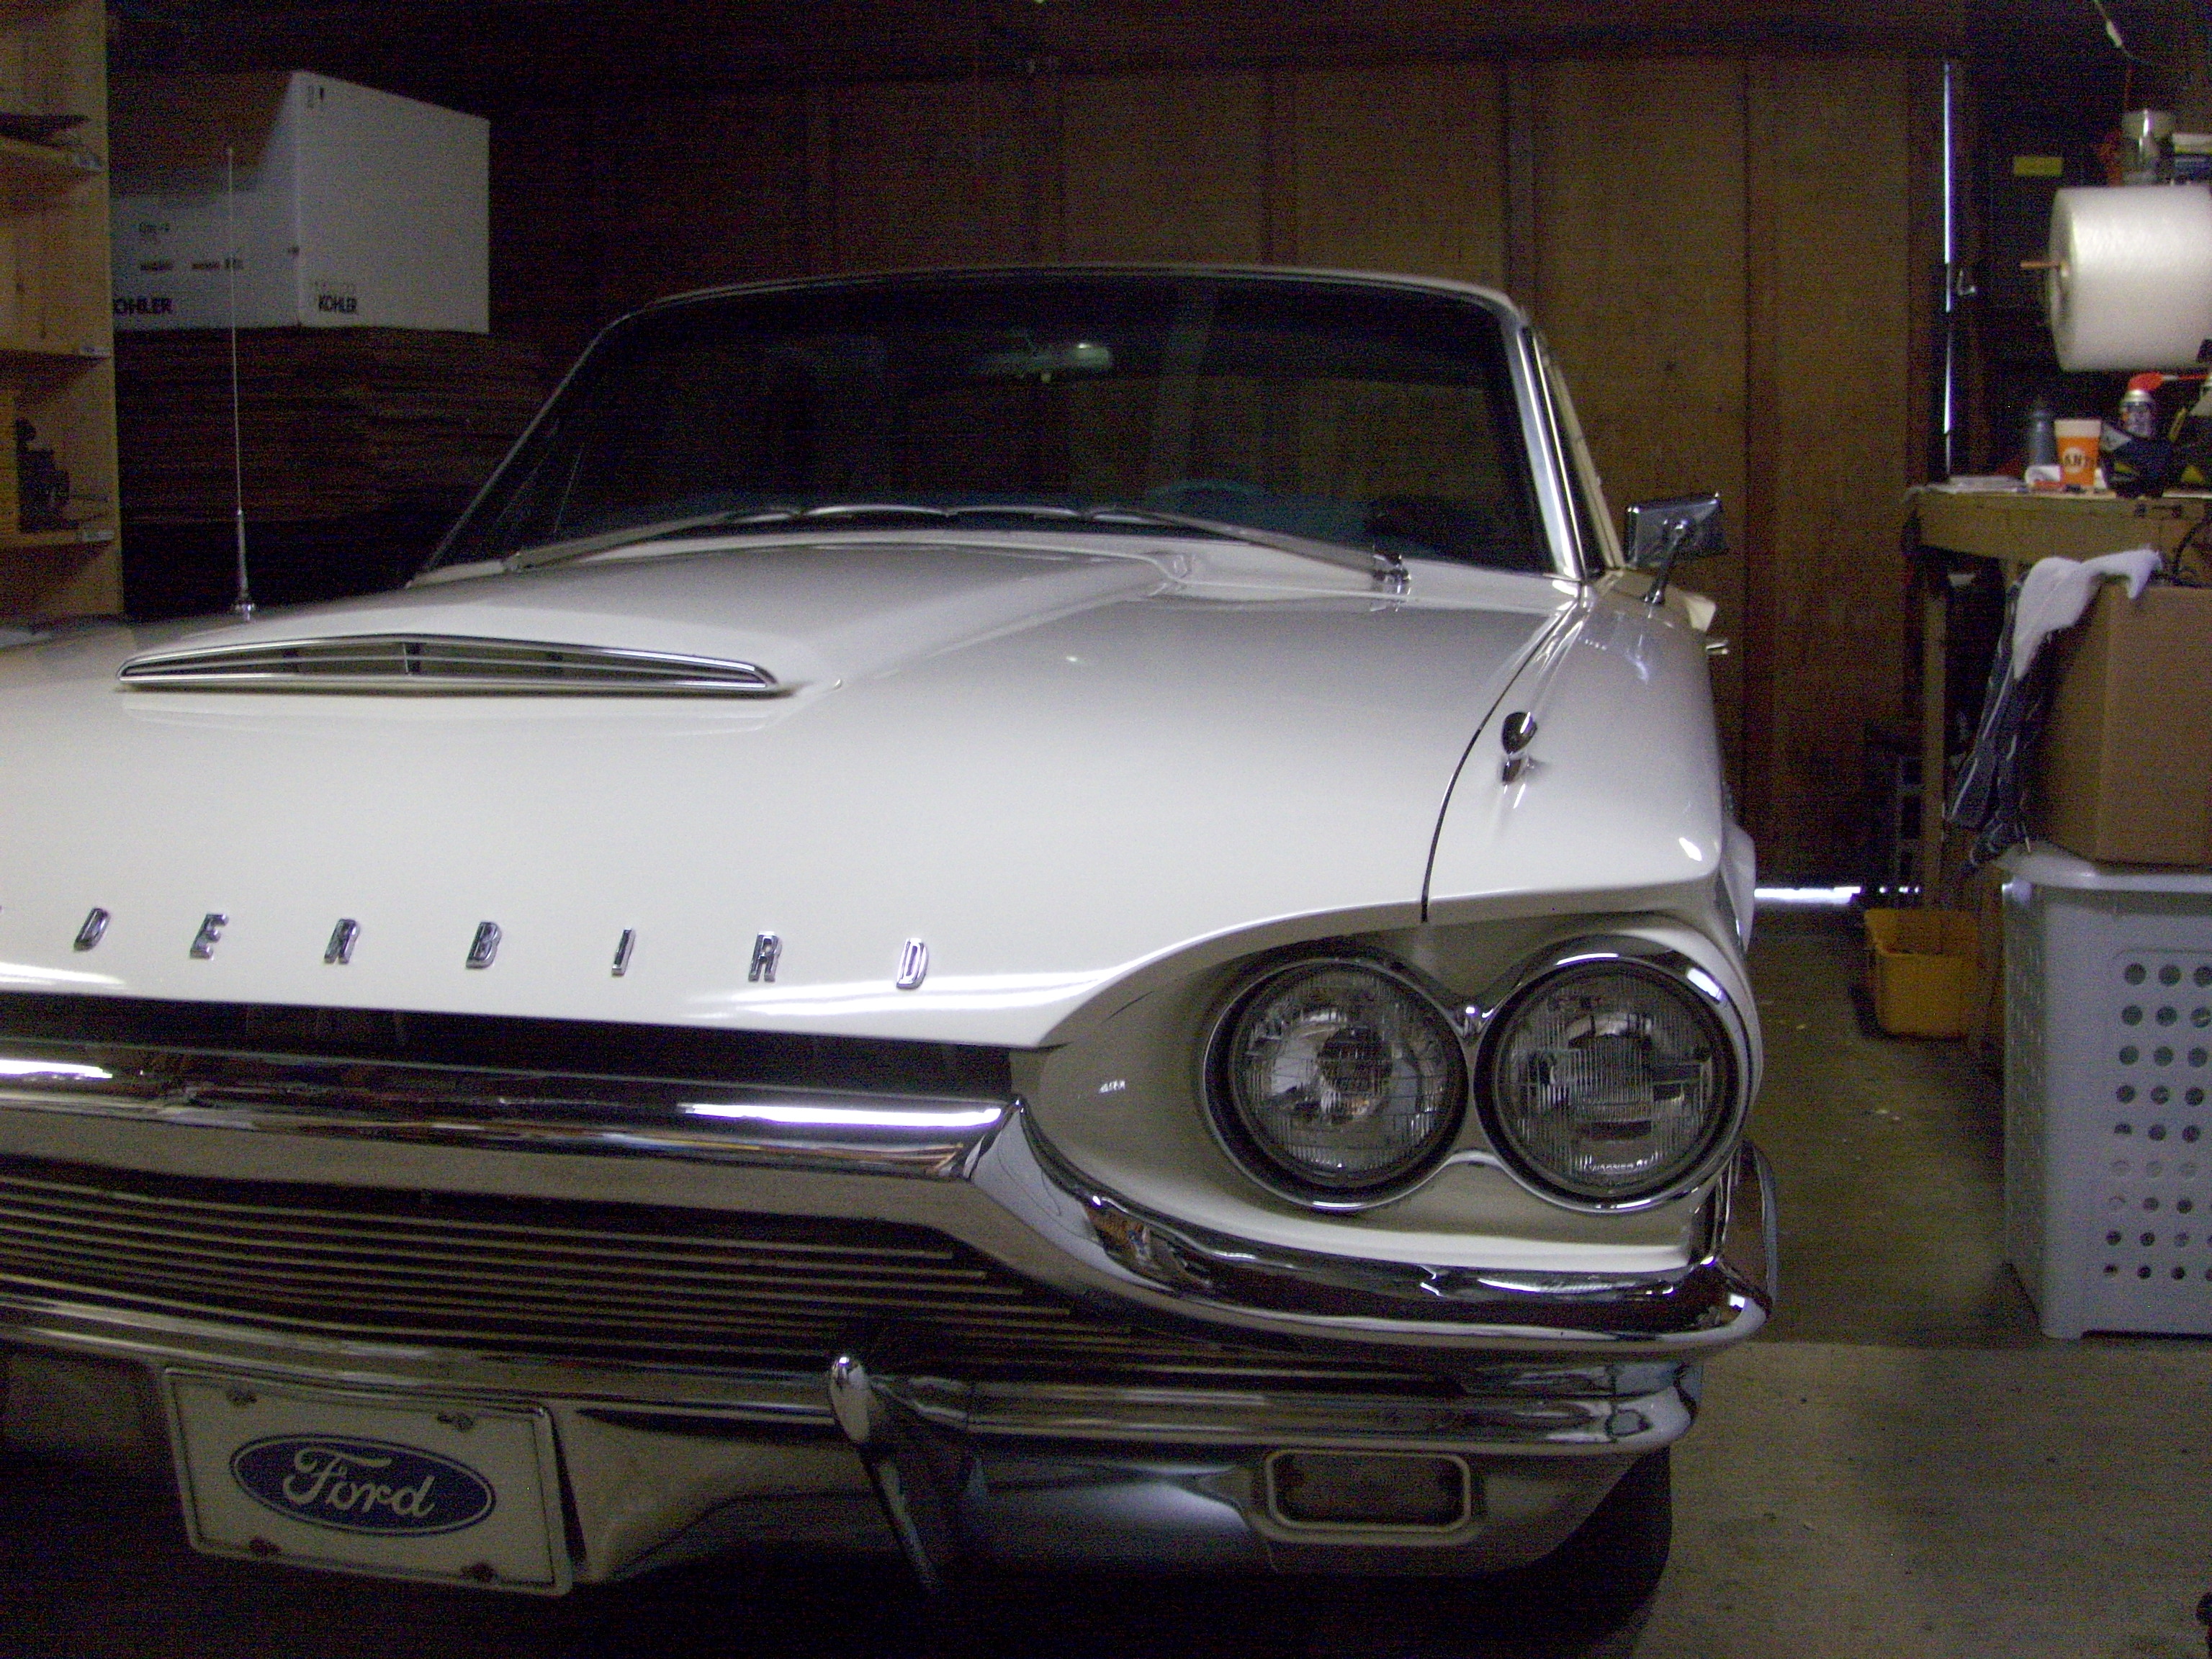
Took me a while, but I finally opened up enough space in my garage to squeeze the T-Bird in there.
Just in time too. Somewhere in my neighborhood some kind of little berries ripen in the fall. Birds just love them, but they are–apparently–a wonderful laxative. And there’s no place to park outside that isn’t under a tree.
Last year, I spent an incredible amount of time scrubbing down the car, picking leaves from the various cracks and crevices and drying out the trunk after rainstorms. Not this year–my only annoyance will be a lack of remote for my ancient garage door opener.
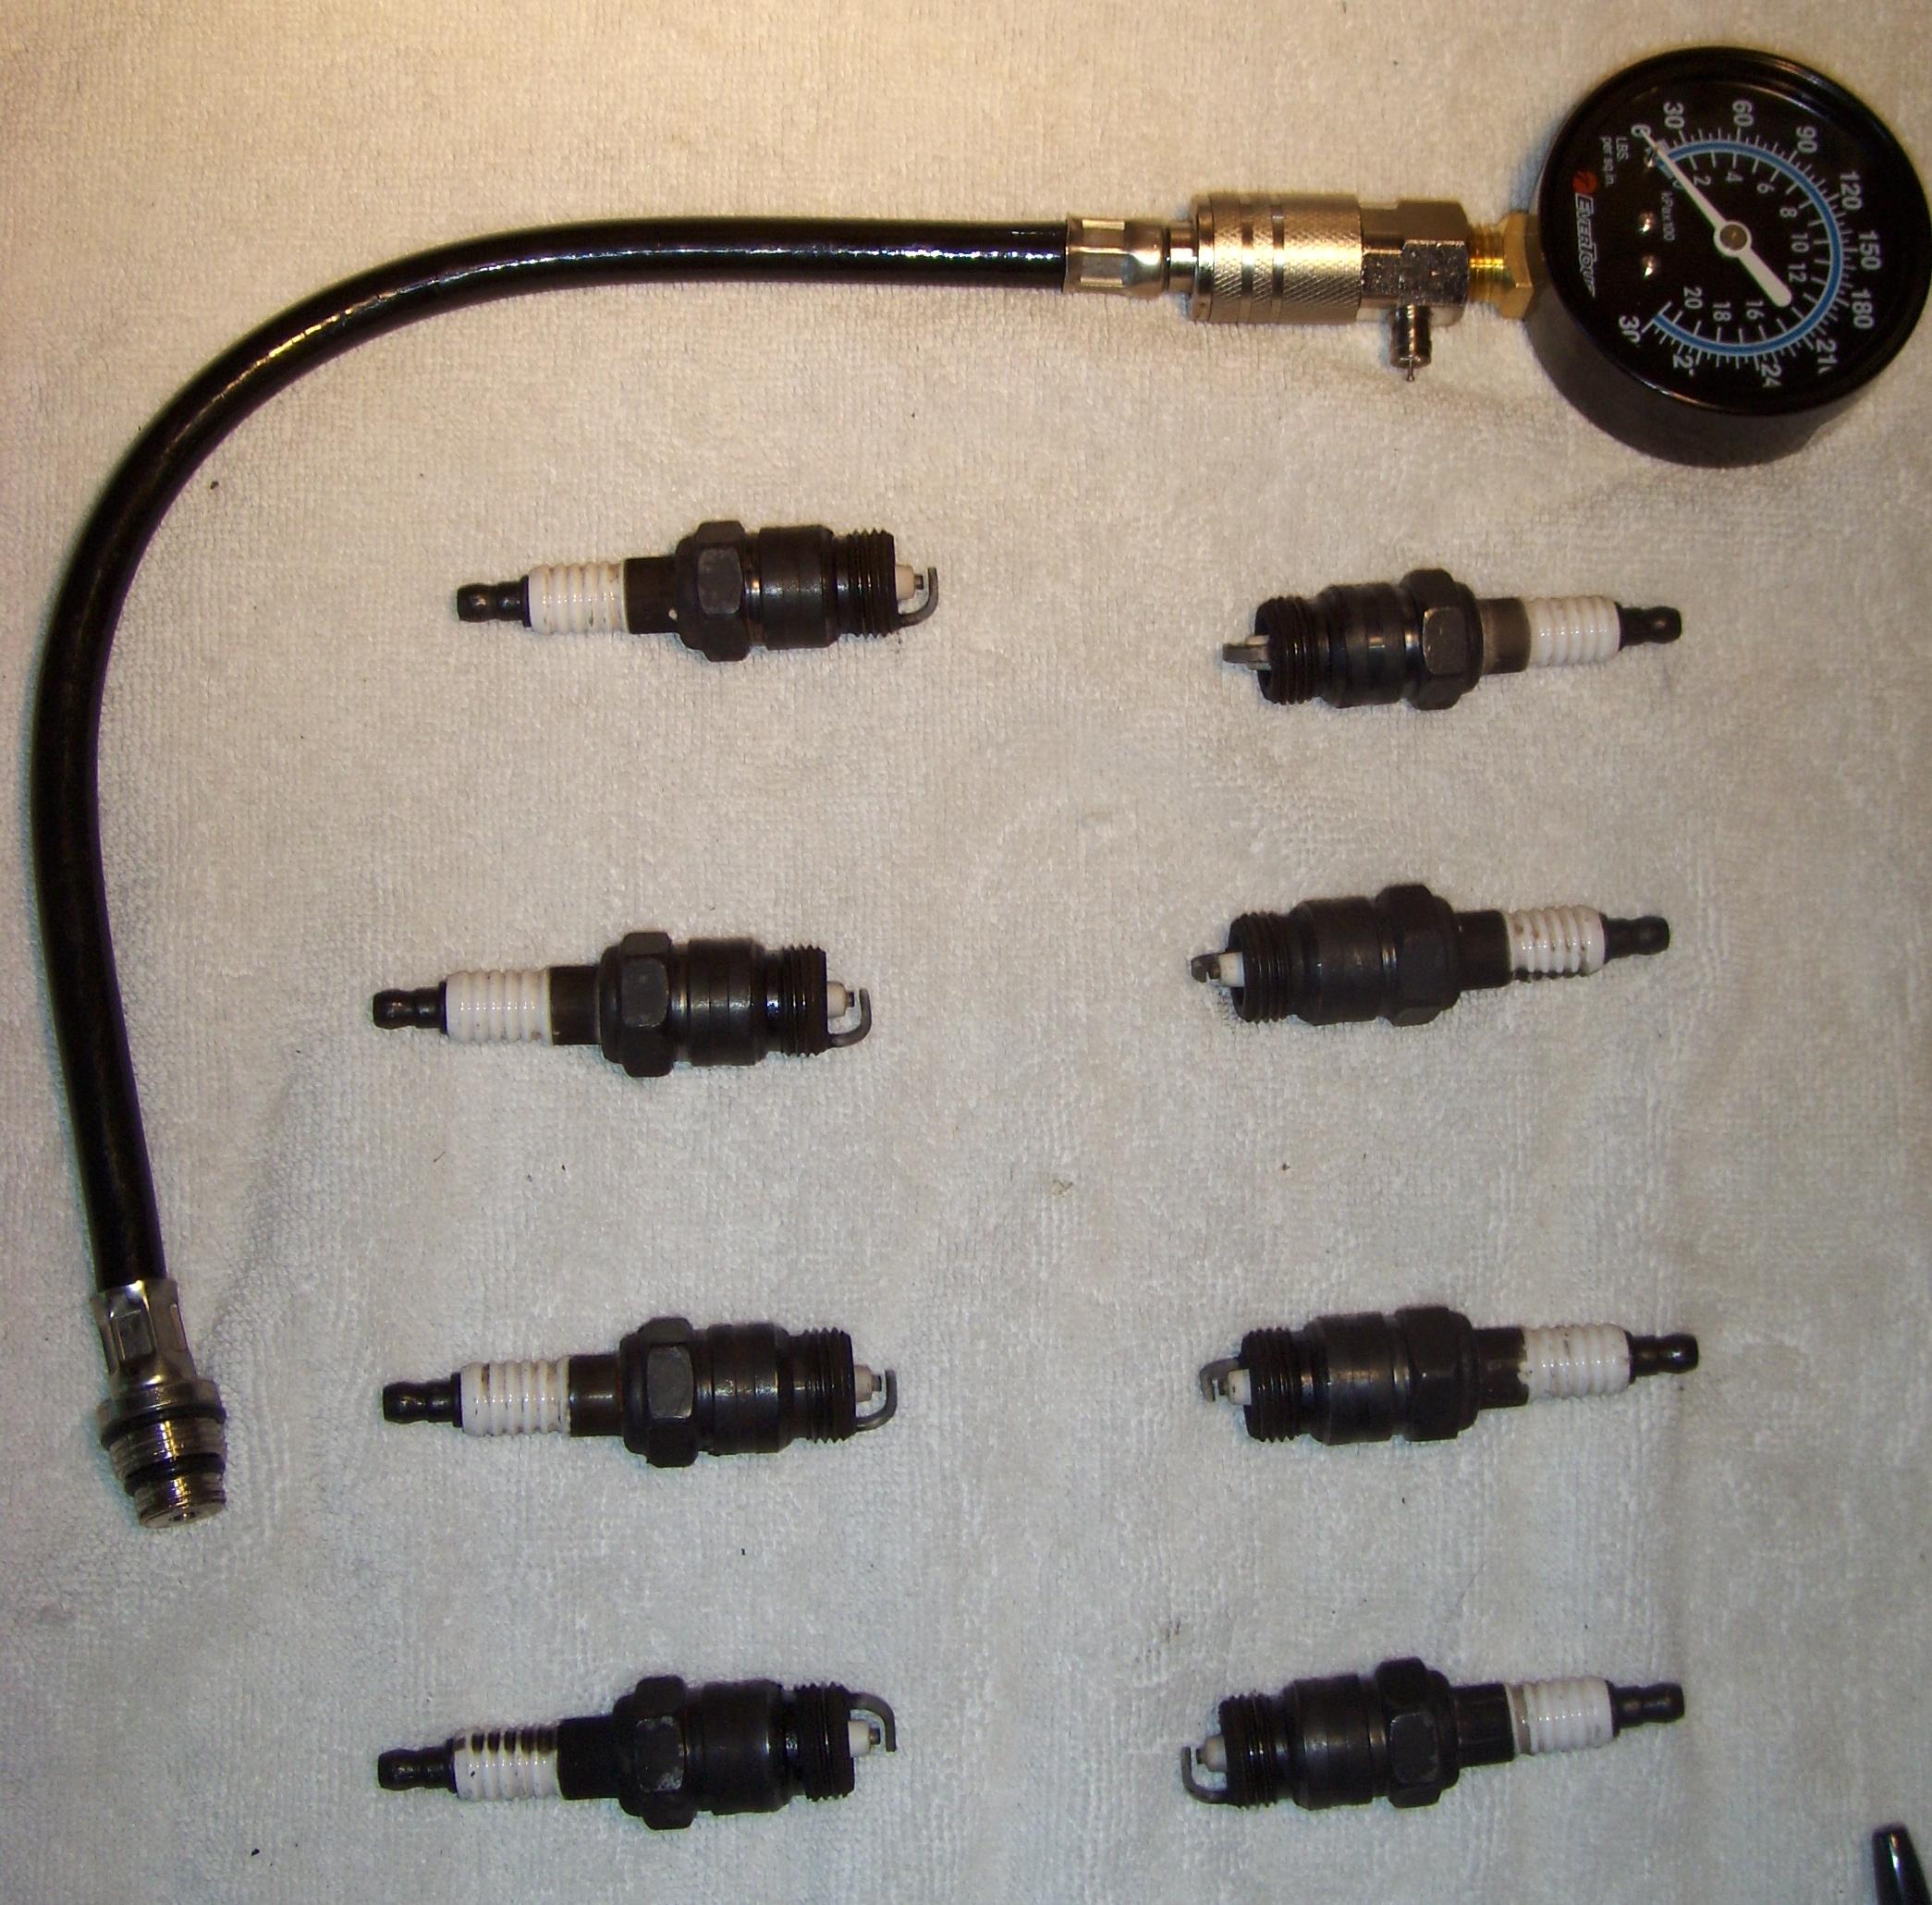
I pulled the plugs and completed the compression test on Friday, which turned out to be mostly good news. The plugs came out looking good–clean with no fouling. Their was no indication of a blown gasket, though there was slightly higher than normal variance between the highest and lowest readings.
Overall, I certainly didn’t find anything that would make me want to pull the engine and take it apart this summer. (In a year or two, maybe.) I’ll be returning to my regularly scheduled plan of action for this summer, rebuilding the dashboard and (if there’s time) replacing the bushings in the rear springs.
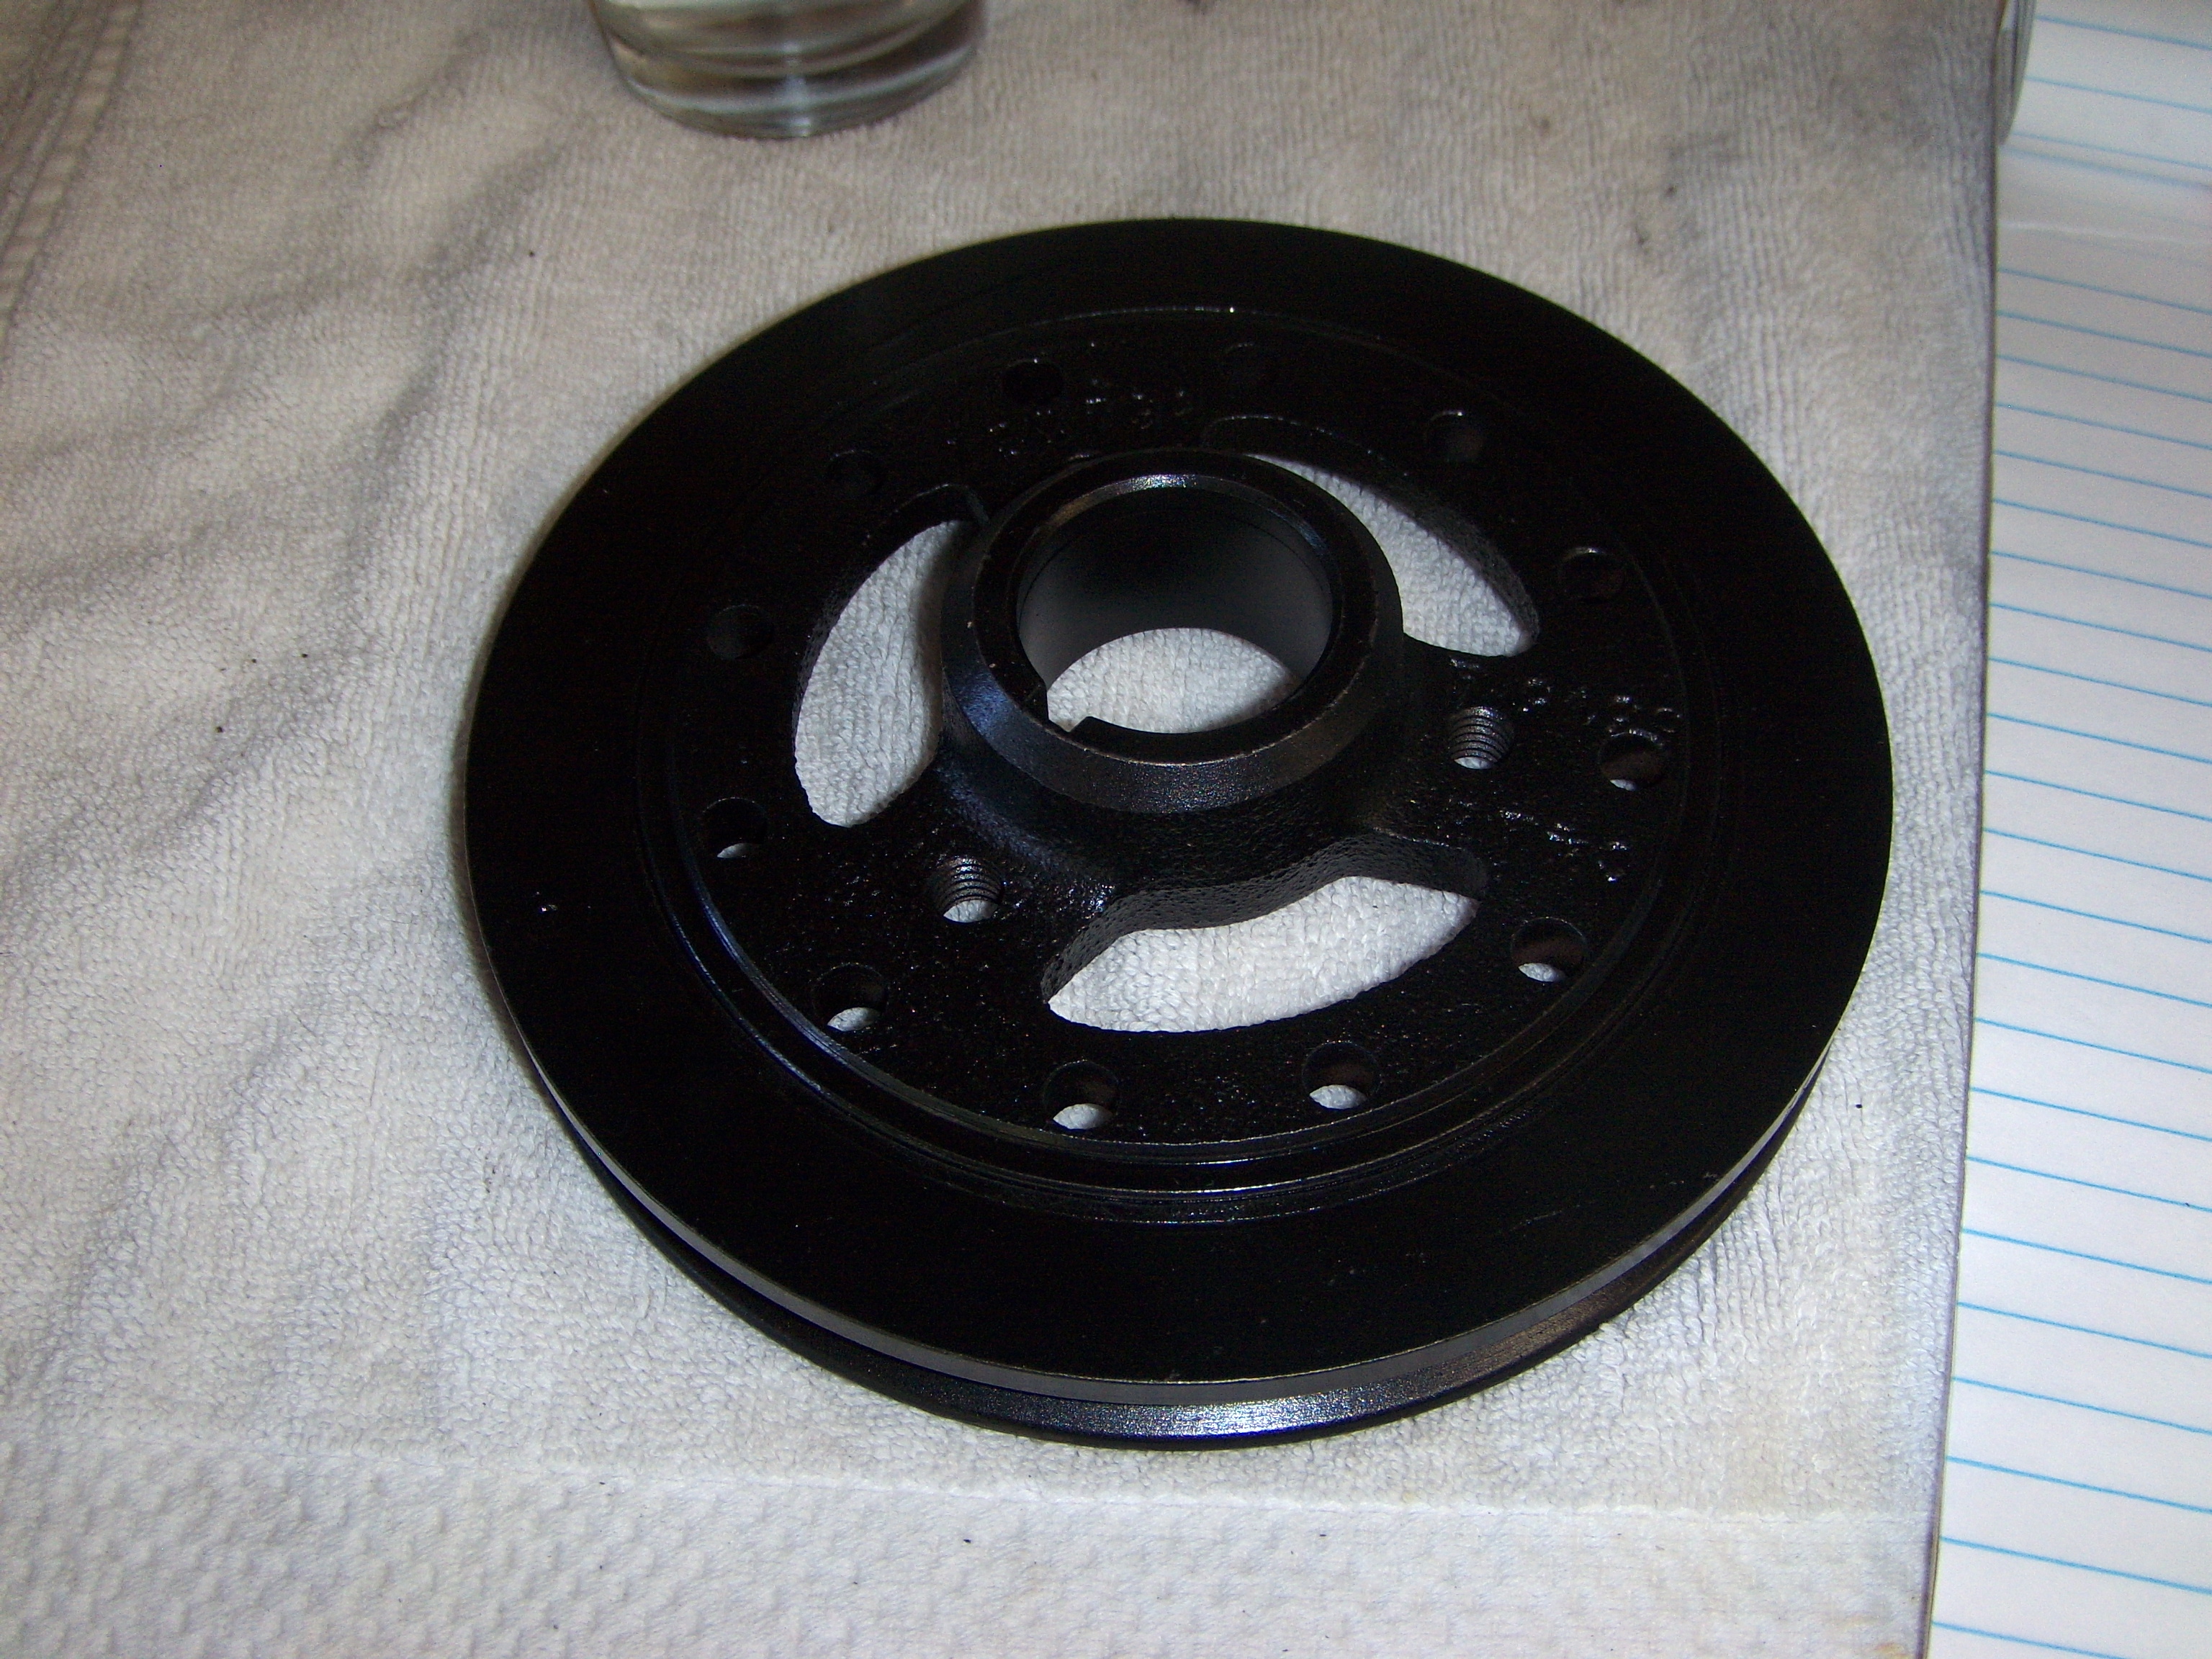
New Damper, ready to install.
I will, though, be keeping a closer eye on the coolant than I had. Checking it early this week, it was completely full, even after a couple of longish drives, including some stretches at speed on the freeway. For now, I’m assuming that the overheating I had was simply a case of a hot day and lots of time at idle. An electric fan would likely solve the problem for good, and it’s something I’m considering.
Before that, though, I will be replacing the harmonic balancer. Mine is old, and there were far too many stories on-line showing overheated cars with the balancer in pieces.
People must have thought I was driving a coal-powered car. Waiting at a drive-through on a warm day, steam started venting from the overflow pipe, accompanied by a loud, low moan from the relief valve.
And I thought the squeaky suspension was embarassing.
I let the engine cool a while and made it home, finally coming to a stop in the driveway where steam continued to vent for some time, enveloping the car and drifting majestically up and over the neighbor’s house. I refilled the radiator–it didn’t take much–and for the next few days couldn’t drive more than a mile or two without overheating the car.
I thought I was dealing with a bad radiator cap–one that just wouldn’t hold pressure, but in the end the coolant level was just too low, and had apparently been falling for some time.
I filled the system completely about a year ago when the new water pump went in. Though some loss is expected over time, I’m going through it too quickly.
The possible reasons are not numerous, and generally not good. Best case scenario is that maybe it wasn’t filled all the way up in the beginning and wasn’t able to handle a warm day. Barring that, a blown head gasket is the next most likely culprit for missing coolant.
Replacing a head gasket is not an expensive proposition if you do it yourself, but it’s heavy time consuming work. (The engine generally needs to come out.) The first step, though, is to test the compression to see if the gasket is indeed the problem.
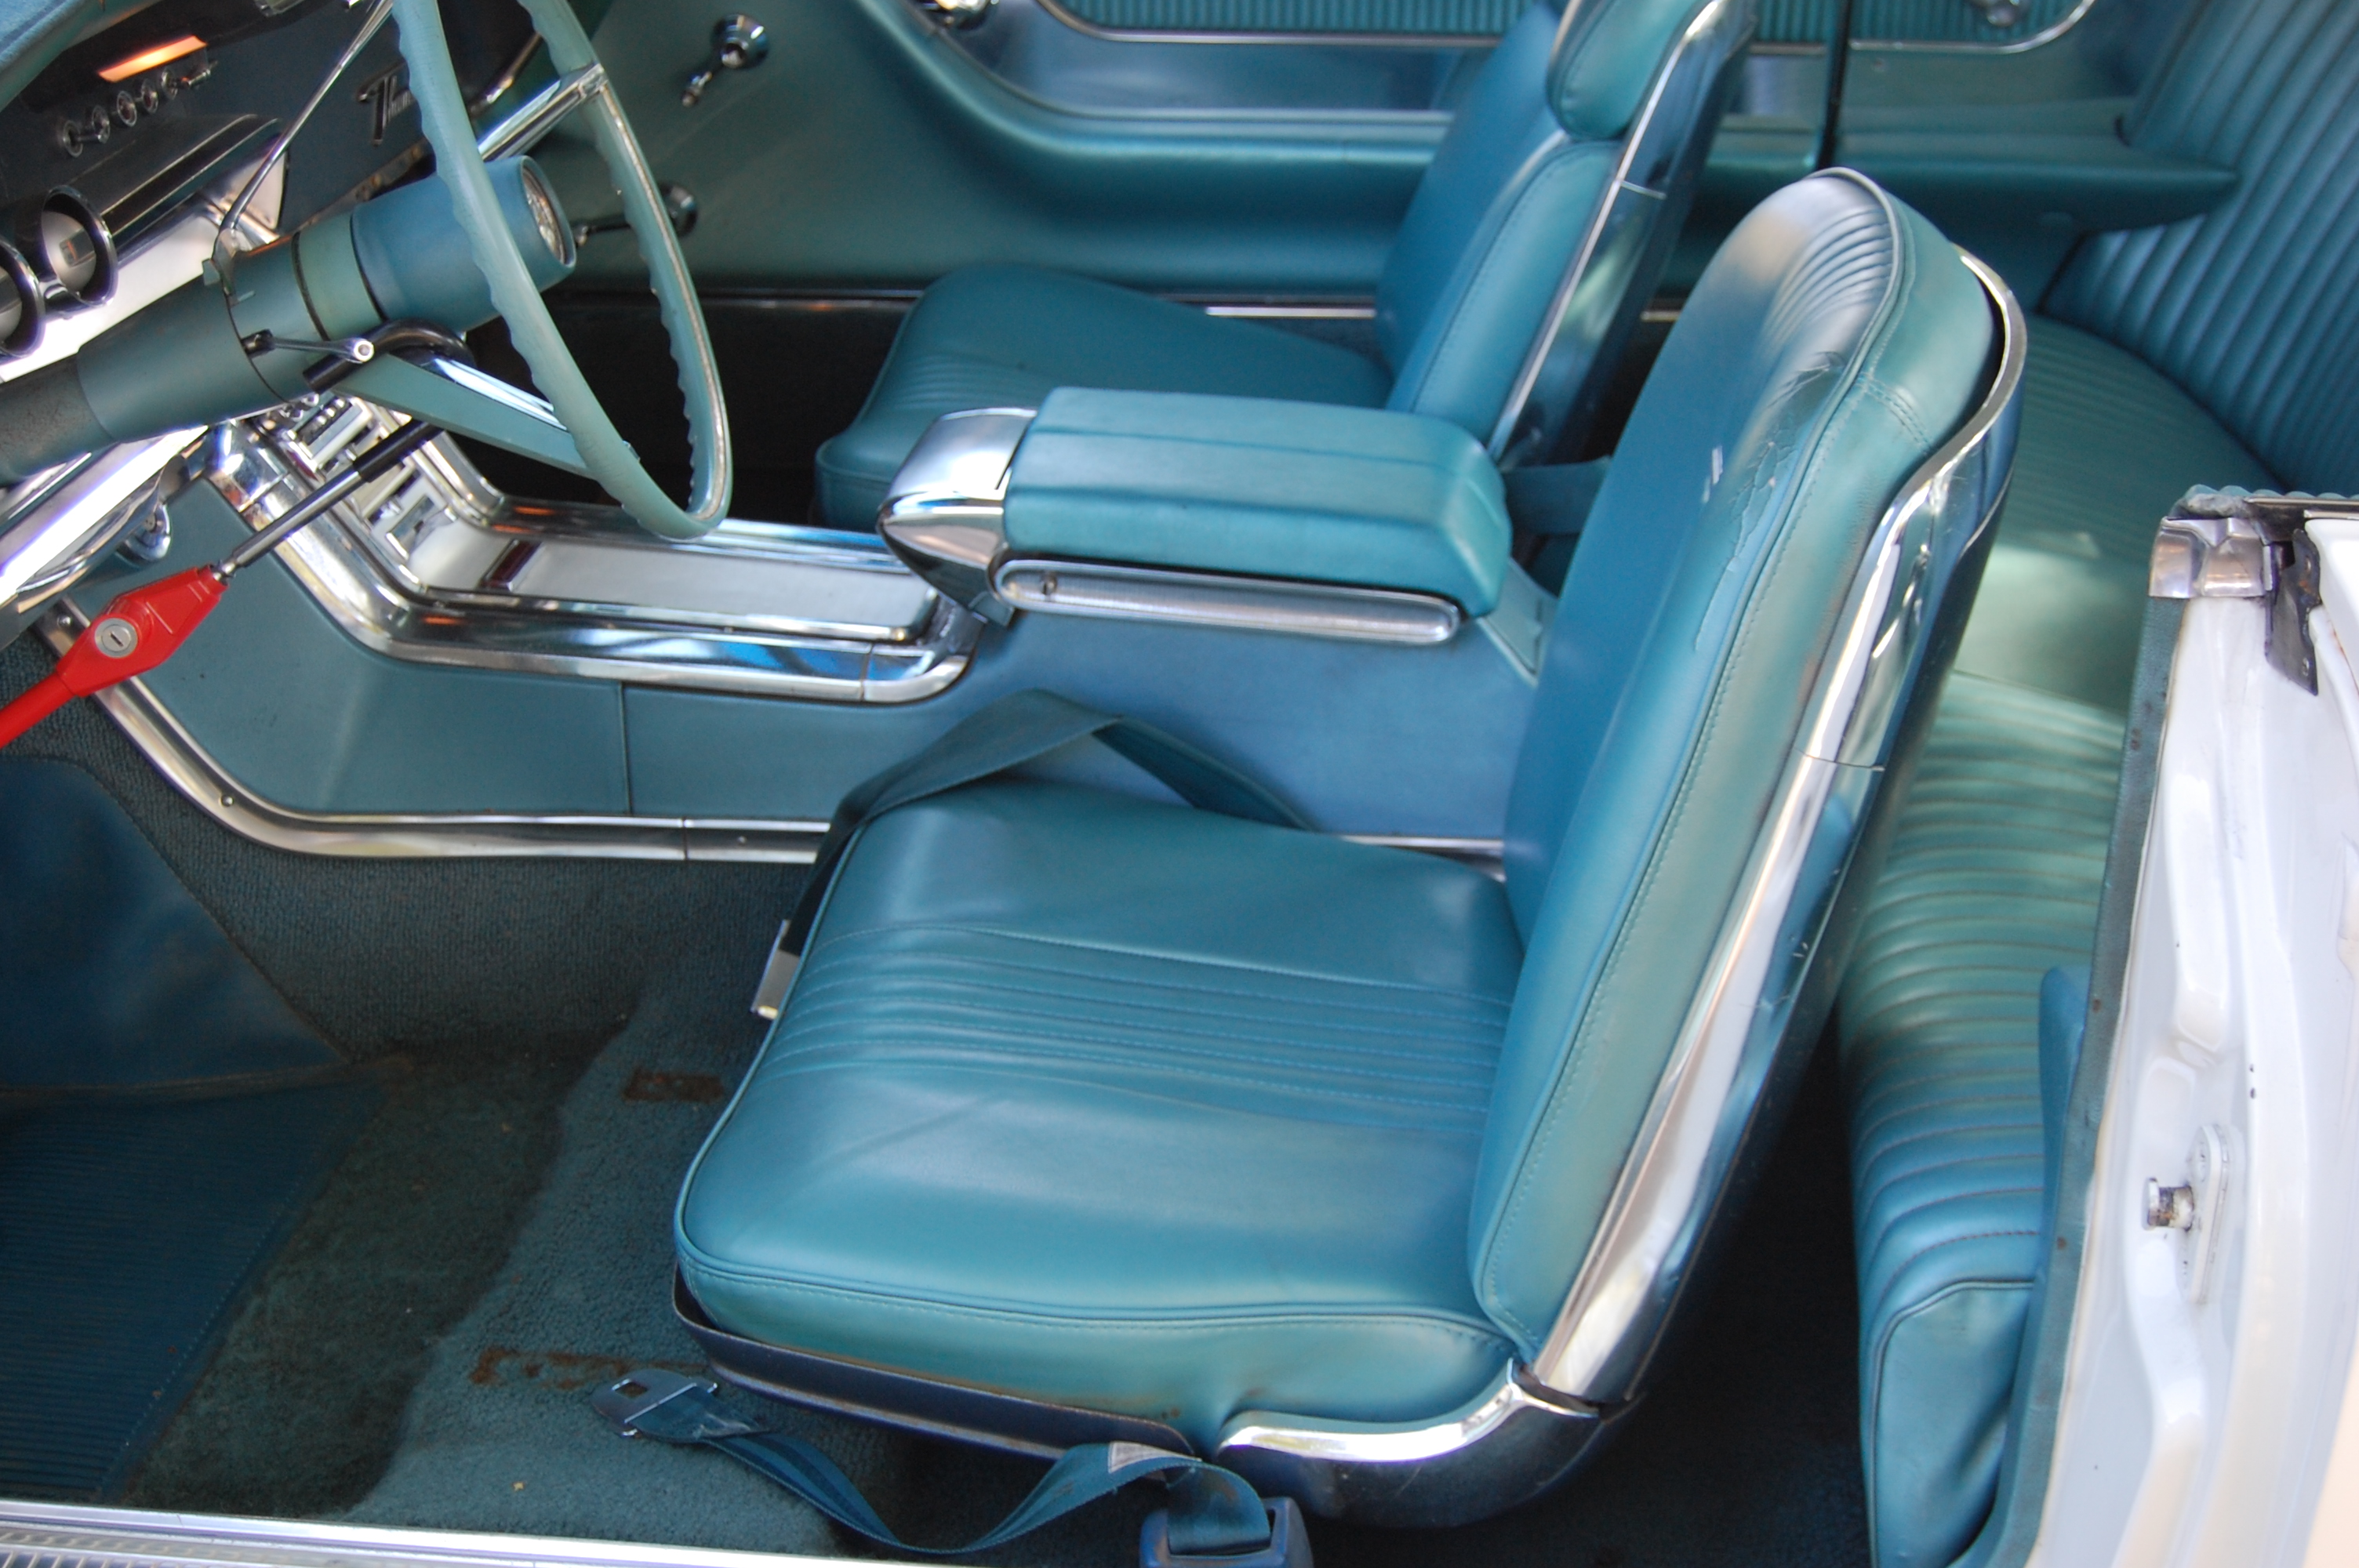
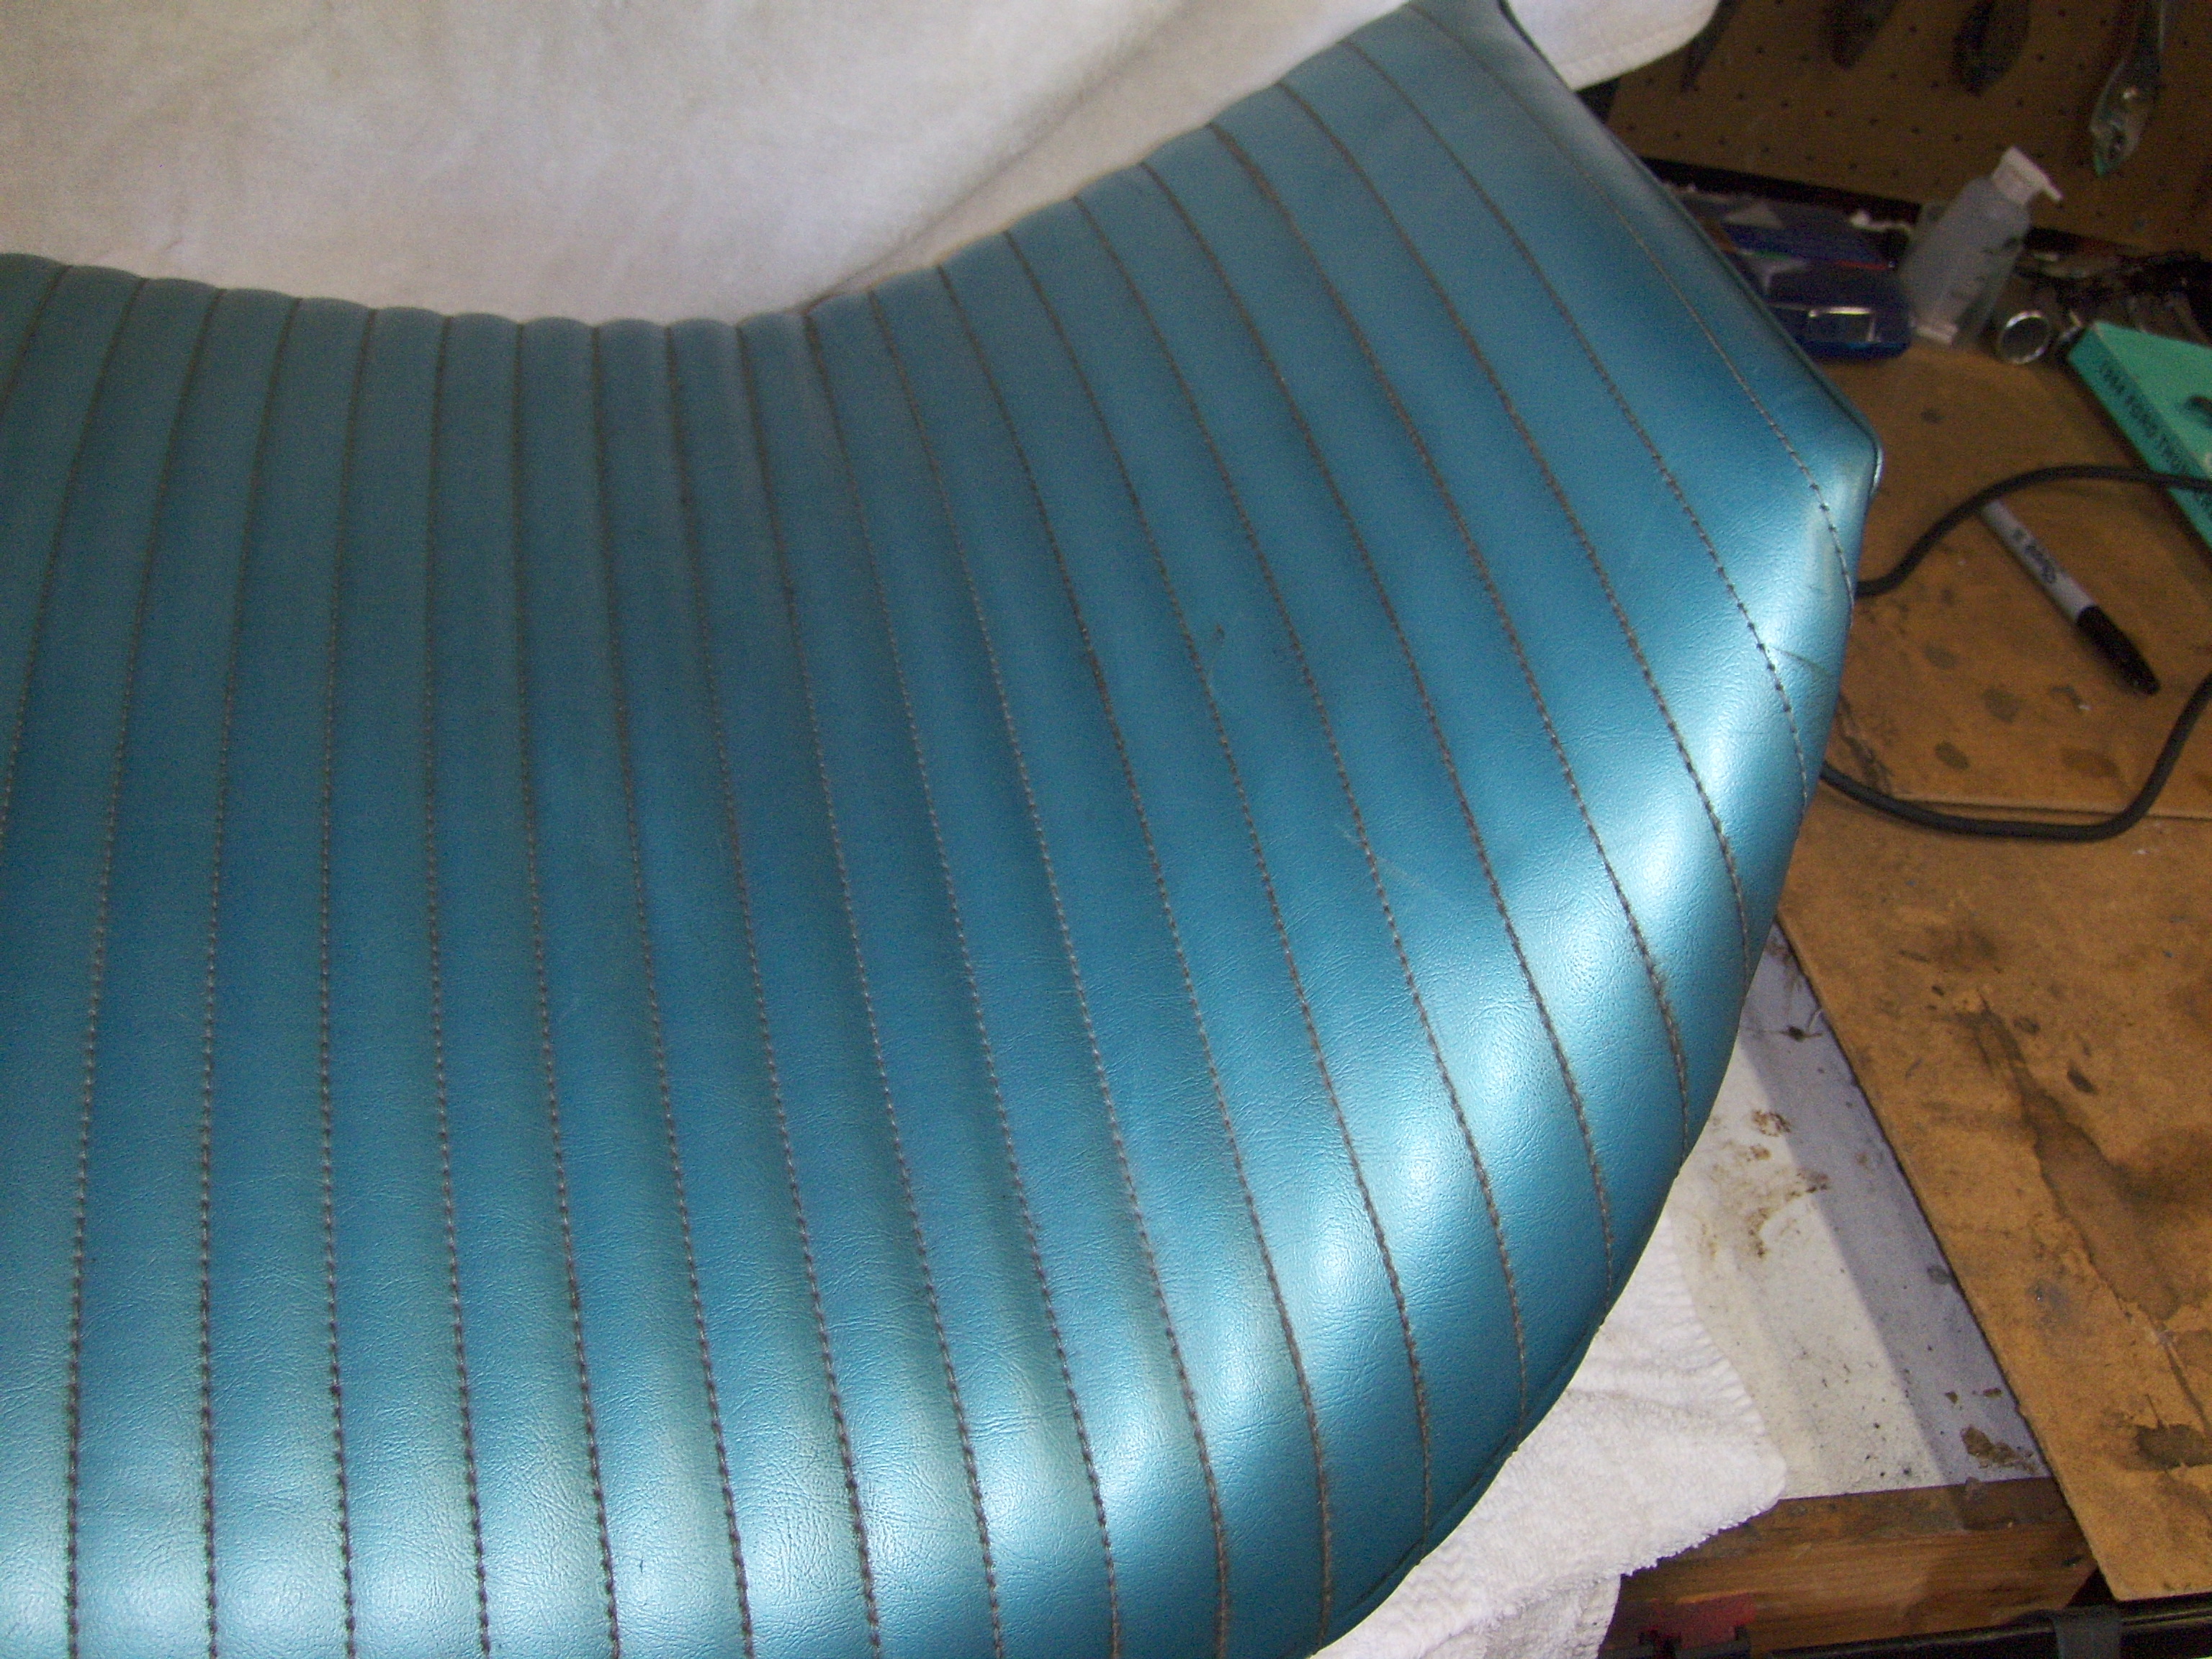
The driver’s seat, reinstalled further back, further down.
I’ve been driving with the seat in it’s “new, improved” position for about a week now. The rake is much more upright, which is taking some getting used to, but the additional height is excellent. Before, it was hard to see the turn indicators for the windshield wipers in the way. Also, the seat just looks better up off the floor and not resting against the back seat.
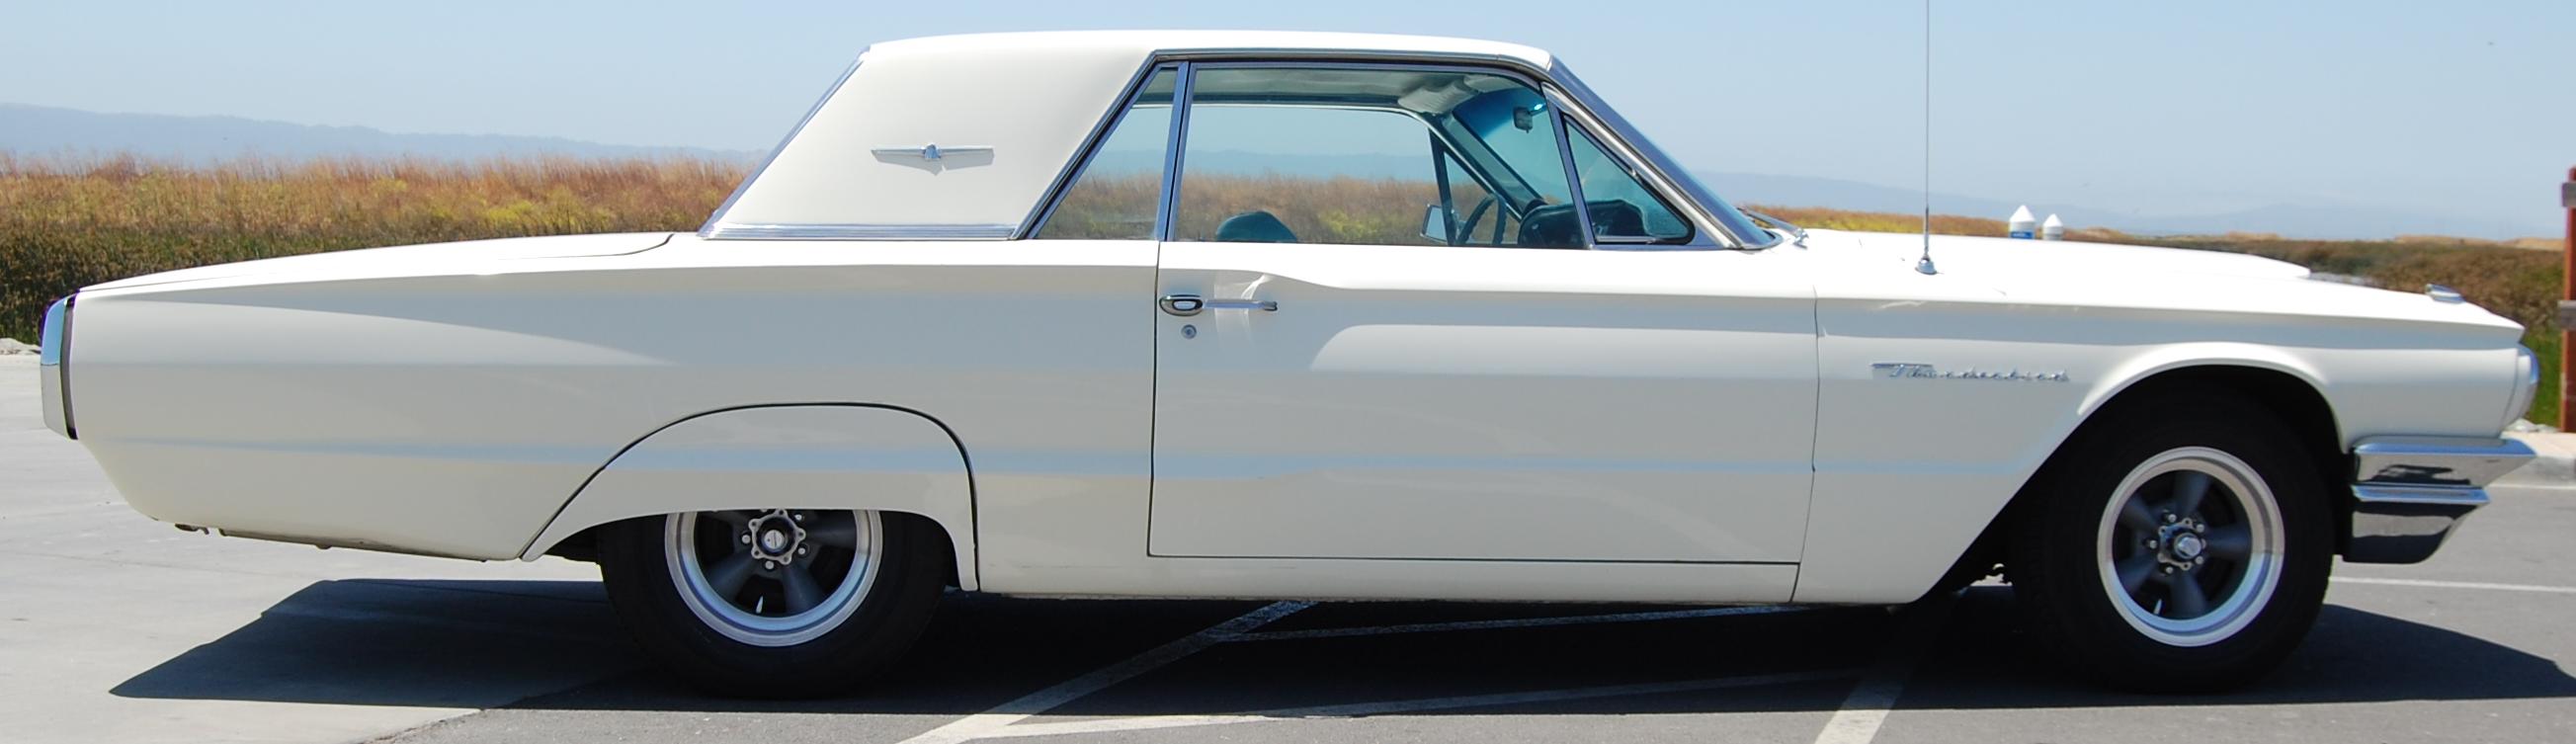
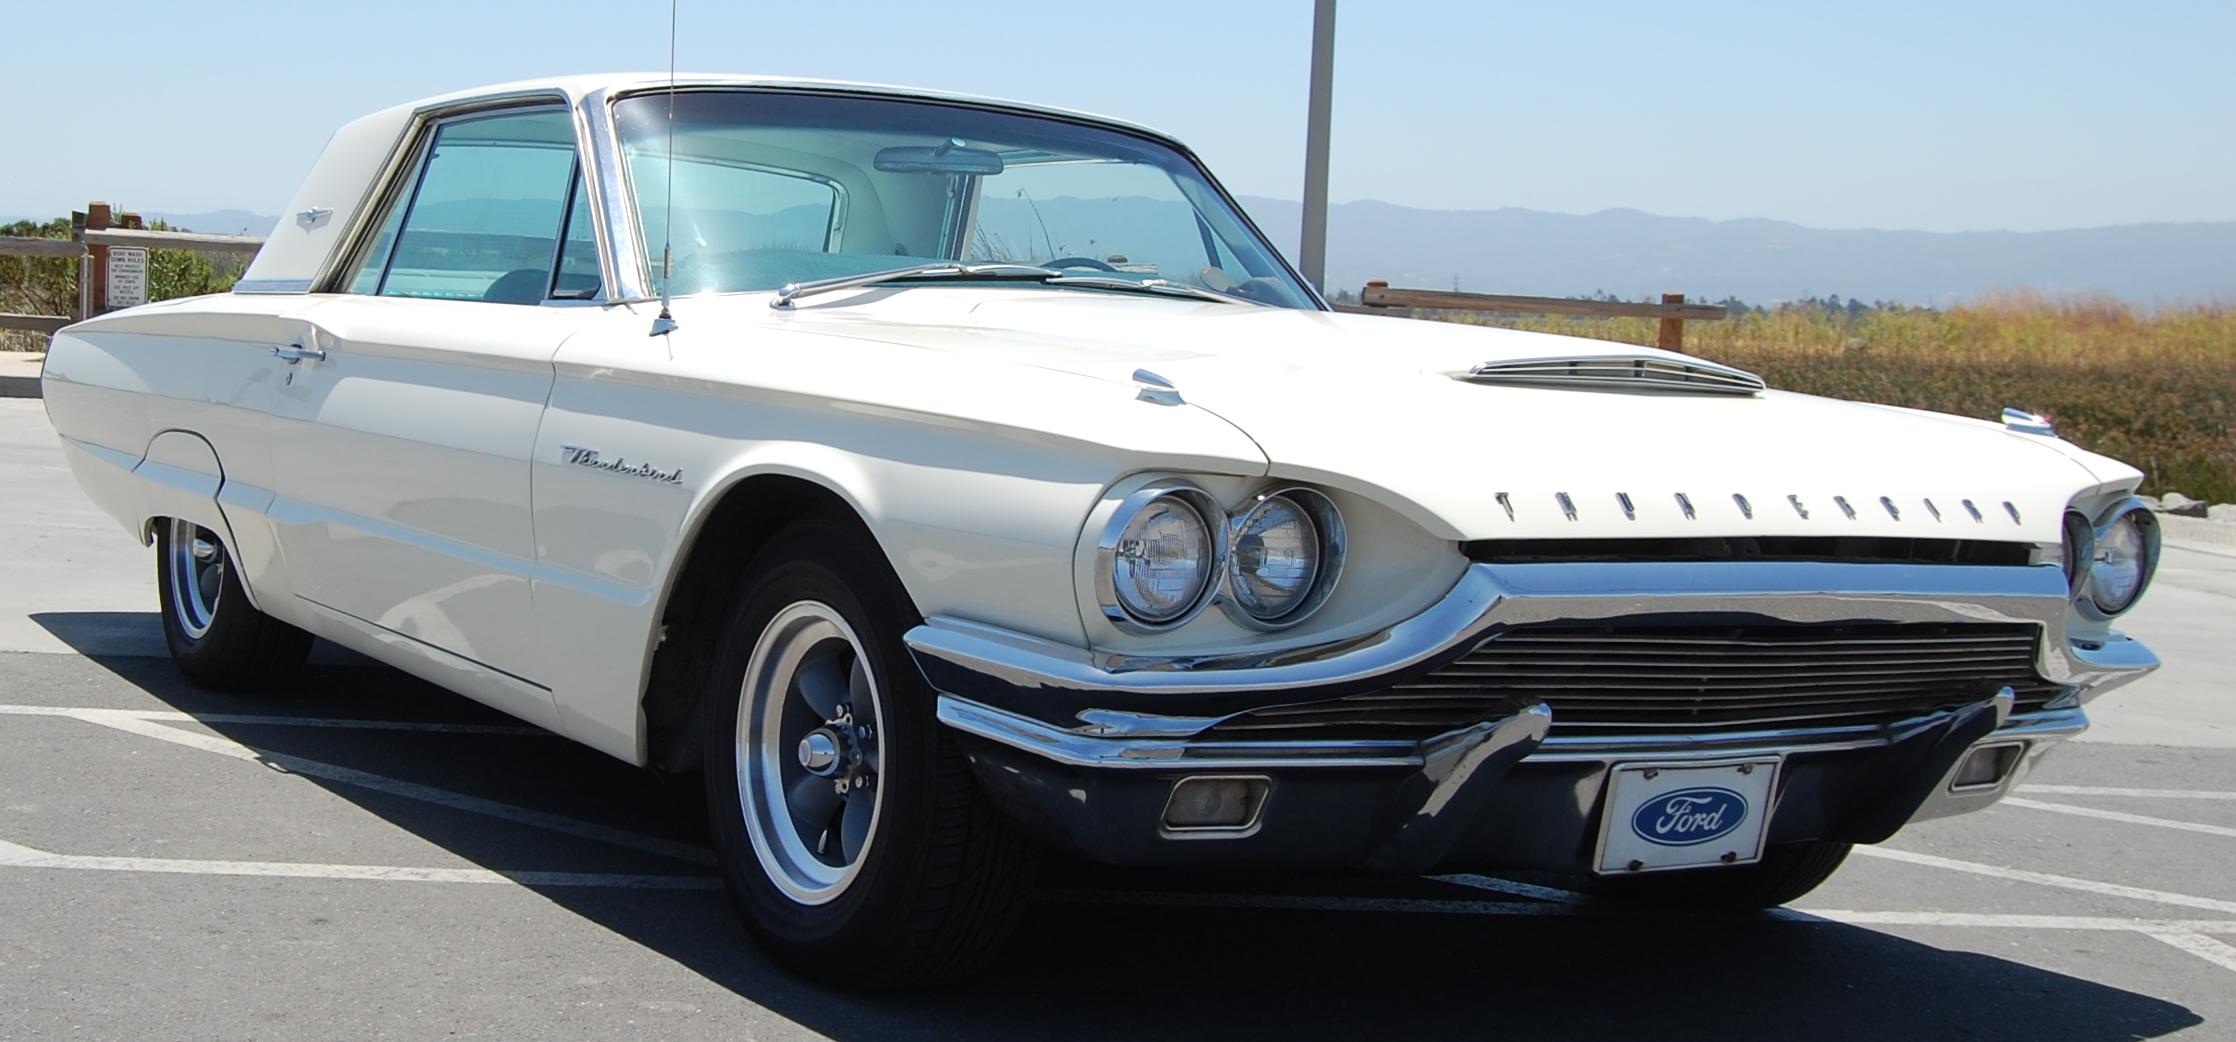
With that done, I took the day on Sunday to polish up the rear wheels, do a thorough clean, then a painstaking wax job. Took her out today for a few errands and stopped at the waterfront for some snapshots. First time in over a year that I actually took the time to photograph the whole car, not just parts.
The driver’s seat in the Thunderbird is designed for a different age with upright seating high off the floor. They did not have tall people in mind. I’m well over six feet, so I was not only cramped in the driver’s seat, my head was firmly jammed against the headliner when I sat in the car.
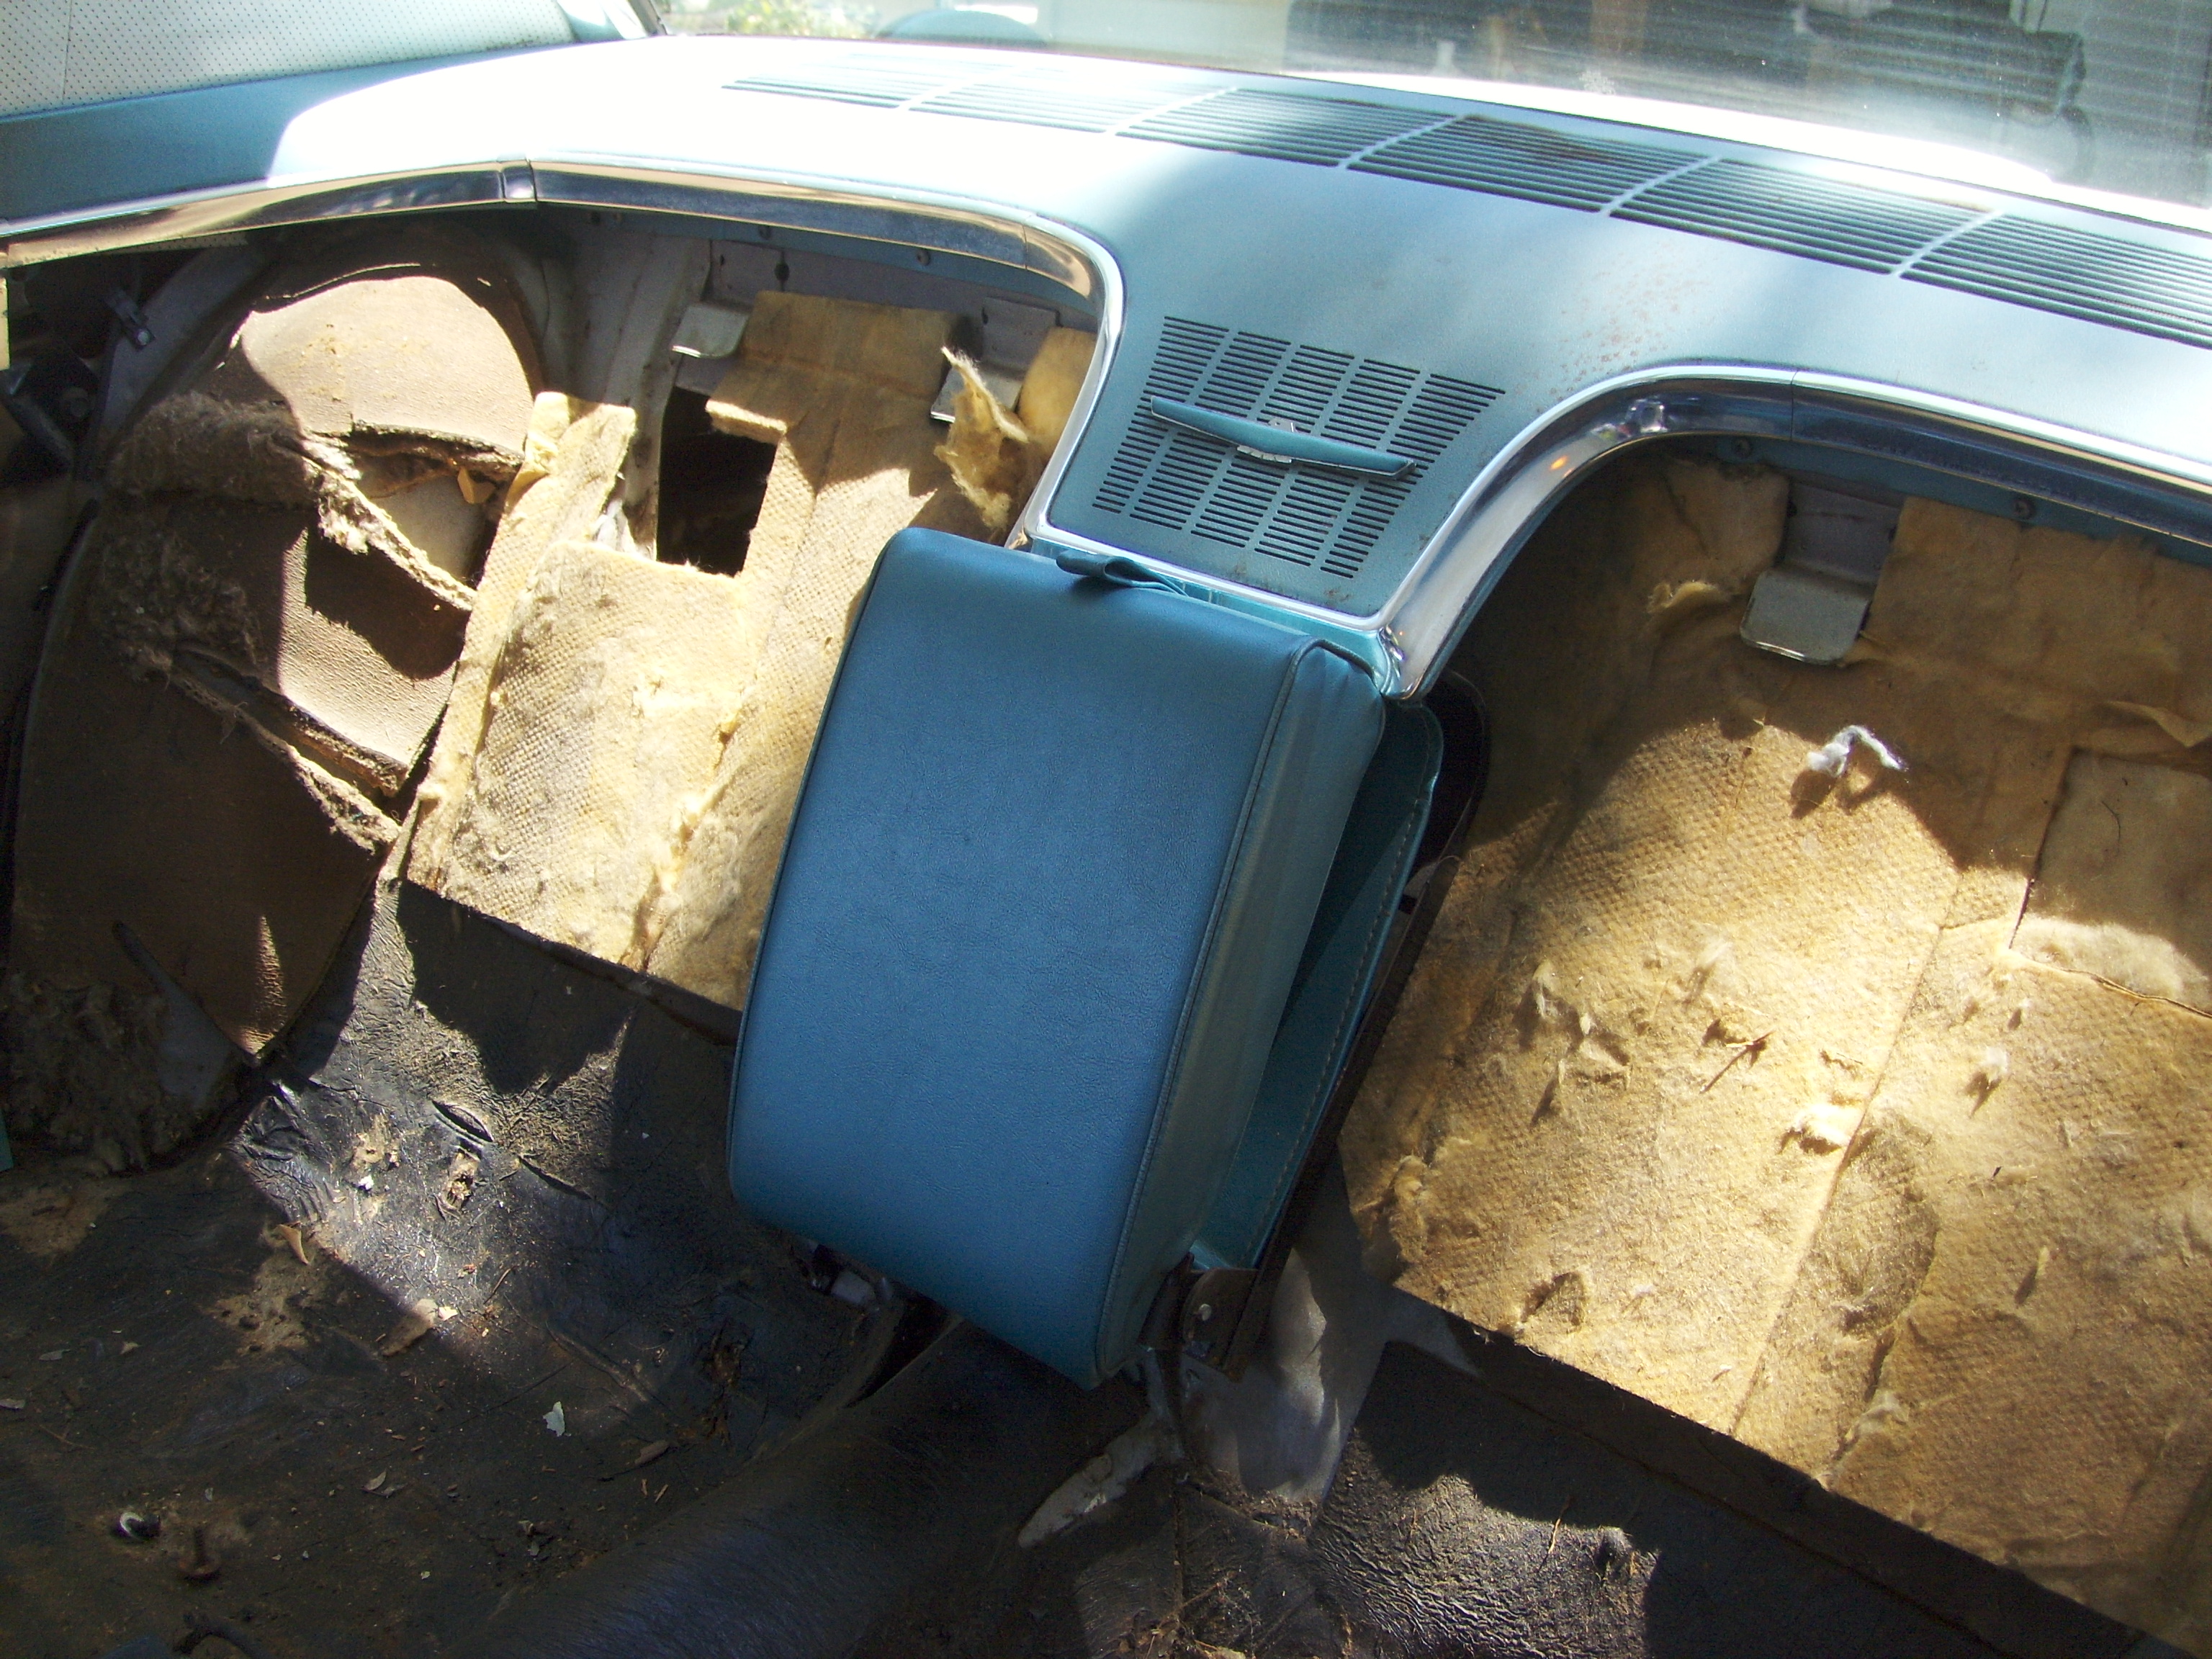
Looks like most of the sound insulation under the rear bench is just plain gone.
One of the first things I did when I got the car was unbolt the seat, remove the slider assembly and move it back as far as I could. It was a crude job meant to get me on the road. It worked tolerably well, but I have basically been sitting with the seat on the floor. Comfortable for driving, not so great for getting in and out of the car.
The rear seat backs I bought have been taking up space in my garage for a few months now, mostly because all the seats need to come out to install them. This weekend I had the time and energy, so I pull both front seats, the rear bench and the old rear seat backs.
The final rear seat installation.
The rear bench comes out easily with a tug once the arm rests are out. The backs are installed with two small screws through tabs on the bottom. The passenger side seat back was in rough shape. The vinyl on top was dried, flaky and cracked. I had to drill one new mounting hole to install the replacement, but it went together nicely. On the driver’s side, the replacement seat back wasn’t a good fit at all. The mounting tabs didn’t line up with the existing holes and the curve of the seat back didn’t nest into the frame. Since the original on this side was still decent (and a good color match with the other side), I reinstalled it.
Reinstallation was relatively simple, except for lining up the screws in the deep recesses of the armrests, which took some doing, and a little creativity.
Inside the seat sliding mechanism.
For the driver’s seat, I removed the four inch riser from the slider assembly, then took the sliders apart to clean and re-grease them. With the sliders back together, I flipped them over (to allow clearance for the seat locking mechanism) and bolted them directly to the seat frame.
I did a test sit with the seat in this configuration and the sliders don’t add a lot of hight, but the seat is in a more upright configuration. It’s not easy to get to the seat latch, which is very close to the floor, but the new set up will allow for some seat movement forward.
To install the new set up in the car, I’ll be running bolts up from underneath into blind nuts glued to the seat rails. Yesterday, I clamped and glued the nuts in place, letting the glue set over night. Today, I expect to have time to get the seat back into the car.
Seems like it was only about a year ago, perhaps longer, that I had to replace the starter. The one I put in didn’t last long, as I mentioned in my last post. When I got the old–but not that old starter out, it had developed some nasty rust and at least one thing had broken off and was rattling around inside.
Clearly, this one was toast.
I got a replacement from O’Reilly’s this time–a brand I had not heard of and a little more expensive than the Napa part I replaced. Installation, as before, is not difficult, though I did pick up a ratcheting box-end wrench to make that top bolt less of a chore. (And I was glad I did!) The new starter fires the car up with a “scchhhvooooom” that I hadn’t heard before, but is otherwise excellent.
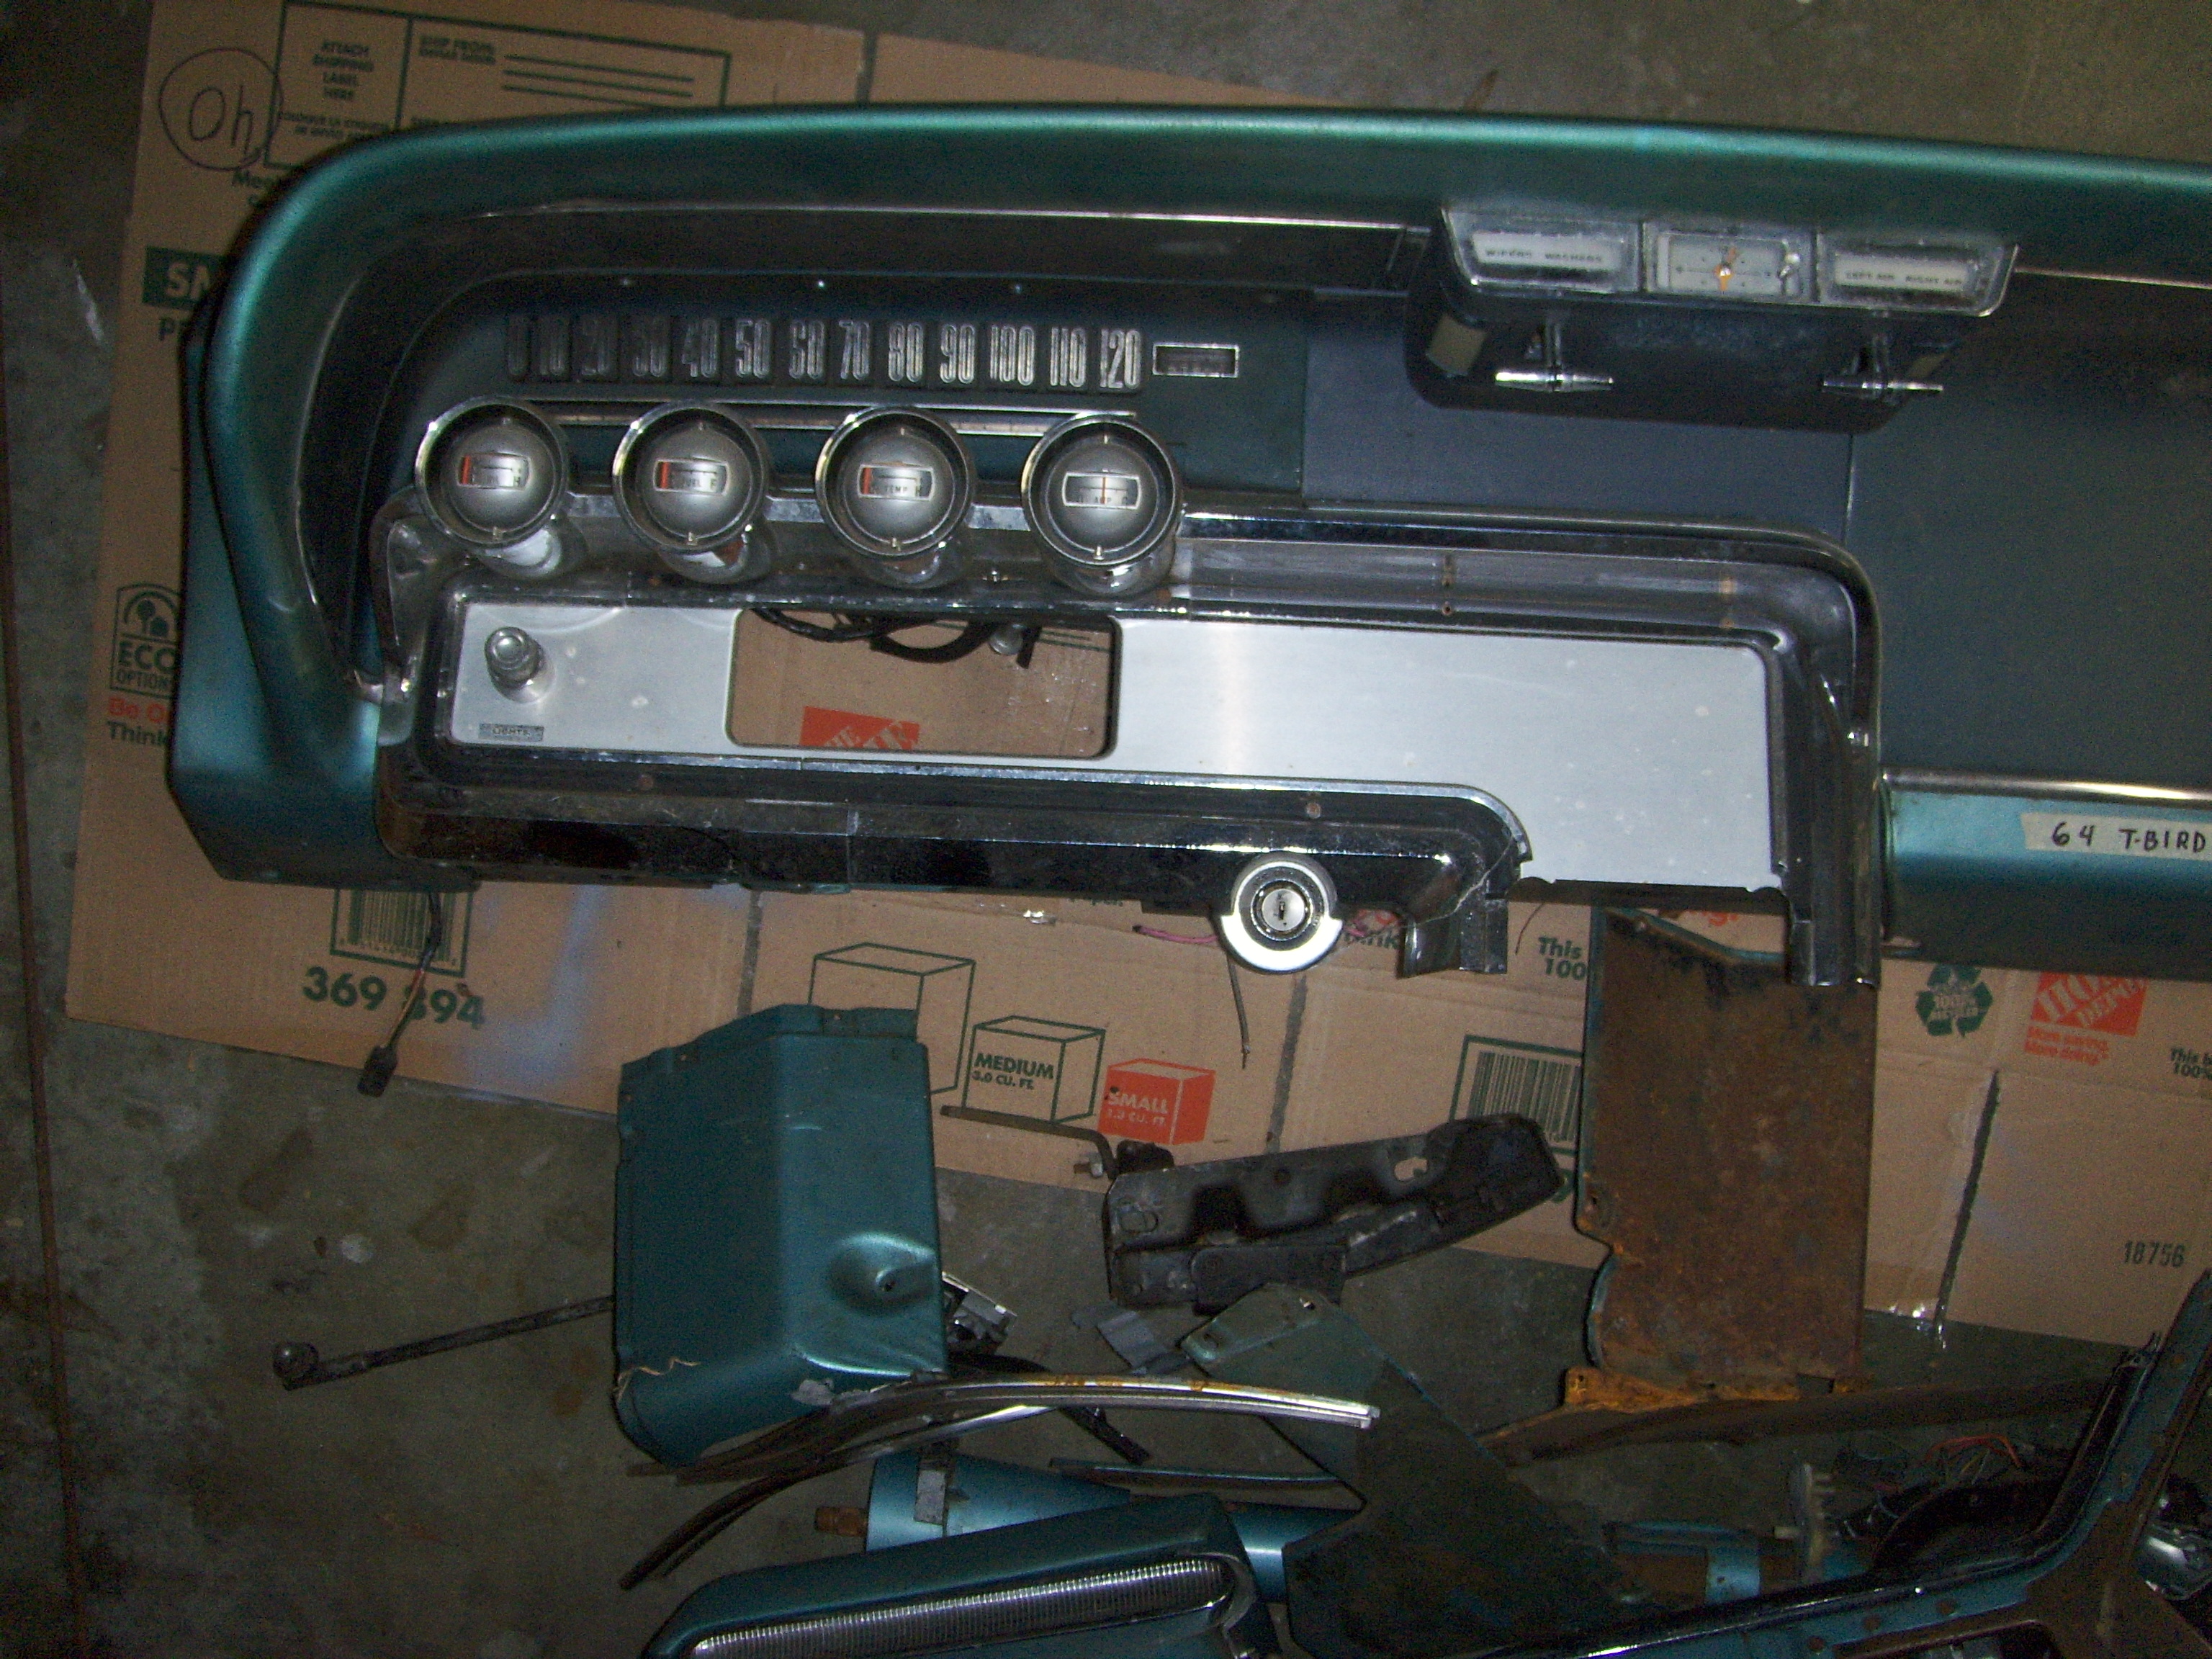
A new (-ish) dash and assorted parts.
Sunday meant a trip out to see a man about a dashboard. The dash he has was carefully uninstalled and in decent shape. It also came with a steering column, a better-than-mine steering wheel and a center console that I will end up trashing. The price was right, so we tossed it in the back of the truck and carted it home. Looks like most of the pieces are in place to get the dash out of the car and spruced up.
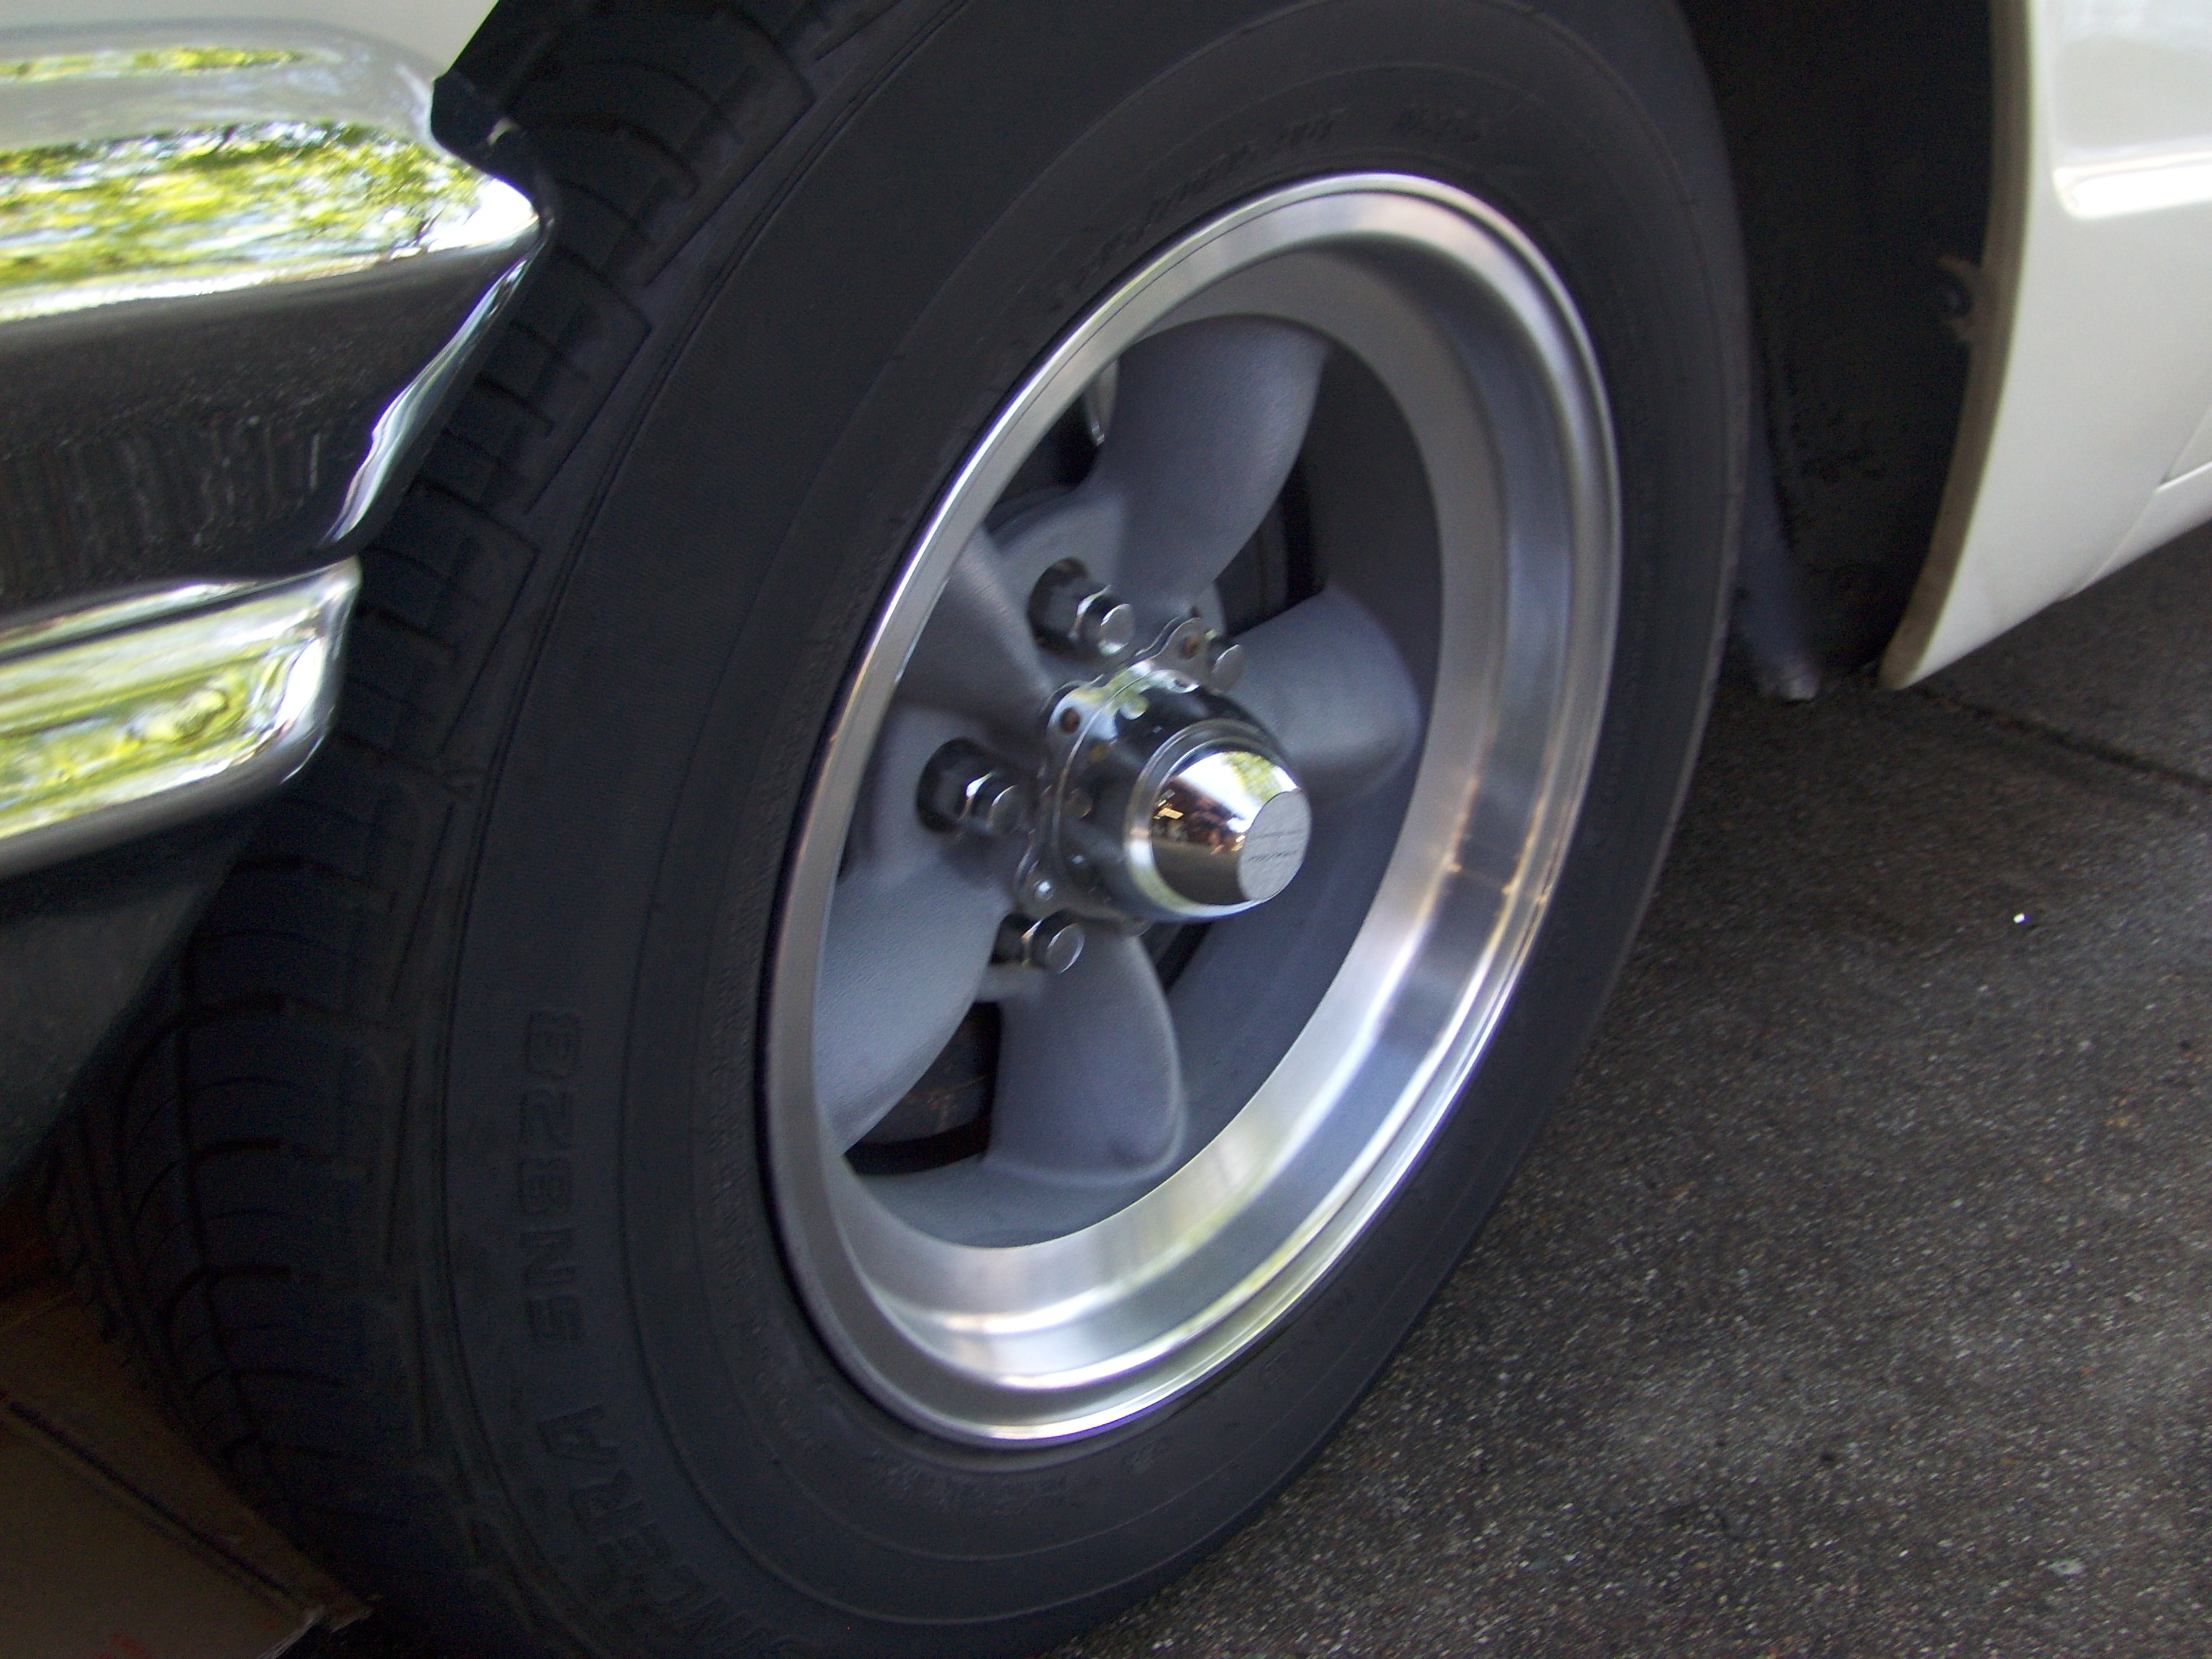
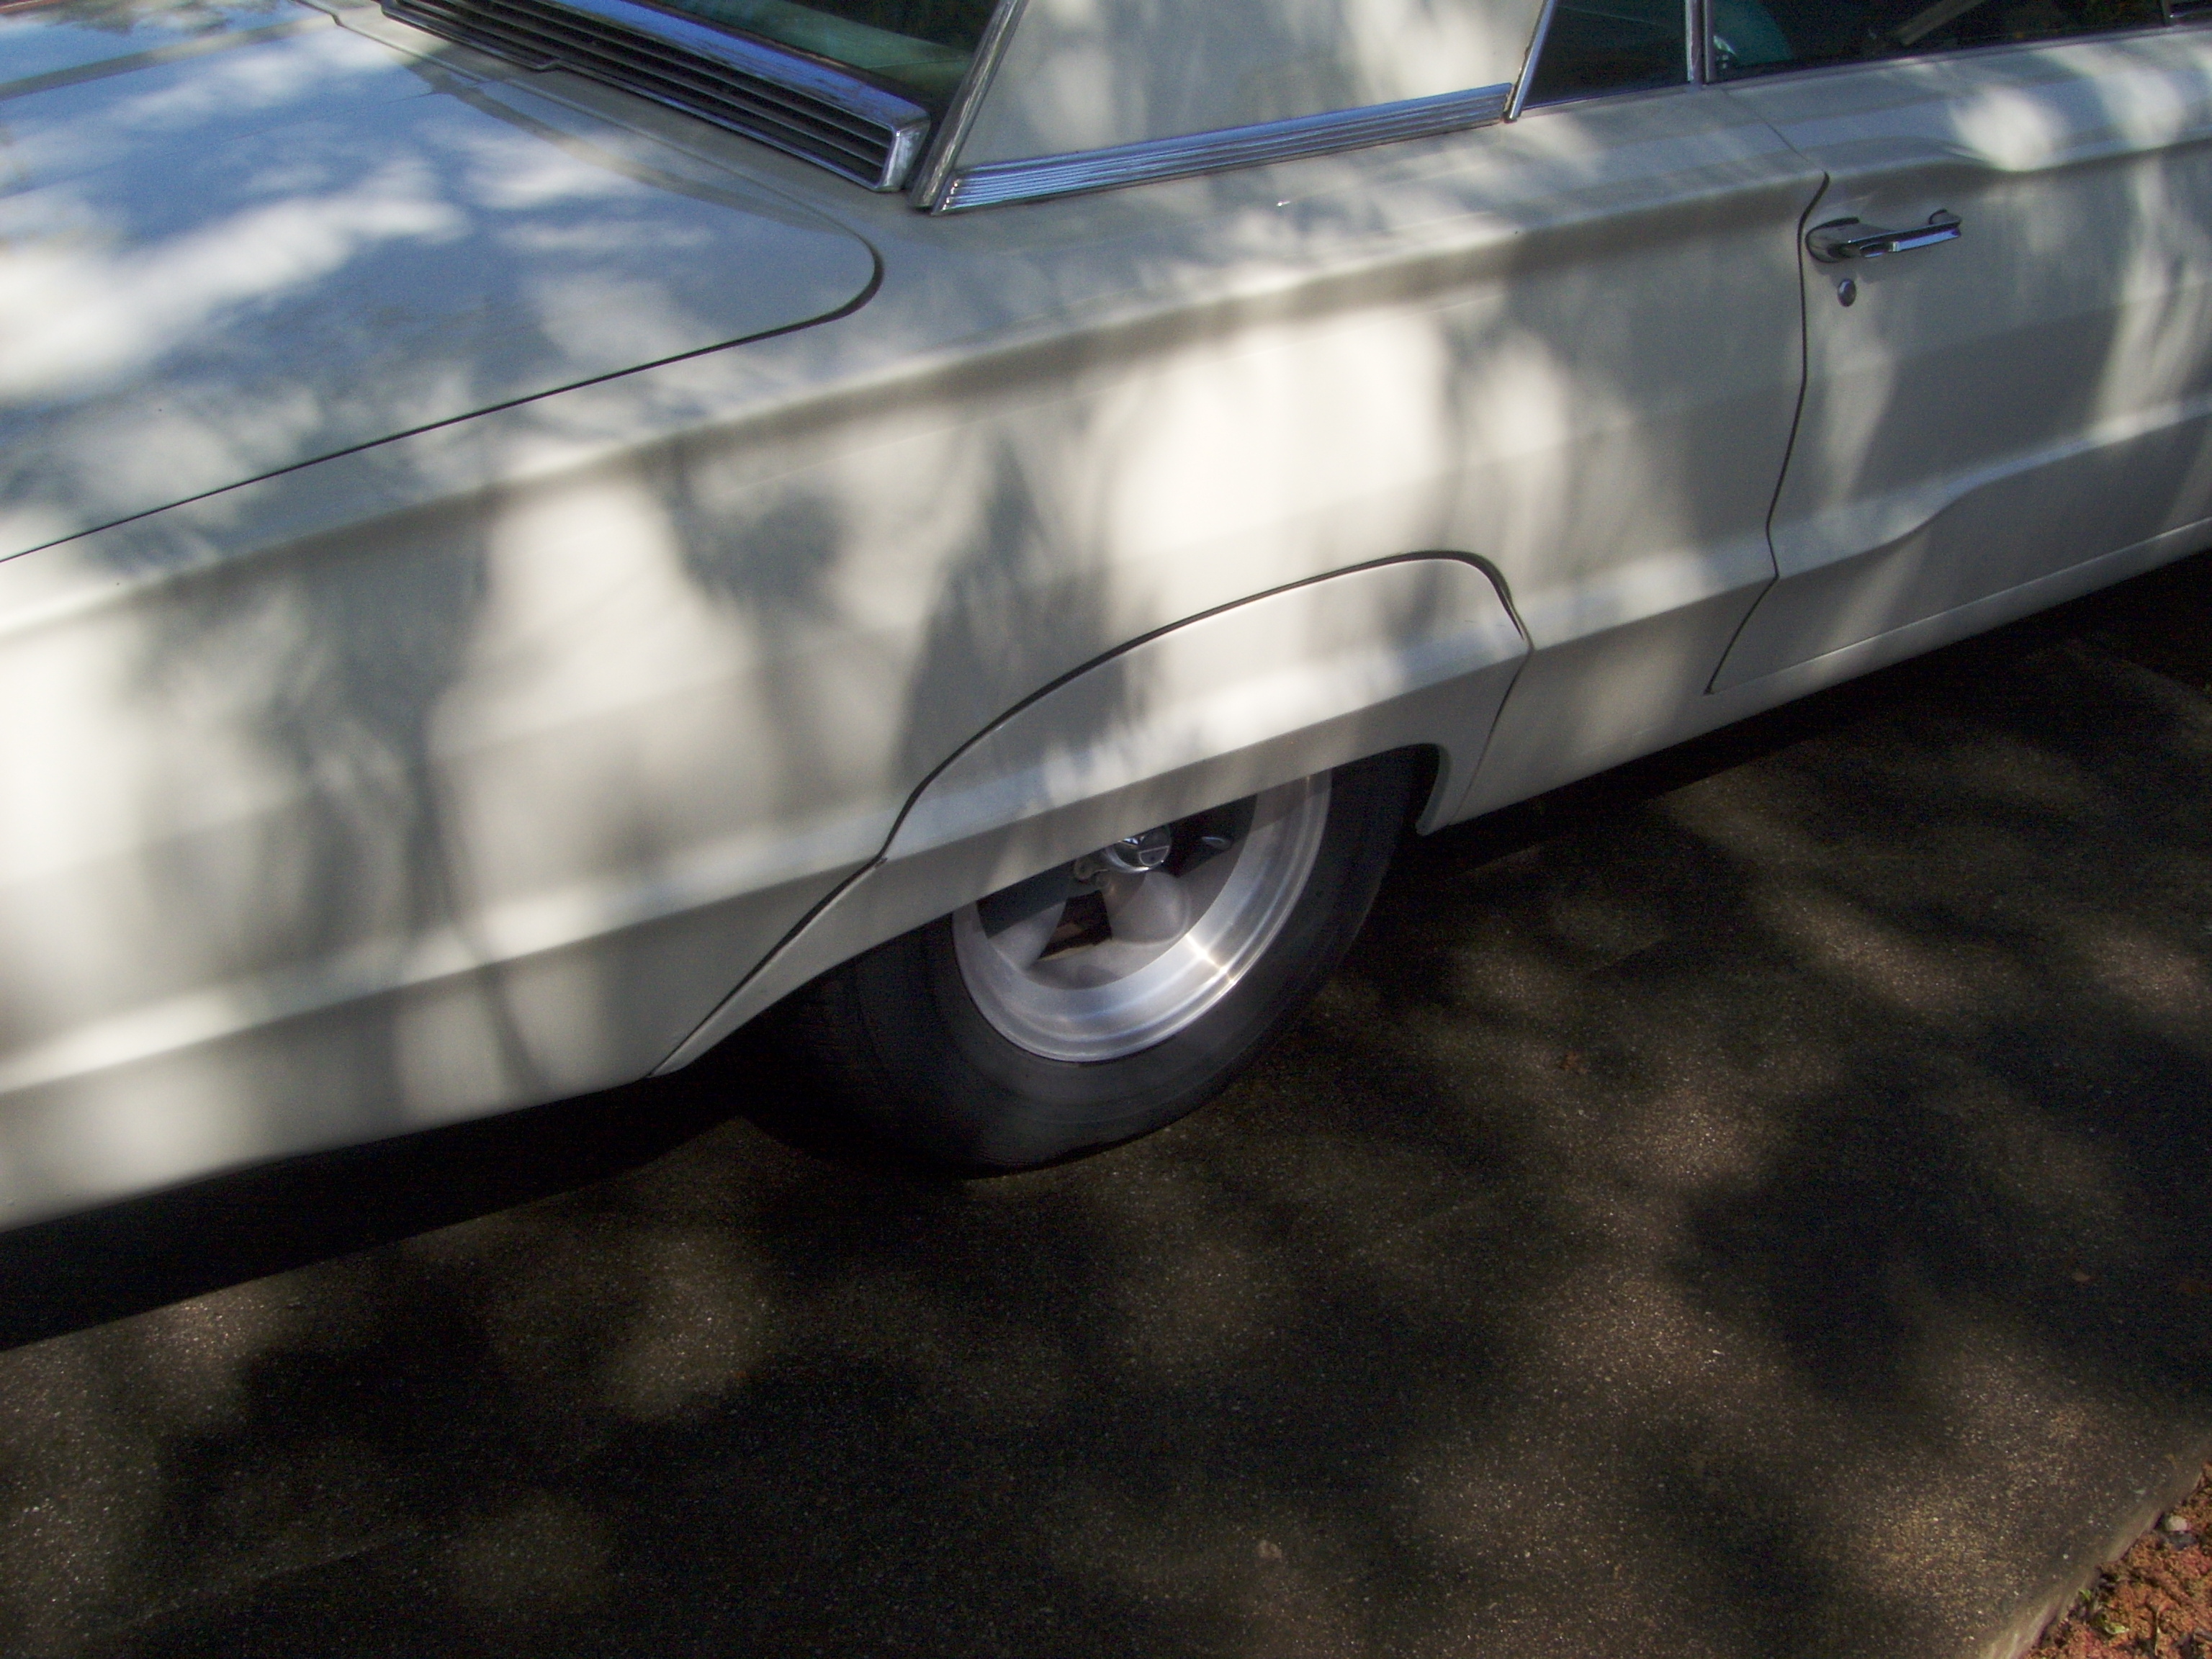
I often get comments on the rims on my Thunderbird. They are period-correct mags, and perhaps not the first style you’d think of when you think T-Bird. I like the look, and based on the comments I get, they evoke a lot of good memories.
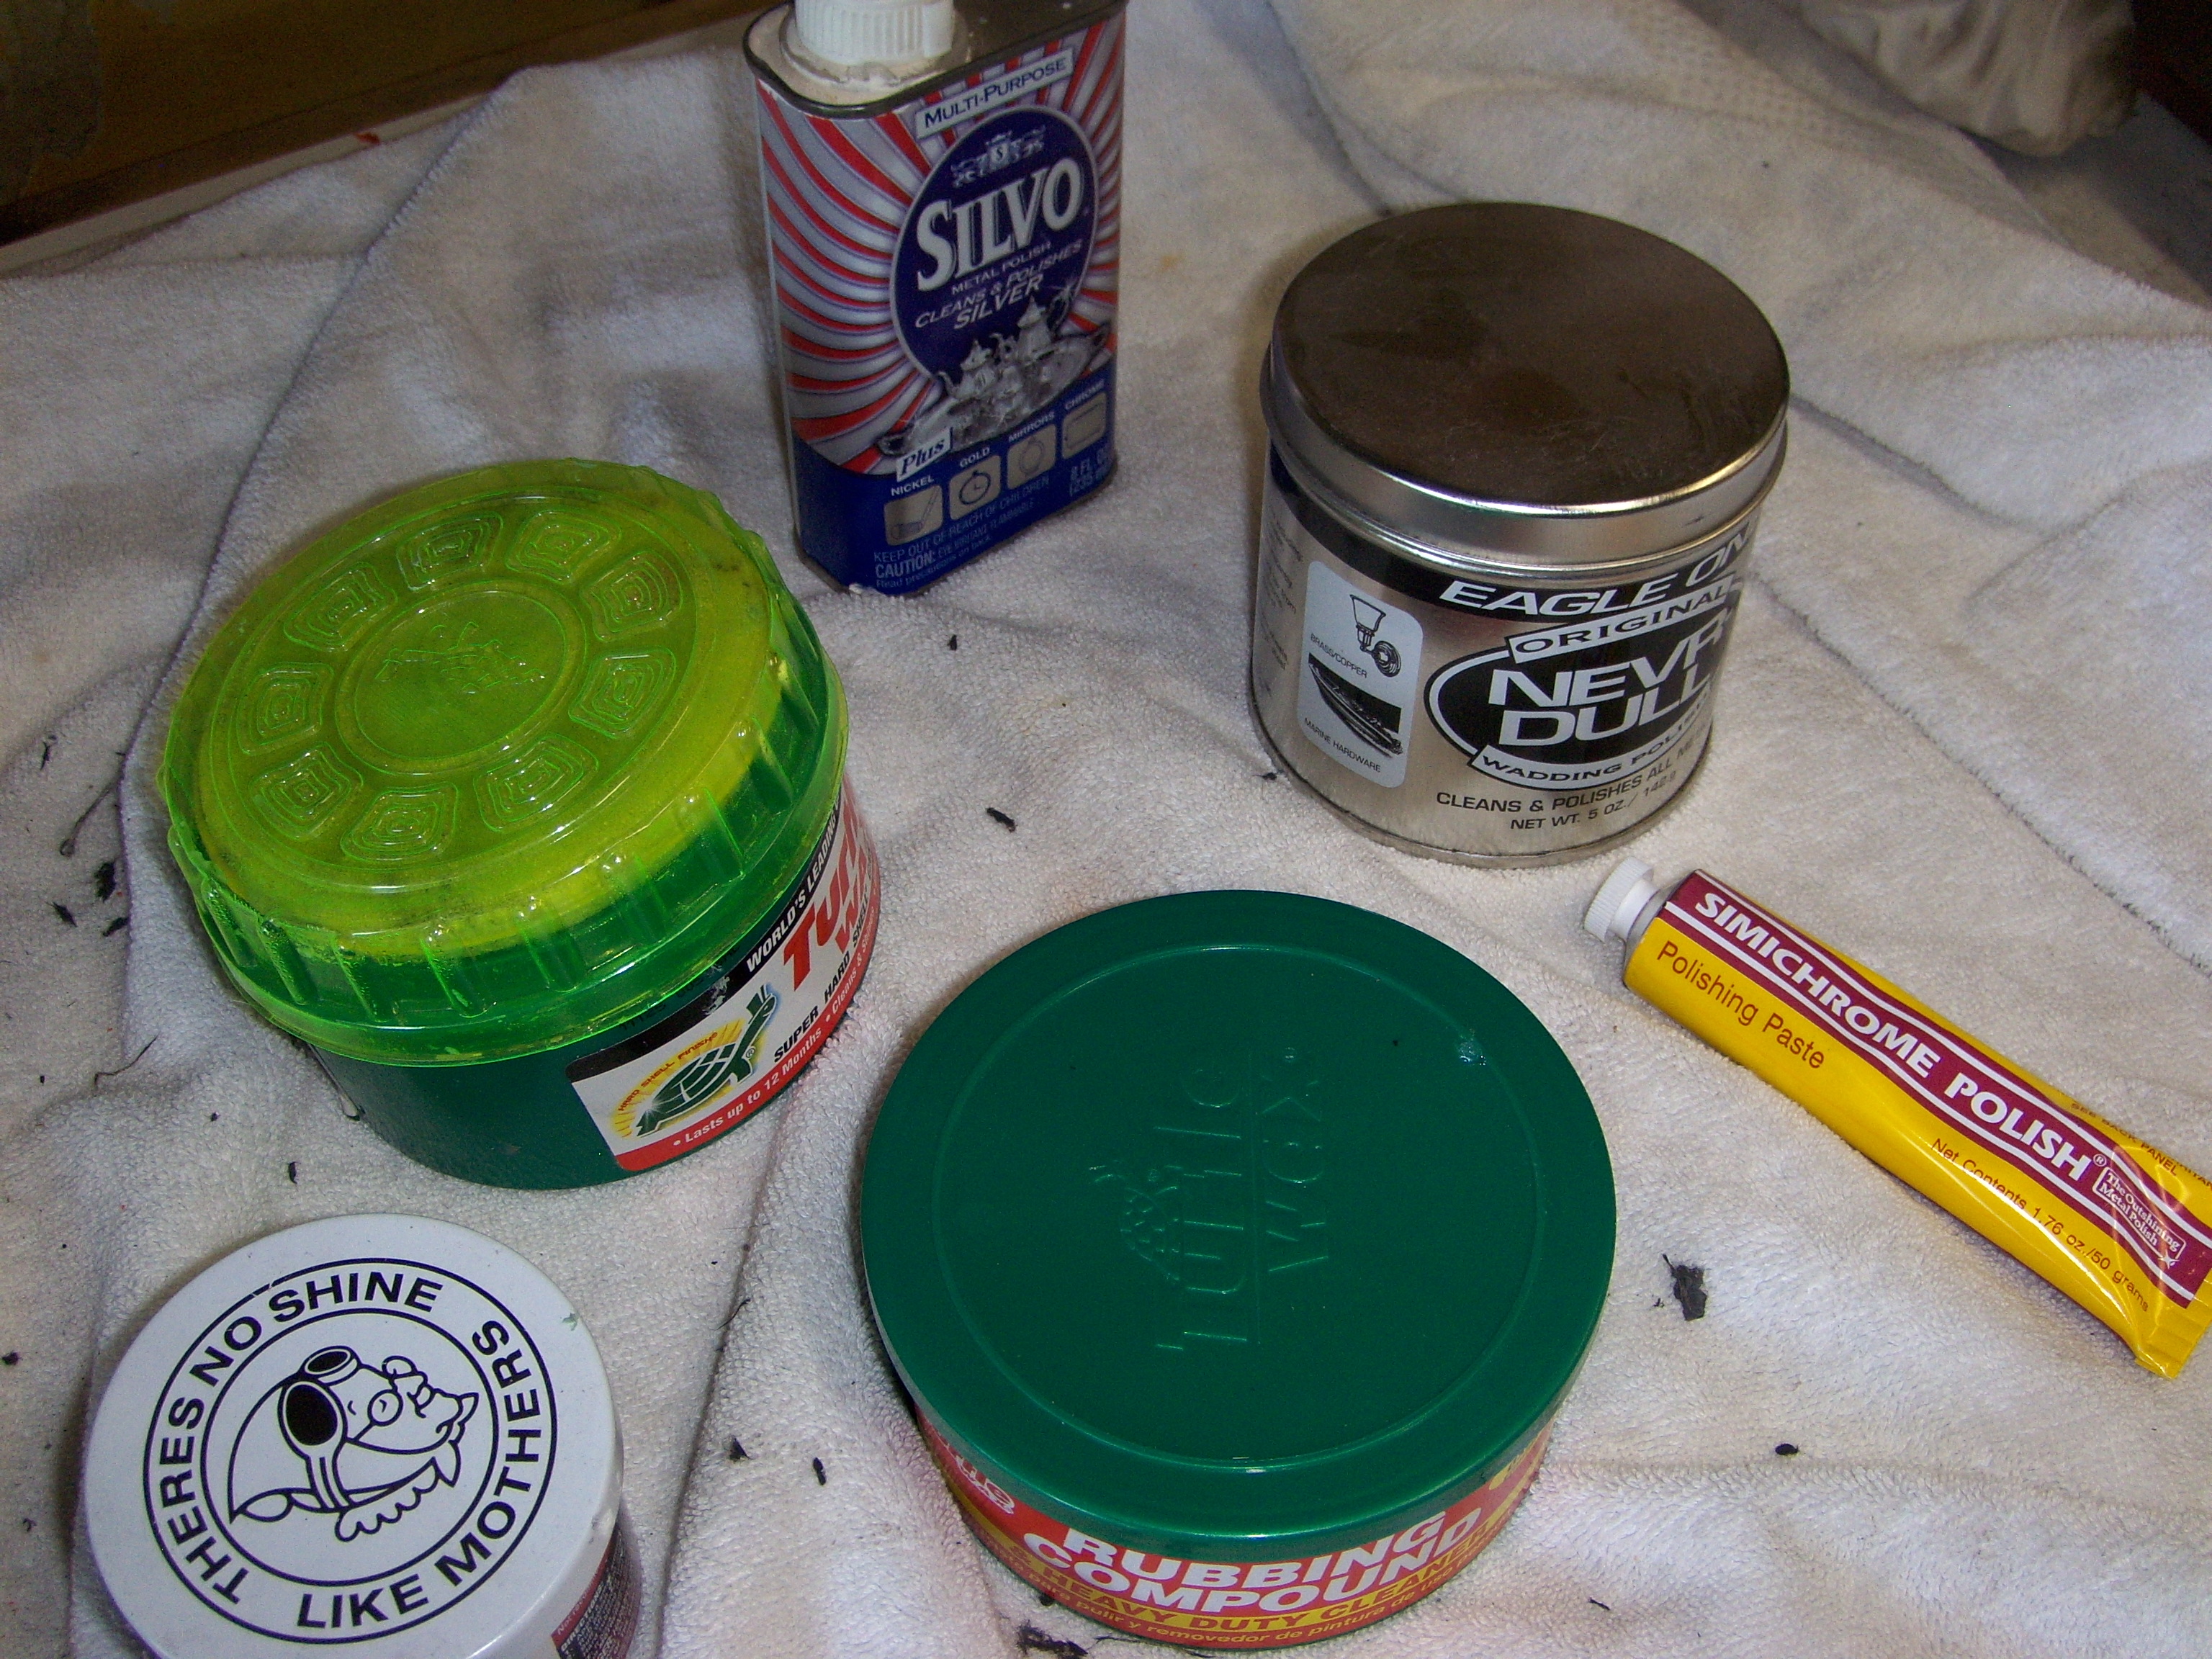
These rims have been around a while and while not in terrible shape, they have some weathering and stains that have resisted my cleanup efforts. Yesterday, I marshaled together all of the polishing and cleaning compounds I could find in my garage, pulled a front wheel and set out to experiment.
After an hour or so–and lots of elbow grease–I found that a good scrub with Nevr Dull wadding followed up with a traditional “Mother’s” mag wheel polish cleaned up the stains pretty well. Under the glare of a halogen lamp on my work bench, the shine didn’t look like much, but once on the car, the wheel looked pretty good. One down and three to go.
The final shine.
Today, I pulled out the Autolite I’ve been wrestling with and dropped it on the manifold once again. Results were similar–easy to start, but won’t run unless at high rpm’s with a little goosing.
I kinda expected that outcome.
Starting the engine with a newly installed carburetor means a little bit of cranking to get gas to the carb. I don’t need to crank the motor much these days, and it looks like it was a bit of a strain on the starter today. While I was testing that Autolite, the starter failed to disengage from the flywheel and it seems stuck there pretty good. I went back to the Edelbrock, which started up fine, of course, but I didn’t let it run long with the starter screeching away under there. Looks like a new starter is in order.
At first, I was a little upset about the breakdown, but then realized I’ve had a long stretch of pretty reliable driving. The last unexpected problem was the coil, which I replaced back in early February–and that wasn’t even a disabling failure. All in all, that was a nice run, especially considering where I was with this car a year ago.
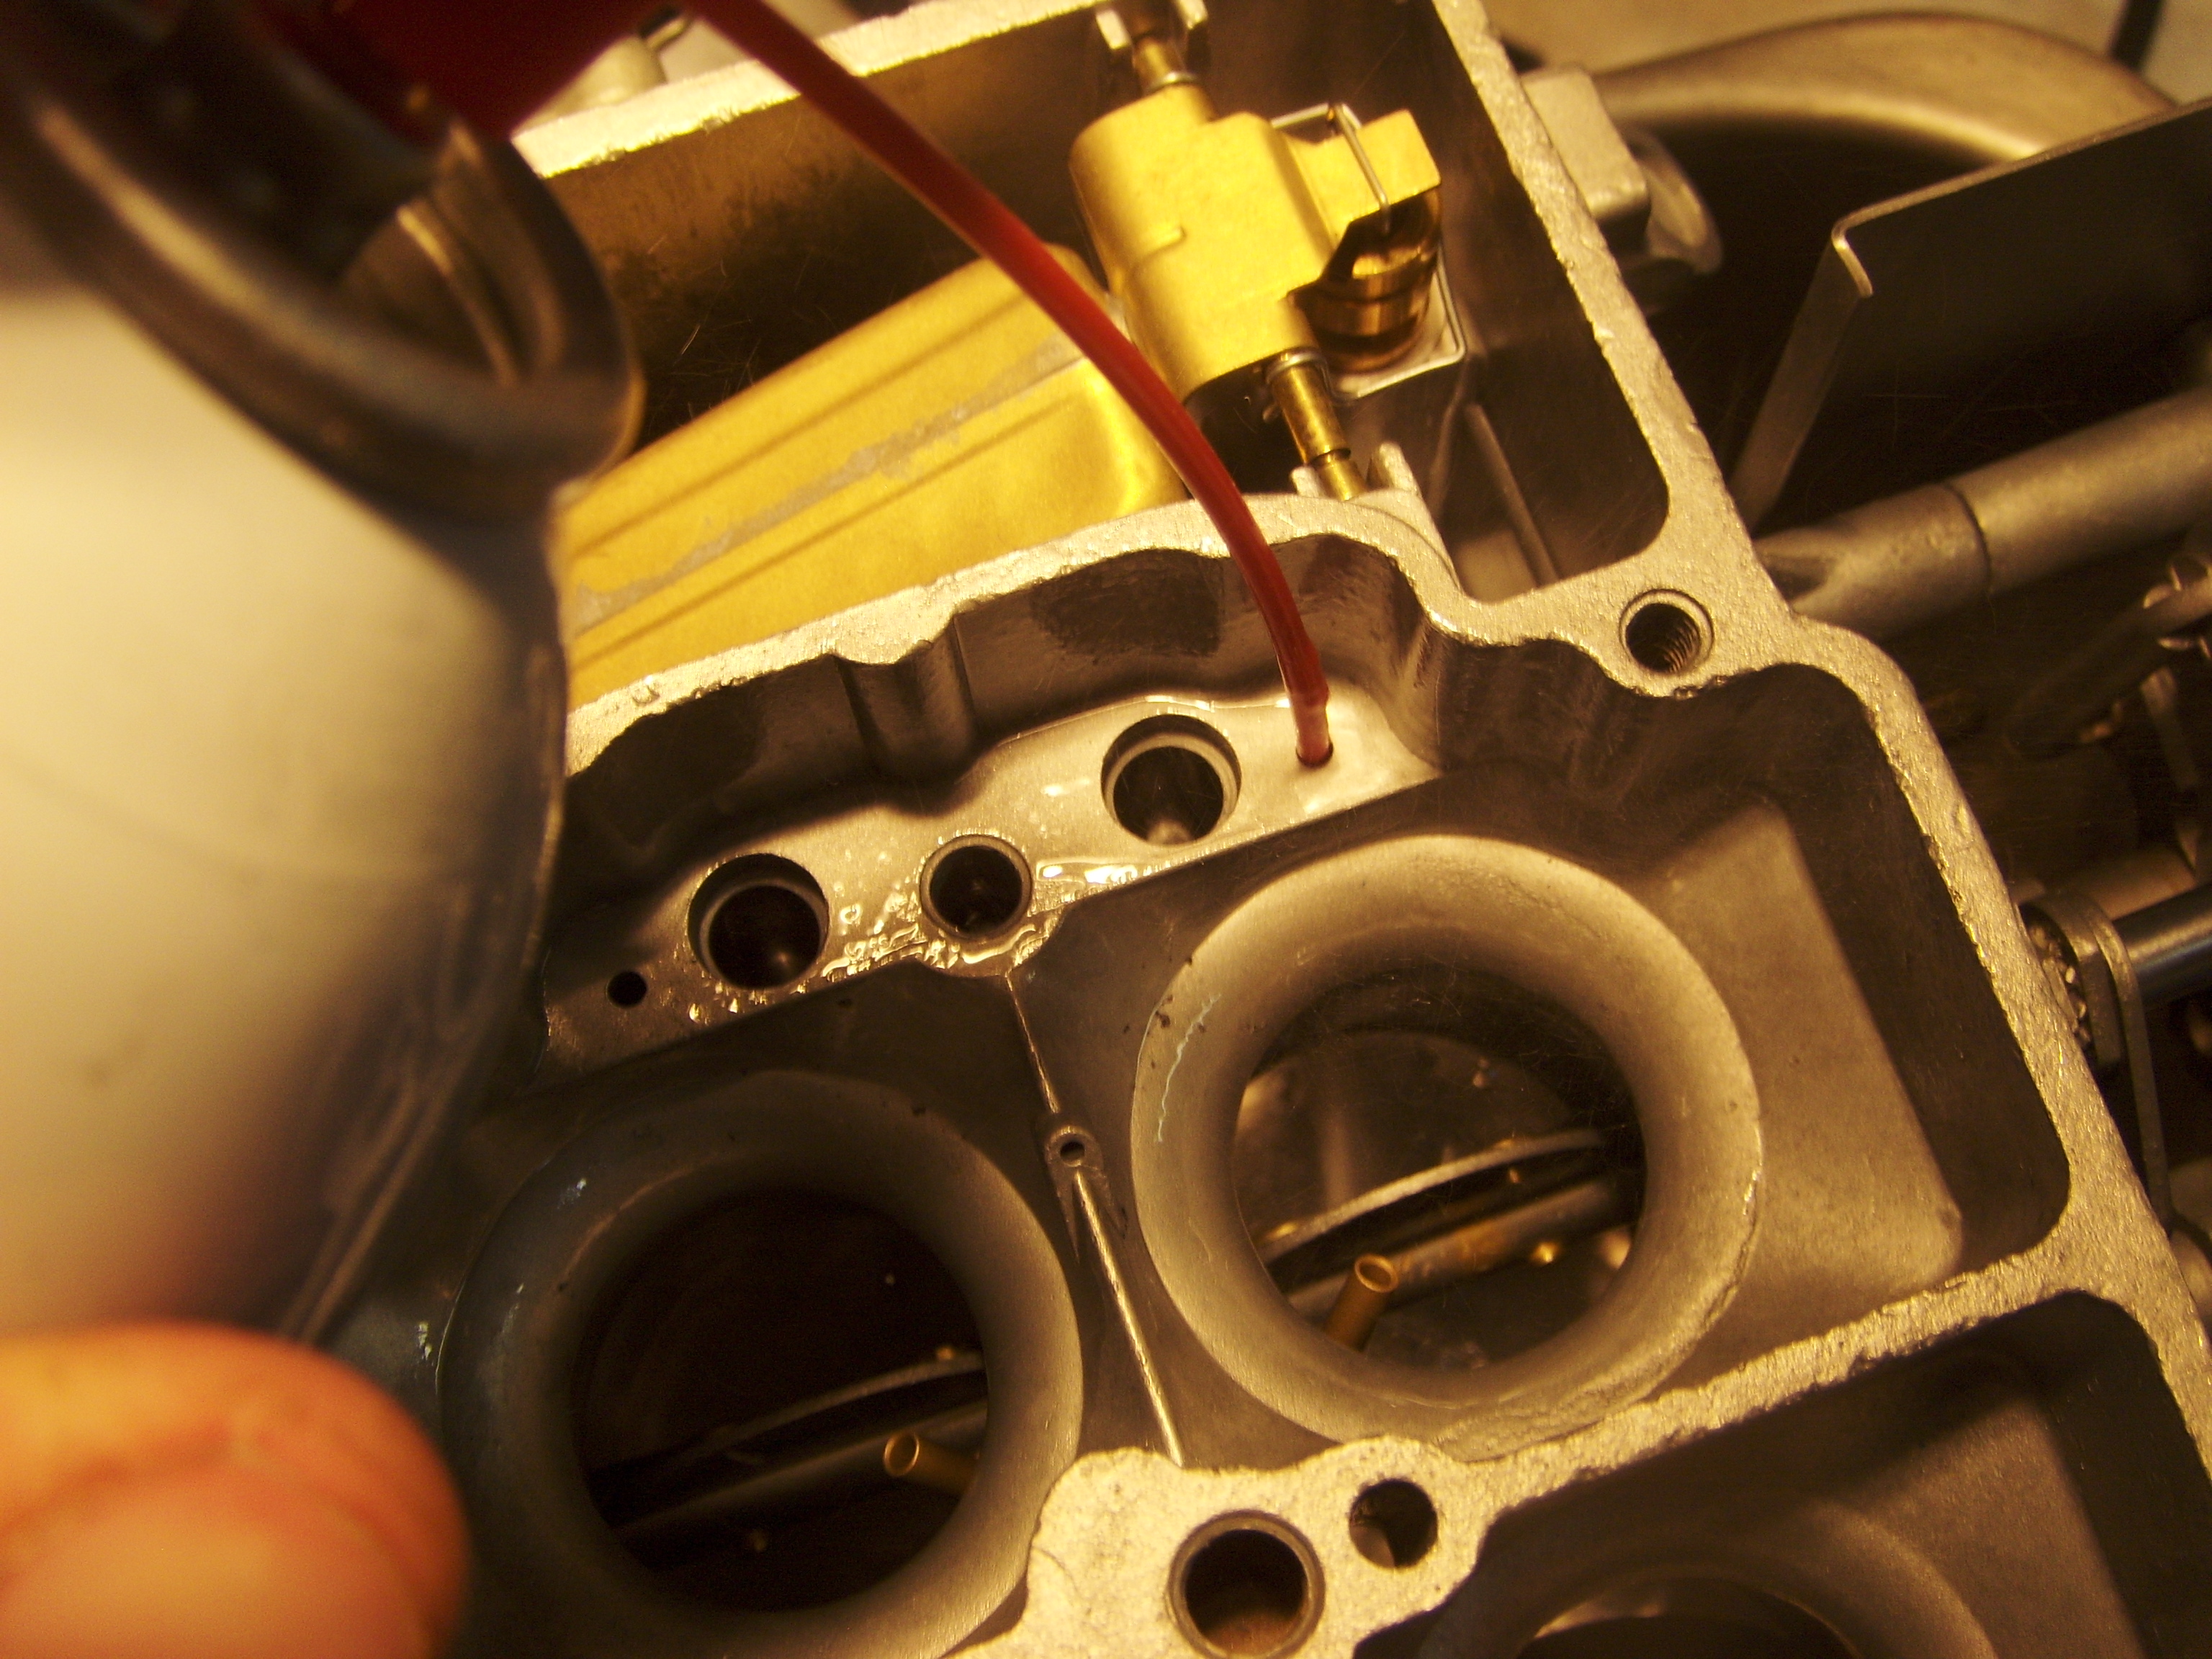
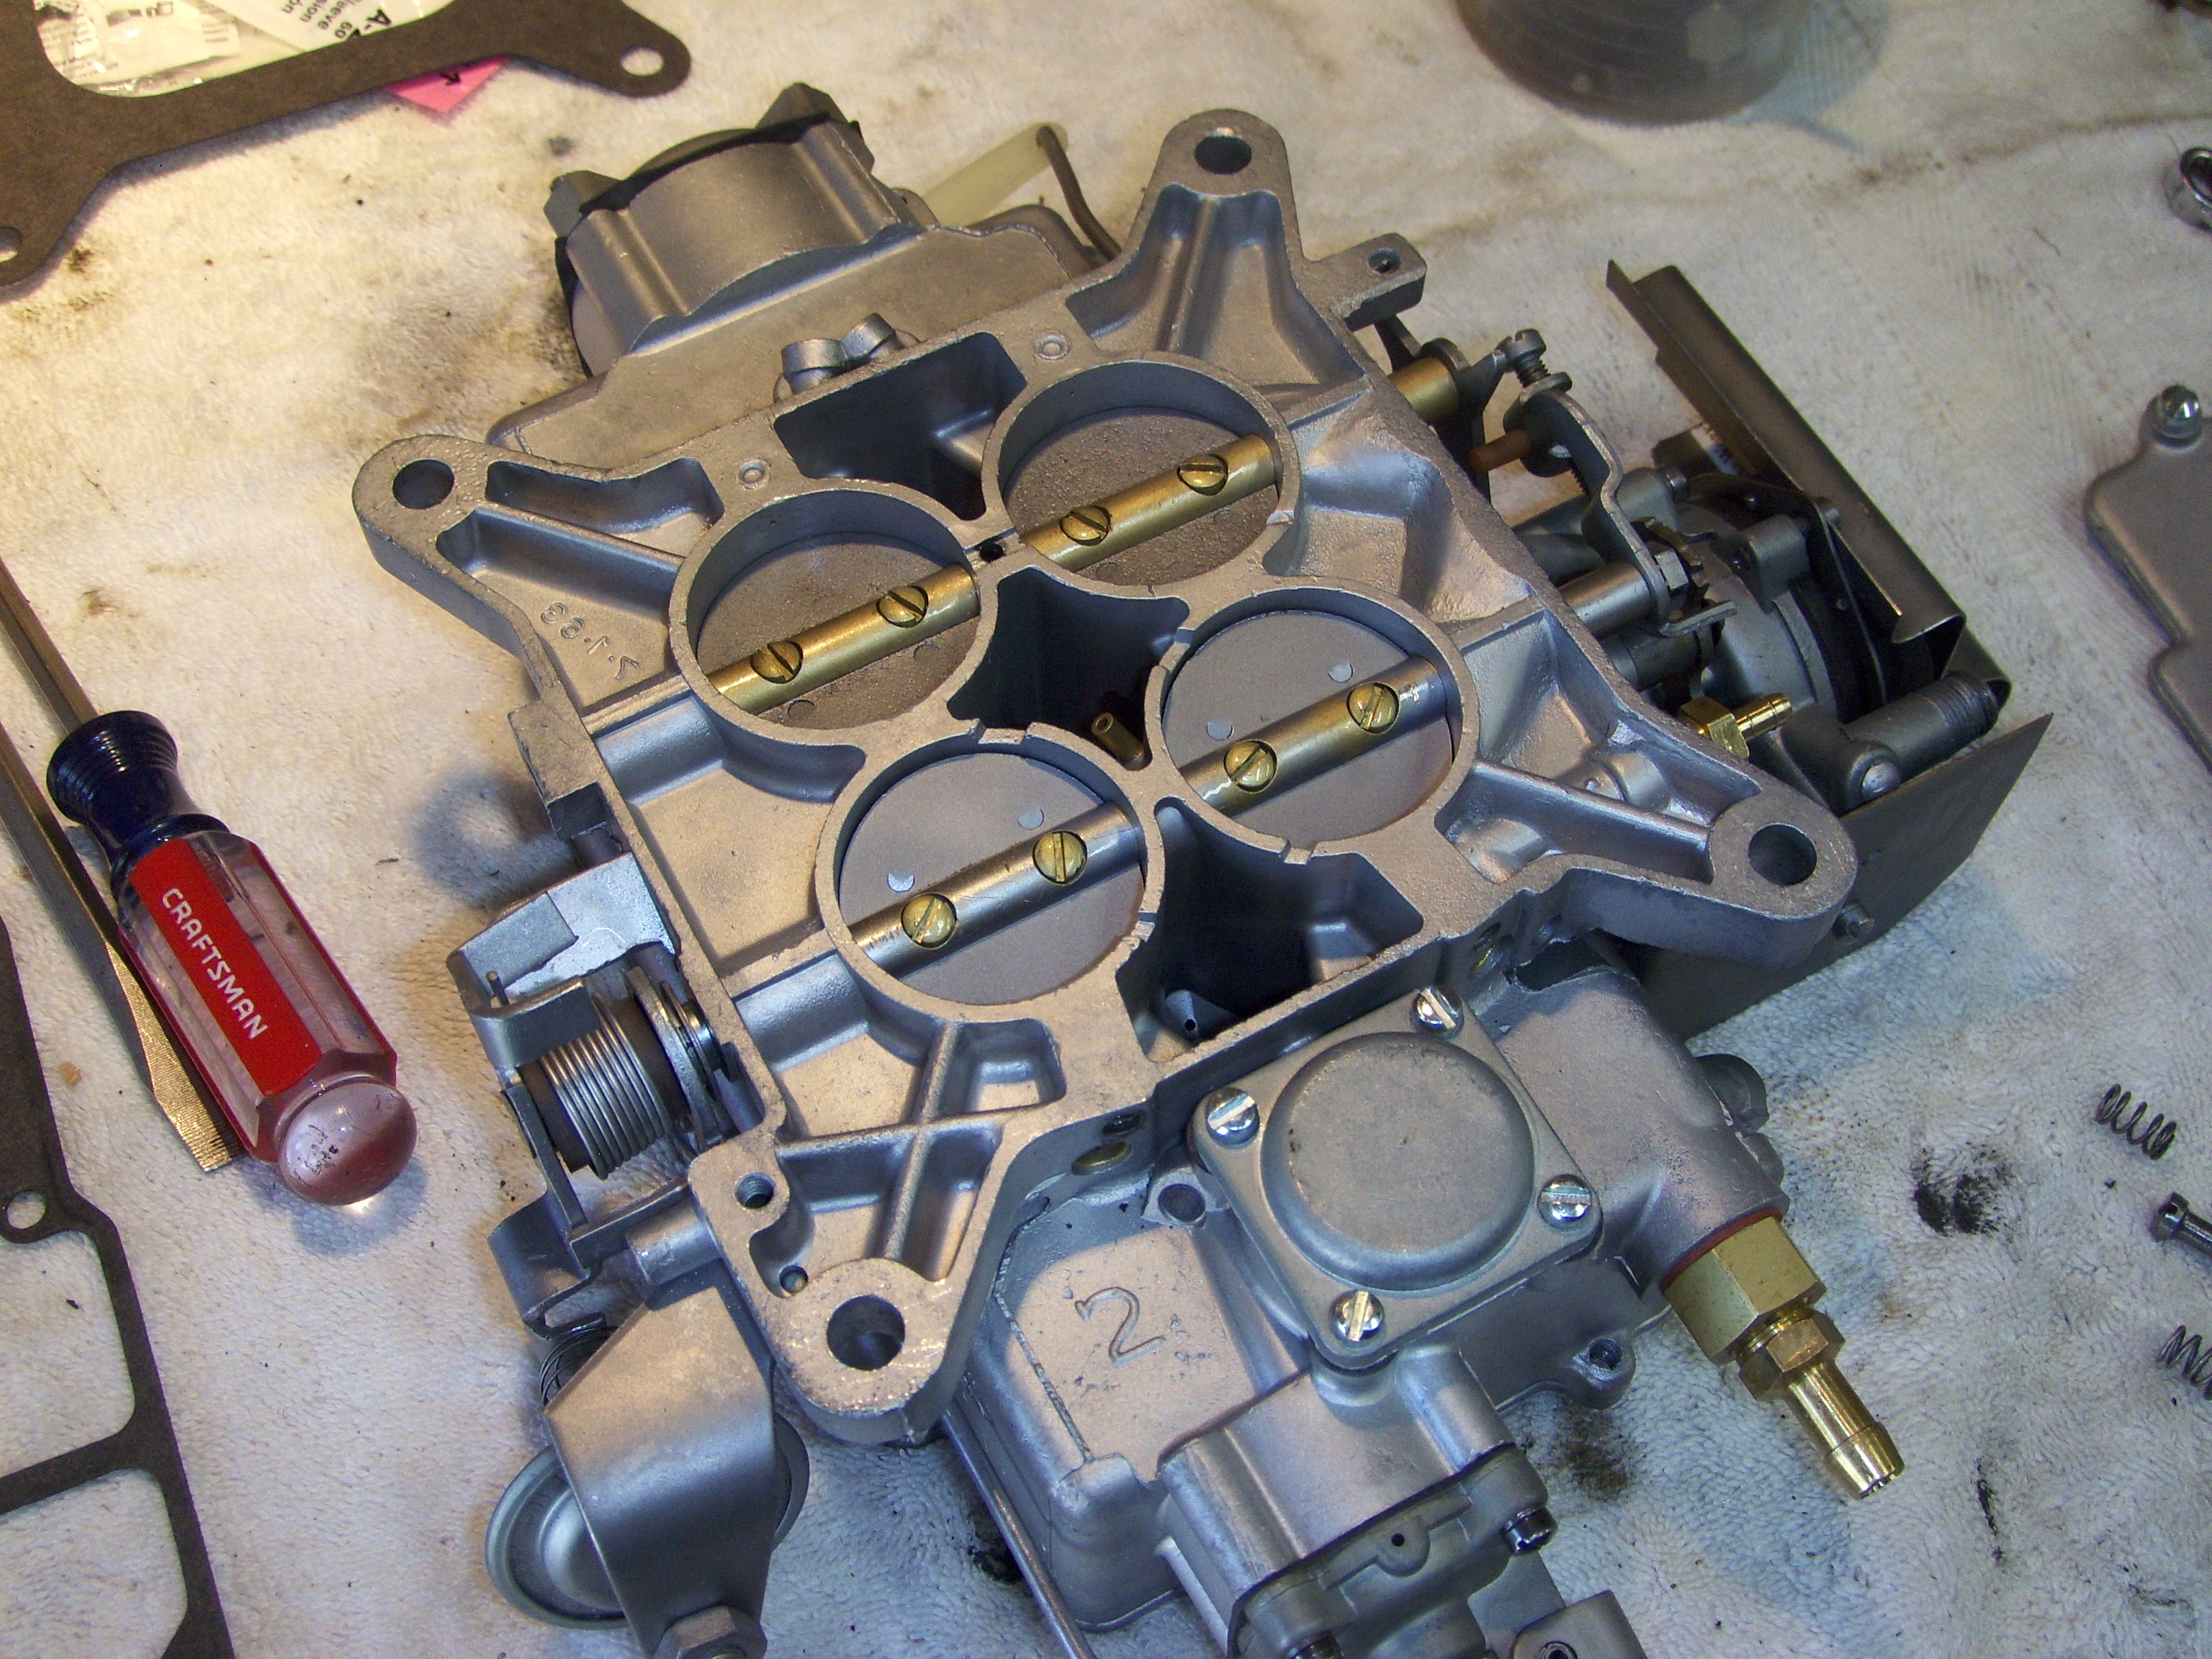
I exchanged numerous emails with my carburetor rebuilder last week. After eliminating several possible issues, he asked that I clean out the idle circuits. I pulled the venturis off as instructed and blew a copious amount of carb cleaner through them, though they did look pretty clean.
Cleaning the carb.
I also double checked the main jets and triple-checked the float level. Examining the baseplate, I agreed with the rebuilder that it was flat enough to expect a good seal against new gaskets. In any case, it appears that dressing it properly would require removing quite a bit of the linkage and the throttle plates. I’ll only try that after installing new gaskets (I got a couple this week).
Rapidly growing weeds meant that I spent much of my weekend in the garden, not in the shop. I didn’t have enough time to actually test the re-cleaned Autolite. I may have an hour or two during the week, however, to swap them and try again.
This rear seat back cleaned up very nicely.
I did get a chance to clean up the back seats I bought a few weeks back. One I got the crud off them, I discovered that they are considerably better than the seat backs I have in the car now. I also salvaged a new glove box lid and steering wheel hub. Neither is perfect, but both are much better my originals. So far, $100 well spent.
Yesterday, I found someone else looking to sell an entire dash, including a decent dash pad–also in turquoise. Could be just what I need to get started on the dashboard rebuild. I’ll be taking a look at it in person in a week or so.
I removed the Edelbrock carburetor yesterday afternoon and replaced it with the new/old Autolite unit I’ve been prepping to install for some weeks now. The carb went on well and looked, not surprisingly, like it belonged there. I had a little trouble with the choke tubes that I ultimately decided to ignore. I was able to start the car with little trouble, but it ran very poorly–wouldn’t idle at all.
I’ll be getting to know this carb a little better in the next few weeks.
I suspected a vacuum leak and checked for loose hoses. Finding none, I suspected the re-used gaskets. Swapping them out had no effect, however. I finally ended up pulling the carb off and replacing it with my trusty Edelbrock. On the bench, I noticed that the Ford has a fairly rough base plate (could be causing a vacuum leak) and a bent idle mixture screw (another possible culprit).
I will need to clean up the base–that’ll involve disassembly–and get a replacement screw. In the meantime, I’m back where I started.
All dressed up.
Not having a new carb to dial in today, I pulled out the fender skirts that have been banging around the garage. They needed a little modification to clear the tire/wheel combination I’m running. That done, I put ’em on and went for a quick spin on this beautiful spring day.
With paint, they say, the quality is all in the prep work. I’m beginning to think that’s true for most projects, not just finishes.
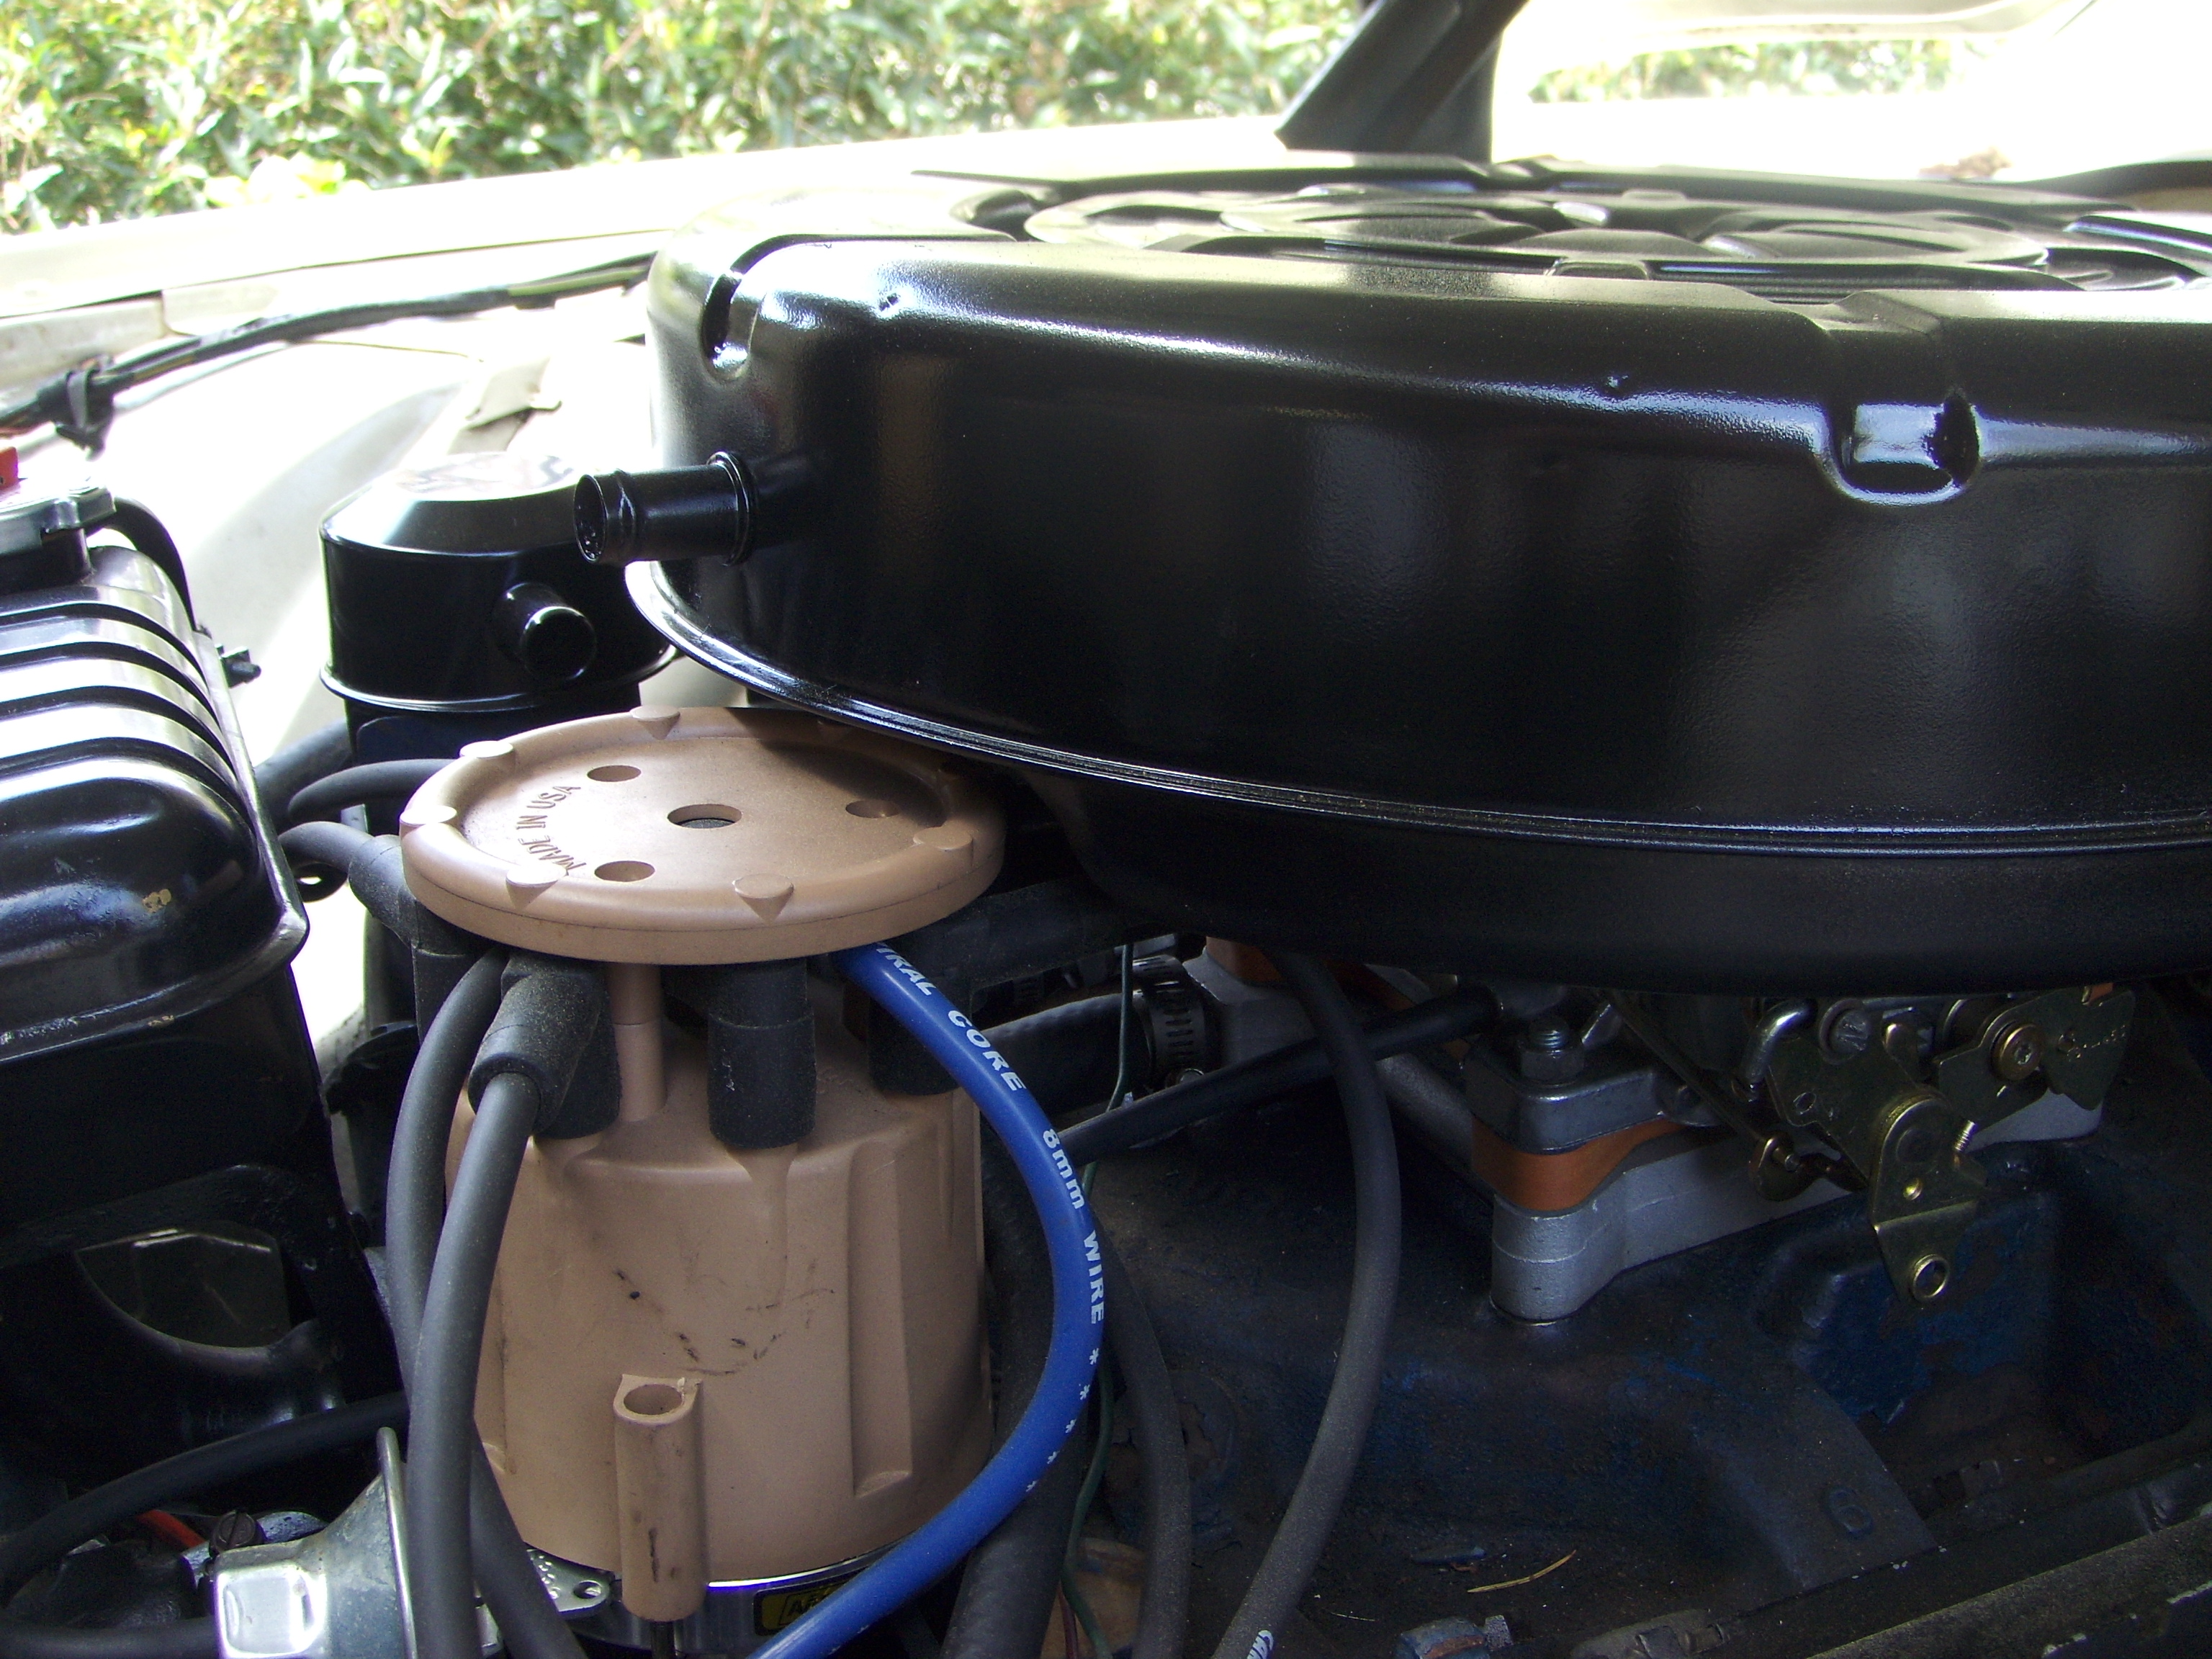
The distributor is just too tall for the original-style air cleaner.
I went to assemble all the bits and pieces for me carburetor swap this afternoon. There were a lot, and I came up one short–the compression fitting for the heat riser tube. A small piece, mislaid somewhere no doubt. I decided not to plunge into the project without everything I needed at hand.
Instead, I took another look at the air cleaner assembly. I worrying about the orientation of the air horn on it, I had overlooked that it bumps into the taller-than-normal aftermarket distributor.
Clearly, more preparation was in order. No original-style air cleaner is going to work as long as I keep the distributor, so I modified my aftermarket air cleaner to work with the choke heater system the Autolite carb requires. Now–I’m sure–everything is ready for the carb swap–probably later this week.
Air is drawn into the choke–via the exhaust manifold–from this nipple attached under my aftermarket air cleaner.
Since I didn’t swap out the carb, I finished a few smaller jobs under the hood: replaced the PCV valve and the vacuum hose to the brake booster. On a test drive to the hardware store (for the compression fitting I need), the motor ran smoother than normal. It’s likely the old vacuum line was leaking.
A week ago, I found someone advertising miscellaneous interior T-Bird parts the same color as mine. It was a nice find–lots of usable trim pieces that will come in handy when I start the dashboard rebuild later this summer. I also scored an entire back seat in better shape than my own.