Daily (Steering) Column

So, yeah, pulling out the steering column is more work than I figured. Even without the fancy slide-away steering wheel, this is not an easy job, but disassembly is complete.
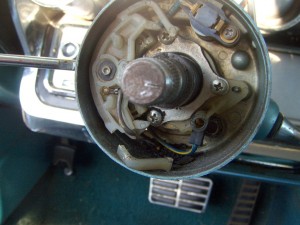
Inside the steering column
Inside the steering column. Small piece on the bottom was once part of the turn signal.

Most of the difficulty came under the hood, trying to reach and turn four bolts, which took most of the afternoon. Had I been willing to remove parts that were in the way, the job would have gone faster, but I simply didn’t relish taking off the hood (the hinge was in the way) or the brake system. (Criminy, I just put that in!). Eventually, I ended up pulling a brace (easy) and a valve cover (needed to come off anyhow) to get to the last bolt.


Like the carburetor rebuild, I’m glad I dived into this. Some of the things I found:

  1. Behind the dashboard fascia plate, most of the screws holding the dashboard trim together are missing. No wonder it rattles so bad.
  2. Someone had jury-rigged the shifter in the distant past. I was only experiencing the shifter slipping from park to reverse (!) unexpectedly, but the day of complete failure was not far off.
  3. The self-canceling mechanism for the turn indicator was broken and needed replacement.
  4. The rubber boot sealing the firewall opening where the steering column goes through was completely shot, allowing exhaust and fumes to pour into the passenger compartment. (Pulling the steering column is the only way to install a new one.)
  5. The lower bearings supporting the shift tube and steering shaft were gone, replaced by a piece of PVC pipe. (Yeah, the kind you use for lawn sprinklers.)
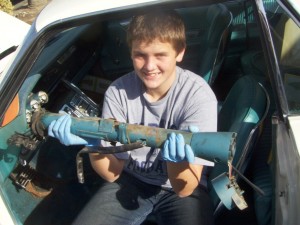
One Steering Column
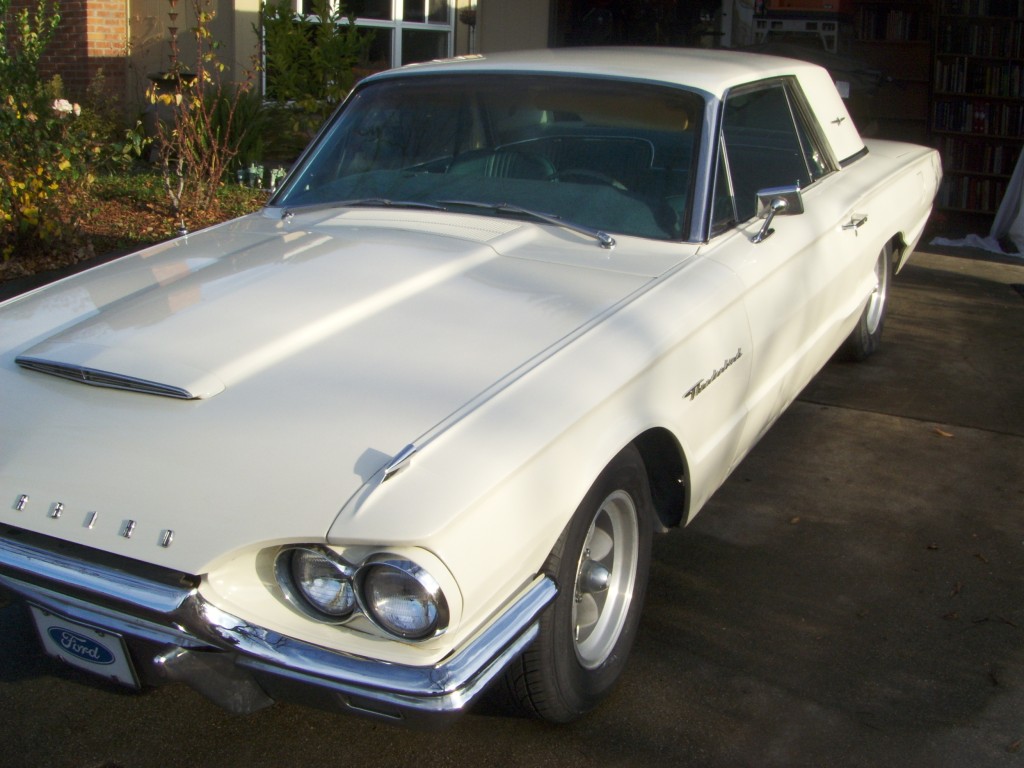
Once out, it was like landing a big fish.

All in all, a major safety upgrade, I’d say. There are a lot of pieces off the car, many of them rusty and some in need of paint. I’ll be putting it back together slowly, refurbishing parts as I go.

A complete photo journal of the disassembly process is posted on Photobucket.

The Culprit

I spent a good portion of the day disassembling the steering column from the steering wheel right on down to the steering box. It’s a task I will frankly say I underestimated. I’ll

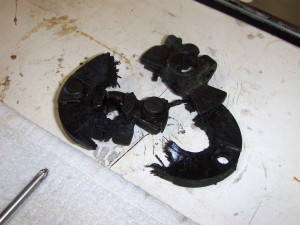
The Old Steering Coupler (Yes, it should be one piece)

post more about the complete job tomorrow, but for now, here’s what’s left of the coupling that is supposed to connect the steering wheel to the road.

This still has the original rivets, so it is likely the unit that came with the car, some 46 years ago. Still pretty glad this didn’t fail when the car was at speed.

Stranded!

It happened sooner than I expected: Stranded. Stuck. Immobile.

Drove the car to the post office, turned it off, came back 2 minutes later, turned the key and . . . nothing.

Really nothing. Not a click. No lights. No power to anything at all.

Eventually, I called a tow truck. 90 minutes later, the Bird and I were back home. Good money is on a defective starter, maybe the solenoid.

To top it off, while trying to wrestle the bird onto the tow truck, the steering coupler snapped. This bird has a clipped wing for a while.

Oh, Rust!

Saturday . . . time to spend some quality time with the ‘Bird. Now that it’s running reliably, more or less, I can focus on “real” restoration projects: taking things apart, cleaning them up and reassembling them (and hoping it all works).

Valve Cover Restoration
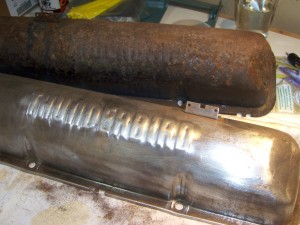
How are you supposed to sand out the loop in the "R"?

The car came with a couple of aftermarket valve covers that I don’t care for–they’re big, a little clunky and hard to keep clean. I also got two pairs of stock-like covers, one set chrome (and rust), the others pretty much all rust now (though I think they used to be blue). The completely rusty set were said to be original, so I set to work on them.

I buffed off as much rust as I could with a wire wheel, then set to work with coarse and medium grit emery cloth. A little bit of this work goes a long way with me–after about an hour, I set the project aside to be enjoyed another day. As you can see from the photo, I made a fair amount of progress with one.

It rained last night and I knew the trunk seal was a little iffy, so I popped the trunk to see how much water came in.

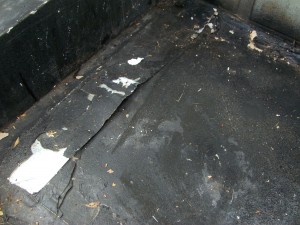
Turns out, it was a lot. Once a dug down through the spare parts to the trunk pan, there was a fair puddle there. Drying it up, it was hard not to notice that most of the trunk pan had long since rotted away; someone in the past did a crude patch job, but there were plenty of peep holes to the ground below. Disappointing, but not a critical item.

Trunk Pan
I once did a roof repair like this. That didn't work, either.

I got out some “elephant snot” rubber seal adhesive, pulled the old seal off, cleaned the whole shebang and glued it all back together properly. The rubber seal was deteriorating a bit, and the channel it sits in was starting to rust in spots as well, but overall the seal went in snugly, and the trunk lid didn’t get glued down permanently when I closed it. (Boy, that glue just gets everywhere.)

Last thing, I swapped out the taillight lenses for a couple of much nicer spares. Inside the housing, I found a bulb socket that was heavily corroded. A little emery cloth and a new bulb and all the taillight elements are now working (and pretty). The old lenses came off in pieces; the new ones are shiny and bright.

Well, that was Awesome

The brake relay arrived in the mail on Tuesday (fast shipping from the folks at Bird Nest), but I was out of commission with a stomach ailment–in no shape to work on the car.

After work today though, I was under the hood. Two screws, plugged it in to the old harness and . . . well, did it work? I had no helper, so I jammed a 2×4 against the brake pedal and peeked around the back. Sure enough, the brake lights were lit up. Sweet!

A new fuse for the turn signals and I was ready to go. Drove the beast on some errands–post office and the auto parts store, two favorite haunts–and it was absolutely awesome to get out of the neighborhood and get the ‘bird up to speed.

Sure, I’ve still got a 50 item to-do list, but the major items are now complete–I now have a ride instead of a project.

Some smaller items finished over the weekend: lock cylinder installed in the decklid (so I can open the trunk with a key, not a screwdriver); cleaned the interior (well, got a start at it); glued down a door seal (trying to stop a water leak into the interior) and took a stab at polishing the mag wheels (serious work will be needed to get through all the oxidation).

In the “going backwards” category, the rear-view mirror simply fell off a few hours after it was installed. Third try is the charm (again), I’m hoping.

Odds and Ends

While I wait for parts to arrive for the brake lights (and the shifter, but that’s another story), I’m working on some smaller, but still important fixes.

Rear View Mirror

I found the components for the mirror in the center console “glove box”, including the button (normally glued to the windshield), the mirror and the the clamp that holds them together. They are a little worn and rusty, but still better than nothing. I used a Permatex product to glue the button to the windshield, and dropped a bit of cloth adhesive tape in the clamp (which was a little loose) to tighten up the assembly when I put it all back together.

License Plate

This is a black plate California car, meaning that it has the original plates issued in 1964. The front plate is gone, and the back plate was only held on with a single screw. I put in anoher nylon nut, added another screw and straightened the plate a bit before putting it all together.

Wiper Blades

It took three trips to the auto parts store to get the correct blades. Unlike modern cars, the T-Bird’s windshield is fairly upright and requires short wiper blades. The catalog at the parts store said 18 inches, but they were 2 inches too long. The next set I got were narrow (who knew?), but the third trip was the charm (although the correct length and width had to finally be special ordered).

Throttle Linkage

This may need to be the subject of its own post. I noticed right away that the push-rod from the throttle didn’t connect properly with the gas pedal. Indeed, it didn’t connect at all. Taking the assembly out of the car, it looks like a bracket is missing, which is also causing the linkage assembly to bind up. I believe I can fabricate a bracket to set matters straight. More on this item to follow . . .

Brake Lights

Originally, this car had a simple brake light switch, but I guess they kept burning out, so they recalled the car and put in a brake light relay to better handle the load.

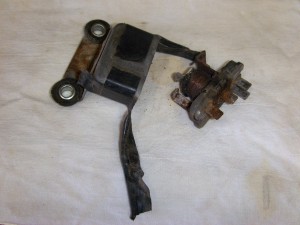
An Ex-Brake Light Relay
A former brake light relay, now trash.

Since the brake system is pretty straightforward (battery, switch, relay, lights), there wasn’t much to check out. The switch checked out, so I took a closer look at the relay only to find that–hey!–it’s being held together with electrical tape.

And inside–ewww–it’s completely rusted. Time for a new one.

Time for a Bird-Bath

Last night, I made out a list of items, big and small, that I needed to get done on the ‘Bird. When it came right down to it this afternoon, I had a little free time and decided, what the heck, I’m just going to clean her up a little bit. So that’s what I did.

Wash Day
Wash Day

It’s Alive!

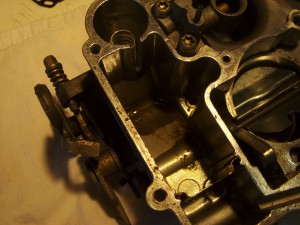
Grit in the Fuel bowl
Grit in the fuel bowl, soaking in heavy duty carb cleaner.

The last time I rebuilt a carburetor, I did not have to wear reading glasses. But with age, comes patience. I took the time to set up a clean work surface, brought over a bright light and actually read the instructions (well, mostly) before I began.

I admit that I had some reservations about the project, given that the car was running not long ago and the potential to screw it up further. Once I opened the carb up, thought, my reservations vanished–the fuel reservoirs were full of a fine silt and quite a few of the parts were coated with varnish. This was a job that clearly needed doing.

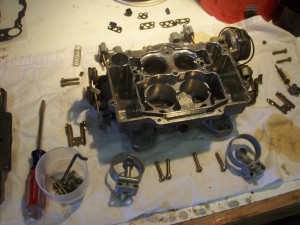
Throttle Body
The throttle body, fully disassembled

My only scare came when I turned over the throttle body and a small part I hadn’t noticed fell out. From where, I had no clue. Rather than guessing, I took a look at an exploded view on-line. (It was the pump discharge weight. Oh.)

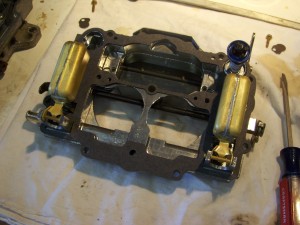
The Top Plate
The top plate and floats fully reassembled.

In the end, it’s not a difficult job, though it can be intricate and it bears some concentration.


With the carburetor reinstalled, three applications of starter fluid brought the beast to life. In fact, I stopped and started it a few times, just for the novelty of it.

There was some bind in the throttle linkage, but a couple of adjustments brought it back into shape (and fixed a perplexing issue where the throttle linkage met the gas pedal).

I’ll admit, I had some butterflies slipping it into reverse and rolling it down the drive. Would the brakes work? Would the throttle stick open? In the end, the breaks worked great, and I crept my way around the block on a test drive–which was awesome.

Next up, I think brake lights would be nice.

Bleedin’ Brakes

My boys and I were able to push the T-Bird uphill into the driveway this morning. A heart-pounding workout early in the morning, but worth it to have the car off the street.

In the driveway, I was able to jack it up and get to the brake bleeders. With the younger son on the brake pedal, we worked our way around the car. There was a lot of air in the rear brake lines, and a bit of a learning curve with the cheap brake bleeder we were using.

Luckily, the bleeder screws were not stuck. Those in the rear are really easy to access; in the front, I couldn’t get to them except with a socket wrench and a short extender. Aside from slowing us down a tad, though, that method worked well.

In the end, with the wheels back on (a little anti-seize on the wheel studs to prevent them from snapping off in the future) the brake pedal was firm and solid–first time I’ve experienced that in this car.

As we were wrapping up the brakes, the mail carrier showed up with the carburetor rebuild kit. The carb is out and on the bench–looking to build on the momentum tomorrow.