Playing with Gasoline

I’ve never had the pleasure of siphoning gas before, but it sounded much easier than disconnecting a line at the tank and trying to drain it that way.
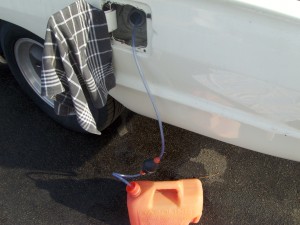
Bulb Siphon
Bulb siphon costs about $5. Worth every penny, but not a penny more.

I bought a little pump siphon and set to work.

There wasn’t much gas in the tank, and it’s a long way down the fill tube. The tube that came with the siphon was all curled up in the package, a shape it liked just fine. Once it was inserted into the tank, it would curl back up and there was no telling how it was positioned. In the end, it took a couple of hours to siphon out about 6 gallons of fuel.

I had to sit in the street and hold the siphon absolutely still during this process, or I would loose suction in the hose, and as they say, I had to rinse and repeat. Sit very still in the roadway for a few hours and you will be surprised just how much traffic there is.

I poured in some fuel conditioner to help stabilize whatever might be remaining, then added 10 more gallons of fresh fuel. With the carburetor end of the fuel line stuck into an empty gas can, I cranked the engine long enough to pump about a half gallon through the system–enough, I think, to clear the lines of the old fuel.
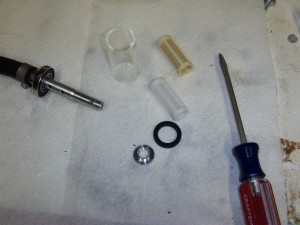
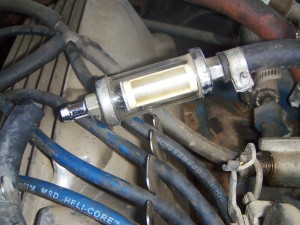
New Fuel Filter
Old filter element on the top. Yep, it was time for a change.

For good measure, I changed out the fuel filter–the old one was pretty clogged with the varnish from the old fuel.

I’d like to say that I turned the key and she fired right up. But no dice. In fact, I added some starting fluid, turned the key and it ran for a few seconds–once almost a minute–on its own before dying.

My guess at this point–and I’m strictly guessing here–is the that carburetor is fouled from the old gas, perhaps exacerbated by me running the stale fuel through it with abandon when I was able to start it earlier this month. A carb rebuild kit is on the way from New Jersey.

Won’t Start

Brake fluid is added, and the master cylinder is bled, but I can’t do the wheel cylinders on the street–need to get the Bird into the driveway!

A few weeks ago, I got the car started with liberal applications of starting fluid and a little luck. I let it run for about 30 minutes, trying to work through the old gasoline in the tank, which has been there at least two years. This time, even after two cans of starter fluid and an hour of trying, it wouldn’t run at all.

The Fuel Filter
Pretty sure "in" marks where the fuel goes in, not the other way around.

The motor will run as long as I pour in fluid, but as soon as I ask it to run on the gas in the tank, it just dies. I little investigation revealed that the fuel filter was installed backwards, but turning it around didn’t really help (though it did prove that the fuel pump was working ok).

What now? I probably need to get the old fuel out of the car. (Easy enough, but what to do with it then?) And probably should rebuild the carburetor, which is likely all gunked up from the old gas.

Wondering, today, if this is more of a project than a ride.

Yet More Brake Work

Last time I posted, the T-Bird was motoring away on the back of a flatbed with a fatal collection of broken wheel studs. Late December now, and the car is back, wheel studs fixed and new tires installed.

At the shop, we discovered that the master brake cylinder was still defective and had the whole assemble (master cylinder and boost system) professionally rebuilt.

Fresh, clean and newly painted.

I reinstalled the rebuilt unit after the car was delivered. It bolts right up to the firewall, and except for some contortionist moves up under the dash (to reach the bolts and the snap ring where the unit attaches to the pedal), it’s pretty straightforward.

With a little luck, the brakes will get bled today and we’ll be on the road for a test drive. Photos to follow.

Rebuilding the Master Cylinder

Without knowing the exact source of a brake leak, the master cylinder is a good place to start work on an older car.

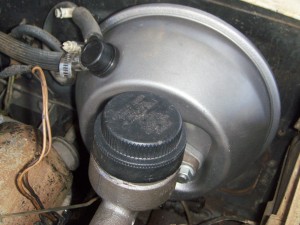
The Master Cylinder
Behind it, the cylinder is attached to the vacuum boost unit.

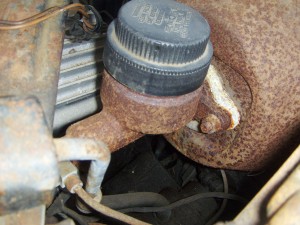
I had to use an oil filter wrench to get the cap off the rusty master, and when I did, I found that the reservoir was empty.

The first step is removing the master from the car, usually just a matter of two bolt at the firewall or brake booster and disconnecting the brake lines themselves. The ’64 Thunderbird has a single circuit for front and rear brakes (not as safe as modern cars, which put front and rear on separate circuits so one failure won’t mean a total loss of stopping power). There are three brake line connections, two for the front, one for the rear.

I removed the bolts and loosened the rear brake line, but the two front lines were frozen–and stripped.

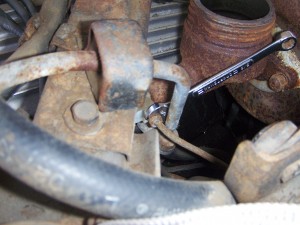
Wrenching on the rear brake line fitting
Plenty of room to swing a wrench on this fitting

With the master cylinder free, I unscrewed it from the brass distributor and got it to the workbench.

A snap ring holds the entire piston assembly together. Once out, the unit comes apart pretty easily. Some brake cleaning fluid and elbow grease are all that’s necessary to clean out the reservoir and cylinder.

I purchased a rebuild kit from a local auto parts store. As it turned out, some of the parts did not fit well, but I was able to replace the spring and all of the seals. I reused the old piston, which did not appear to be original, but was still in good condition. At least it fit–the replacement was too large to move smoothly in the bore.

Once together and back in the car, I had brakes again–briefly. I had stopping power long enough to move the car from the street to the driveway. Fluid

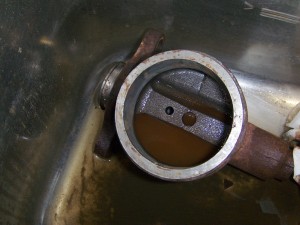
Cleaning out the master cylinder
I let the cleaning fluid soak at the bottom, where there was a lot of sludge to eat through.

was leaking out of the brake system fast enough to pool on the ground, and burn copiously on the exhaust manifold, but it wasn’t coming from the master cylinder after all–the source was actually a crack in the brass distributor.

No fix for that but a new part, which was finally delivered today. With luck, the T-Bird should be on the road tomorrow.


Brakes Come First?

A car that won’t stop is not much of a car at all, so with a brake pedal that simple sinks to the floor made me think that brakes would be number one our our fix-it list. While I worked on them, though, I thought, why not get some fresh tires while the brake project is under way?

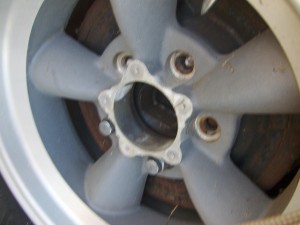
Broken wheel studs
Maybe if the two remaining studs were opposite one another, they would still work? No . . . probably not.

I grabbed a big enough wrench and got to work loosening wheel nuts. It wasn’t long before I got to the right rear. I approach nuts and bolts on an older car with some degree of trepidation. Sometimes I am surprised with a screw that will turn freely, even with a lot of evident rust, but all too often a bolt is frozen or weak or both.

One of the studs on the right rear was already missing–a bad sign. But the first two nuts come off easily. They were, in fact, a little loose. The next two, though were frozen, and it really took very little effort to sheer them right off.

A car without brakes is one thing, but a car with wheels falling off is another. The rear wheel studs are pressed into a flange at the end of the axle. It’s not hard to get them out, and they are readily available. I don’t have the tools to press parts apart, so this repair calls for a trip to the shop, on a flatbed truck.

Off to the shop
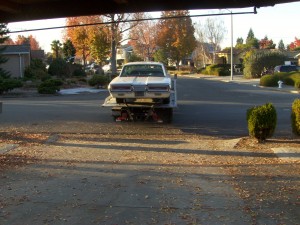
An antique car on an antique flatbed two truck.