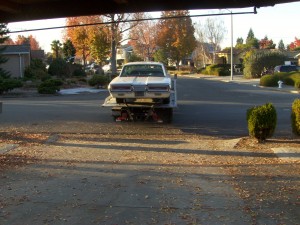
Daily (Steering) Column

So, yeah, pulling out the steering column is more work than I figured. Even without the fancy slide-away steering wheel, this is not an easy job, but disassembly is complete.
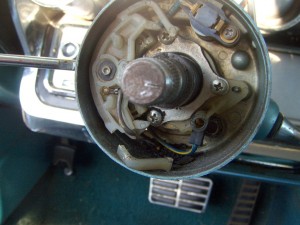
Inside the steering column
Inside the steering column. Small piece on the bottom was once part of the turn signal.

Most of the difficulty came under the hood, trying to reach and turn four bolts, which took most of the afternoon. Had I been willing to remove parts that were in the way, the job would have gone faster, but I simply didn’t relish taking off the hood (the hinge was in the way) or the brake system. (Criminy, I just put that in!). Eventually, I ended up pulling a brace (easy) and a valve cover (needed to come off anyhow) to get to the last bolt.


Like the carburetor rebuild, I’m glad I dived into this. Some of the things I found:

  1. Behind the dashboard fascia plate, most of the screws holding the dashboard trim together are missing. No wonder it rattles so bad.
  2. Someone had jury-rigged the shifter in the distant past. I was only experiencing the shifter slipping from park to reverse (!) unexpectedly, but the day of complete failure was not far off.
  3. The self-canceling mechanism for the turn indicator was broken and needed replacement.
  4. The rubber boot sealing the firewall opening where the steering column goes through was completely shot, allowing exhaust and fumes to pour into the passenger compartment. (Pulling the steering column is the only way to install a new one.)
  5. The lower bearings supporting the shift tube and steering shaft were gone, replaced by a piece of PVC pipe. (Yeah, the kind you use for lawn sprinklers.)
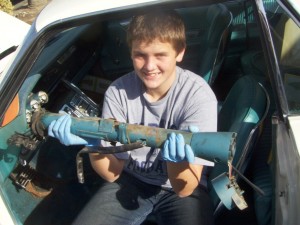
One Steering Column
Once out, it was like landing a big fish.

All in all, a major safety upgrade, I’d say. There are a lot of pieces off the car, many of them rusty and some in need of paint. I’ll be putting it back together slowly, refurbishing parts as I go.

A complete photo journal of the disassembly process is posted on Photobucket.

The Culprit

I spent a good portion of the day disassembling the steering column from the steering wheel right on down to the steering box. It’s a task I will frankly say I underestimated. I’ll

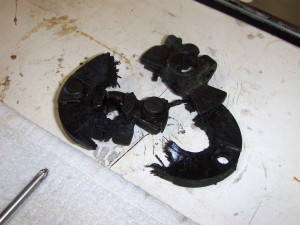
The Old Steering Coupler (Yes, it should be one piece)

post more about the complete job tomorrow, but for now, here’s what’s left of the coupling that is supposed to connect the steering wheel to the road.

This still has the original rivets, so it is likely the unit that came with the car, some 46 years ago. Still pretty glad this didn’t fail when the car was at speed.

Stranded!

It happened sooner than I expected: Stranded. Stuck. Immobile.

Drove the car to the post office, turned it off, came back 2 minutes later, turned the key and . . . nothing.

Really nothing. Not a click. No lights. No power to anything at all.

Eventually, I called a tow truck. 90 minutes later, the Bird and I were back home. Good money is on a defective starter, maybe the solenoid.

To top it off, while trying to wrestle the bird onto the tow truck, the steering coupler snapped. This bird has a clipped wing for a while.

Brake Lights

Originally, this car had a simple brake light switch, but I guess they kept burning out, so they recalled the car and put in a brake light relay to better handle the load.

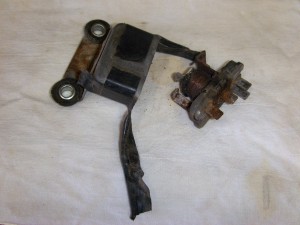
An Ex-Brake Light Relay
A former brake light relay, now trash.

Since the brake system is pretty straightforward (battery, switch, relay, lights), there wasn’t much to check out. The switch checked out, so I took a closer look at the relay only to find that–hey!–it’s being held together with electrical tape.

And inside–ewww–it’s completely rusted. Time for a new one.

It’s Alive!

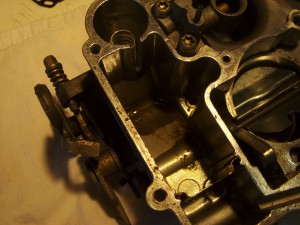
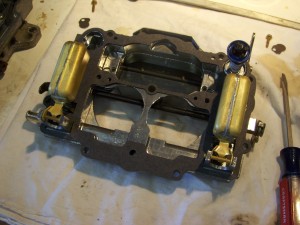
Grit in the Fuel bowl
Grit in the fuel bowl, soaking in heavy duty carb cleaner.

The last time I rebuilt a carburetor, I did not have to wear reading glasses. But with age, comes patience. I took the time to set up a clean work surface, brought over a bright light and actually read the instructions (well, mostly) before I began.

I admit that I had some reservations about the project, given that the car was running not long ago and the potential to screw it up further. Once I opened the carb up, thought, my reservations vanished–the fuel reservoirs were full of a fine silt and quite a few of the parts were coated with varnish. This was a job that clearly needed doing.

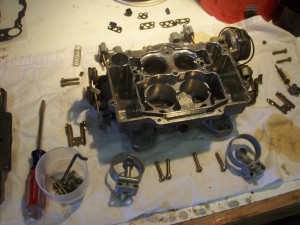
Throttle Body
The throttle body, fully disassembled

My only scare came when I turned over the throttle body and a small part I hadn’t noticed fell out. From where, I had no clue. Rather than guessing, I took a look at an exploded view on-line. (It was the pump discharge weight. Oh.)

The Top Plate
The top plate and floats fully reassembled.

In the end, it’s not a difficult job, though it can be intricate and it bears some concentration.


With the carburetor reinstalled, three applications of starter fluid brought the beast to life. In fact, I stopped and started it a few times, just for the novelty of it.

There was some bind in the throttle linkage, but a couple of adjustments brought it back into shape (and fixed a perplexing issue where the throttle linkage met the gas pedal).

I’ll admit, I had some butterflies slipping it into reverse and rolling it down the drive. Would the brakes work? Would the throttle stick open? In the end, the breaks worked great, and I crept my way around the block on a test drive–which was awesome.

Next up, I think brake lights would be nice.

Bleedin’ Brakes

My boys and I were able to push the T-Bird uphill into the driveway this morning. A heart-pounding workout early in the morning, but worth it to have the car off the street.

In the driveway, I was able to jack it up and get to the brake bleeders. With the younger son on the brake pedal, we worked our way around the car. There was a lot of air in the rear brake lines, and a bit of a learning curve with the cheap brake bleeder we were using.

Luckily, the bleeder screws were not stuck. Those in the rear are really easy to access; in the front, I couldn’t get to them except with a socket wrench and a short extender. Aside from slowing us down a tad, though, that method worked well.

In the end, with the wheels back on (a little anti-seize on the wheel studs to prevent them from snapping off in the future) the brake pedal was firm and solid–first time I’ve experienced that in this car.

As we were wrapping up the brakes, the mail carrier showed up with the carburetor rebuild kit. The carb is out and on the bench–looking to build on the momentum tomorrow.


Playing with Gasoline

I’ve never had the pleasure of siphoning gas before, but it sounded much easier than disconnecting a line at the tank and trying to drain it that way.

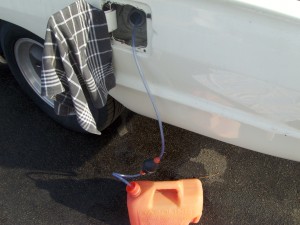
Bulb Siphon
Bulb siphon costs about $5. Worth every penny, but not a penny more.

I bought a little pump siphon and set to work.

There wasn’t much gas in the tank, and it’s a long way down the fill tube. The tube that came with the siphon was all curled up in the package, a shape it liked just fine. Once it was inserted into the tank, it would curl back up and there was no telling how it was positioned. In the end, it took a couple of hours to siphon out about 6 gallons of fuel.

I had to sit in the street and hold the siphon absolutely still during this process, or I would loose suction in the hose, and as they say, I had to rinse and repeat. Sit very still in the roadway for a few hours and you will be surprised just how much traffic there is.

I poured in some fuel conditioner to help stabilize whatever might be remaining, then added 10 more gallons of fresh fuel. With the carburetor end of the fuel line stuck into an empty gas can, I cranked the engine long enough to pump about a half gallon through the system–enough, I think, to clear the lines of the old fuel.

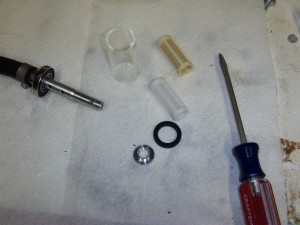
New Fuel Filter
Old filter element on the top. Yep, it was time for a change.

For good measure, I changed out the fuel filter–the old one was pretty clogged with the varnish from the old fuel.

I’d like to say that I turned the key and she fired right up. But no dice. In fact, I added some starting fluid, turned the key and it ran for a few seconds–once almost a minute–on its own before dying.

My guess at this point–and I’m strictly guessing here–is the that carburetor is fouled from the old gas, perhaps exacerbated by me running the stale fuel through it with abandon when I was able to start it earlier this month. A carb rebuild kit is on the way from New Jersey.

Yet More Brake Work

Last time I posted, the T-Bird was motoring away on the back of a flatbed with a fatal collection of broken wheel studs. Late December now, and the car is back, wheel studs fixed and new tires installed.

At the shop, we discovered that the master brake cylinder was still defective and had the whole assemble (master cylinder and boost system) professionally rebuilt.

Fresh, clean and newly painted.

I reinstalled the rebuilt unit after the car was delivered. It bolts right up to the firewall, and except for some contortionist moves up under the dash (to reach the bolts and the snap ring where the unit attaches to the pedal), it’s pretty straightforward.

With a little luck, the brakes will get bled today and we’ll be on the road for a test drive. Photos to follow.

Rebuilding the Master Cylinder

Without knowing the exact source of a brake leak, the master cylinder is a good place to start work on an older car.

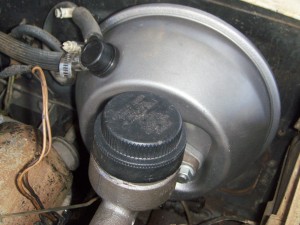
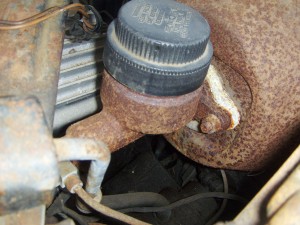
The Master Cylinder
Behind it, the cylinder is attached to the vacuum boost unit.

I had to use an oil filter wrench to get the cap off the rusty master, and when I did, I found that the reservoir was empty.

The first step is removing the master from the car, usually just a matter of two bolt at the firewall or brake booster and disconnecting the brake lines themselves. The ’64 Thunderbird has a single circuit for front and rear brakes (not as safe as modern cars, which put front and rear on separate circuits so one failure won’t mean a total loss of stopping power). There are three brake line connections, two for the front, one for the rear.

I removed the bolts and loosened the rear brake line, but the two front lines were frozen–and stripped.

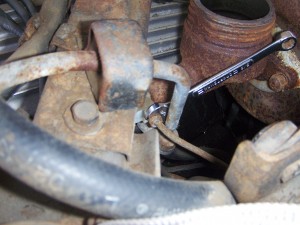
Wrenching on the rear brake line fitting
Plenty of room to swing a wrench on this fitting

With the master cylinder free, I unscrewed it from the brass distributor and got it to the workbench.

A snap ring holds the entire piston assembly together. Once out, the unit comes apart pretty easily. Some brake cleaning fluid and elbow grease are all that’s necessary to clean out the reservoir and cylinder.

I purchased a rebuild kit from a local auto parts store. As it turned out, some of the parts did not fit well, but I was able to replace the spring and all of the seals. I reused the old piston, which did not appear to be original, but was still in good condition. At least it fit–the replacement was too large to move smoothly in the bore.

Once together and back in the car, I had brakes again–briefly. I had stopping power long enough to move the car from the street to the driveway. Fluid

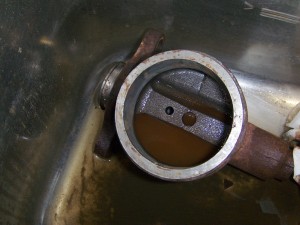
Cleaning out the master cylinder
I let the cleaning fluid soak at the bottom, where there was a lot of sludge to eat through.

was leaking out of the brake system fast enough to pool on the ground, and burn copiously on the exhaust manifold, but it wasn’t coming from the master cylinder after all–the source was actually a crack in the brass distributor.

No fix for that but a new part, which was finally delivered today. With luck, the T-Bird should be on the road tomorrow.


Brakes Come First?

A car that won’t stop is not much of a car at all, so with a brake pedal that simple sinks to the floor made me think that brakes would be number one our our fix-it list. While I worked on them, though, I thought, why not get some fresh tires while the brake project is under way?

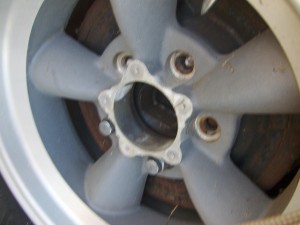
Broken wheel studs
Maybe if the two remaining studs were opposite one another, they would still work? No . . . probably not.

I grabbed a big enough wrench and got to work loosening wheel nuts. It wasn’t long before I got to the right rear. I approach nuts and bolts on an older car with some degree of trepidation. Sometimes I am surprised with a screw that will turn freely, even with a lot of evident rust, but all too often a bolt is frozen or weak or both.

One of the studs on the right rear was already missing–a bad sign. But the first two nuts come off easily. They were, in fact, a little loose. The next two, though were frozen, and it really took very little effort to sheer them right off.

A car without brakes is one thing, but a car with wheels falling off is another. The rear wheel studs are pressed into a flange at the end of the axle. It’s not hard to get them out, and they are readily available. I don’t have the tools to press parts apart, so this repair calls for a trip to the shop, on a flatbed truck.

Off to the shop
An antique car on an antique flatbed two truck.