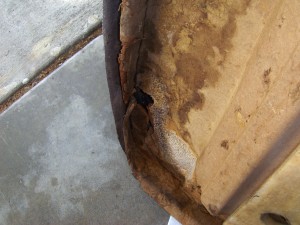
And Yet Even More Brake Work

I thought that changing out the wheel cylinder on the right side would be relatively simple after seeing how the left side went together. And so, I approached the job with a certain amount of confidence.
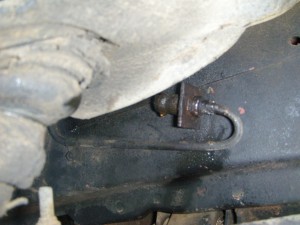
Frozen Fitting
The fitting that has become one.

I got the brakes apart pretty well–no issues at all and there were less missing and broken elements on the right. But when I went to remove the brake line fitting to the flexible hose, I hit a stone wall. The fitting was (well, still is, as of this writing) completely frozen. I tried locking pliers after the nut rounded off and penetrating fluid failed. I even went to the extreme of heating the fitting to red hot with a torch.

No dice.

Cutting the fitting off seems to be the only real option, but that leads down a couple of nasty roads: either a short piece of replacement steel line attached with a union of some sort, or replacing the entire line right back to the master cylinder.
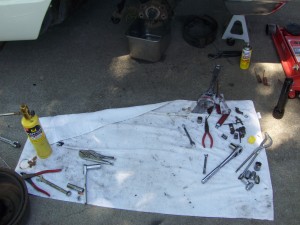
Tools
At the end of the day, I had a lot of tools out, but little progress.

Like many of the projects before this, the question is how much time and money to invest. A completely new line will take some time, and probably some trial and error setbacks while I learn technique. A quick fix still means that I can get back on the road sooner rather than later, but leave “doing it right” to another day.

Decisions, decisions.

Two Steps Forward, One Step Way Back

I modified a woodruff key from one purchased at the local hardware store, installed it and fired up the car with the new power steering pump. The manual says you need to bleed the air out of the system by jacking up the front, turning the windshield wipers on full and turning the wheel from stop to stop.

I did that, but it didn’t seem to bleed much out of the system. A quick test drive and everything worked normally.

I took a couple of trips with the car, checking for leaks. Only found one small coolant leak, the result of a loose hose clamp. A few twists of a screwdriver and all was well.

On the last trip I took, I noticed a decided squishiness to the brake pedal, though the car still stopped ok. Brakes are a big deal, especially on a car of this weight and ungainliness. Way back in the archives, I wrote a lot about my frustrations with the master cylinder and the brake booster. Both absorbed a lot of time and money right after the ‘Bird arrived. Little time was spent on the brake system at the wheels, though they were inspected and pronounced sound.

Not to take away from today’s success, but it sounds like a little more brake work is in order. Maybe it’s a good time to remove and polish up the wheels, too.

Key to Success

The buttoning-up process accelerated this weekend. The water hoses went on easily, as did the peripherals I removed like the carburetor and the vacuum canister. Getting the

Surge Tank
Surge Tank: harder to install than it looks

surge tank on was a bit of a struggle. The thermostat is sandwiched in between the tank and the fitting on the manifold, but there’s nothing really to hold it in place. Even with a little sealant on the ‘stat, it slipped while we put the assembly together.

Out of place like that, it looked like everything was ok, but we poured water in the top, only to see it leak out the bottom.


1. Swear.
2. Remove
3. Try again.

The second time we moved faster and things seemed to go together ok. (This is something I notice more and more about this car. It’s hardly the precision engineering we see today, so you have to take it on faith that inside the parts you just put together, everything really did go together right.)

Almost Finished
Almost finished.

With everything in place, I started up the car and let it heat up to normal operating temperature. (Starting the car, thank God, is no longer the drama it once was!) It took a little extra coolant, as expected.

I noticed a steady drip on the driver’s side, crawled under the car to catch some of it. Coolant it was, but all the normal suspects were dry.

When the coolant was drained, it pooled under the radiator, so I finally concluded that the fan was blowing it around, causing the drip. In any case, it stopped after a while, so I’m going with the theory that everything  is ok.

Restored Parts
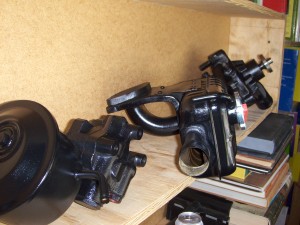
Pumps, water and steering, and the surge tank, ready to install

After that test, I bolted in the power steering pump, which went together smoothly, sort of.

The pulley on the front of the pump is held on with a single bolt and keyed with a woodruff key. I pulled the old key, just a sliver of metal really, off the old pump and put it in a safe place. It’s probably still there, wherever that might be.

Woodruff keys can be fabricated, but I’m going to try the hardware store first.

With a little luck a test drive with the new parts will take place tomorrow.


Turn the Wrench

In every car project, there comes a time when you stop unscrewing bolts and start screwing them in. I usually notice when I switch the direction on my socket wrench, and it’s a little exciting if the car’s been apart for some time.

New Power Steering Pump
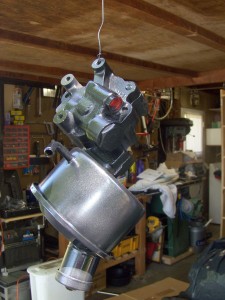
New power steering pump, freshly painted.

Had that moment earlier this week when took a fitting off the old water pump and screwed it on to the new one. Since then, I’ve got the power steering pump partially reassembled, (Yeah, not entirely sure where that last extra piece is supposed to fit.)

I used some heavy duty carb cleaner to swab down the front of the engine, followed up with some water-based degreaser (that works better than you would think–and doesn’t carry warnings about contaminating the world). The engine and bay are not as clean as they could be, of course, but clean enough for me to see where oil might be leaking–in case I want to do anything about it. (Right now I’m thinking not.)

I painted up the power steering pump and there are a number of parts that could use the same treatment. It’s a lot of work, though, and the newly painted parts don’t look that great after a few weeks of daily driving.

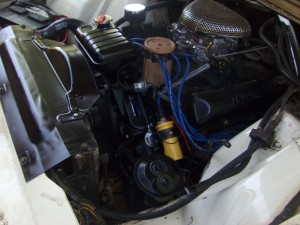
Cleaner engine
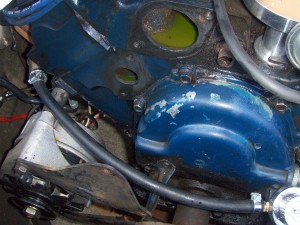
A cleaner, if not clean, engine.

The last piece I’m going to paint is the fan shroud, which is right out front, very visible. I took a wire wheel to it yesterday and started stripping it down. There were layers of paint, then the original rusty metal down there at the bottom. I looked down while I was working and realized I was still in slippers, so maybe that job isn’t as hard as I imagine.

I had planned to get the water pump back on the car this afternoon, but it looks like I’ve got 10 feet of the wrong size water hoses. Tomorrow, then.

Mission Creep

It’s nearly impossible to start a small project on this car. Everything I do, it seems, leads to more things that could be done. In the case of the cooling system, I had already planned to do a lot: the power steering pump and perhaps a little clean up on the engine (while so many parts are already off). And while I’m at it, what about scrubbing the engine compartment? And getting that sound padding finally installed on the underside of the hood?

Coolant Reservoir
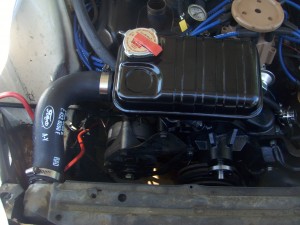
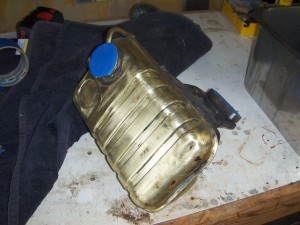
Coolant reservoir, cleaned to the bare metal. Well, mostly

Cleaning and painting the engine, though, is a big deal, and probably off the table if I want to be driving the car any time soon. (Not to mention all those other tasks!) The PCV valve, though, is very accessible with the carburetor off (and is clearly very old), so I may add that to my list as this project progresses.

I did make some progress today, and I expect to be back on the road next week. Today, I cleaned and painted the coolant reservoir, which looks way better (if not quite concourse quality) and made some progress on the power steering pump.

Coolant Reservoir
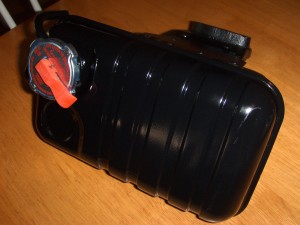
Coolant reservoir, cleaned and painted.

Unlike a more modern car, the new power steering pump was just the pump . . . not the pulley or the reservoir that holds the fluid. I had left the pump in an oil drain pan, and after a couple of days, it was sitting in a pool of goop.(Nitrile gloves are a godsend in situations like this.)

The reservoir, pulley and bracket came off easily. I was a little surprised to find that there was a filter for the power steering fluid inside the reservoir, so I ordered a new one on short notice–only available on-line, unfortunately. (Chance are, the one in there is old and clogged.) The parts to be re-used are partially cleaned. The plan is to get them stripped, painted and mounted to the new pump tomorrow.

The Door, Part 3

Getting the repaired door panel on was a struggle involving about an hour and some foul language. The top of the panel is supposed to hook over the door, but it was bent and far too tight. In fact, I’m sure the issues with the panel all started because it had not been firmly seated for years.

I straightened the upper lip of the door panel, but it was still tight and required a lot of force to drop in. Once on, though, the door opens and closes smoothly, and it was very cool to be able to lock (at least one side of) the car and roll the window up and down.

The Restored Panel
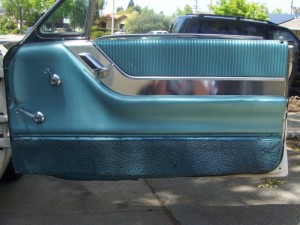
The restored panel, in place.

The next project was to be the cooling system, including removal and replacement of the power steering pump. The ‘Bird was way ahead of me, though. Just a day or two after installing the door panel, the power steering failed while I was out on an errand.

There was no immediate warning: no noise, fluid leak or other sign from under the hood. Just one minute the steering was feather-light, then next it was truck-like. The rubber rag-joint the connects the steering column to the steering mechanism doesn’t seem strong enough to survive me yanking the steering wheel around (that’s how it got ripped apart last time), so I parked the car mid week.

Disassembly for this stage of the restoration begins today.

The Door, Part II

Today was the day to get the passenger door all put together. Instead, I installed a screen door on the house–and the T-bird’s door still needs a little work.

Fiberglass Application
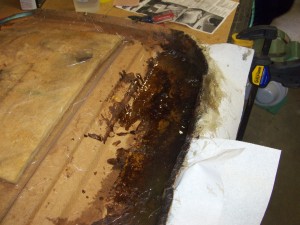
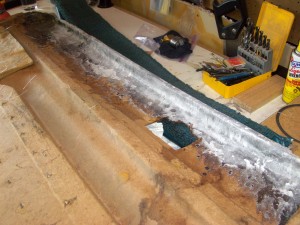
Fiberglass reinforcement, just applied.

I had no idea how intricate that door panels on these cars could be. The are made of multiple pieces and can be disassembled, unlike that door panels from cars in the 70’s and beyond. Many of the pieces are stapled together, some are held on by bent tabs and others are glued.

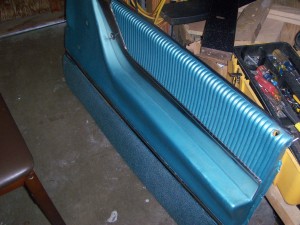
The bottom of the panel slides into a small channel at the base of the door. (Later cars typically use clips to hold the panel to the door.) If you’ve been following the saga, you know that the molded cardboard at the base of the panel, which is supposed to sit in the channel, was rotting away. I spent a good deal of time reinforcing the rotted elements with fiberglass this afternoon, and the results were good–the bottom of the panel should slide far enough into the channel to give it some support and hold it in place.

Fiberglass, Cured and Sanded
The fiberglass, cured and sanded.

Once the fiberglass reinforcements were done, I removed the carpet trim and glued it firmly in place. (It had been held on–sort of–with double-sided foam tape.) After that, I was able to install the stainless steel trim between the carpet strip and the vinyl. The trim came with the car and is probably original, but it has been floating around in the trunk for years.

The last piece was the felt strip at the top of the door panel. Aside from acting as a trim element, the window glass rides against the felt, preventing it from rattling around in the door. The old piece was shot and there was a new one–once again–in the trunk. I had to remove a number of old rusty staples to get the old trim off. There was no way to staple the new one on (and I don’t have the right tools anyhow), so I glued the new trim piece on with epoxy.

The Restored Panel
The restored panel

At the end of the day, I left the panel out so all the glue could cure properly. If it all appears solid tomorrow, I’ll take a stab at putting it on the actual door. In the end, it’s hardly perfect, but it’s much better than it was.

The screen door looks nice, too.

Lock and Roll

The 64 T-Bird was equipped with an automatic parking brake release. Put the car in gear and the parking brake klunks free. The mechanism is a vacuum switch on the steering column. A lever on the shift tube moves the switch, activating a vacuum motor, releasing the brake.

On my car, of course, this was all disconnected. I put a new vacuum switch on when working on the shifter. Getting a new hose up from the switch to the vacuum motor was not easy. Once it was there, I was a little shocked–happily so–that the whole system still worked.

With that done, I put the lock cylinder back in the passenger side door. I had the great folks at Mountain View Lock and Safe rework the cylinder to fit the existing ignition key. Installation of the lock cylinder is simple. Once in, I was able to lock and unlock the car from both the key and the knob–probably the first time in 20+ years that this door has been locked.

The vacuum system that operates the lock is still not functioning, but the issue is not in the door, so the panel will go back on this weekend. More photos from that evolution to follow.


To Restore a Door

There’s a whole bunch of stuff inside the doors of this car: locks, latches, windows and window regulators. A vacuum system controls the locks from a central switch on the dash, and there’s a switch in the latch mechanism to illuminate a “door ajar” light on the dash as well.

Door panel
The door panel, before removal

The locks are gummed up and jammed; the central locking was also inoperative. The window regulators on both sides are hard to turn; rolling the windows up and down is a chore. The  door ajar warning light doesn’t work (didn’t even know it was there!) and the door trim panel, at least on the passenger side, was loose and broken.

I pulled off the door panel today to see what I could do. What I found is a multi-day job.

The trim panel comes off easily one you figure out the secret of the E-clips holding the window cranks on (tip: pull the clips off with a bit of wire bent into a hook). Getting the window regulator mechanism out is a puzzle that took me at least half an hour to work through. After that, getting the window glass out was relatively simple following the instructions in the shop manual.

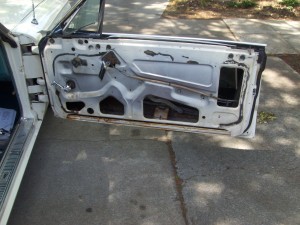
The door, opened up
The door with the panel off.

With everything out, I was able to get a close look at the locks. The mechanism appears fine–not even rusty. The old grease has hardened and I was able to work the lock free with some silicon spray. After I got it working, though, the central locking system was still dead, and more perplexing, the key wouldn’t turn the lock.

The ignition key is supposed to work for the doors and the glove box (there is a separate key for the trunk). It would appear that someone changed out the ignition cylinder in the past without changing the door locks, too. In that case, there’s been no way to lock this car in a long time.

Inside the door panel
Rot on the inside of the door panel

I was able to work some oil into the window regulator with good success. Provided I can snake it back in, the window should go up and down pretty easily now. As for the rest, some prioritizing is in order. Left to be done: re-key the door lock cylinders, troubleshoot the central locking system and figure out why the door ajar light is not working.

After that, I’ll need to make a decision about the door panel itself. It’s made from a molded cardboard with vinyl and carpet overlays. The cardboard has been wet in the past, enough to rot a portion away. It may be possible to restore it, but a replacement–very pricey–may be in order.

What a Gas

I needed the ‘Bird warmed up this morning to check the settings on the carb, so I took her for a spin out on the open freeway. (Something I rarely do.) She’s been running so well, I took the opportunity to open her up. I was pleased to discover that there’s still some kick to her; we cruised along with traffic for 10 miles or so before (reluctantly) heading home.

Old sender coming out
The old sender coming out

The tuning wasn’t off by much, so I was quickly on to the main event of the day: replacing the fuel gauge sender. With the back of the car up on ramps, I crawled underneath, camera and tools in hand.

The sending unit sits about half-way up the tank. I figured the tank was less than half full, but had no way of knowing for sure. The old unit came out easily, and it was not followed by gallons of fuel, which was a good thing. The most difficult part was getting the old fuel line off–it was held on by the original crimp-on style clamp.

Old vs. New
The old sender with the new

The float on the old unit was full of gas, which was probably part (if not all) of the problem. I could have just changed the float, but I had a brand new unit (with an in-tank filter) that seemed more like a sure bet.

A while back, I replaced the sender for the oil pressure gauge with no success, so there was no telling if the fuel gauge was still good. But with the key on, the gas gauge went right up to 1/3 full! Nice.

Of course, I made a complete photojournal of the project.