I disassembled the right side suspension a few days ago. With some experience under my belt (and a better spring compressor), the entire process only took 2-3 hours, most of that spent on the spring. (It took some time to figure out the compressor operation. It’s a vintage tool, and the original instructions were long gone.)
Original factory grease on the control arm shafts on the passenger side.
When I took apart the right side upper control arm, I was a little surprised to find it in pretty decent shape. Both ends still had a considerable amount of the factory grease and there was little wear.
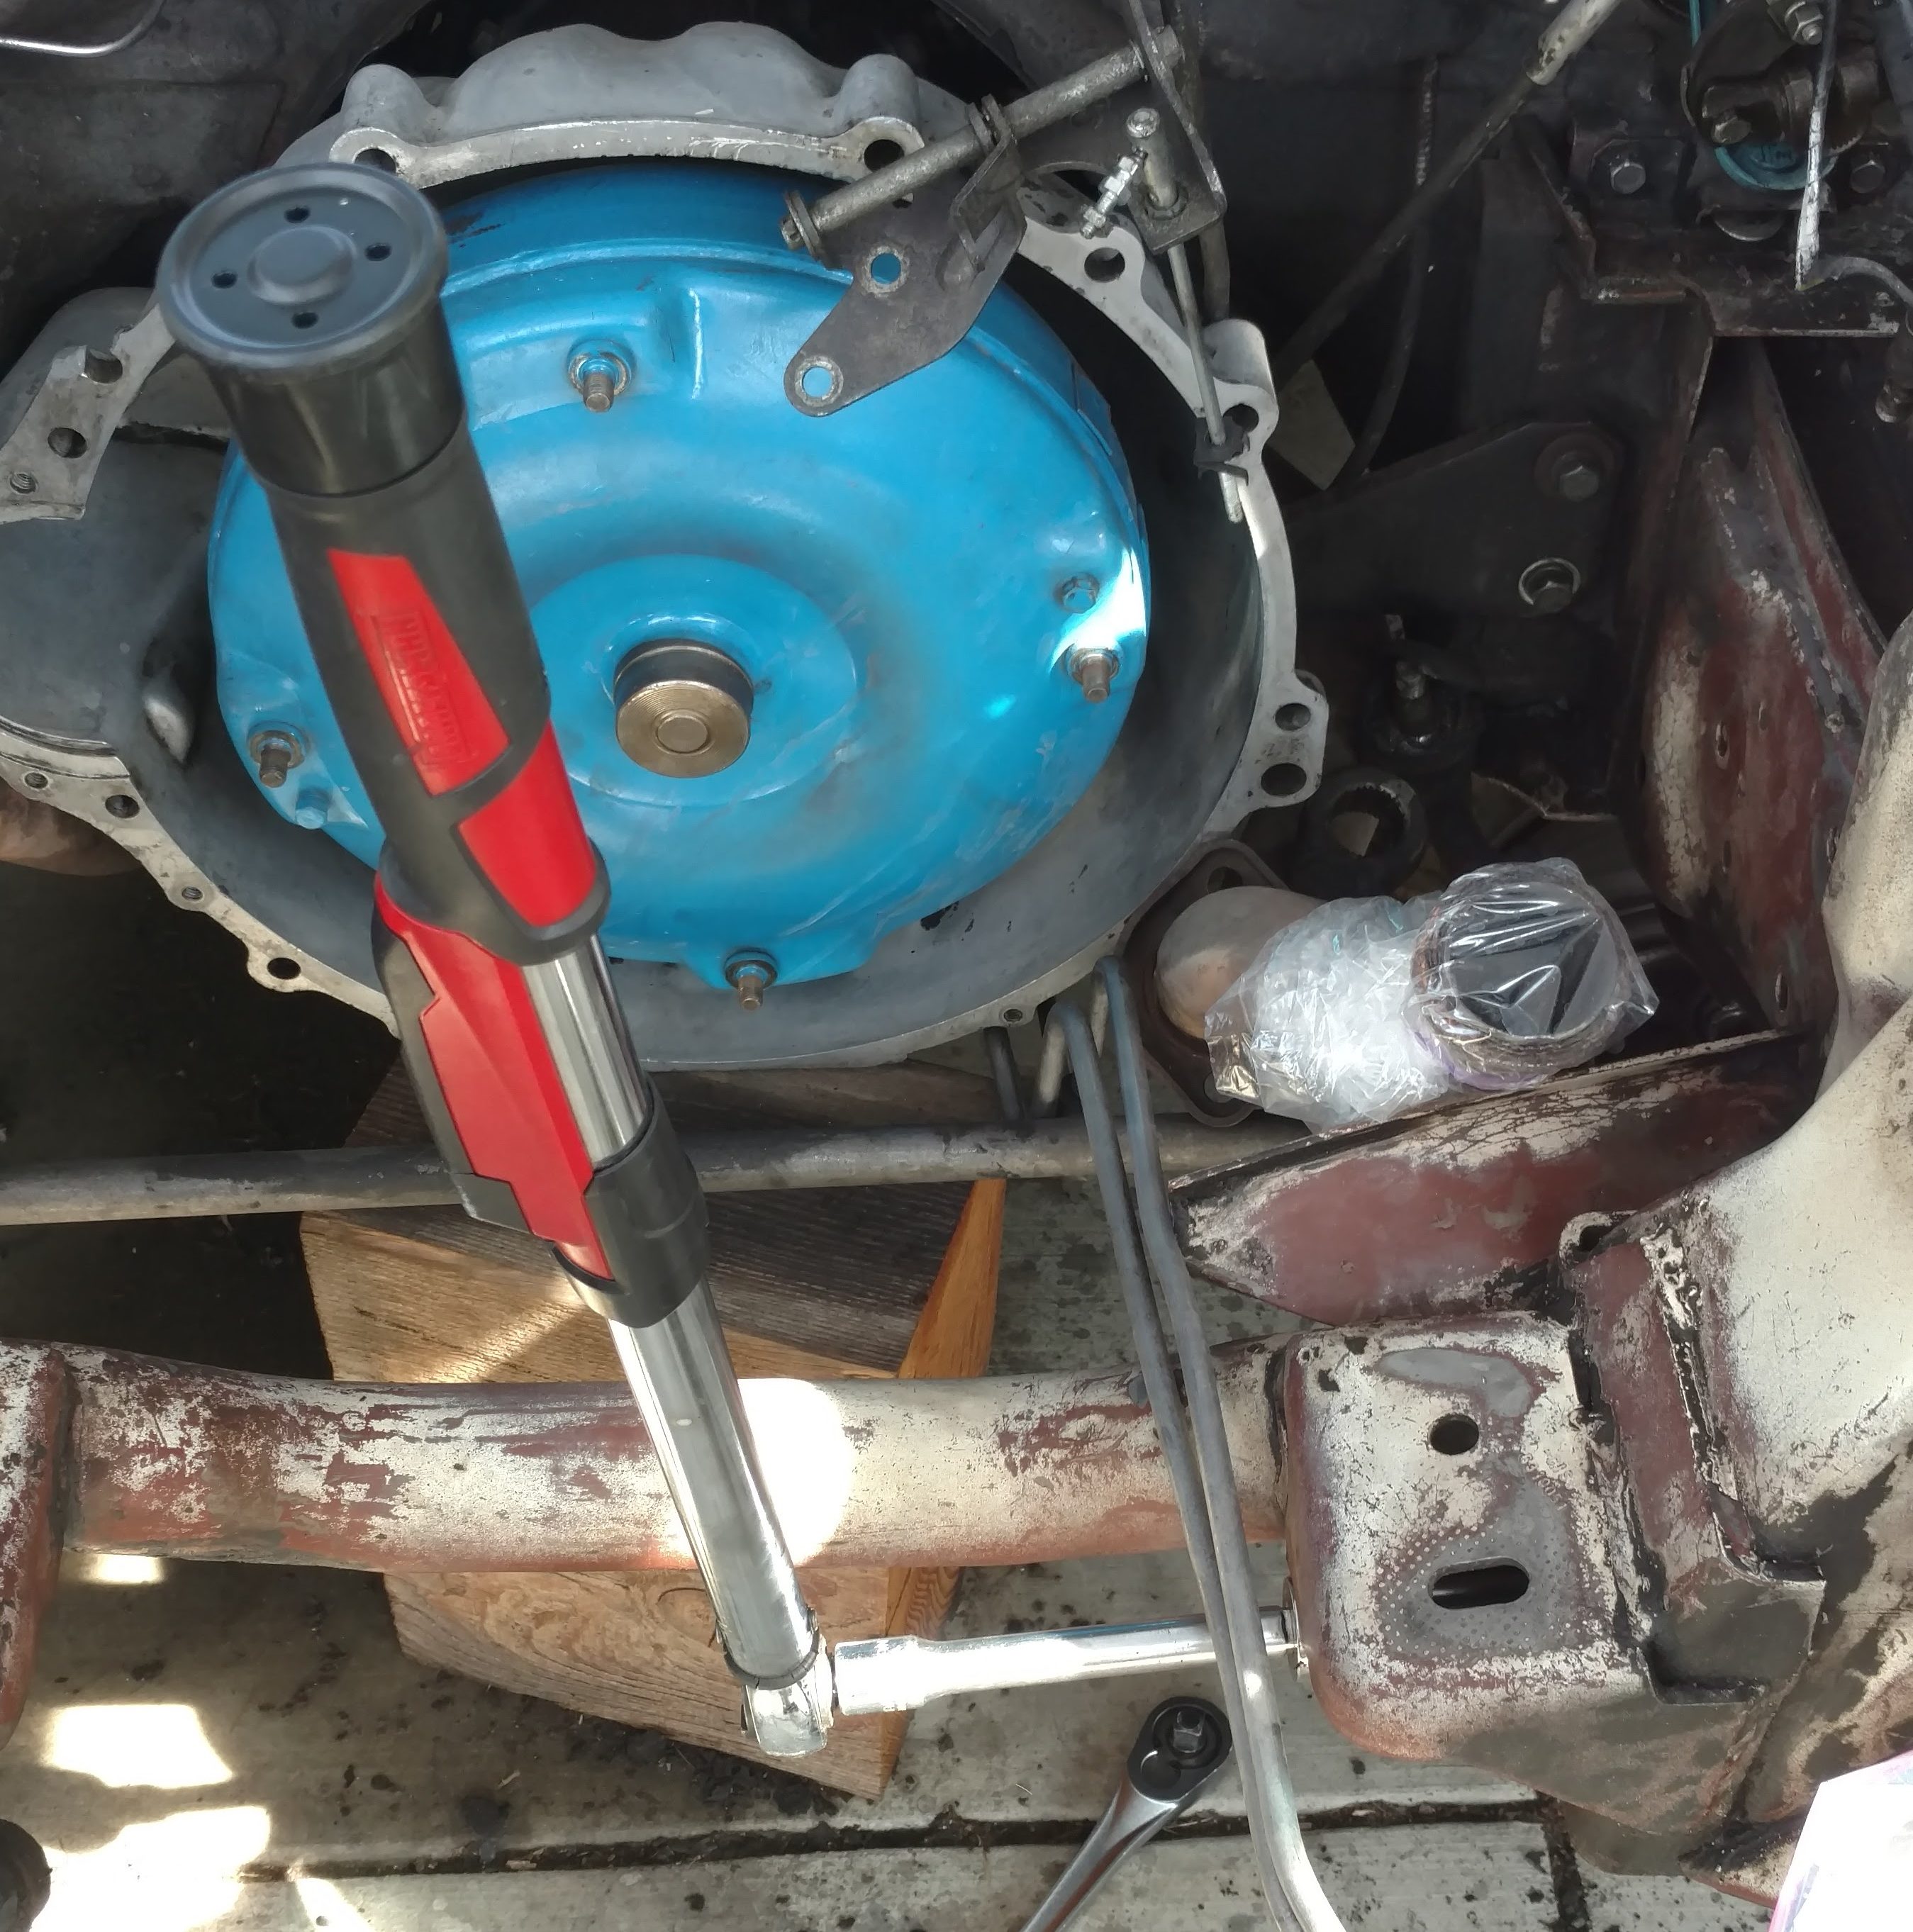
Standing over the car to do a job is always better than crawling underneath.
With the lower arms refurbished (new ball joints and bushings) I bolted them back into the car today. Having the engine out was a bit of a help, especially when it came to torquing some of the nuts down. (More details about reassembly are on the repair journal for this job.)
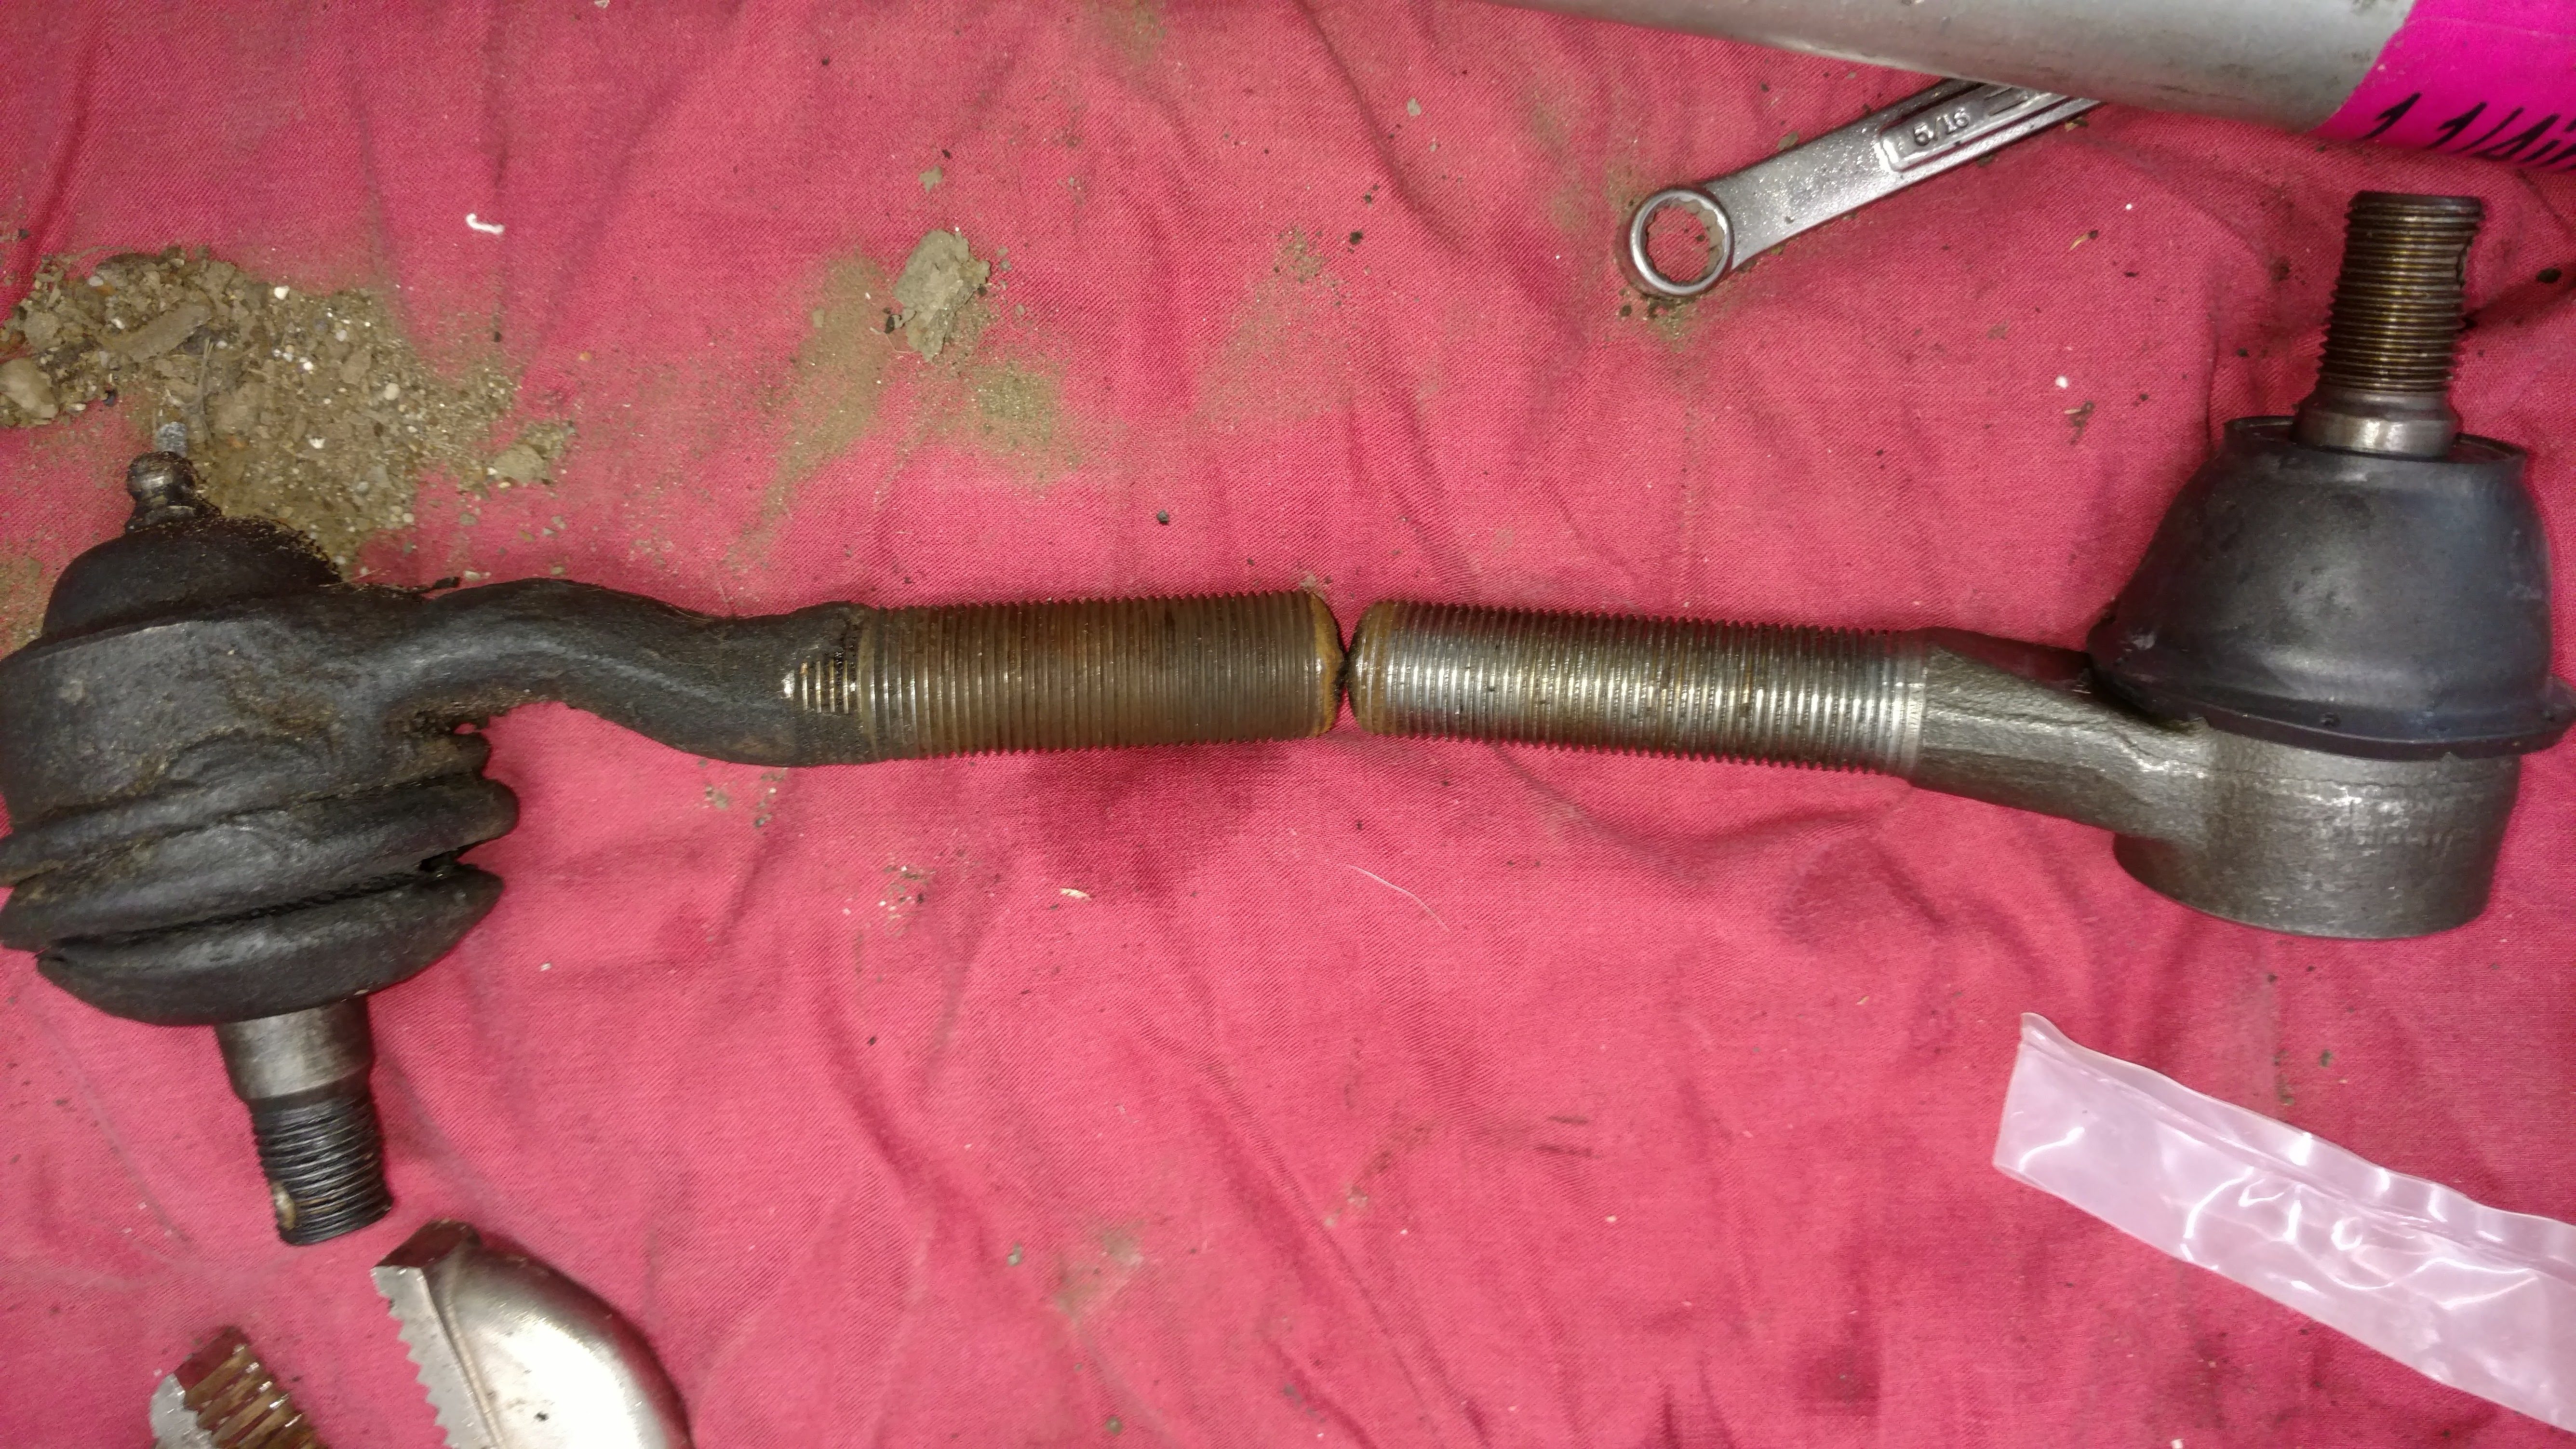
Old vs. new tie-rod ends. Just slightly different.
I’ll be replacing the tie-rod ends before everything is said and done, but need to order a few more parts. The new ends are slightly smaller and were loose in the existing adjusting sleeve, which I thought I could re-use. I’ll have to order a couple of these before the steering goes back together.
If I can get the new control arm shafts installed tomorrow, there’s some chance the rest of the suspension reassembly will get done over the holiday weekend, on schedule.
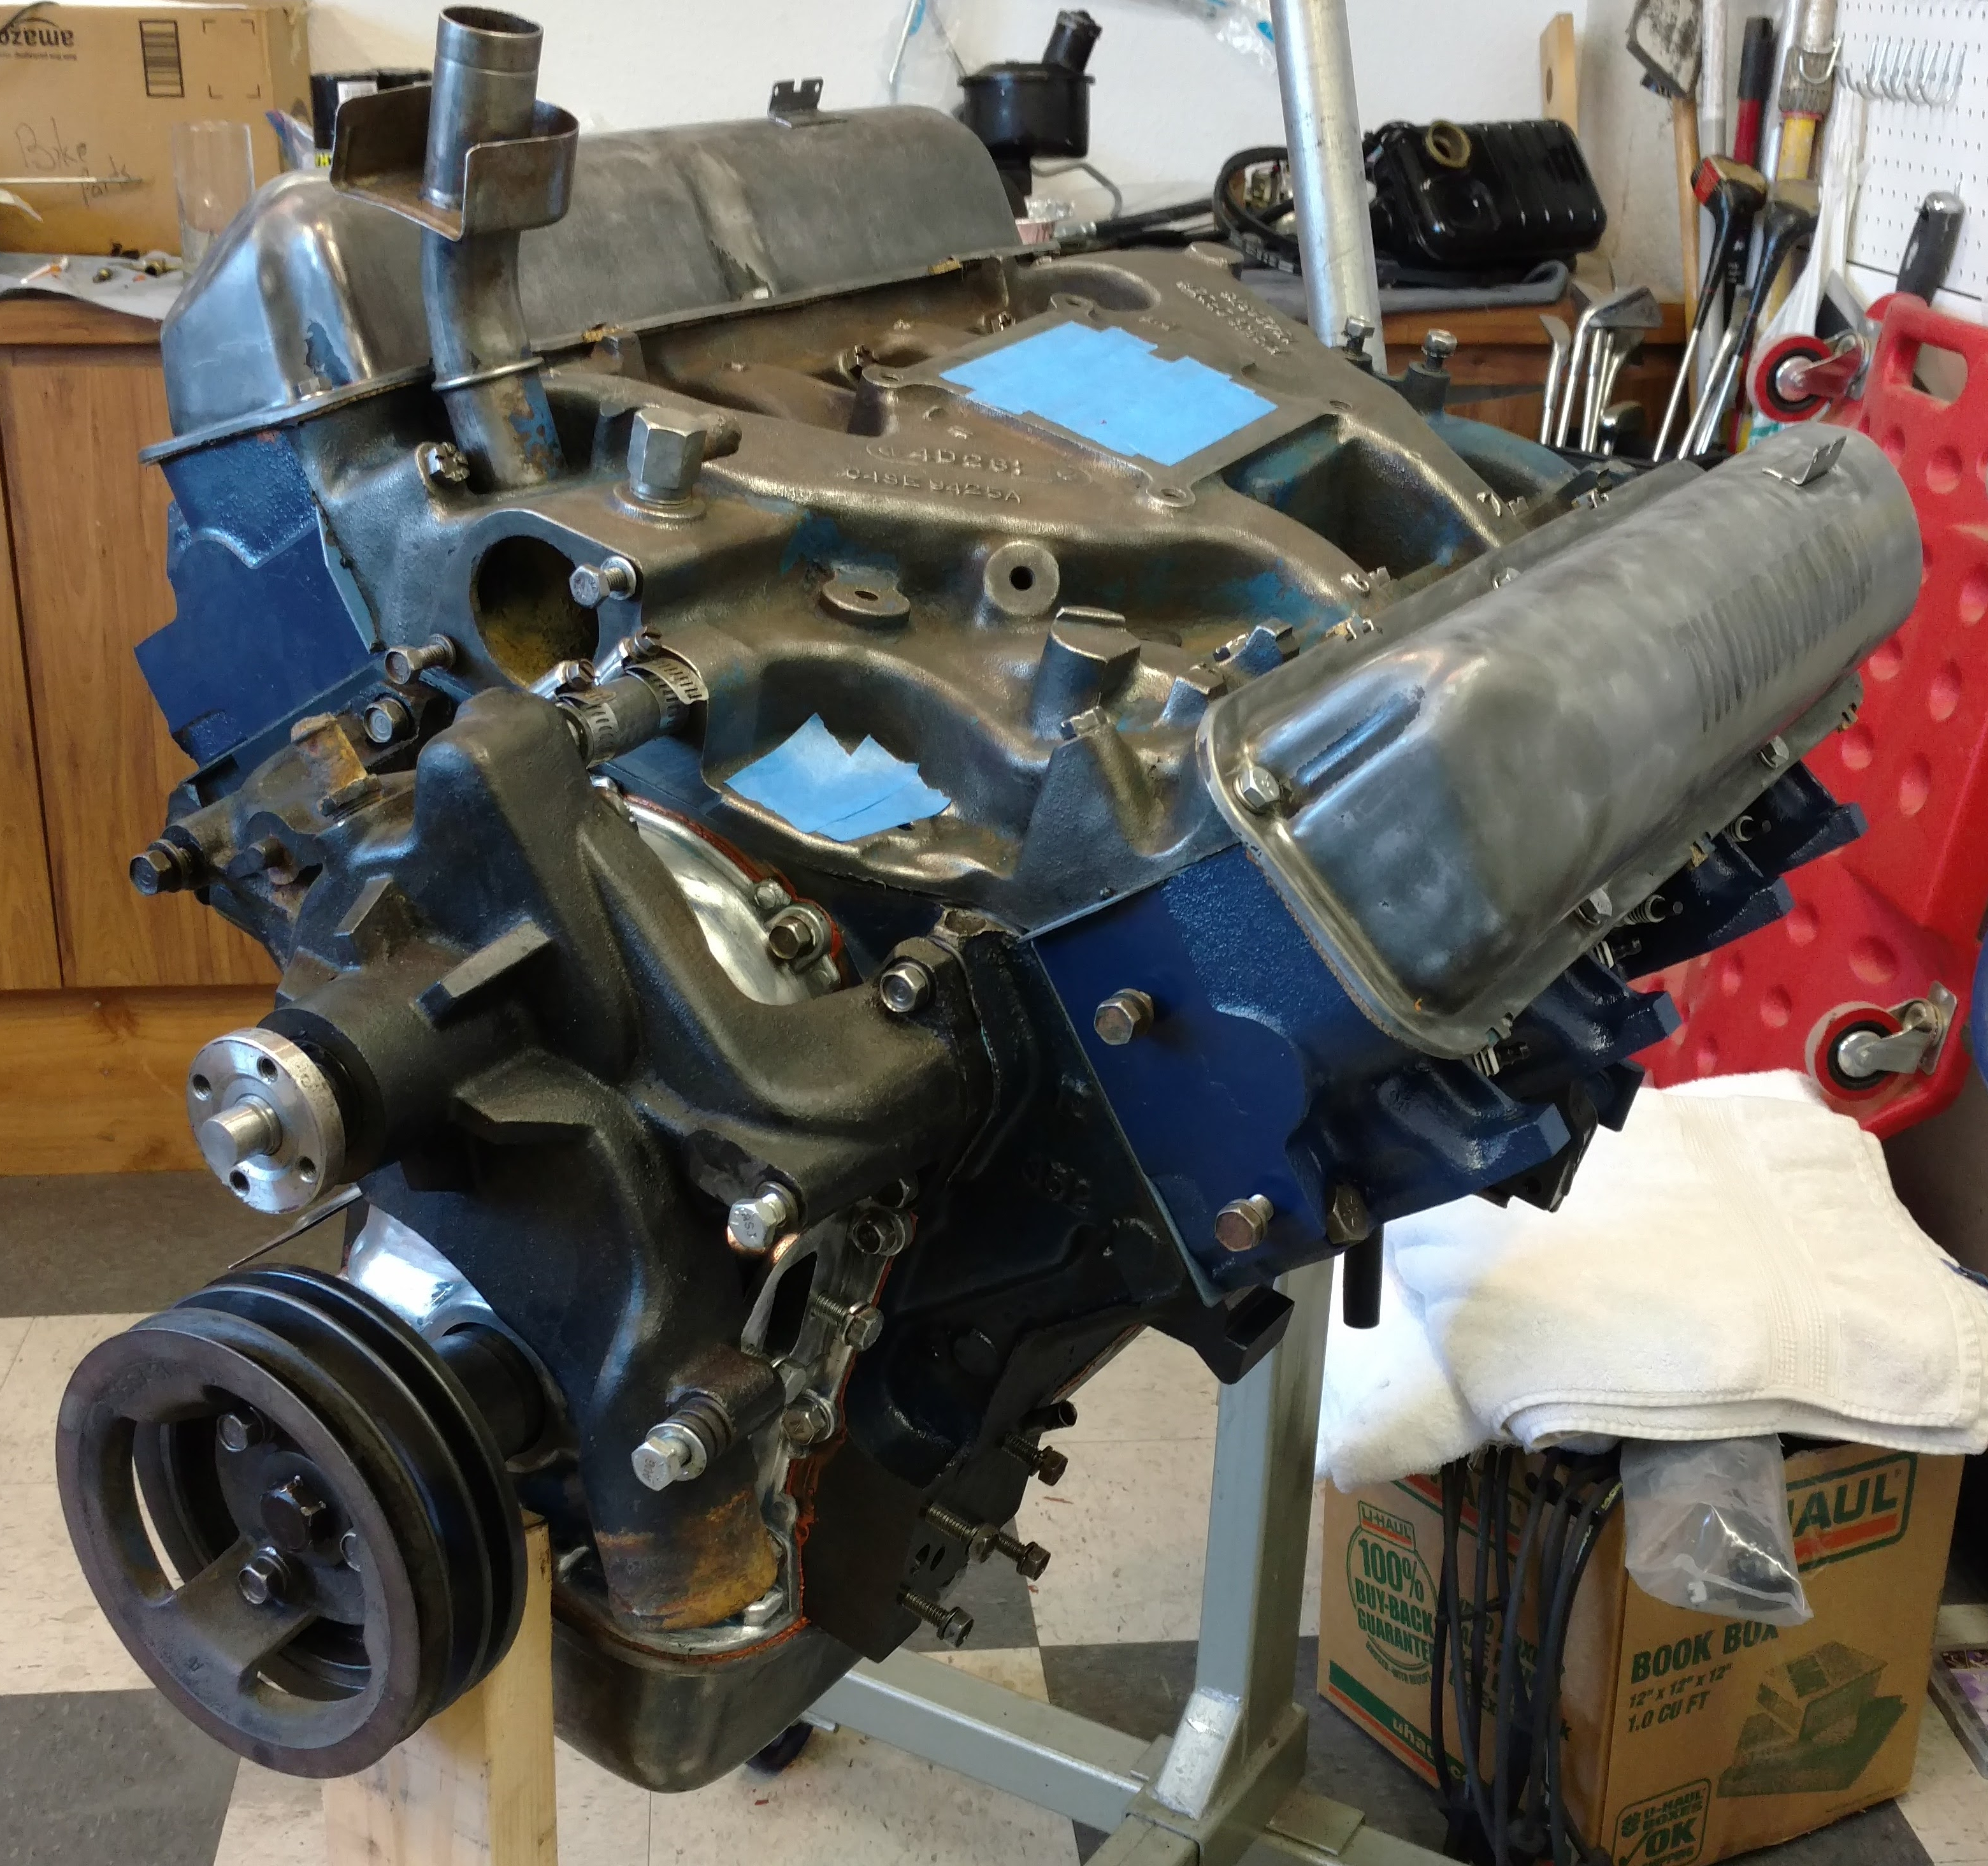
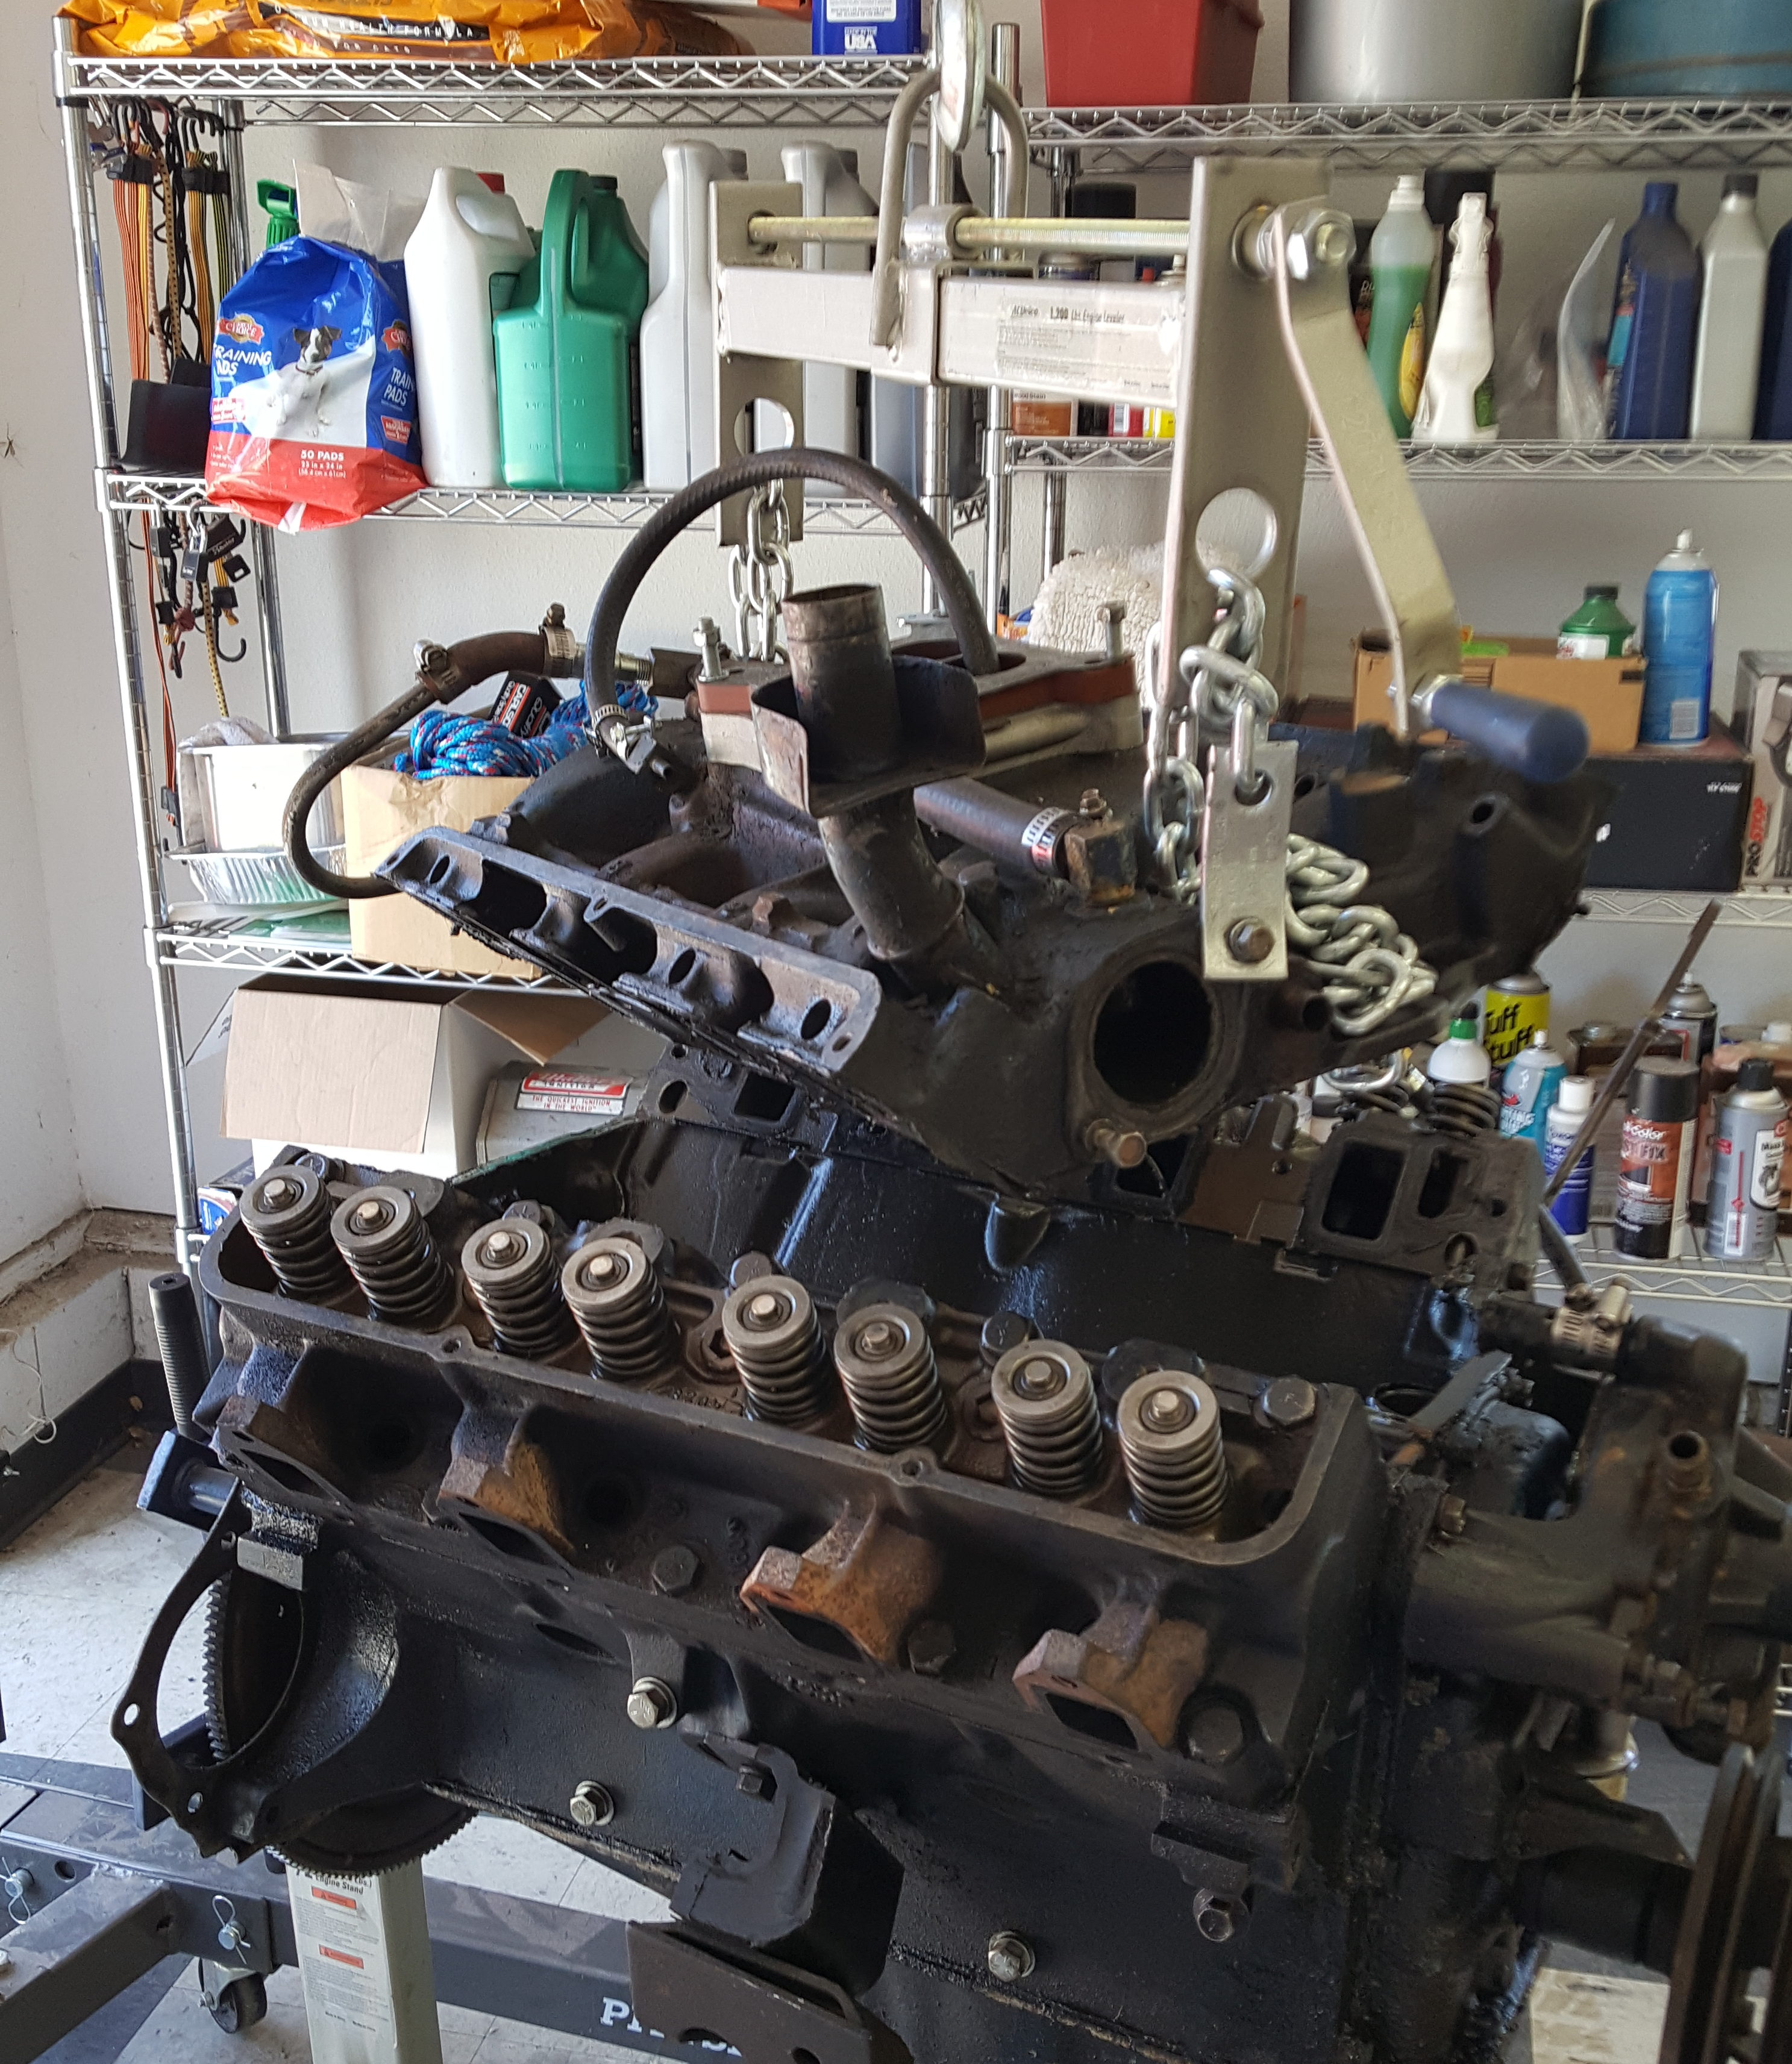
I’ve got most of the motor back together and ready to go. I’ve had the valve covers off a couple of times when the motor was in the car, and it was always a bit of a mess trying to get the gasket to stay in place and keep sealant from spreading everywhere. The job is, of course, far easier with the motor out, and I think I’ve got a nice, tight, leak-free seal on both banks.
Just about ready for paint.
I did the job twice, it turns out. After I got them installed, I couldn’t recollect if I had cleaned the covers on the inside before they went on. Rather than risk running dirt, wire wheel splinters and the like through my refreshed motor, I pulled them off to check. Sure enough, they were dirty inside, so time and money well spent.
The water pump is also on, so now I just need to do a final degreasing, masking and painting.
While this has been going on, I’ve disassembled the driver’s side front suspension, a process I detailed in a photo journal yesterday.
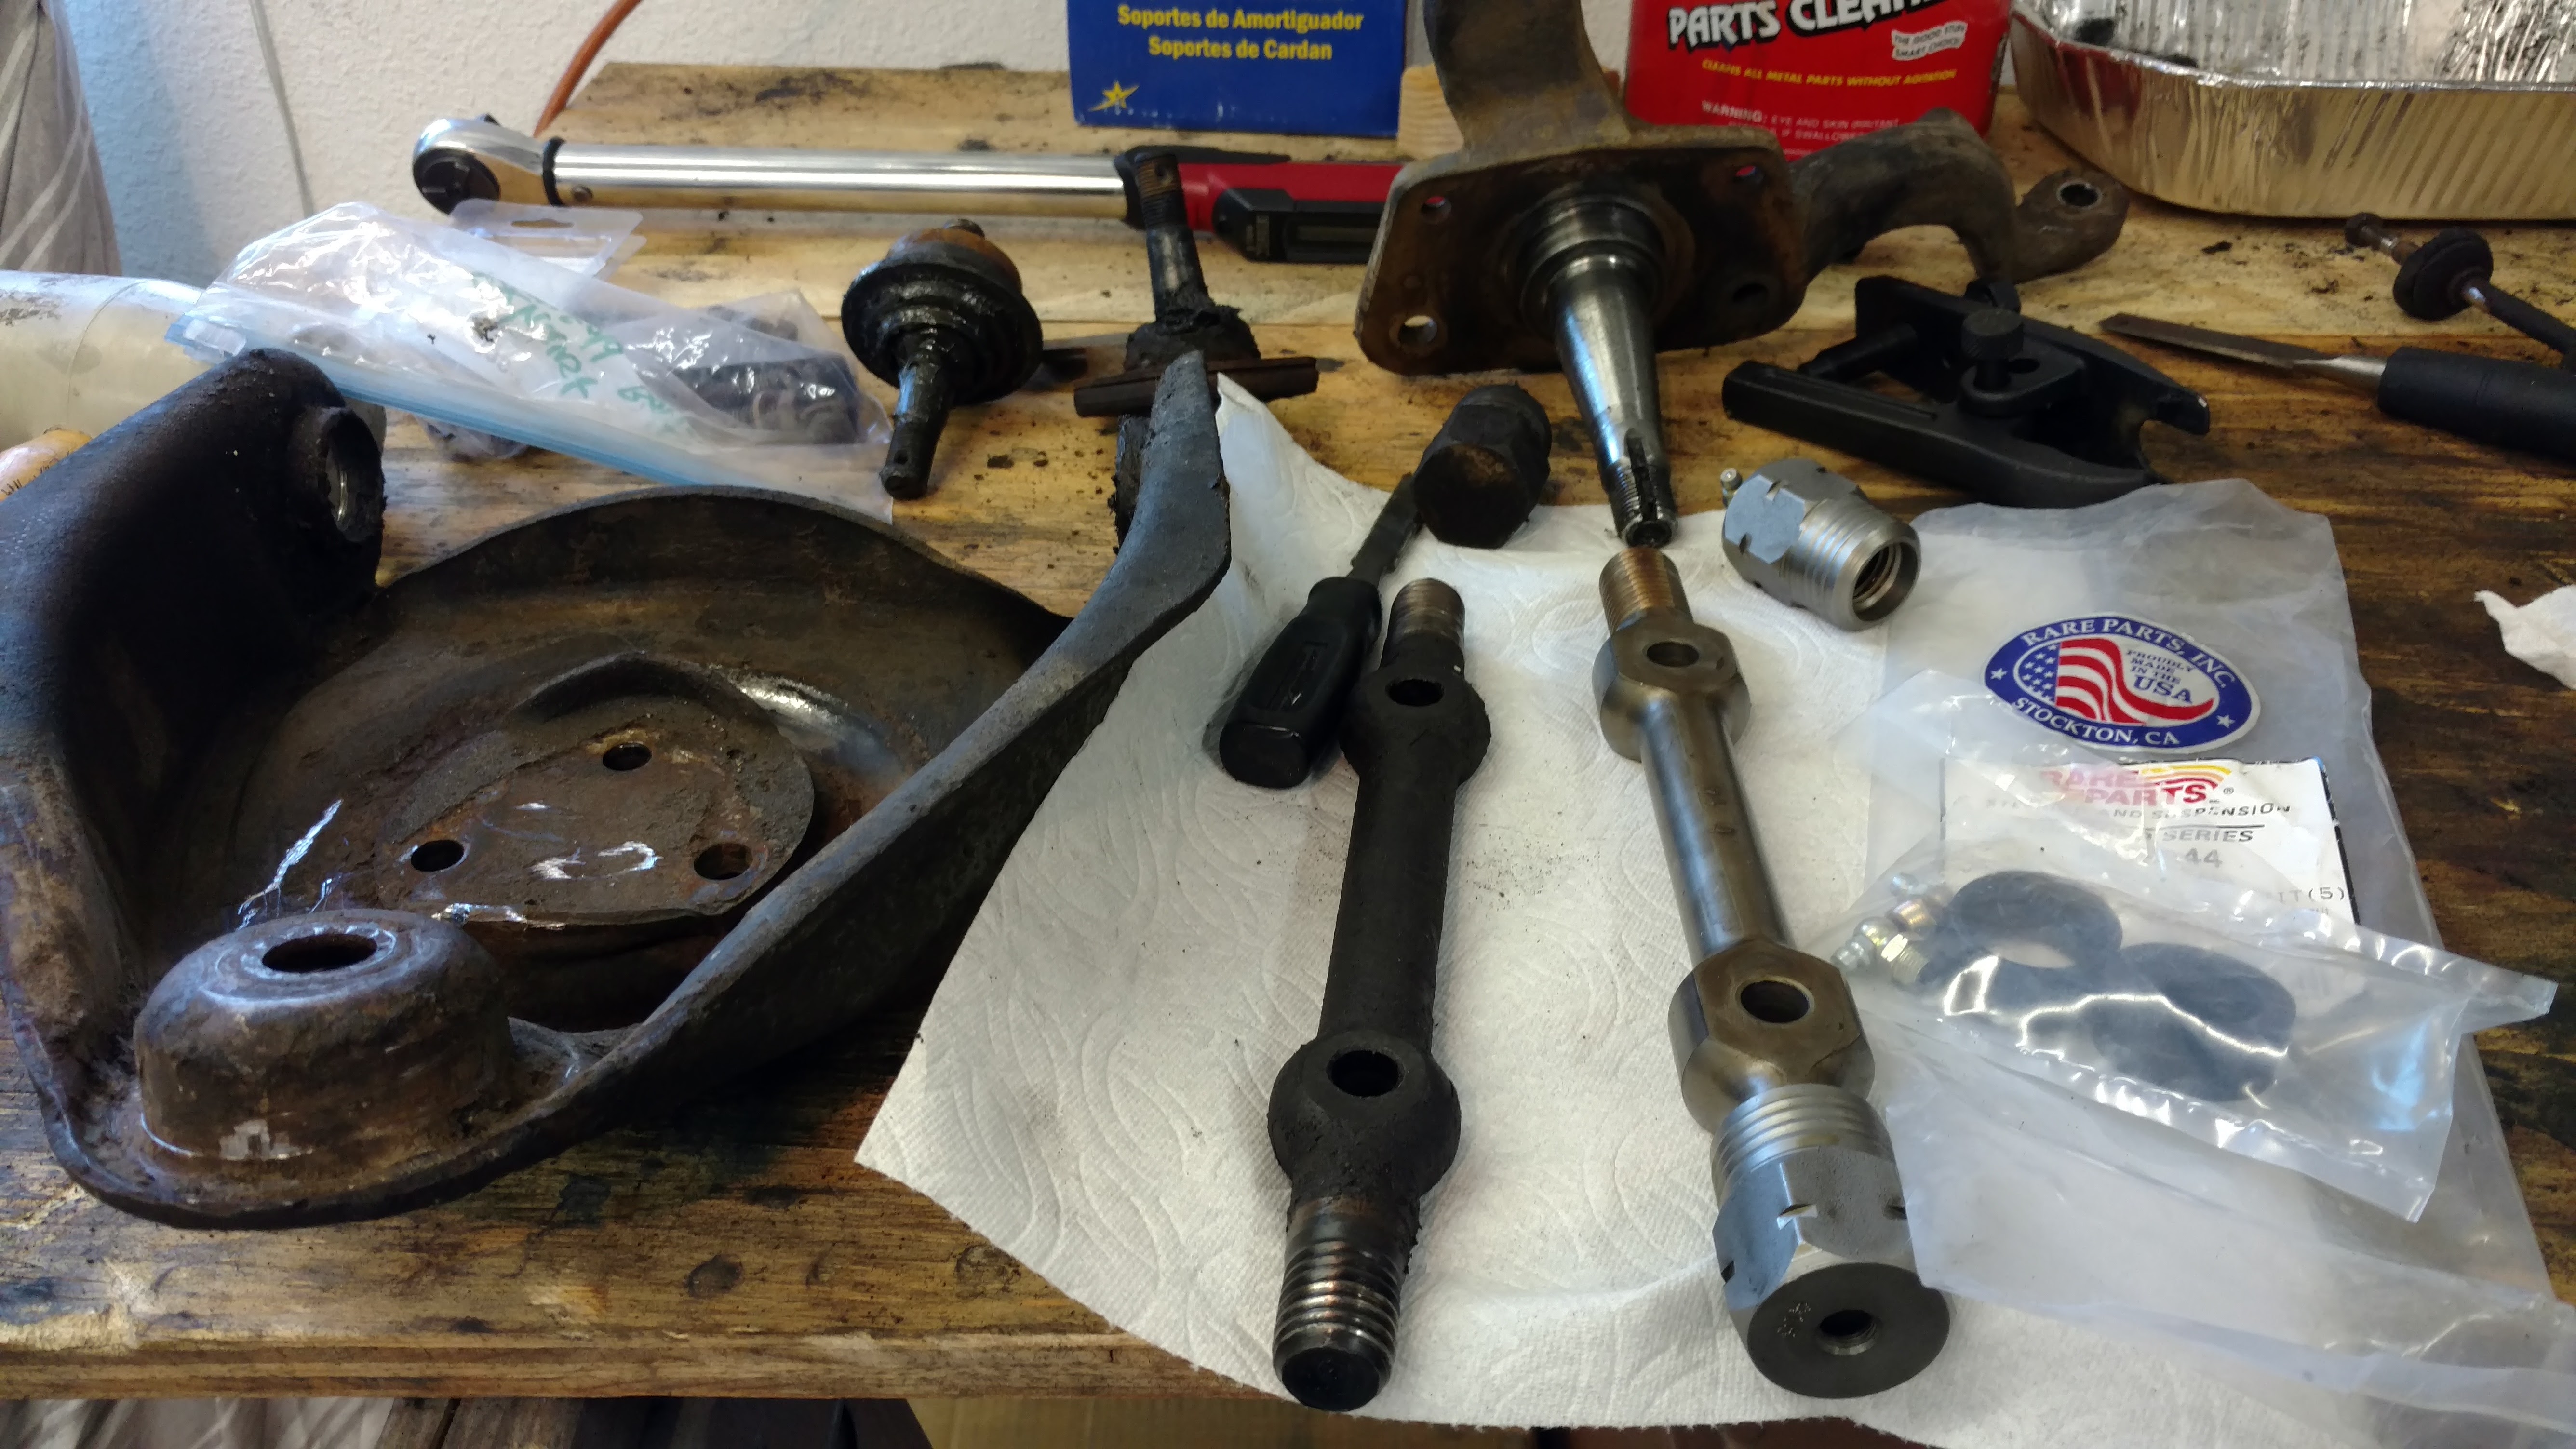
At this point in the project, I’ve got a lot of loose parts, new and used, floating around.
Except for the bushing on the lower control arm, which I farmed out, I’ll be reassembling this side of the suspension myself the next couple of days with plans to have both sides done by the end of this weekend.
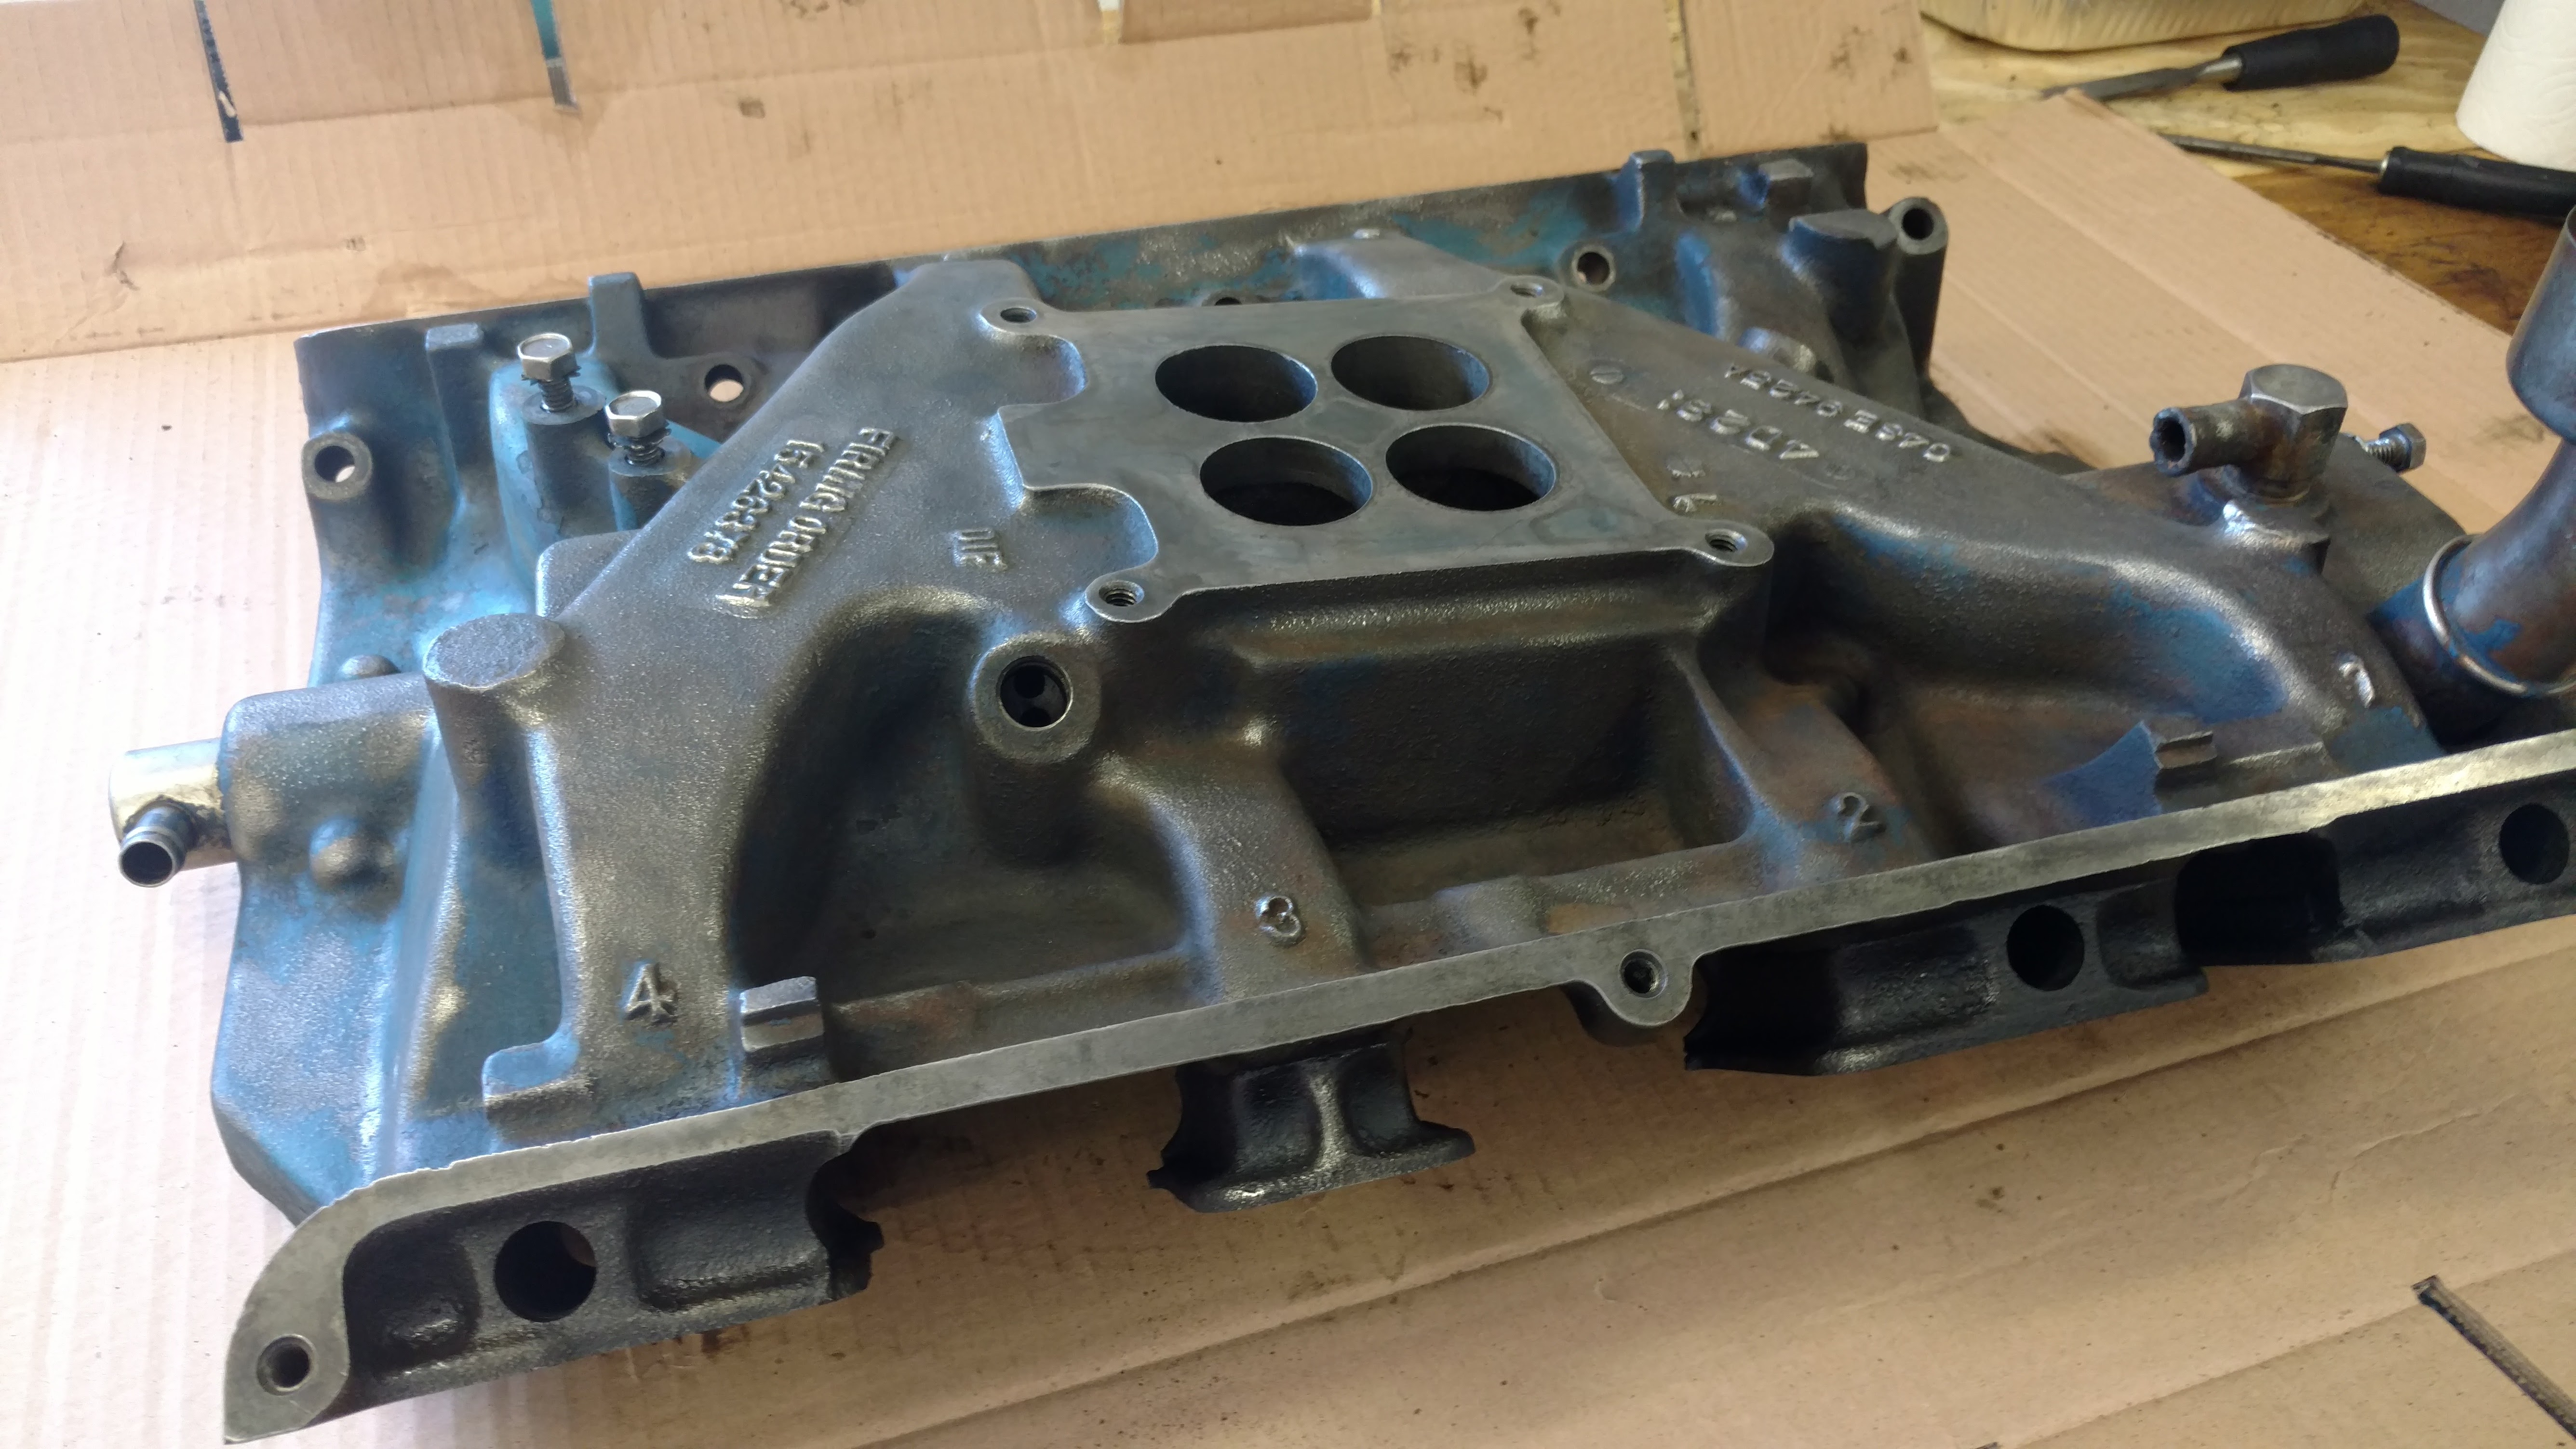
I’ve been making slow, steady process on the motor over the last few weeks, cleaning up parts and taking my time with the assembly. (I would really like to end up with a motor that doesn’t leak!) I had been putting off the daunting task of cleaning the rusty, greasy intake manifold. When I did dive into the project (with wire wheels, acetone, steel wool and lots of gloves) it took about 6 hours to finish. There are still a few nooks and crannies that could be better. If I had to do it over again, I’d pay a shop to clean it up for me. As it is, I think paint will stick ok.
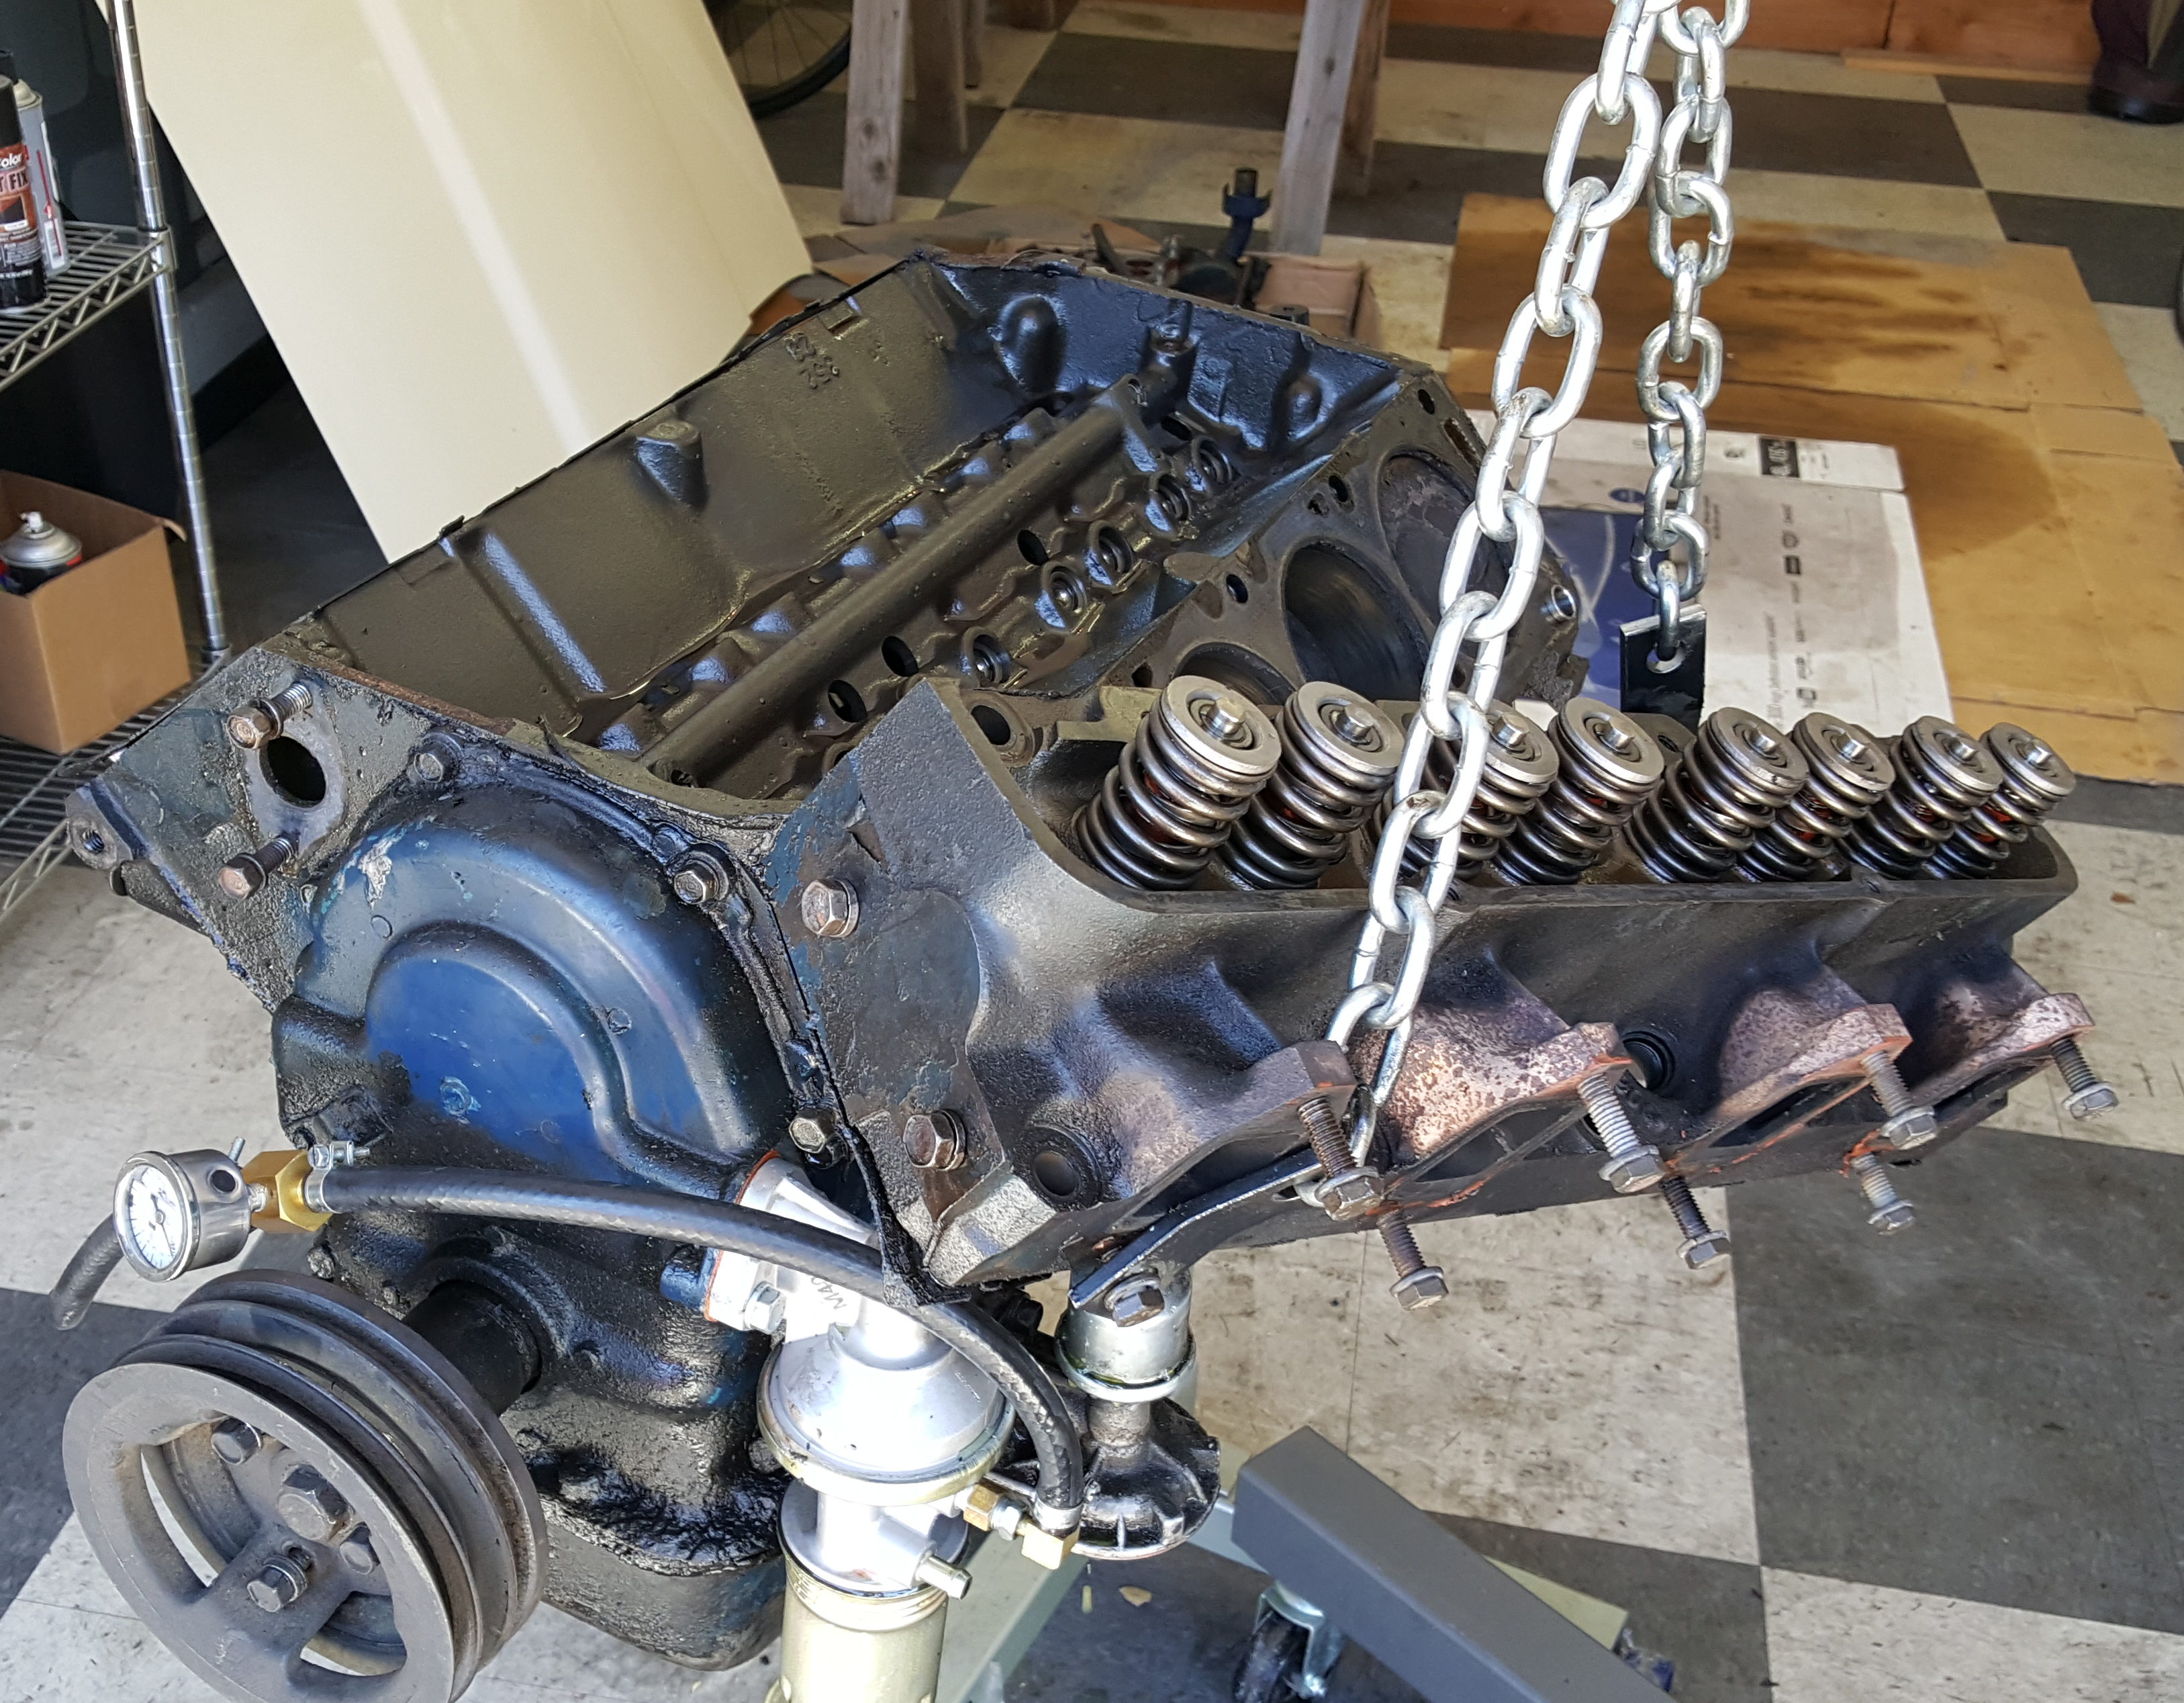
I’ll be using my hoist to reinstall this now that it’s cleaned up.
Once I have it reinstalled , I can proceed to the rocker arm shafts and valve covers. At that point, I’ll be just about ready to paint.
With the calendar slipping into August, though, I realized I need to pick up the pace. Since I’m using the garage as an engine assembly shop and paint booth, the car is outside on jack stands. It doesn’t rain during the summer here, but it would not be a shock to have some precipitation in September. It would be great to have the ‘Bird back in the garage before that happens.
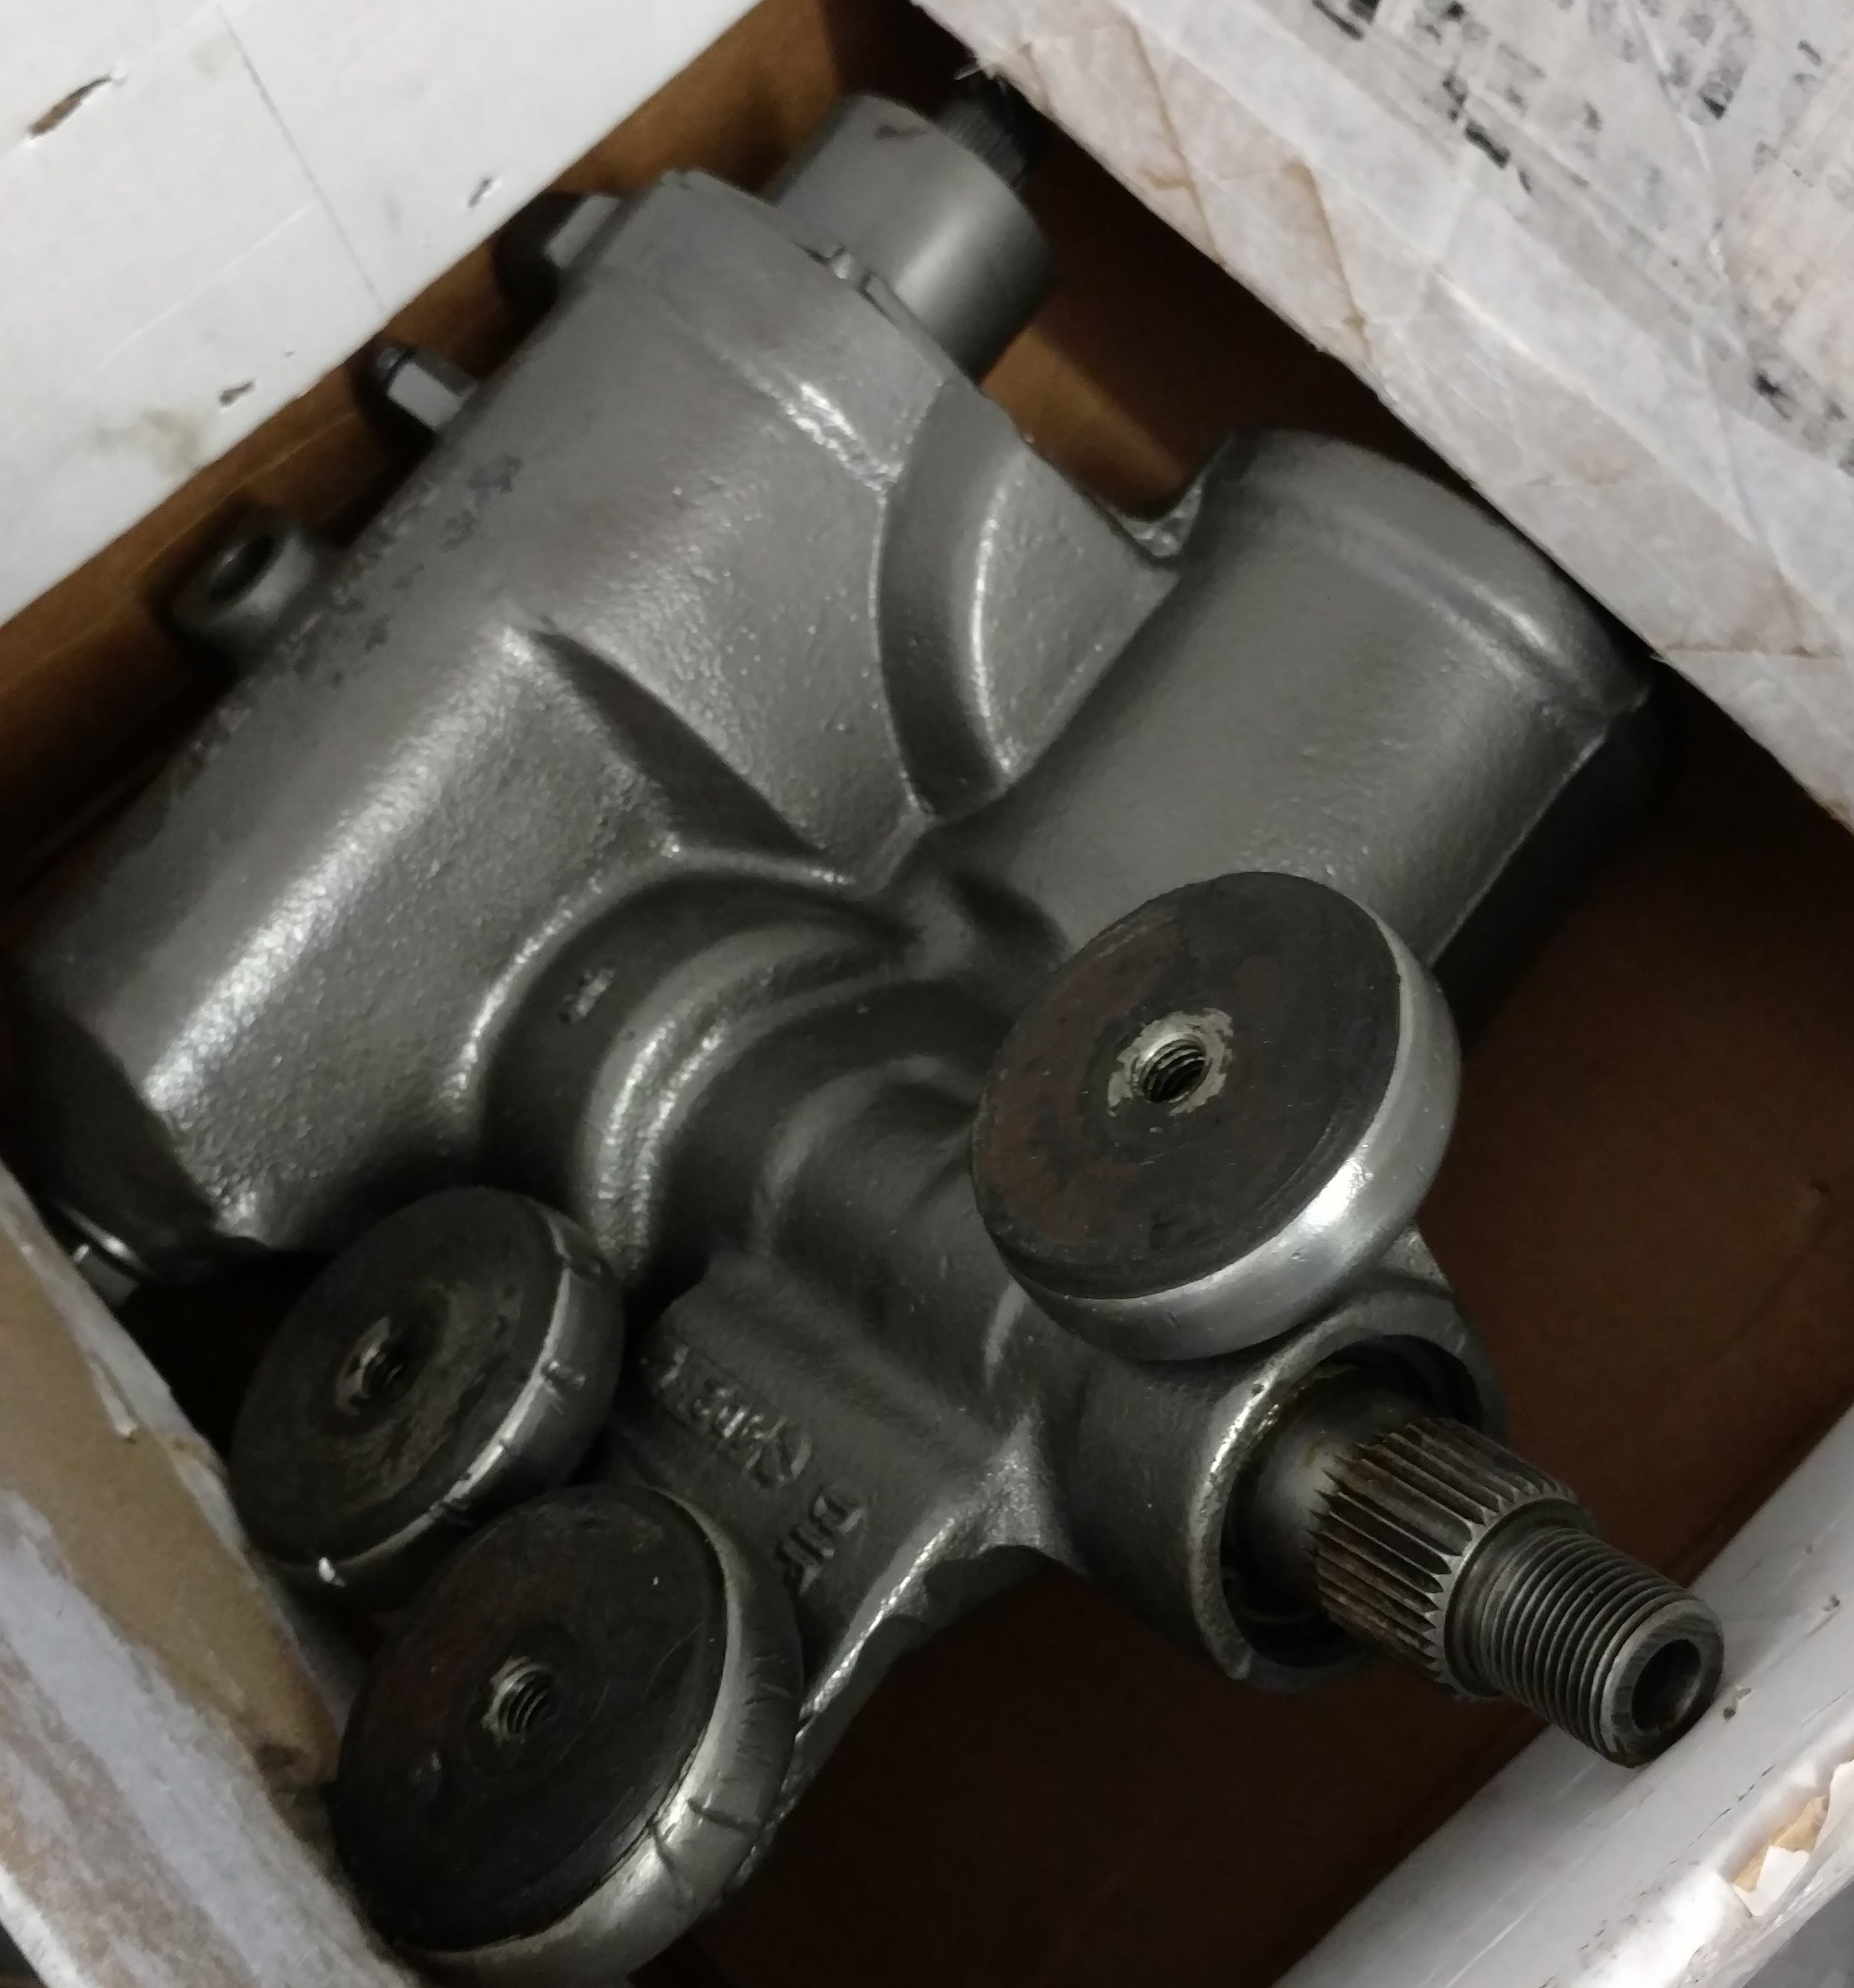
The rebuilt steering box. I was able to reuse the isolators, which was a nice surprise.
So, this morning I ordered up a whole bunch of front suspension and steering components: upper and lower control arm shafts and bushings, tie rod ends, ball joints and a center link. I’m told (and whole-heartedly believe) that replacing these parts will be far easier with the motor out. The steering box came back some weeks ago, cleaned, sealed and rebuilt; when done, the front end should be like new.
With the engine out, I’m in full mission-creep mode, and I’ll be attempting a lot of work on the front suspension this summer. First on my list is getting the steering box rebuilt. I never found the steering all that loose, but it leaks like crazy and I’m pretty tired of pouring Type F in the top of the system only to clean it off the floor a few days later.
It looks like this steering wheel puller will work to remove the pitman arm, but it won’t.
The steering box in held on with three bolts, though you need to detach hoses, the steering column and the inevitable ground strap to make sure it actually comes out when the bolts are removed.
It is, of course, also attached to the suspension via the pitman arm, which requires a special puller to remove. I tried to use my steering wheel puller for the job, but quickly realized it wouldn’t work. A local auto parts store loans the proper tool for free, but I had to wait a few days for it to become available. Once I had it, the arm came off in just a few minutes.
With the correct tool, the pitman arm came off easily.
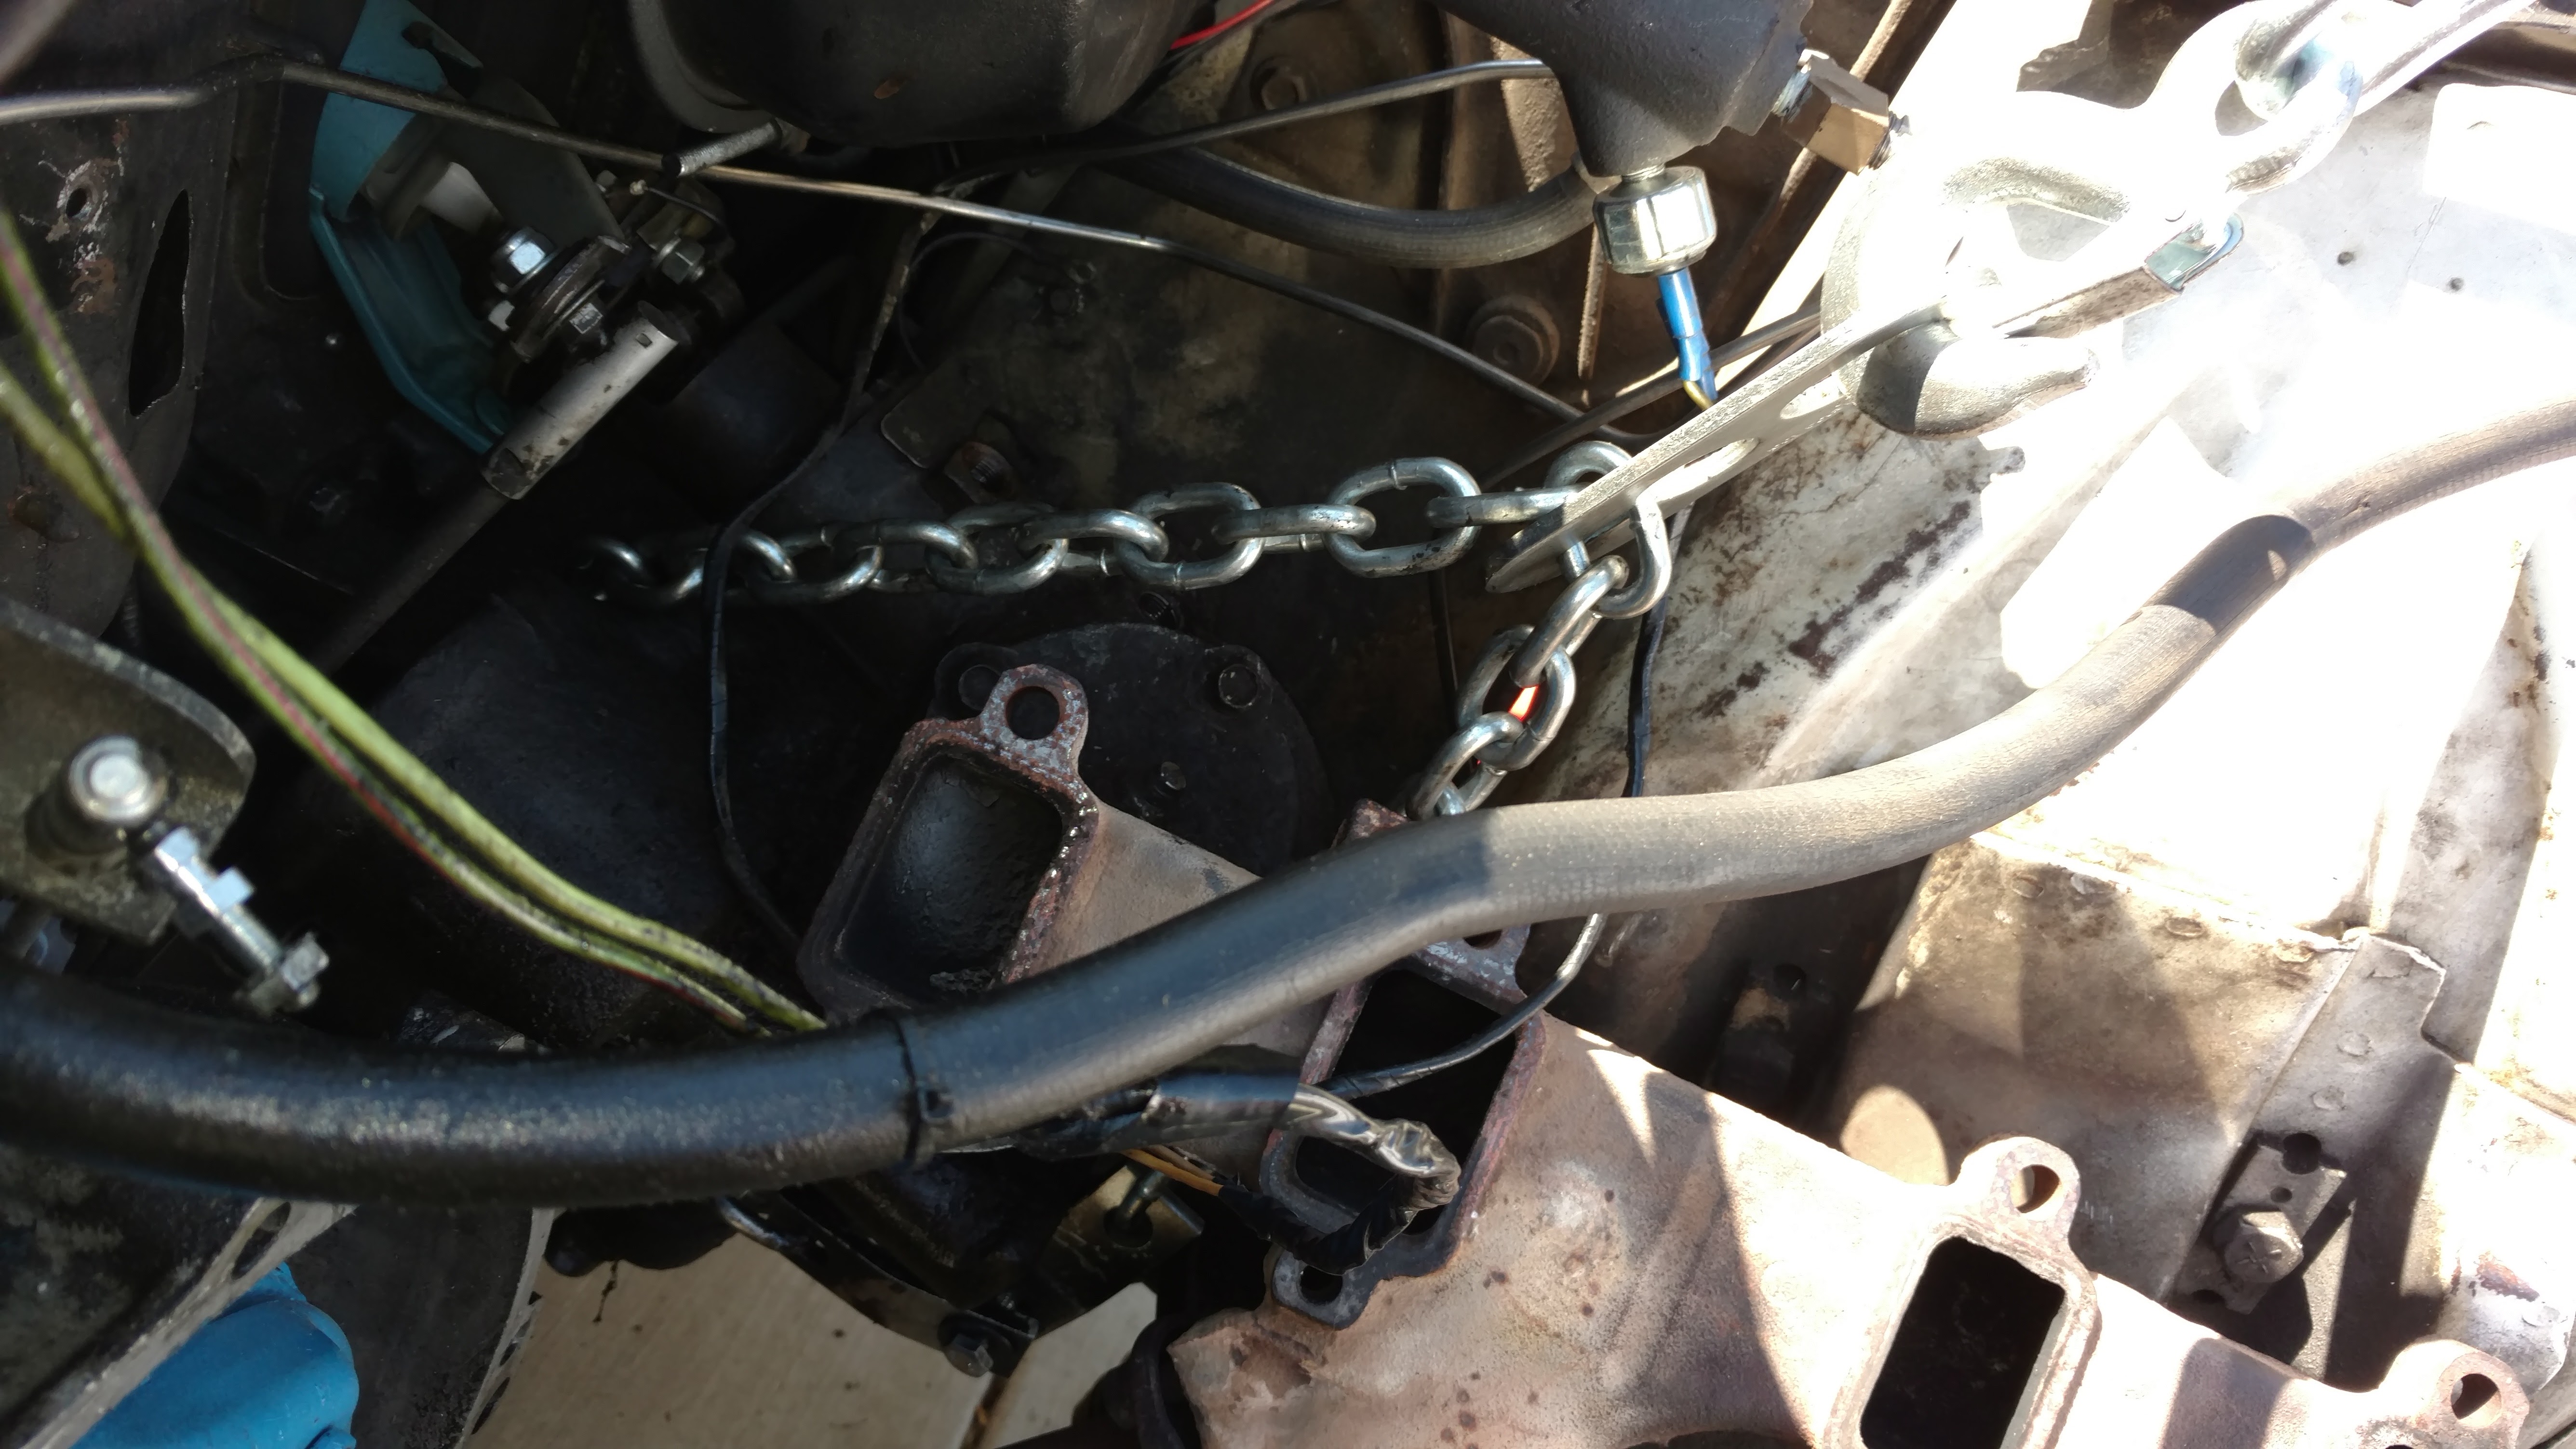
I thought at first that I could use a jack to lower the box when it was loose, but there’s no real flat surface on the bottom to rest the jack, and it appeared that the box needs to slide sideways a bit before it drops down. The darn thing is heavy and I didn’t want it falling to the ground, so I wrapped a chain around it and hooked it to my engine hoist, which worked pretty well: with the bolts out, I could lower the box a bit, maneuver it around obstacles, lower again, rinse and repeat.
It’s a long reach with the hoist back to the steering box, but this worked well.
When it got close to the ground I slipped the chain off and lowered it the rest of the way by hand, where it fell over a barfed up a few more ounces of fluid (of course!) I’ll be off to the rebuilders a little later this week.
As it turns out, I will likely leave the bottom end of the motor alone. I’ve had a chance to examine things more fully and discussed the engine with the owner of a local machine shop.
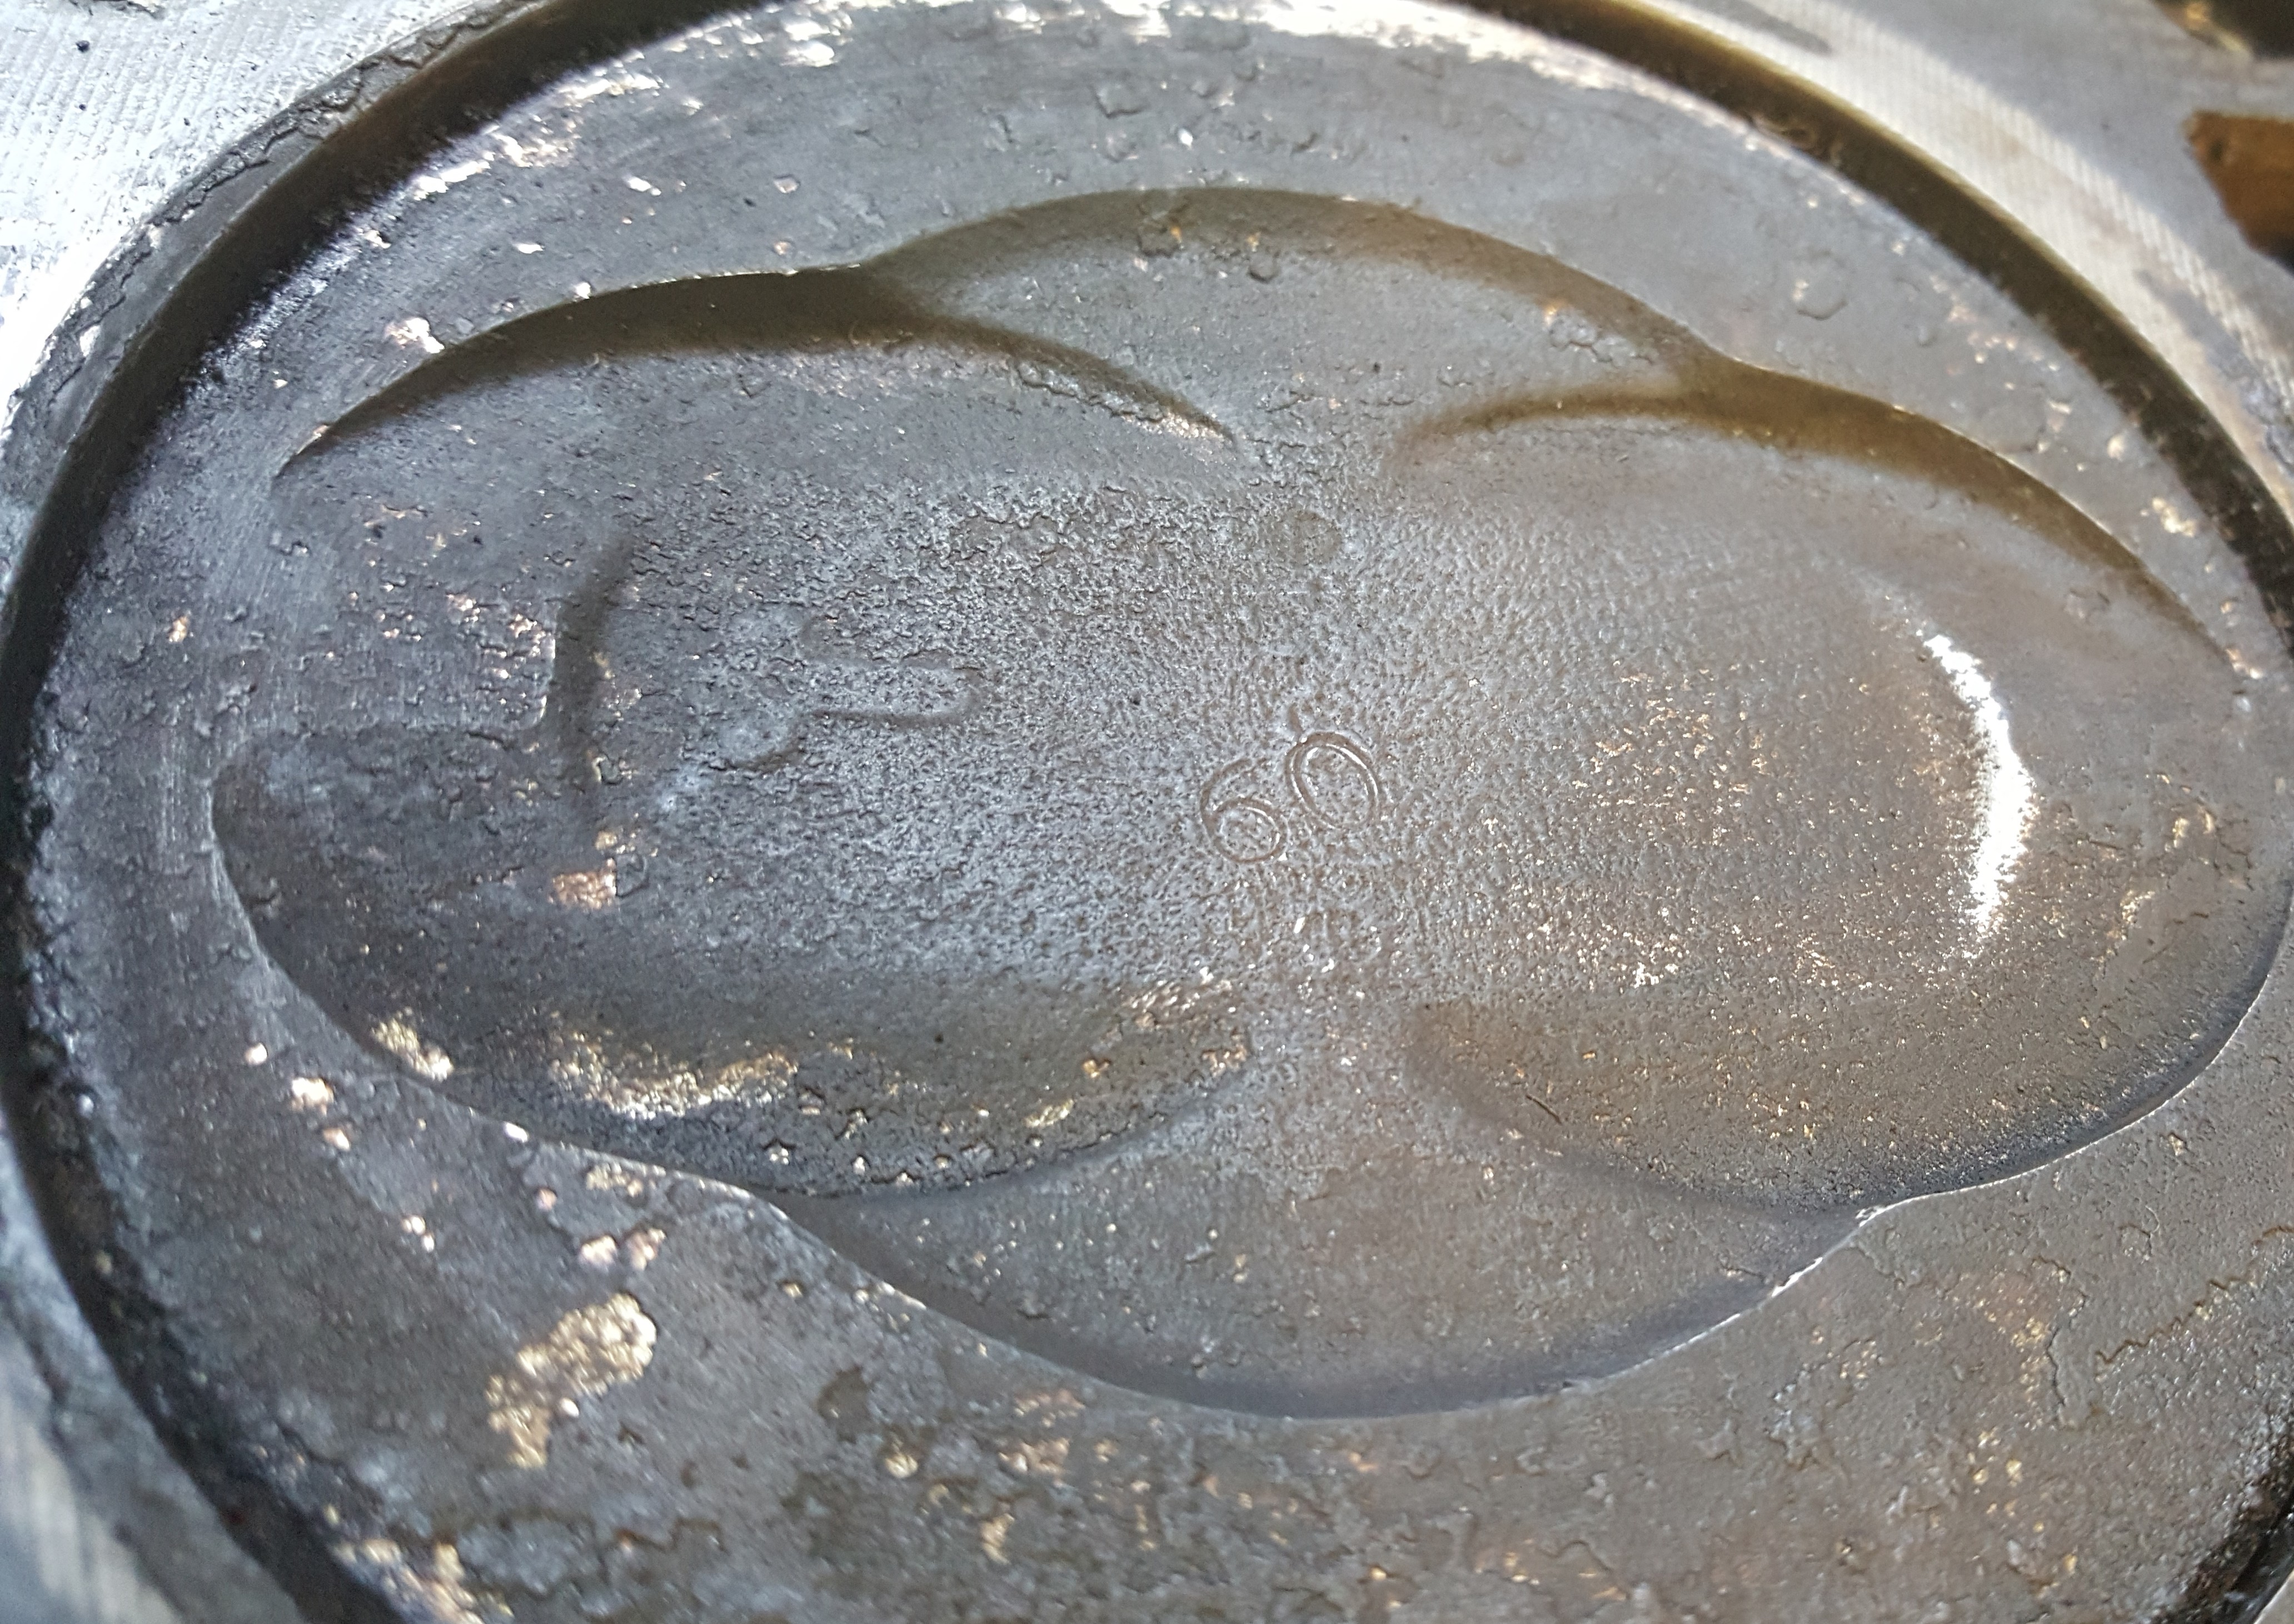
The 60-over piston
First, I saw that the pistons are marked “60over”, so the cylinders have been bored .060 inches oversized—as far as they can be taken. Likewise, the valve guides were simply bored out and replacement valves with oversized stems (now long since discontinued) were used. I have no doubt that the crank was turned down as far as it could go as well.
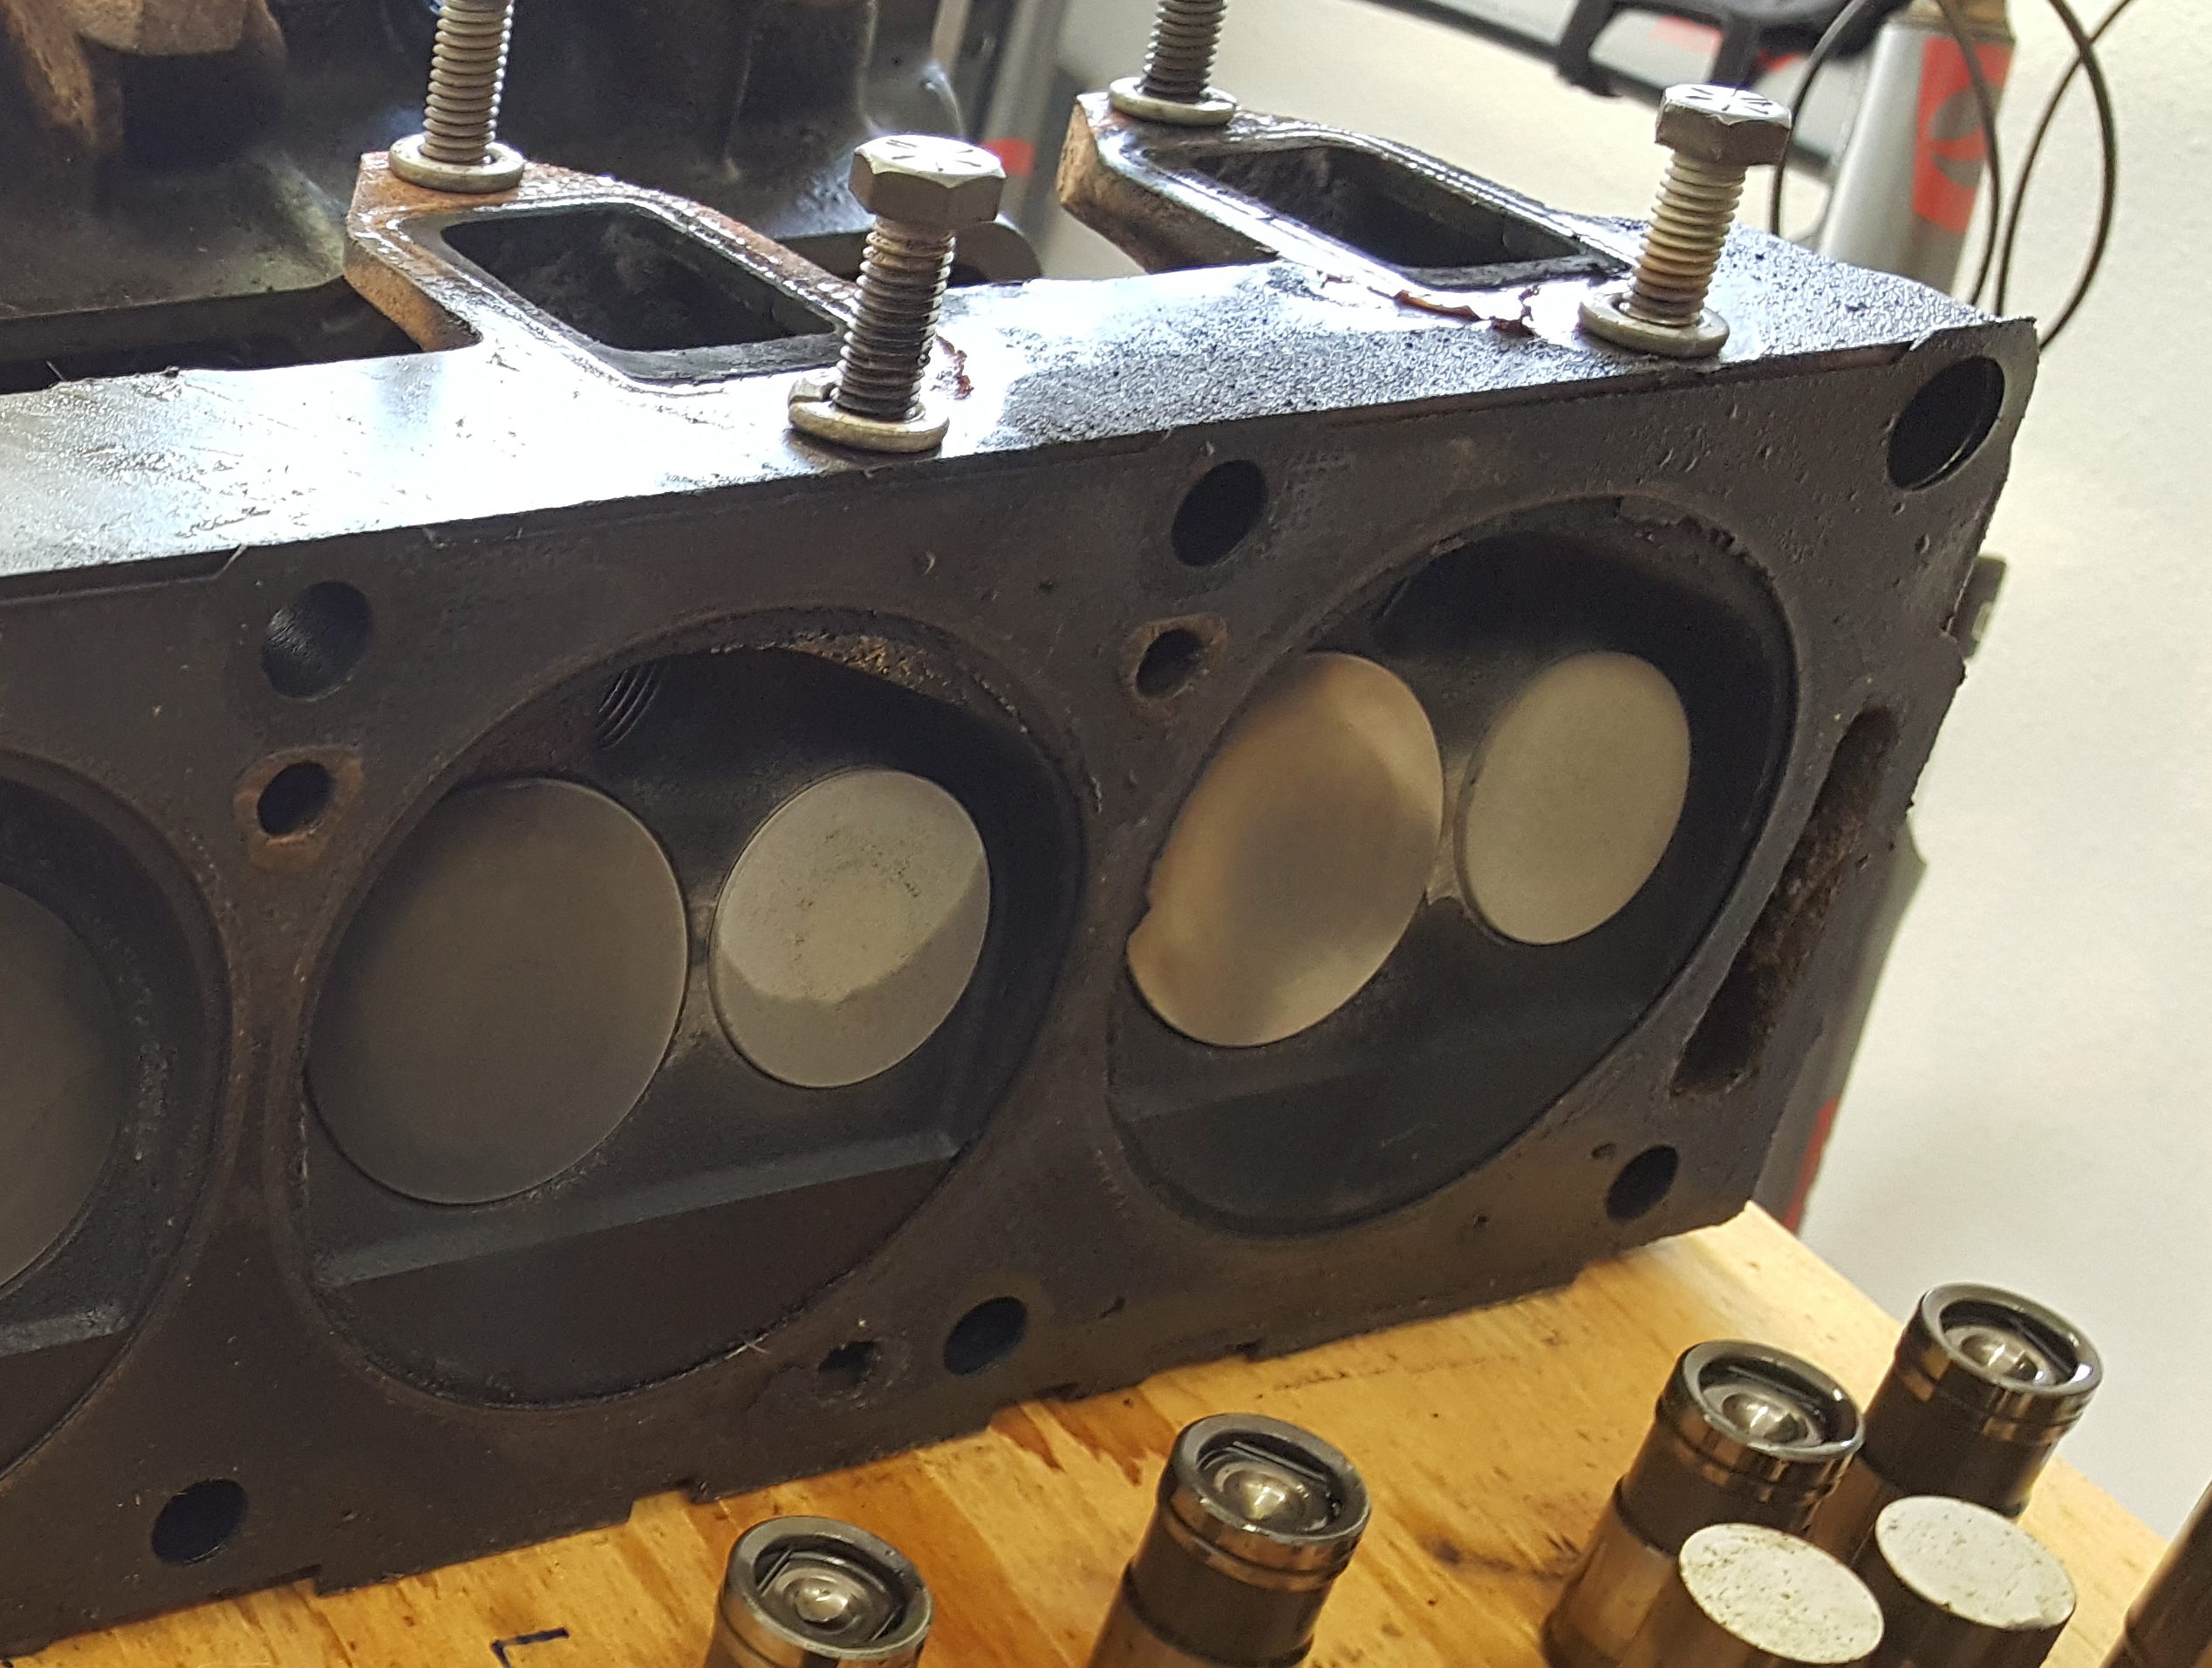
I took apart the valves on the suspect #8 cylinder and was happy to see that hardened seats had been installed.
I doubt that a valve job is absolutely necessary, since the engine was not using oil, but if it is, it will require new guides and new valves—pretty pricey. Likewise, once the cylinder walls are too far worn, sleeving and new pistons will be required. I think the only option for the crank, when the time comes, would be to find a new one.
What this adds up to, sadly, is an engine nearing the end of its service life It’s not there yet, though. With reconditioned heads, a new cam and proper maintenance, I can still get a number of good years out of this motor. However, there’s certainly no reason to pull it apart further right now.
I’ve spent some time this week pulling the 390 apart, a task that was not as easy as I expected.
Lifting the intake manifold.
I think the intake manifold is actually heavier than the heads. I had to use my hoist to break it free and lower it to the ground. The head bolts came free easily using a breaker bar. I also used the hoist to separate them from the block and lower them to the floor. (I know from my younger days that it’s a terrible feeling to drop one of these.)
Pulling the heads
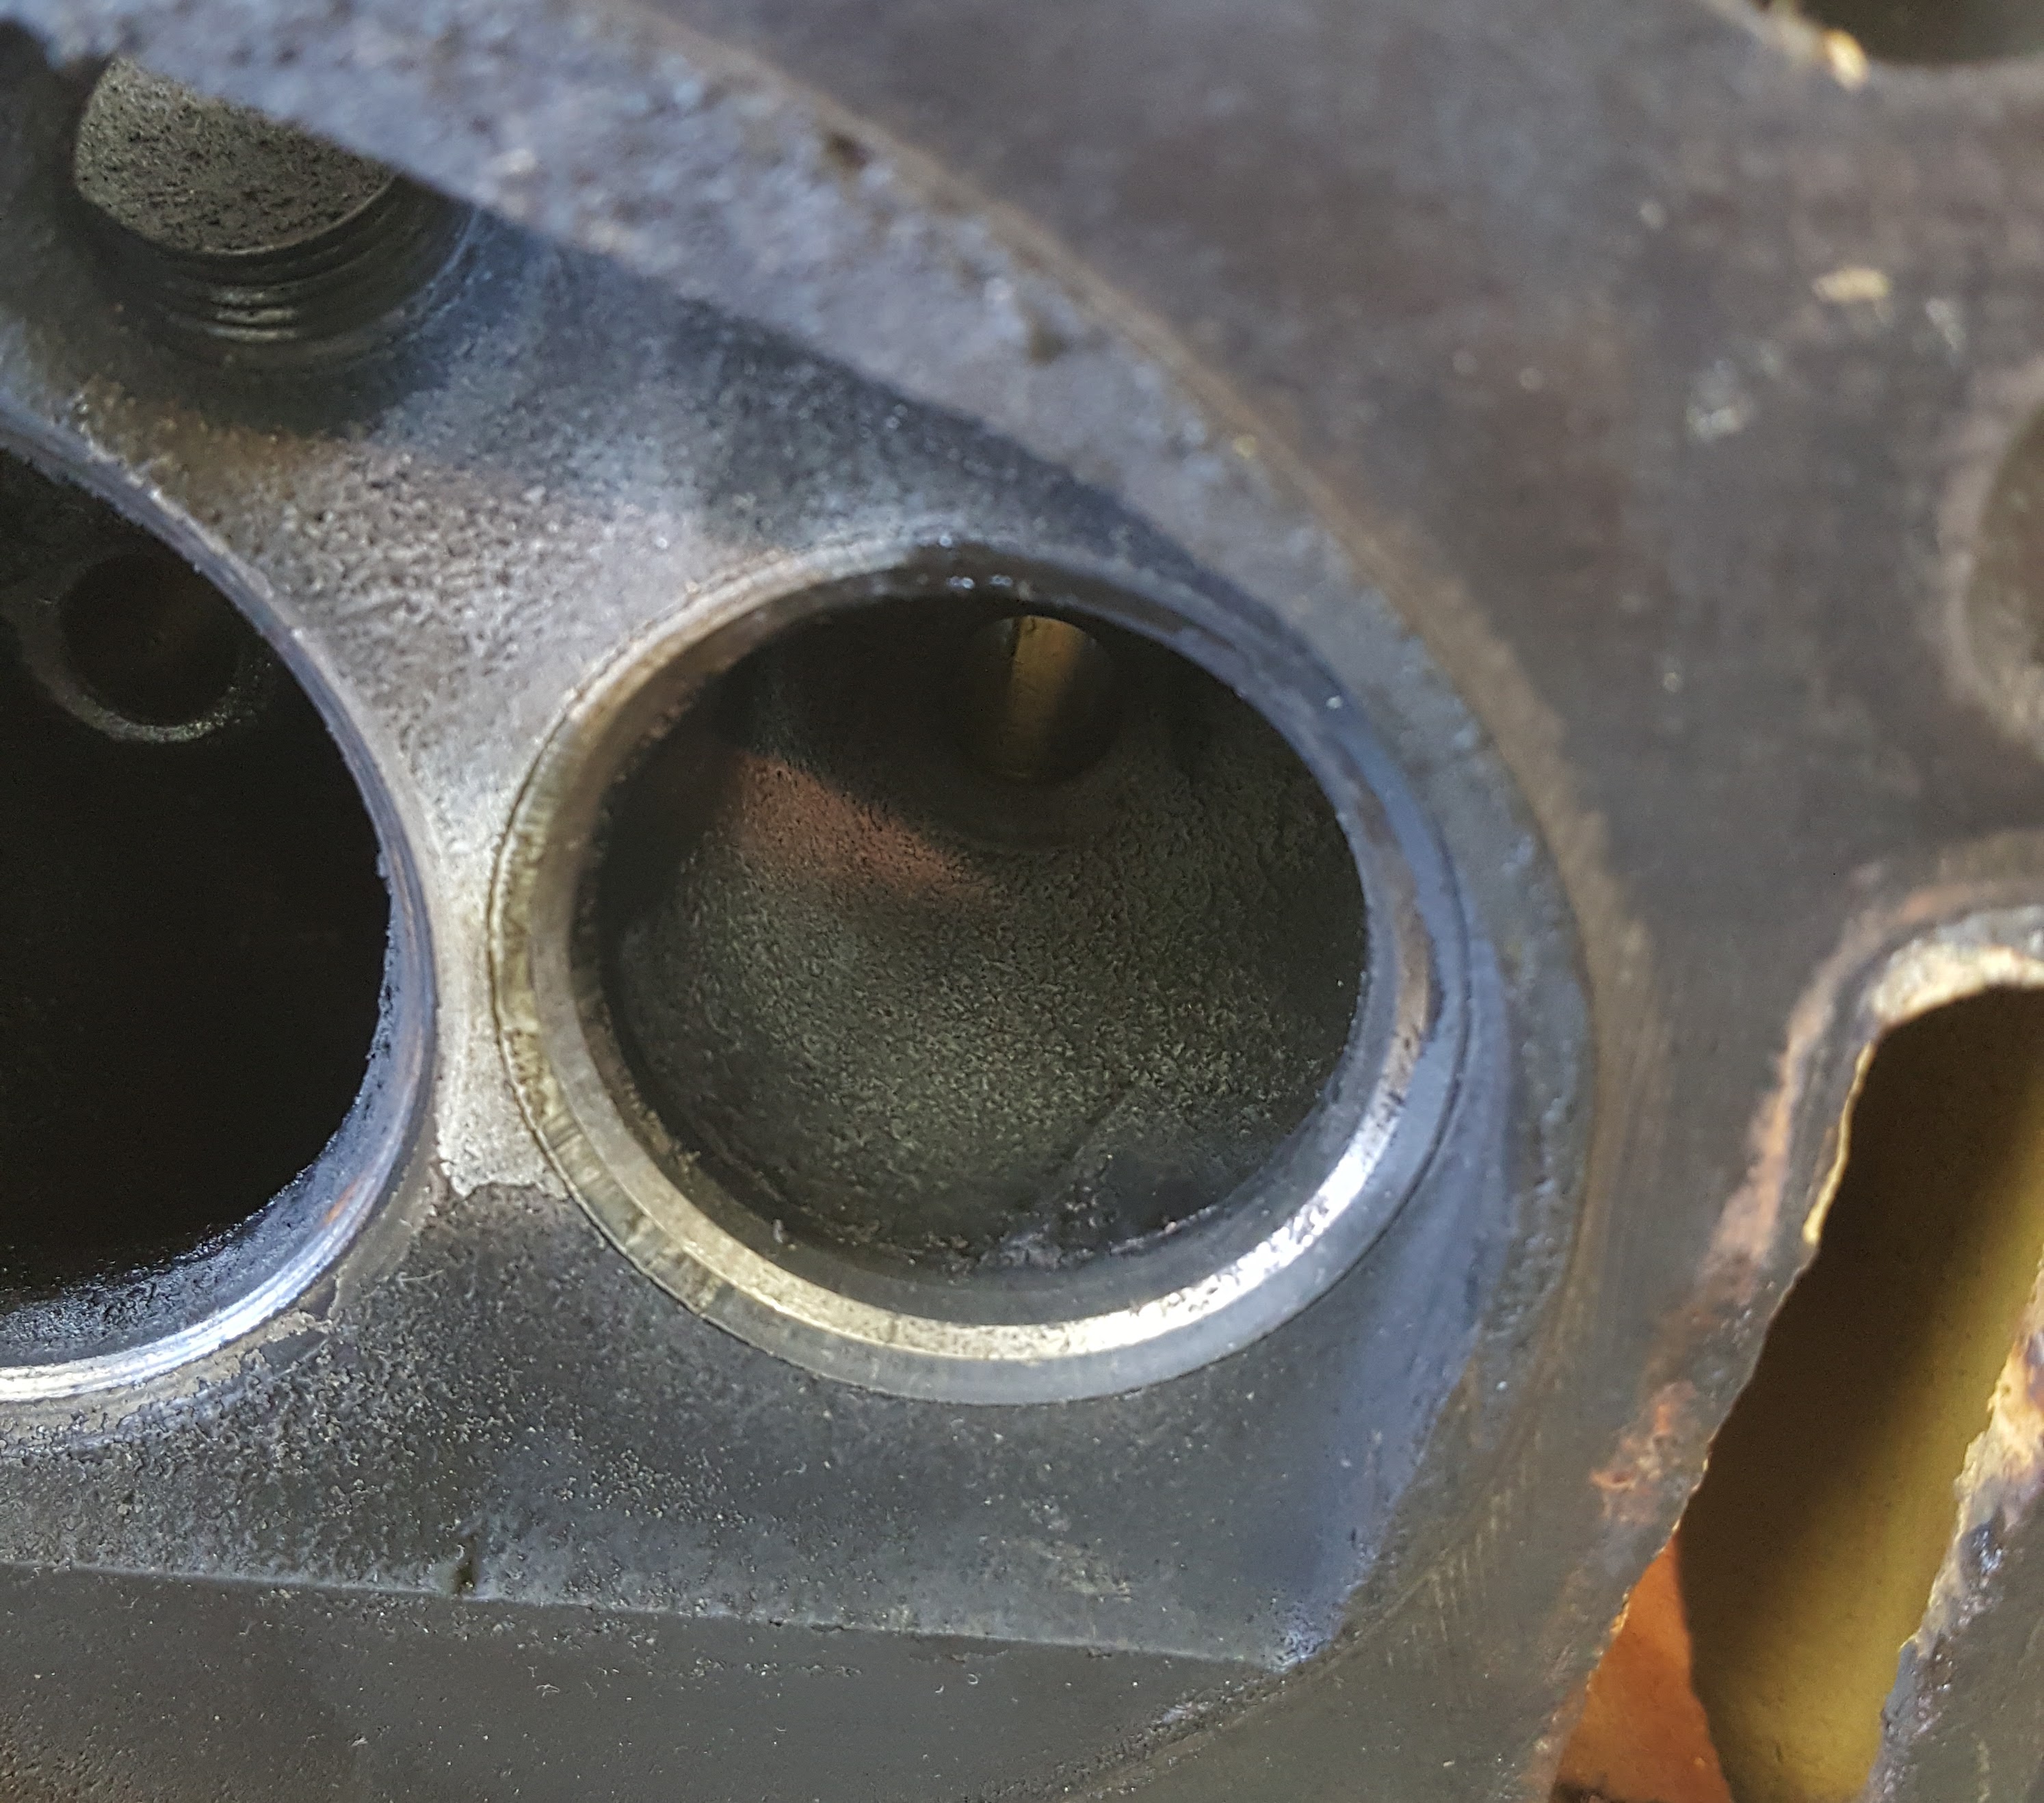
I discovered that the water jacket openings at the back of heads, by the #8 and #5 cylinders, were full of debris and completely blocked. Also, the intake valve in the #8 cylinder is discolored like an exhaust valve—yet another reason to suspect that it’s the source of the misfire.
All the cylinders look like the one on the left here, except #8, on the right. The large intake valve has the carbon burned off like the exhaust valve next to it.
It took a few days to get the harmonic balancer off. I couldn’t budge the bolt with just a breaker bar. I finally found time to pick up a piece of pipe I could slip over the bar to get more leverage. This is normally a terrible idea, since breaking the bolt or the tool is a strong possibility. In this case, I got lucky and the bolt groaned free.
Not sure why they decided to use screws to hold this on.
After that, it was pretty simple to get down to the thrust plate, which is held on with big phillips-head screws. I had to give these a tap with a hammer before I could turn them.
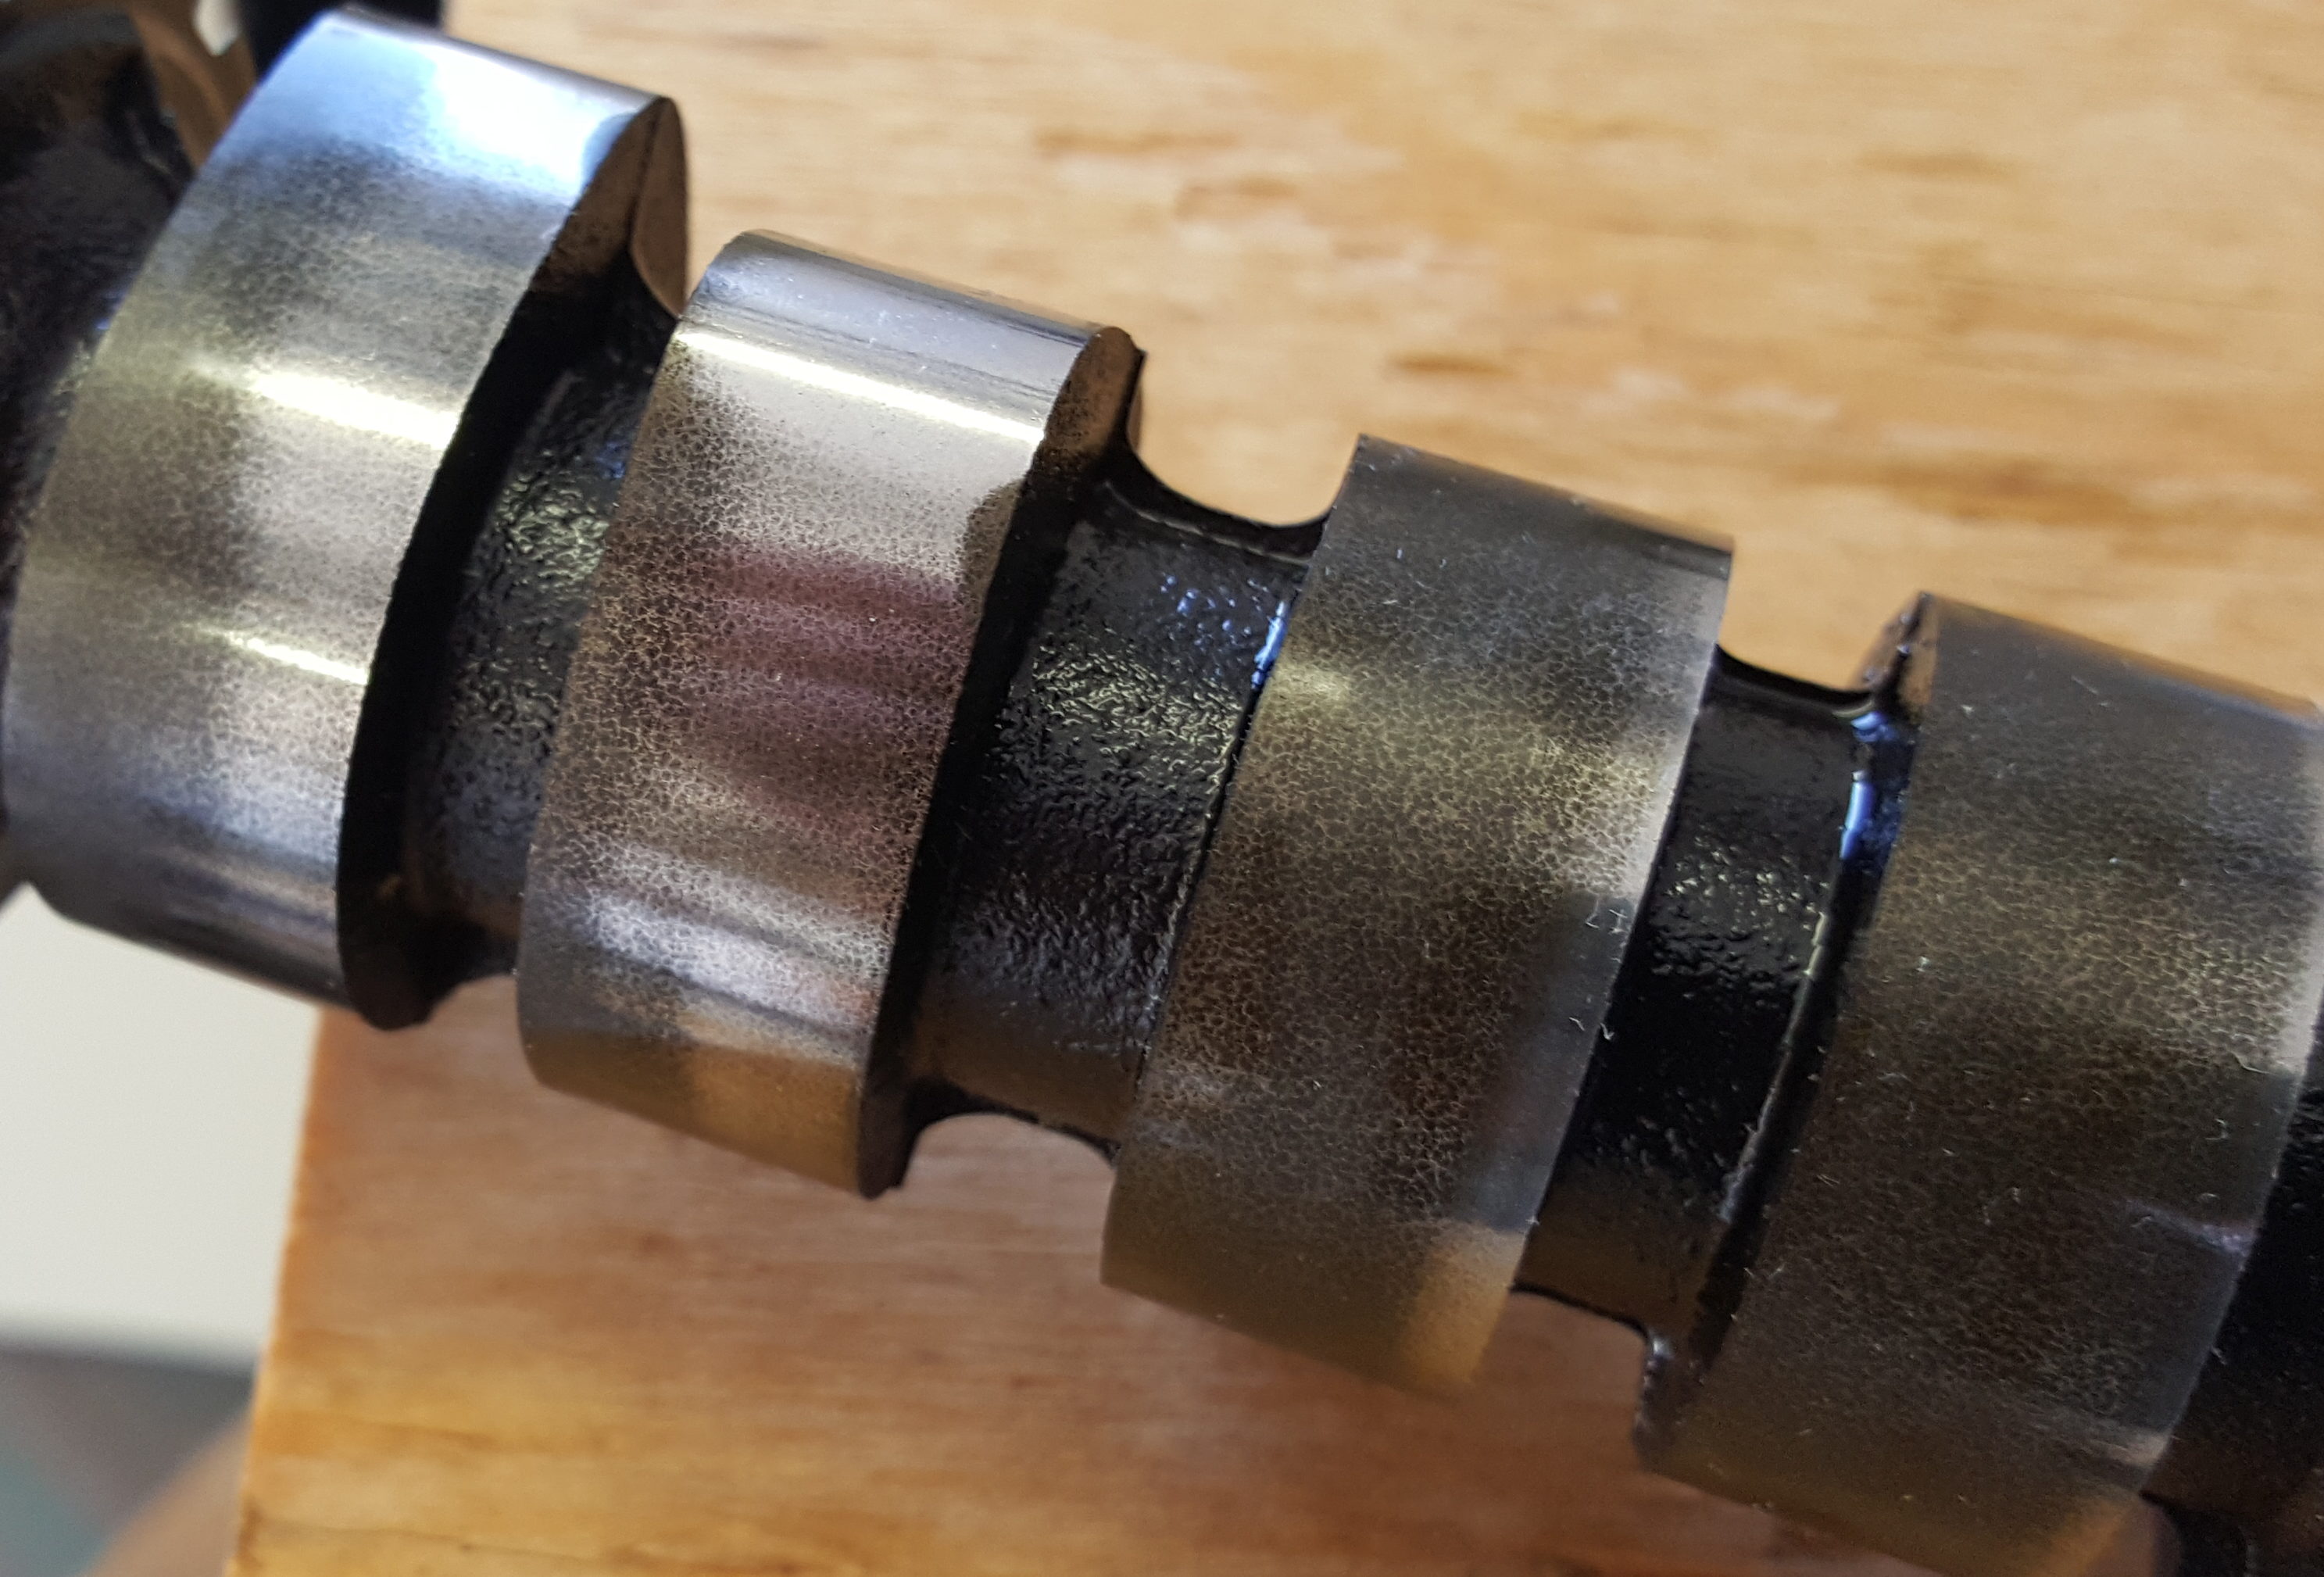
The discolored sections are corrosion and pitting.
Thrust plate off, I was able to remove the camshaft. I expected it to have some problems, especially down on the end where #8 lives, but it was pretty horrible along the whole length. There was corrosion, pitting, flat spots and uneven wear on every lobe.
Close up of the corrosion on the front of the cam.
I don’t exactly know how the condition of the cam relates to the misfire I was experiencing, but I do know that it needs to be replaced. It also looks like a lot of debris (rust?) has worn off the cam and has been circulating in the oil, so I’ll tear down the rest of the block so it can be thoroughly cleaned and inspected.
About half way–all the easy parts have been removed.
Last week I performed some thorough diagnostics on the motor: checked the vacuum, tweaked the tune on the carburetor, looked at the timing, etc. In the end, the high rpm hot misfire persisted—maybe even got a little worse, as I managed to coax a backfire during one test run.
While I’m not 100% convinced it’s an internal engine issue, I strongly suspect it. (It’s unlikely, but it could still be an ignition issue in the distributor or plug wires.) Digging deeper, I pulled the valve covers and the rocker arm assemblies. There were no bent pushrods and nothing looked terribly amiss at this level, except perhaps an odd wear pattern on the rocker for the #8 exhaust valve. That cylinder was also the low outlier when I did a compression test some years back.
A little corrosion, but otherwise nominal.
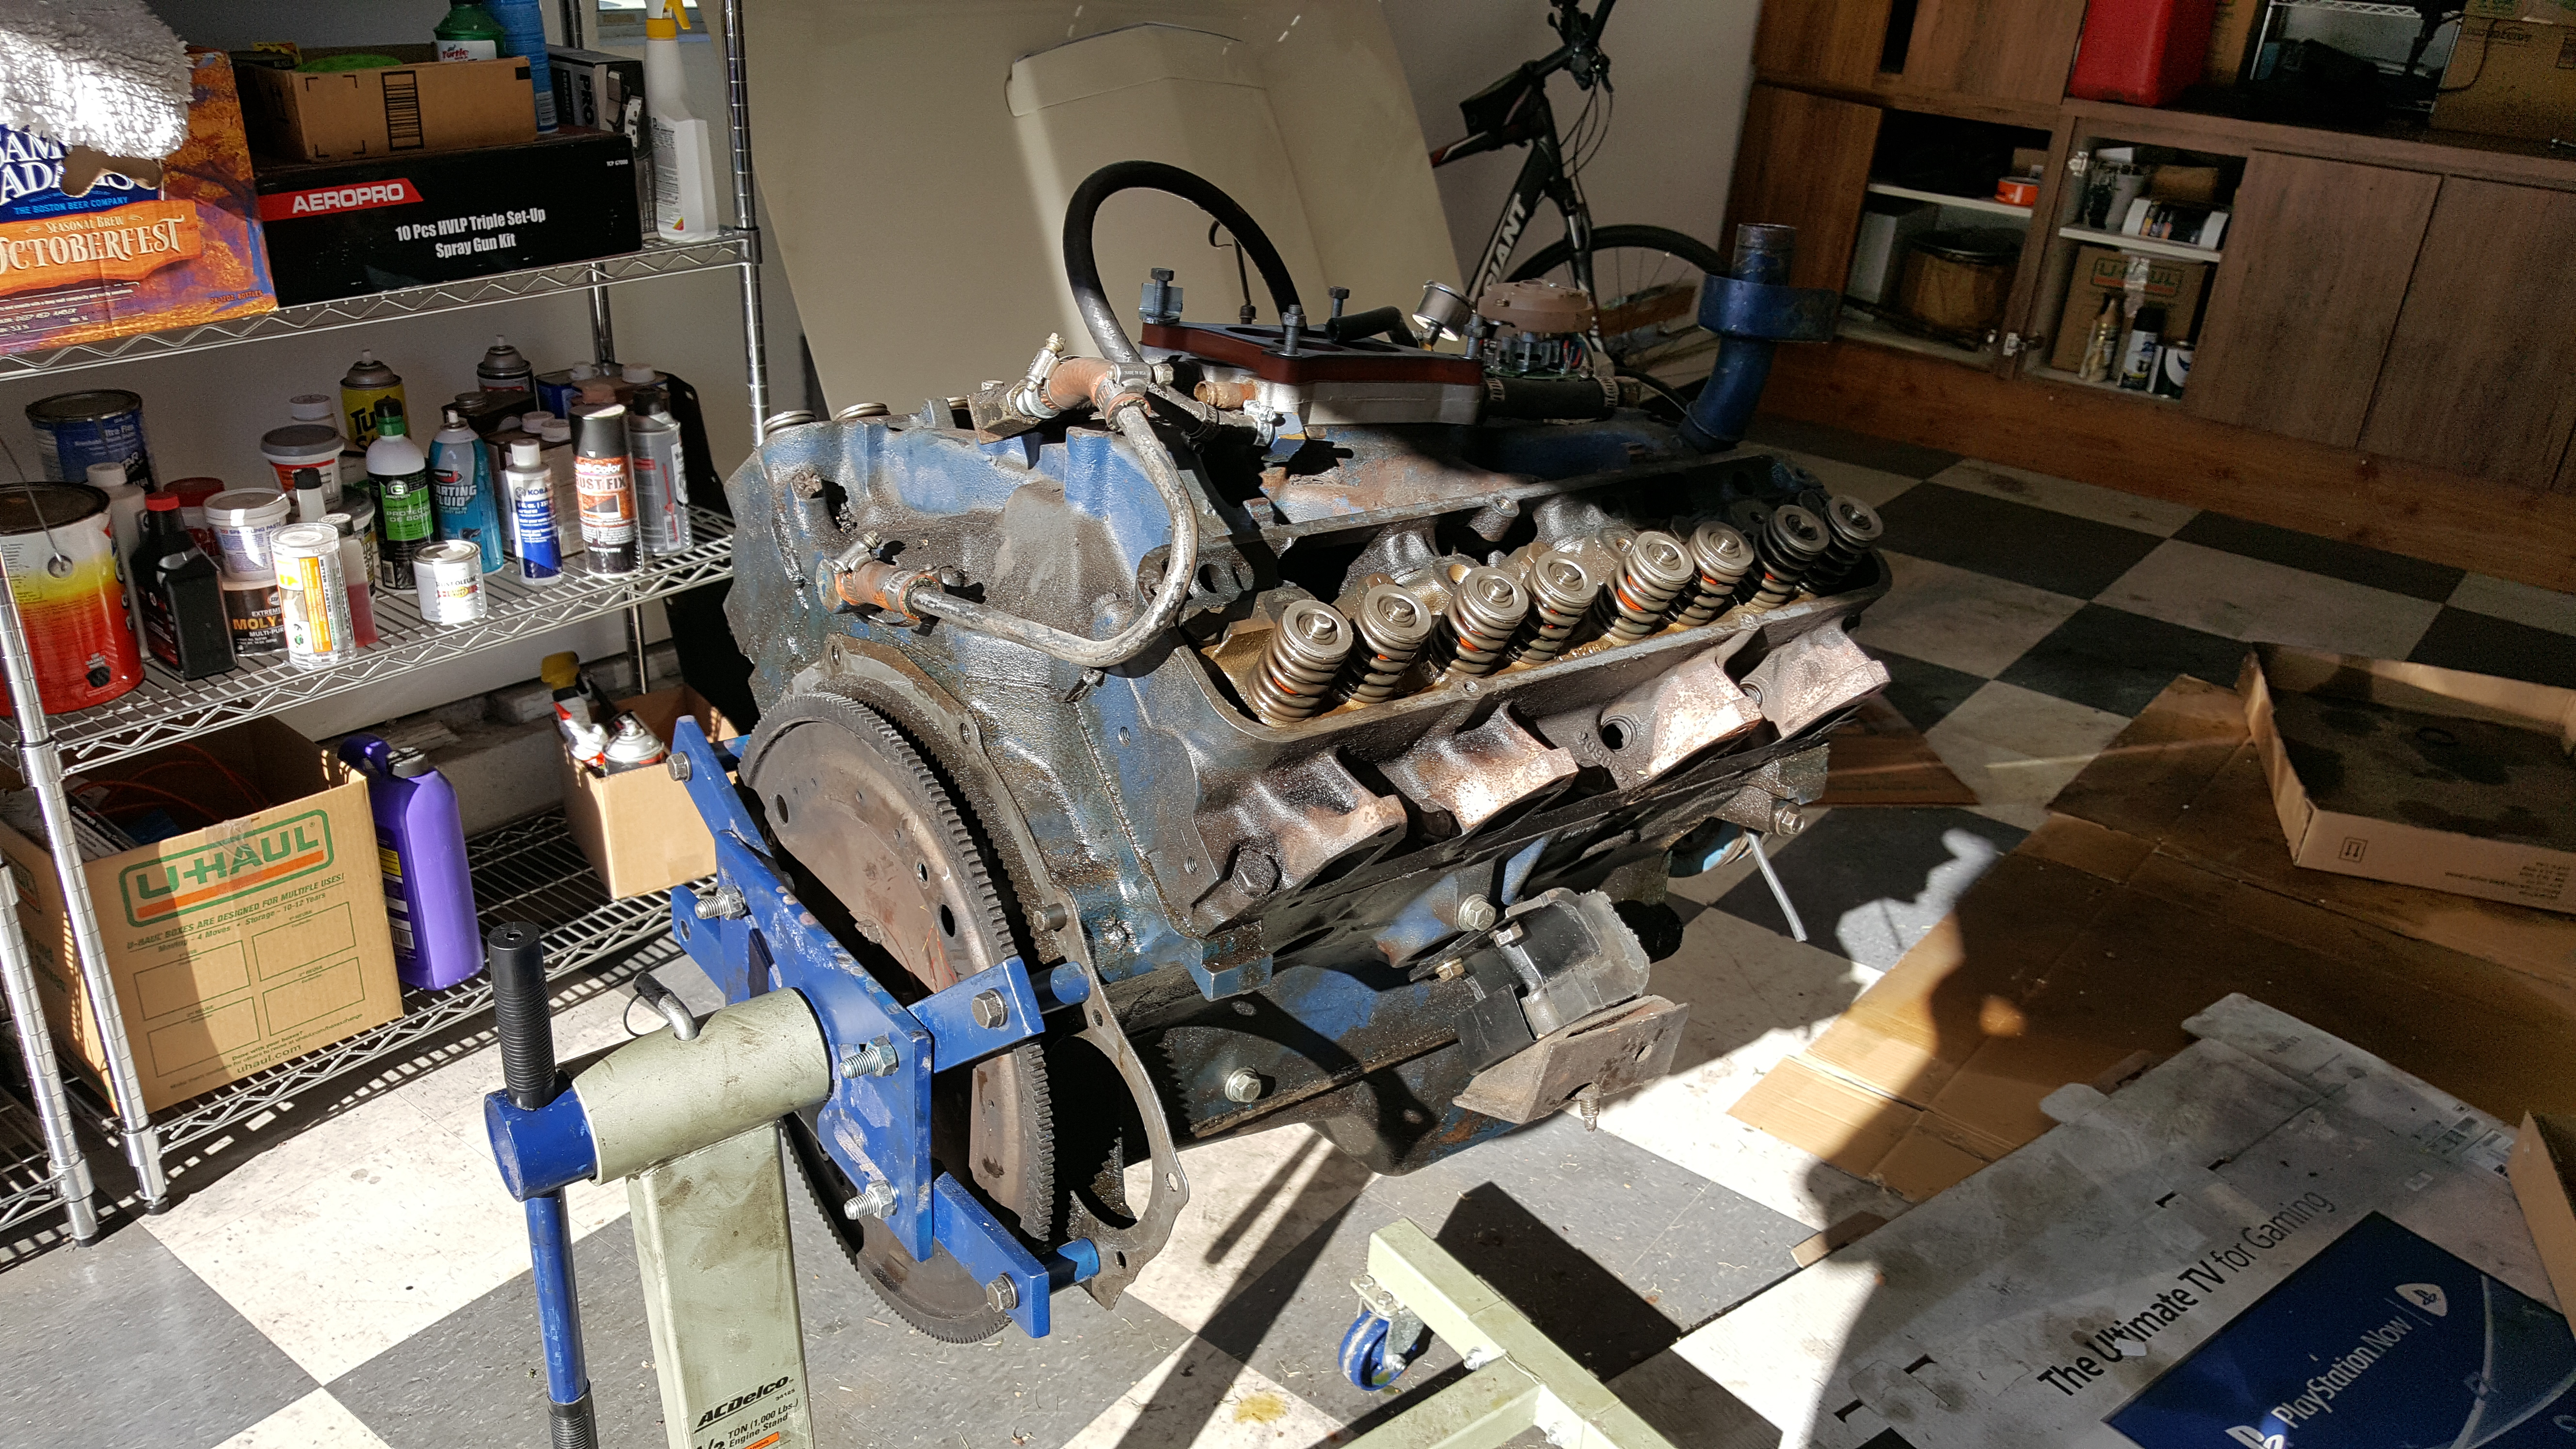
The diagnostic flowchart goes down the rabbit hole at this point, but one strong possibility is an out-of-spec camshaft. So, with help from my son, the engine came out of the car yesterday.
I’ve pulled engines from at least 5-6 cars over the years, and each one of them has been a challenge in some way. The tight fit in the Thunderbird engine compartment had me relying on every bit of that experience. (And I gained even more in this evolution.)
The FE is heavy; right at the limits of my engine stand.
Getting the hood and accessories off was routine, and with the radiator out, the front of the engine is remarkably easy to access. Likewise when the hood came off things like the throttle arm and bellhousing bolts—notoriously difficult to reach—were right there for the taking.
Underneath, the exhaust flange bolts are buried in deep, greasy recesses, and even though these had been removed a few years back when the transmission came out, they were completely frozen. I ended up removing the 16 exhaust manifold bolts instead. (Many were, surprisingly, only finger tight! I guess the exhaust guy I used doesn’t believe in lockwashers).
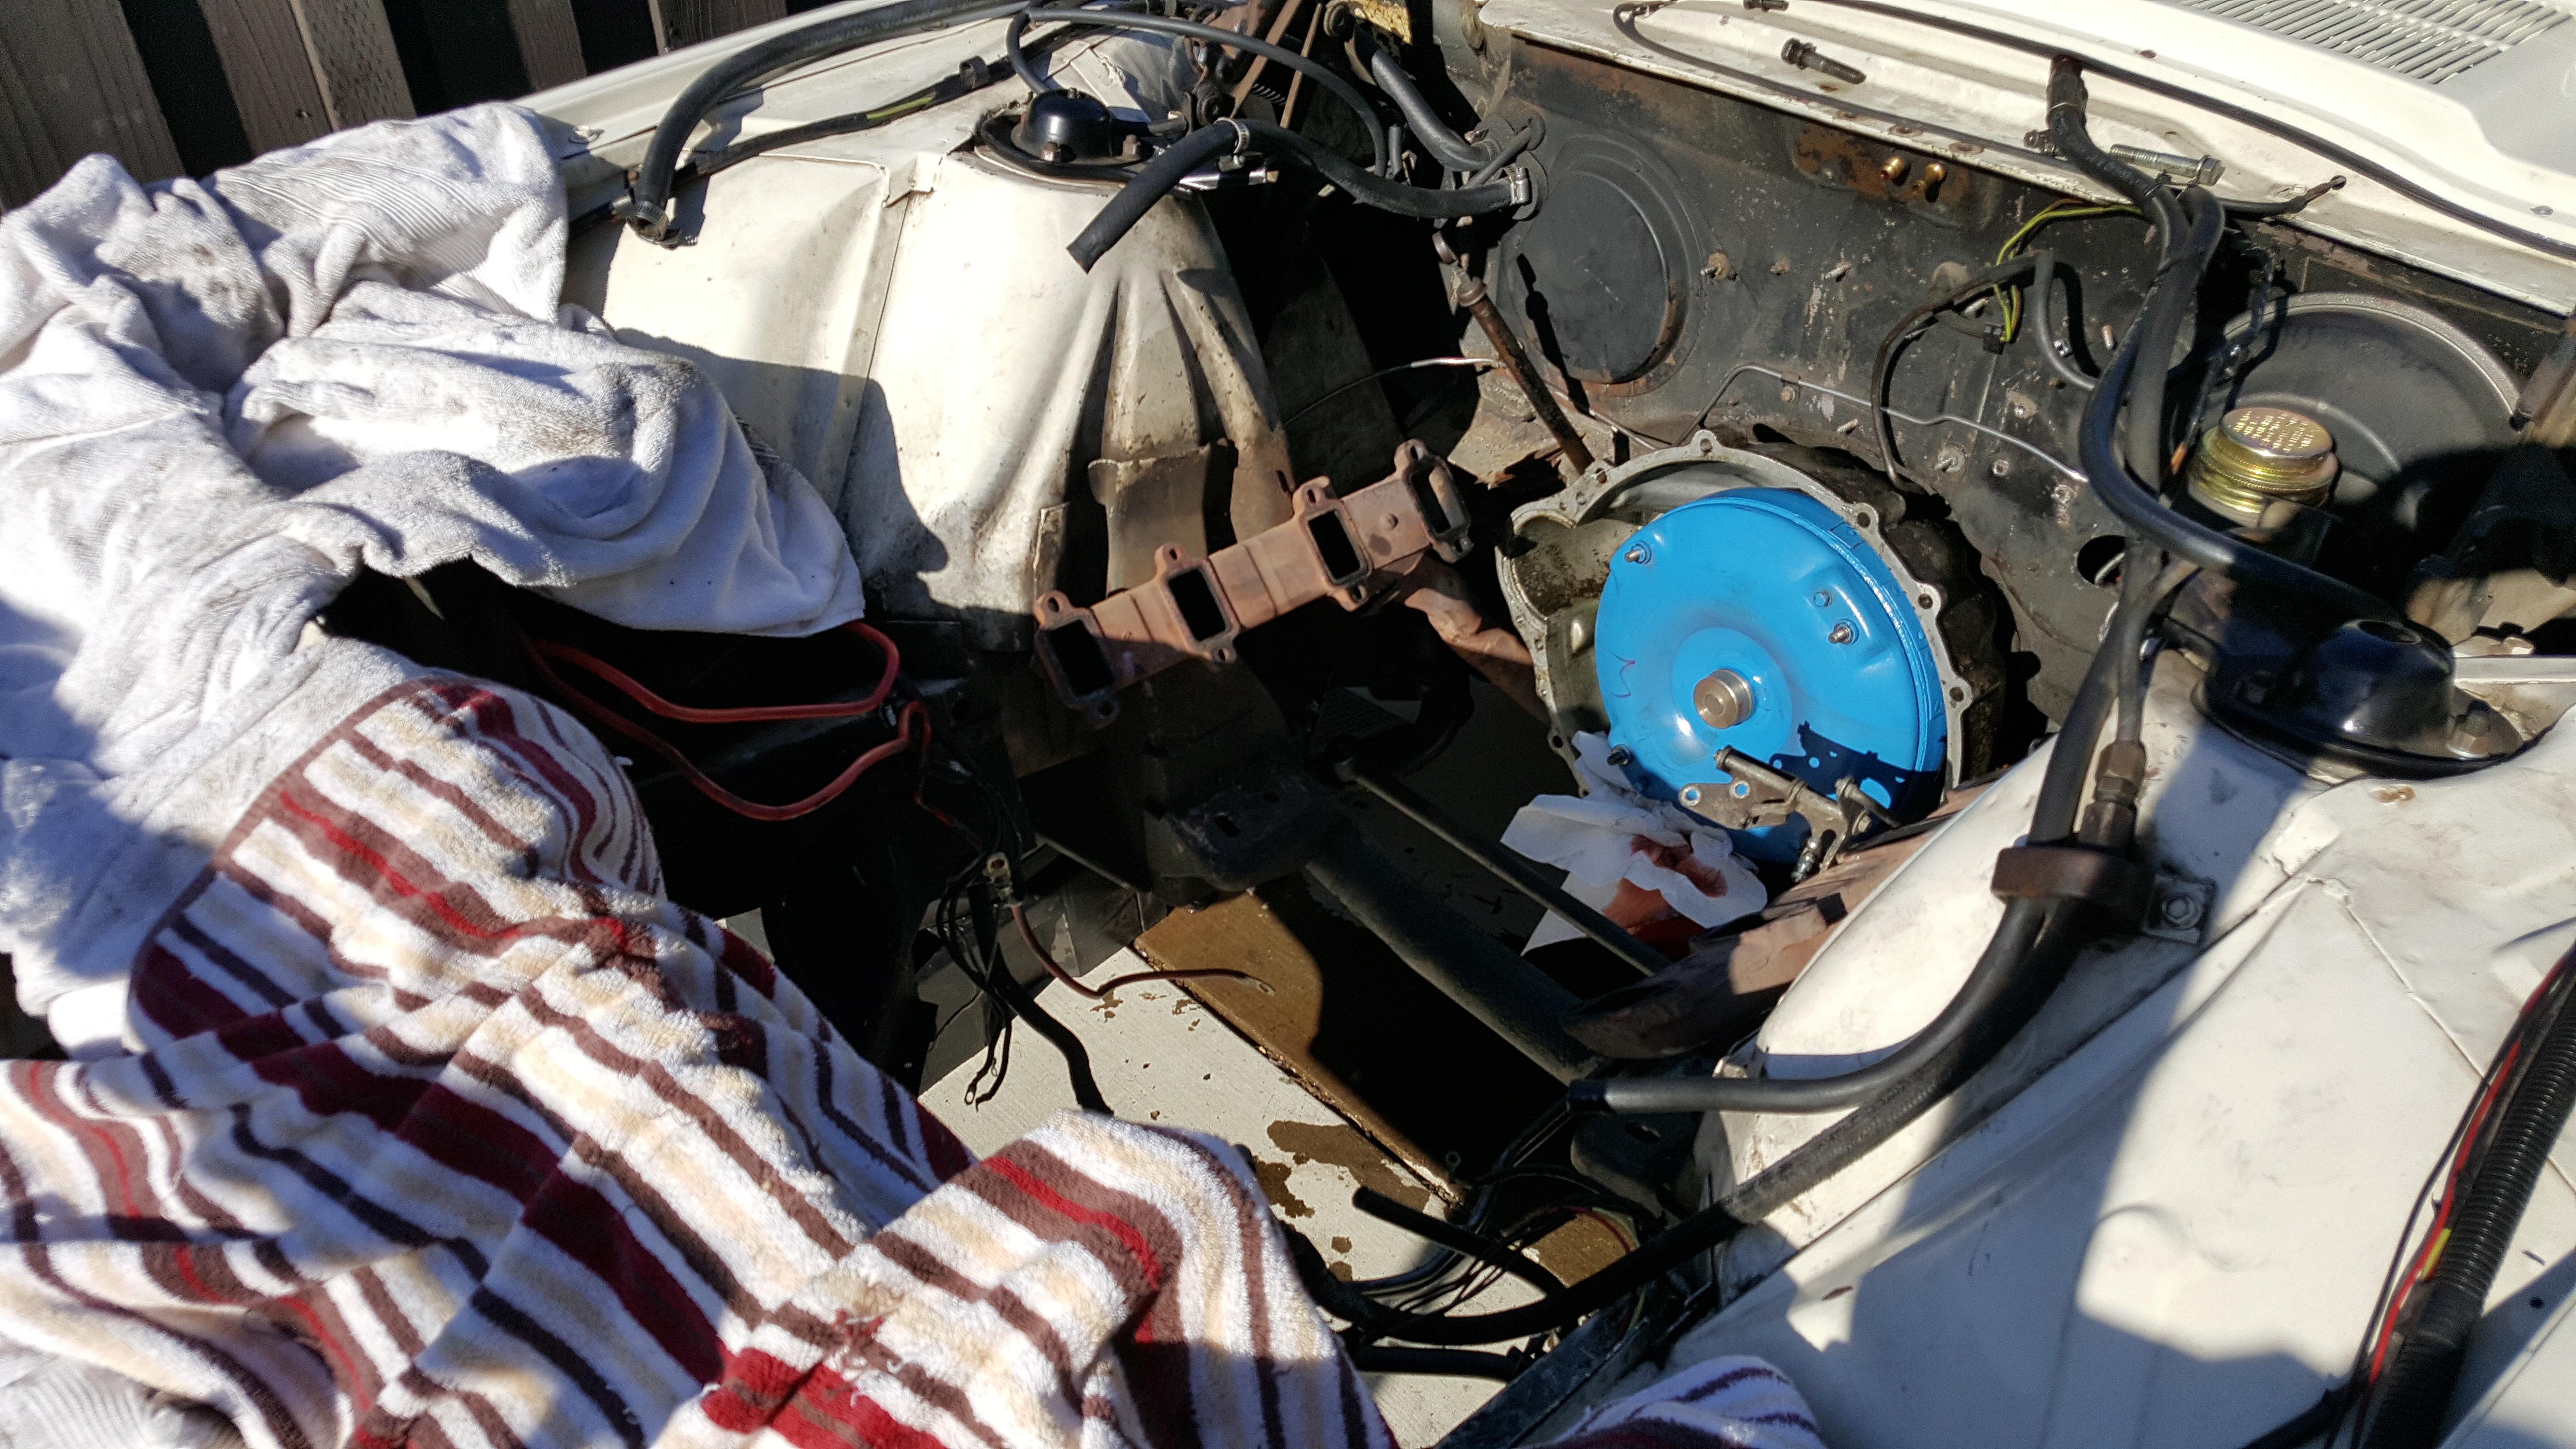
Lots of cleanup to do here. At this point, the fluid leaking from the transmission is just a trickle.
While lifting the motor, we got hung up on the transmission cooler lines (hate those things, but no damage done) and the motor mounts snagged on the now free-floating (but unremovable) exhaust manifolds. After some head-scratching, we worked it free and the lift had just enough height to clear the radiator support. (The car being up on ramps to facilitate work underneath.)
There’s a paradox to the engine removal in the T-Bird. The motor has to come up a few inches to clear the motor mount studs, but it has to come forward an inch or so at the same time in order to clear the studs on the torque converter. It’s difficult to do both at once. In my case, the converter came partway with the motor and some 4 quarts of transmission fluid poured out the bellhousing until I pushed it back in. I’m not sure if that’s normal on a COM transmission or if I mucked up the front transmission seal.
In any event, with the lifting out of the way, the real work is just beginning.
I’ve got a few miles under my belt with the new rear spring bushings and a new fuel pump. The springs ride fine, but I’ve only noticed minor improvements to ride quality. I’ve still got a bit of noise in the rear, too, so I will likely be looking to replace the springs at some point in the future.
I haven’t been paying much attention to the ride, though, as I’ve still got some—potentially serious—issues under the hood.
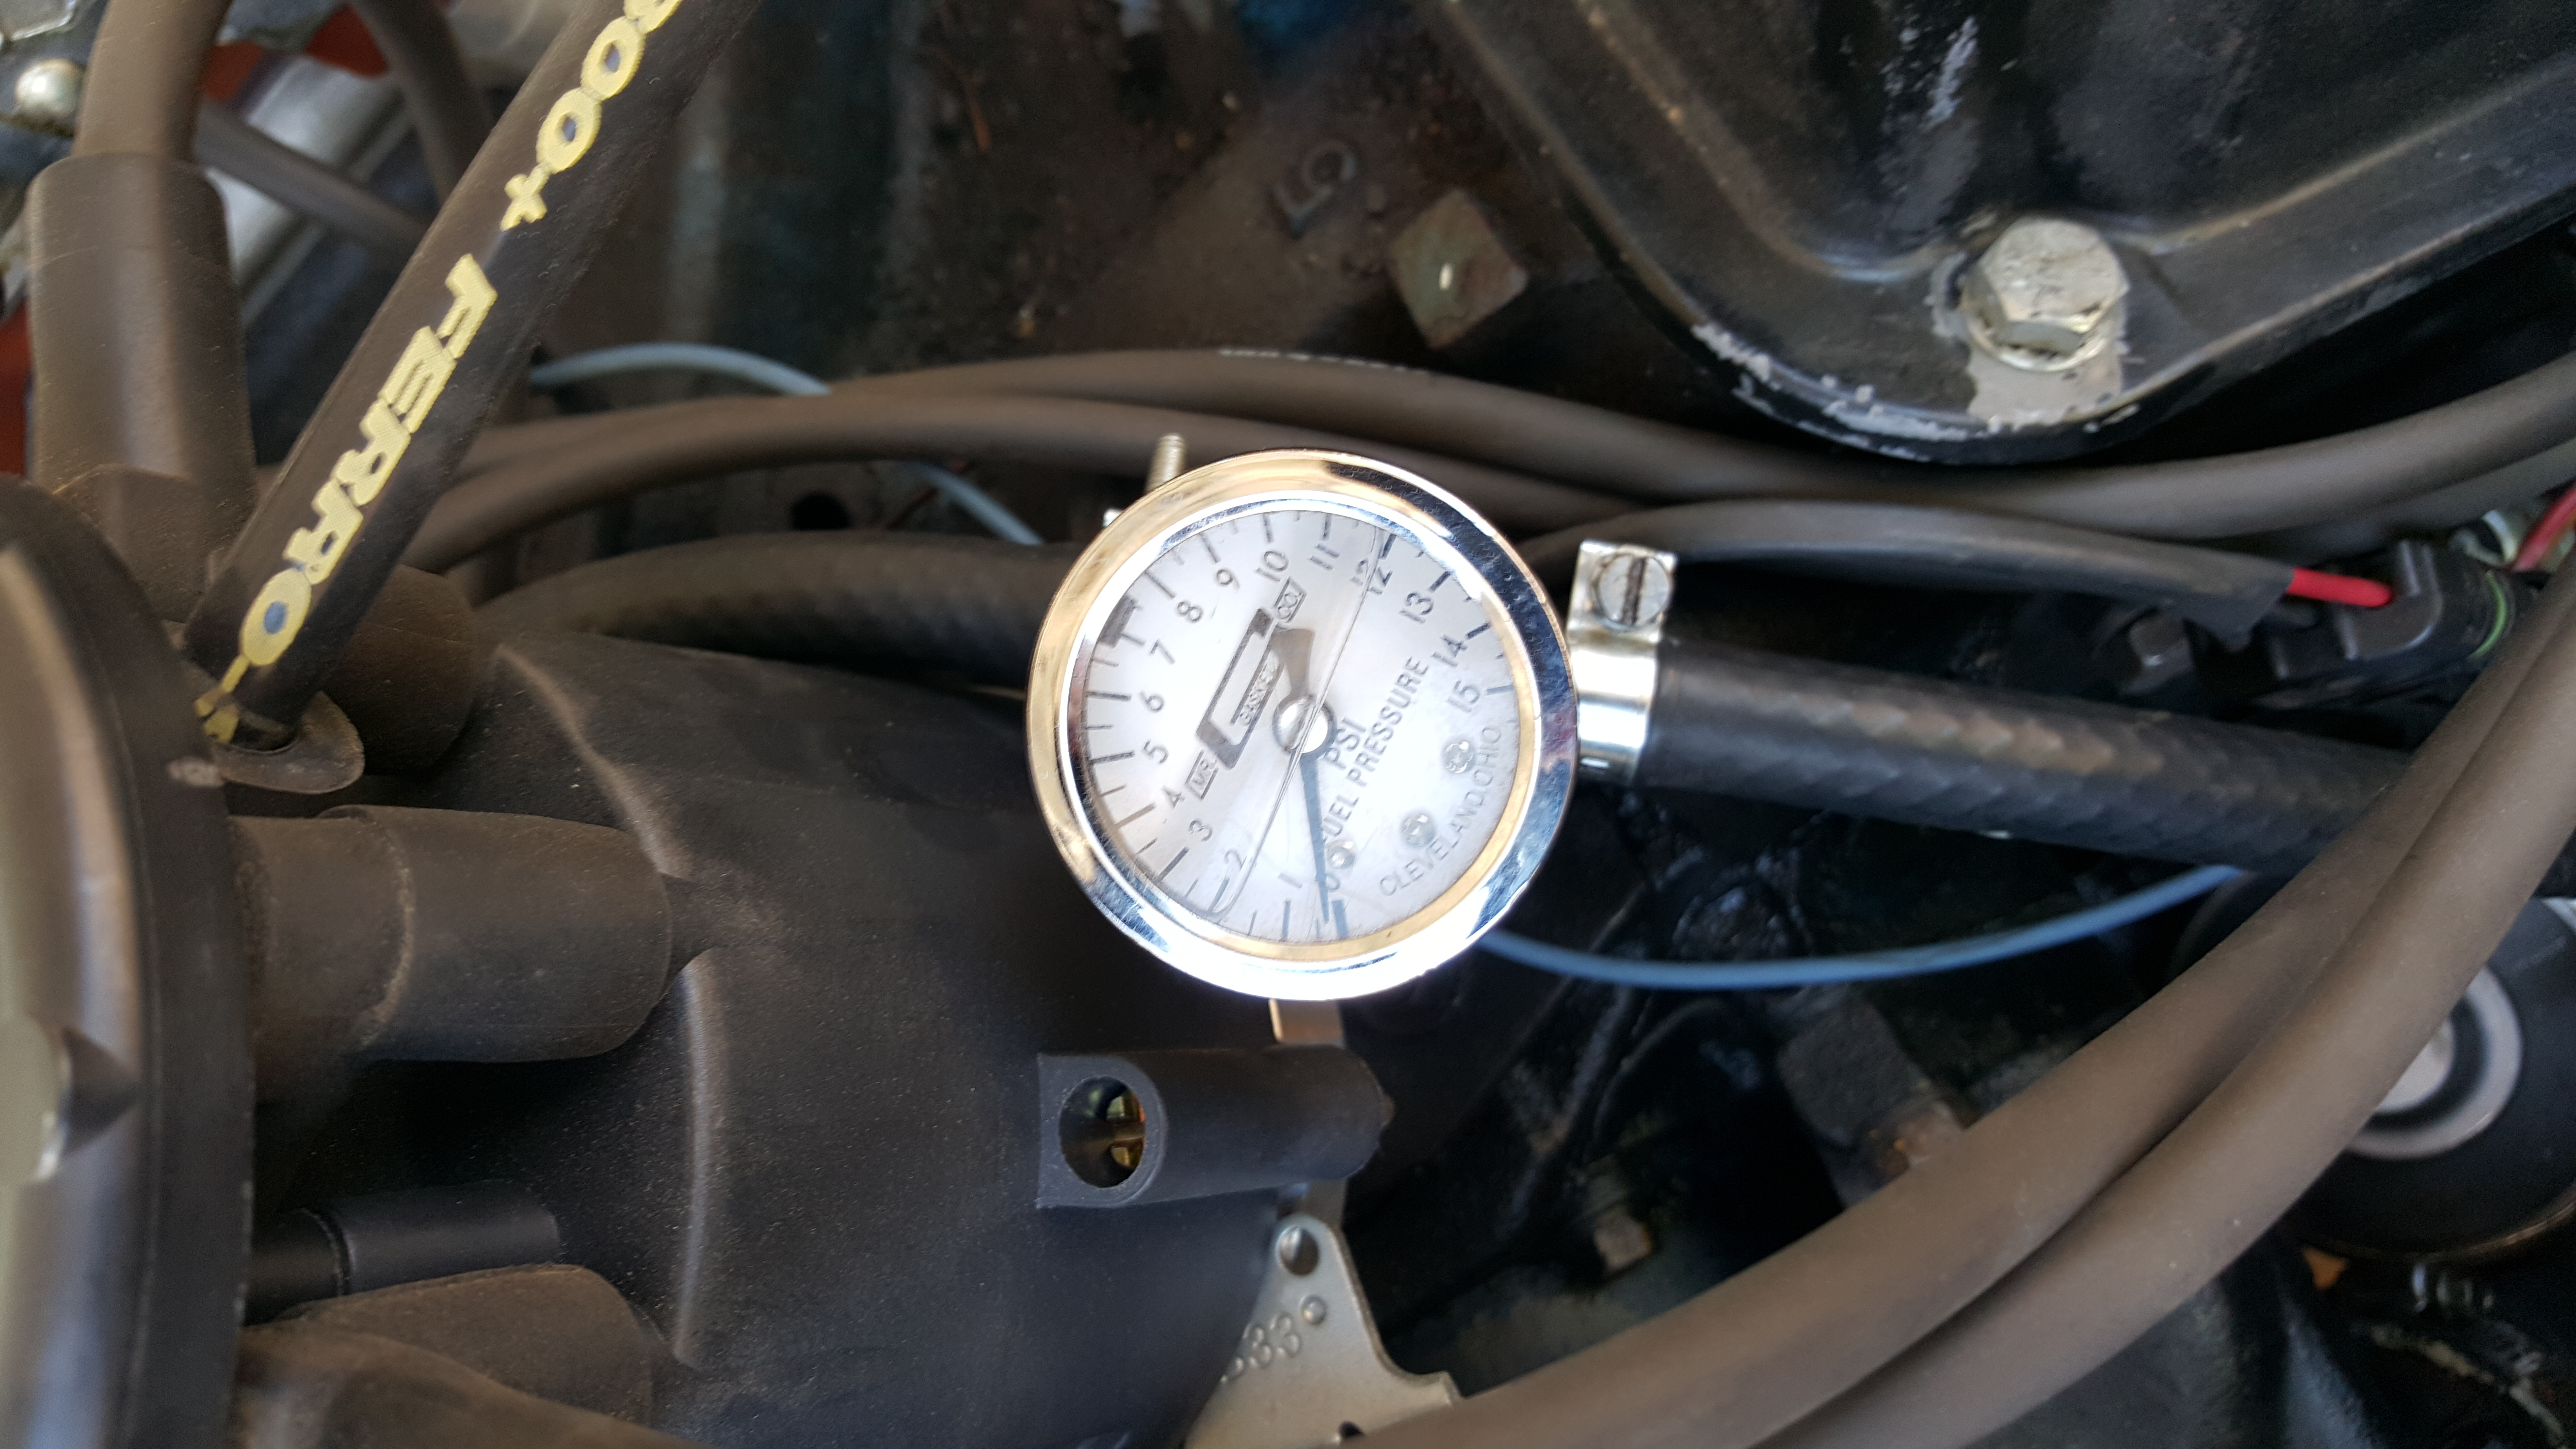
The new fuel pump didn’t resolve the fuel pressure issue. Suspecting a clog in the filter at the pickup in the tank, I crawled underneath and pulled the sender from the tank. The filter, which I’m pretty sure was there when I installed the unit, was no longer attached. So, it fell off at some point or it got knocked off when the sender came out of the tank. In either case, the only result from this evolution is that the sender no longer works. Ug.
After running a few minutes with the new pump, fuel pressure dropped down to near zero at idle.
The only other possible fuel restriction I could think of was the rubber line to the pump. I put a clamp on this line while the pump was off the motor to prevent fuel leaks in my garage. Assuming that the clamp permanently deformed the line, I replaced that too. Whatever the restriction was, it’s now gone and fuel pressure is nominal.
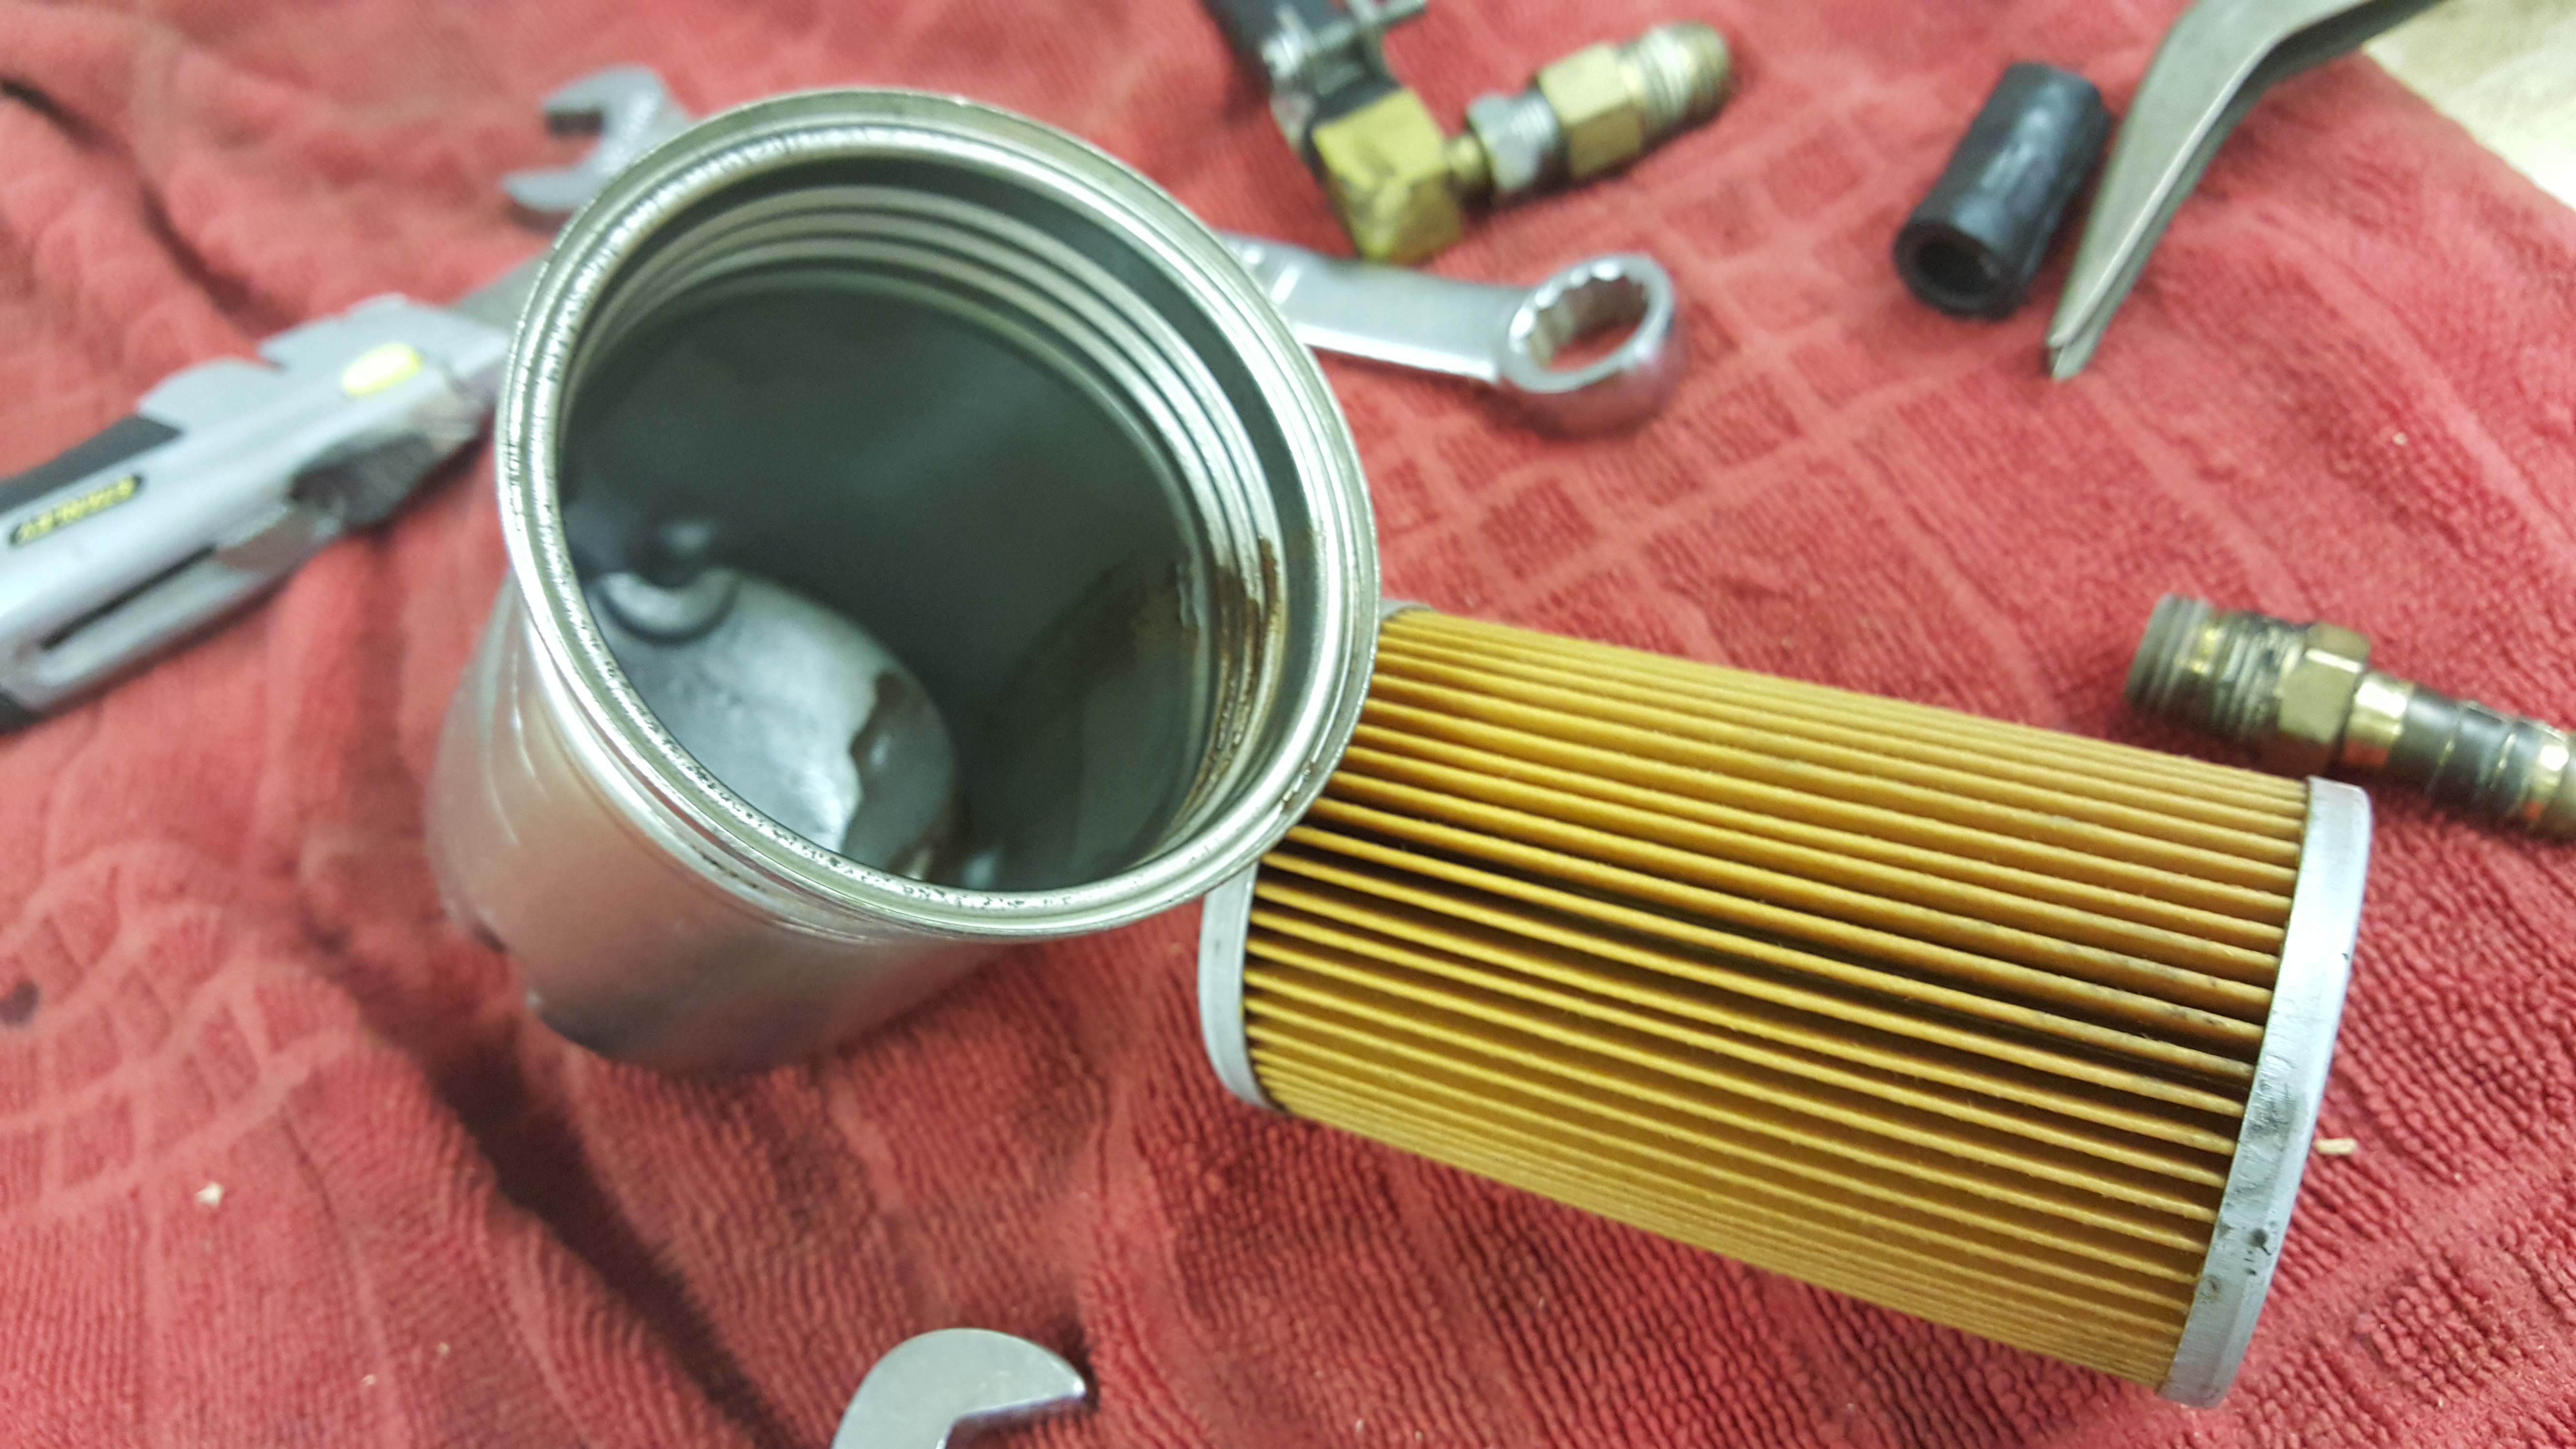
The fuel filter inside the cannister of the old pump was clean–just a little residue at the bottom.
With that fixed, I no longer have the hiccups and stuttering. Unfortunately, I’ve still got an engine miss at speed, and it’s getting worse. The problem might be ignition related, but it appears to be a associated a valve train tick that’s getting ominously louder.
I’ll check the timing, but I’ve long said that this would be the year to freshen the engine. Now may be the time to pull it.
As it turns out, removing the rear springs to replace the bushings was more intuitive than I thought. Following the manual and some great guidance from a VTCI member, it was straightforward—if sometimes heavy—work.
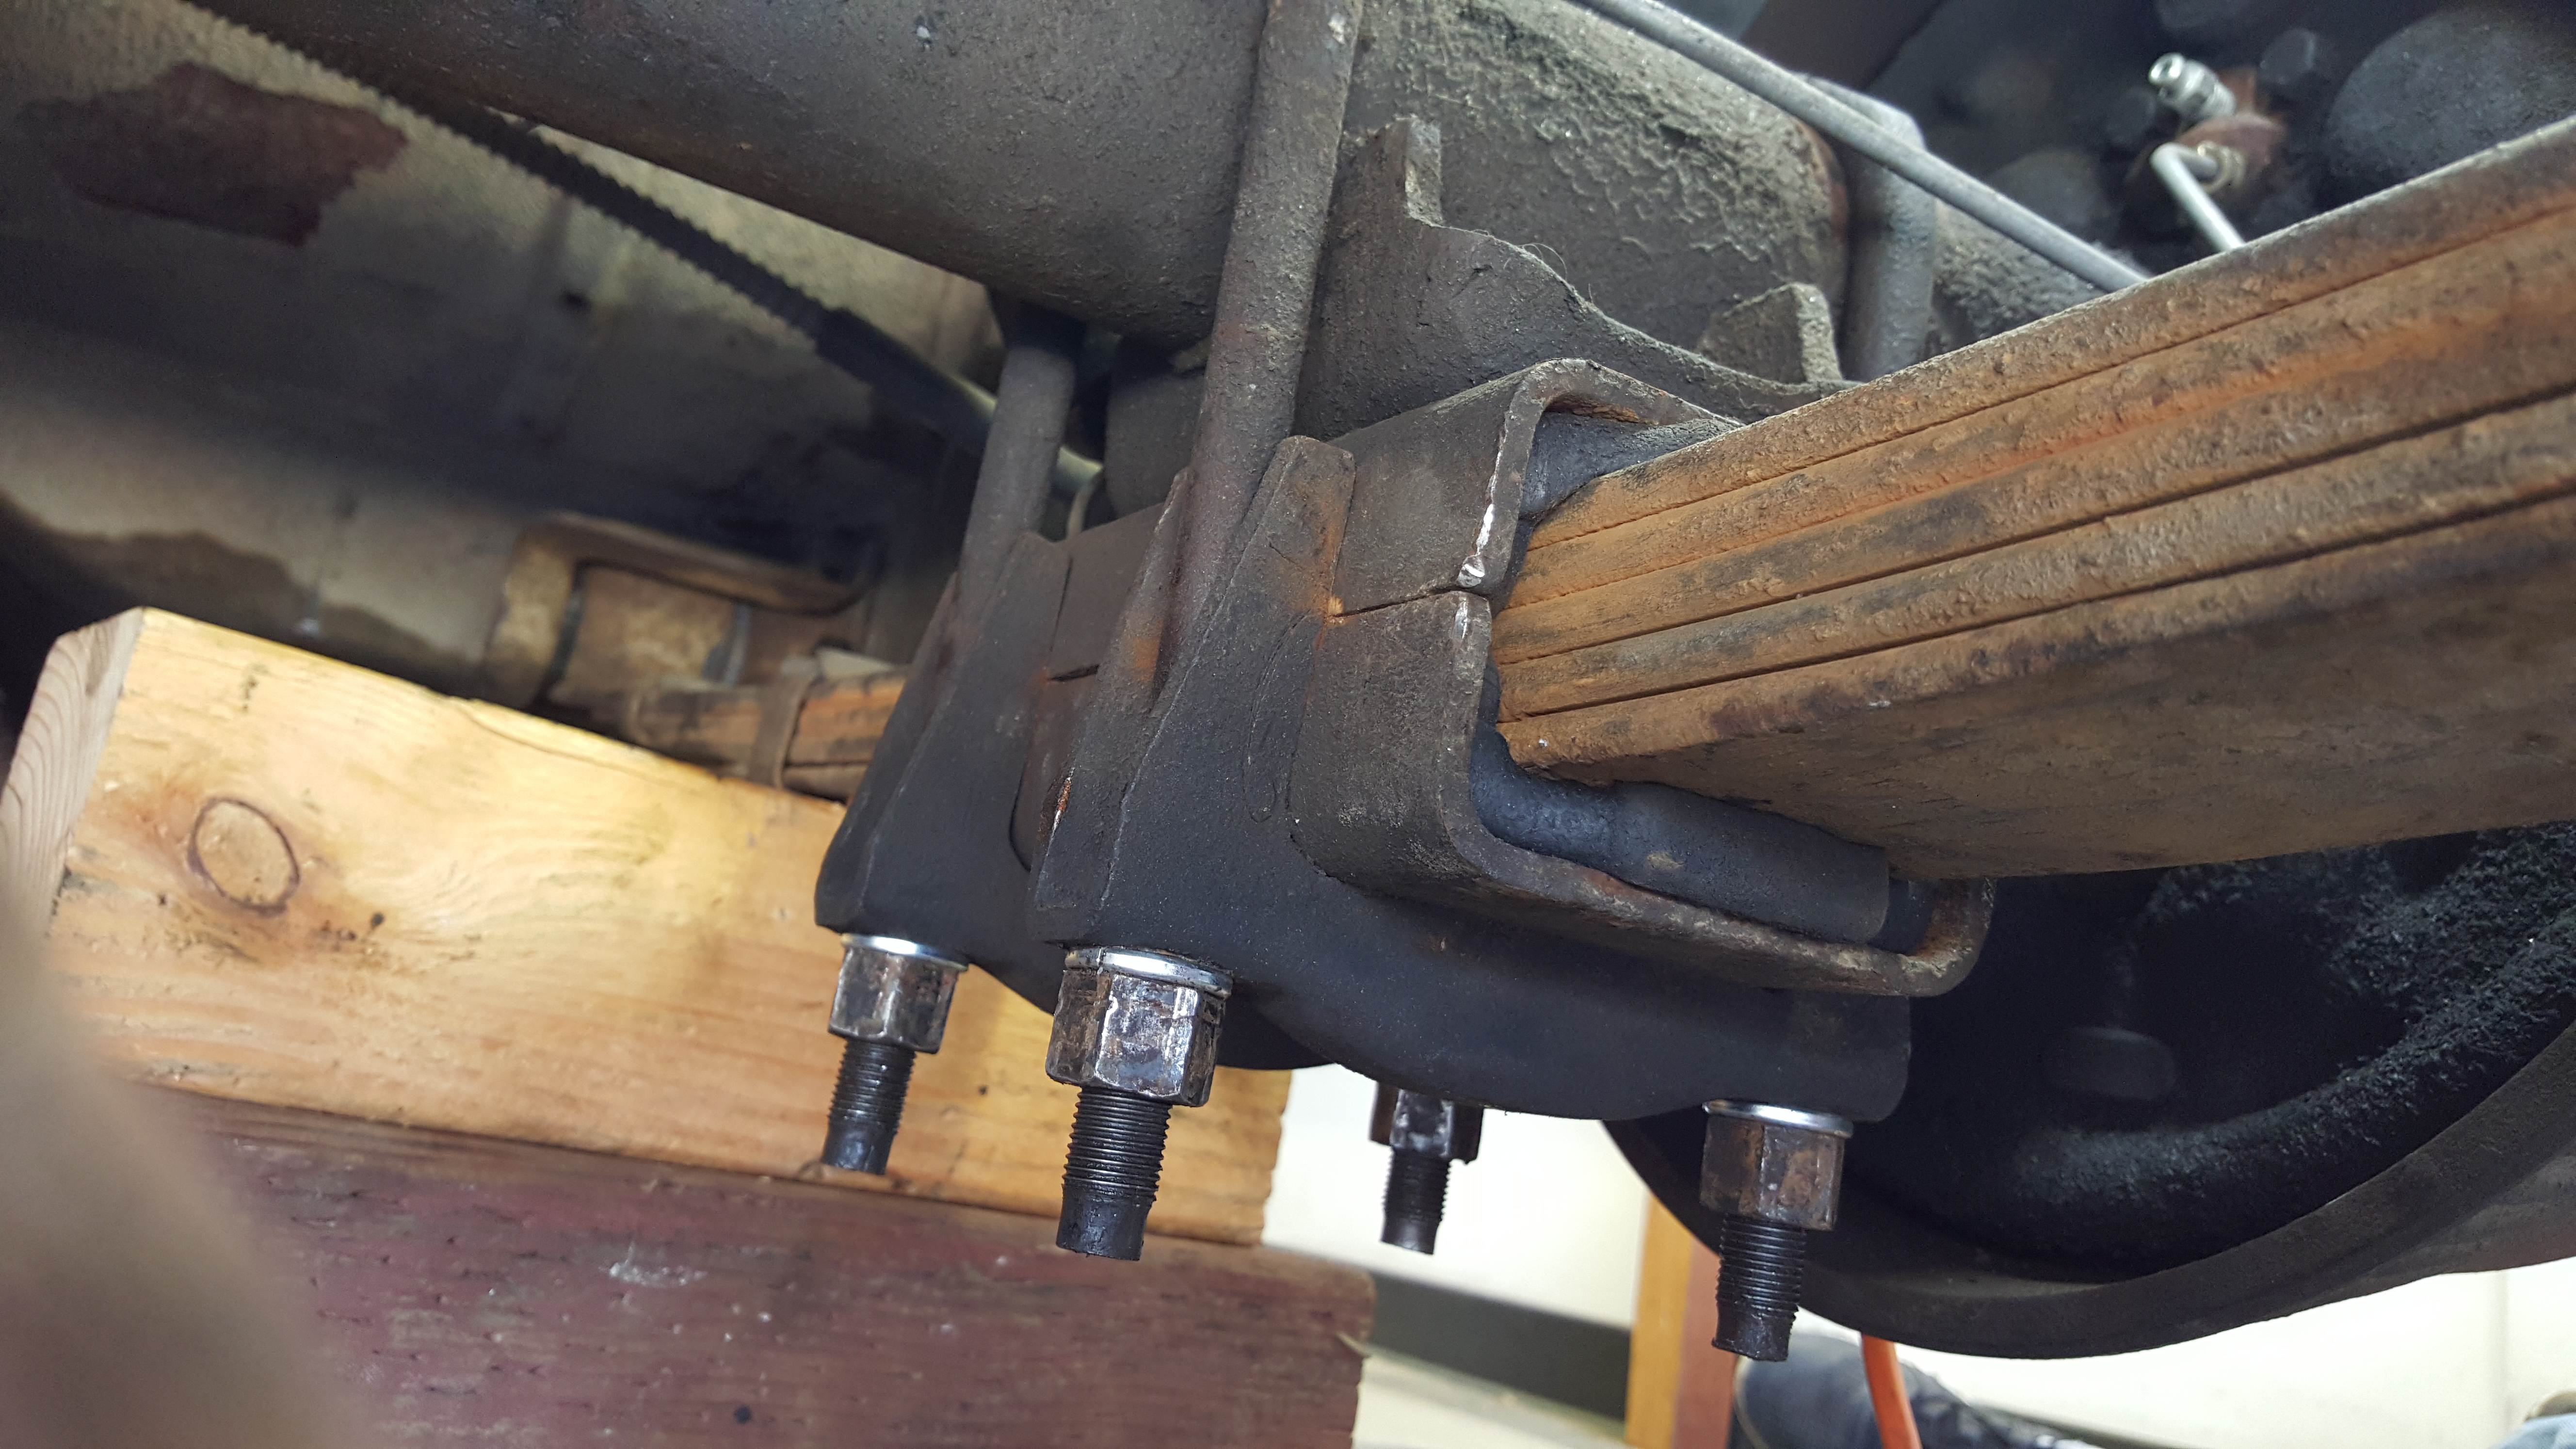
Aligning the spring to the axle took some muscle and the occasional application of leverage from a cat’s paw.
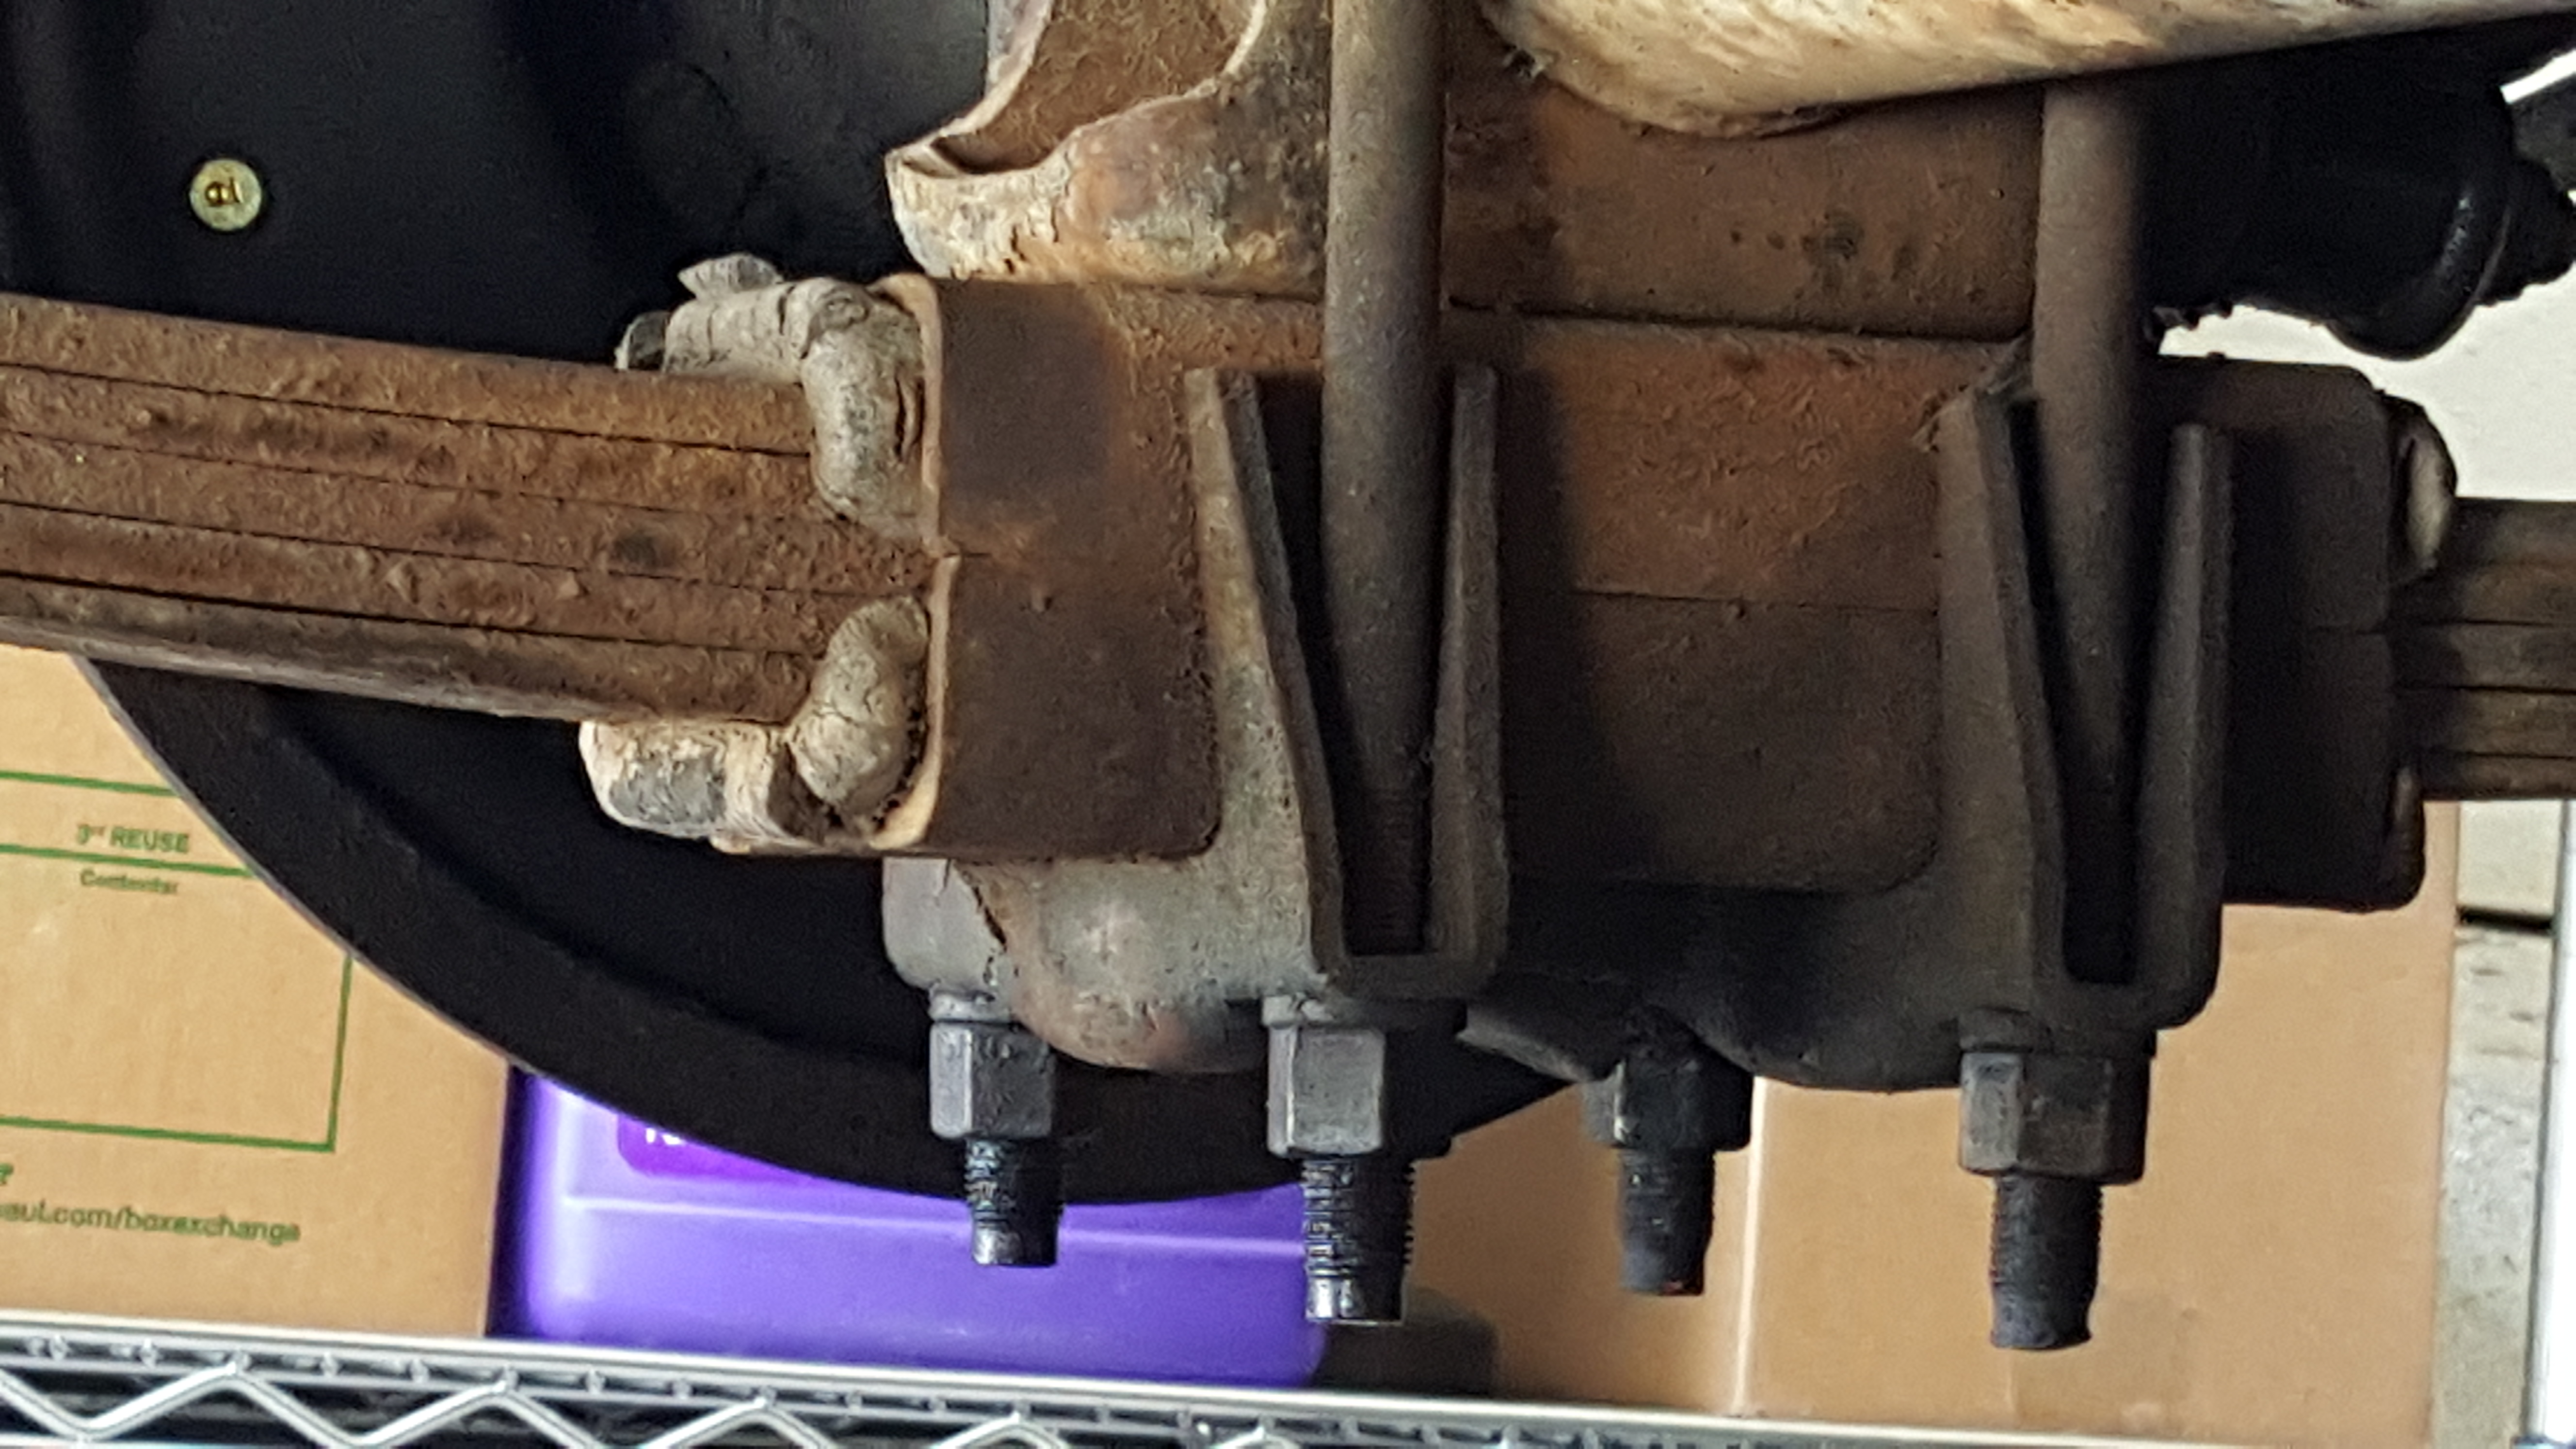
I ran a die down each leg of the U-bolts to chase and clean up the threads, which were pretty beat up after years of road debris. I also tapped out two of the nuts, which were damaged when I unscrewed them. I’m told that wasn’t such a great idea, as they are meant to work like pinch nuts, locking in place. I’ll check the torque on them after a few hundred miles, just to make sure replacements aren’t in order.
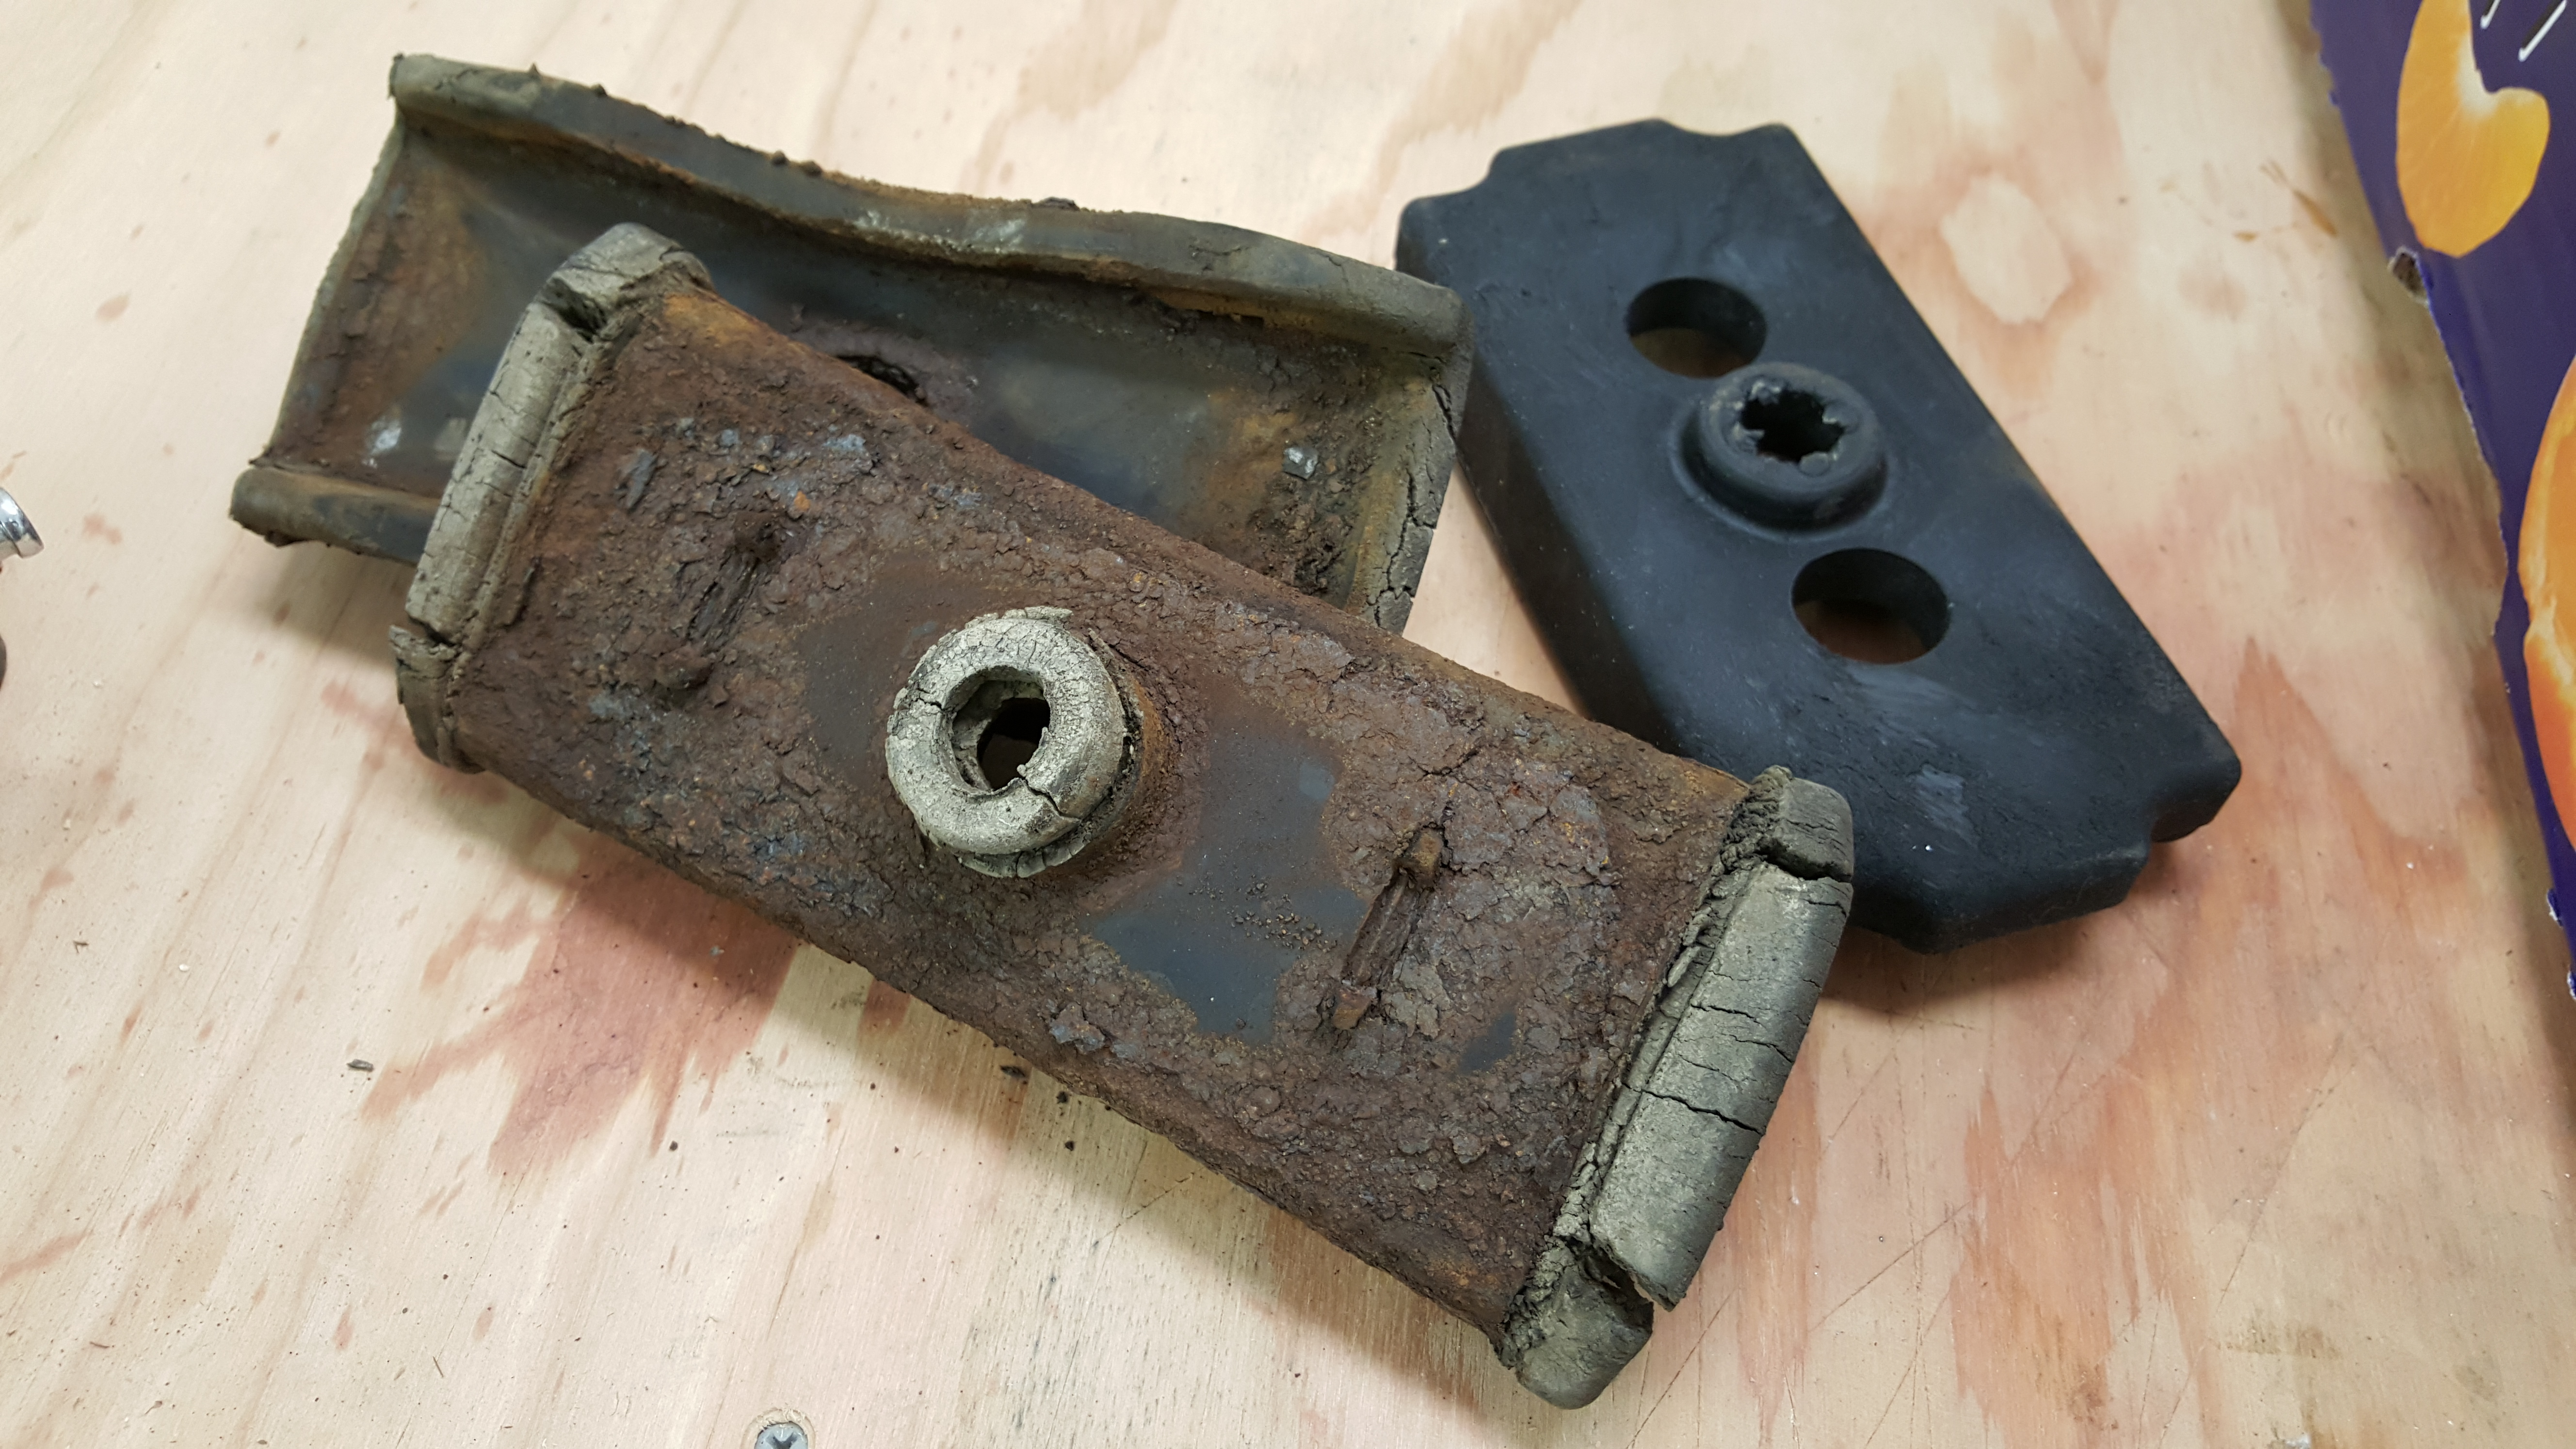
Fifty+ years of wear and weather doesn’t look good on rubber parts.
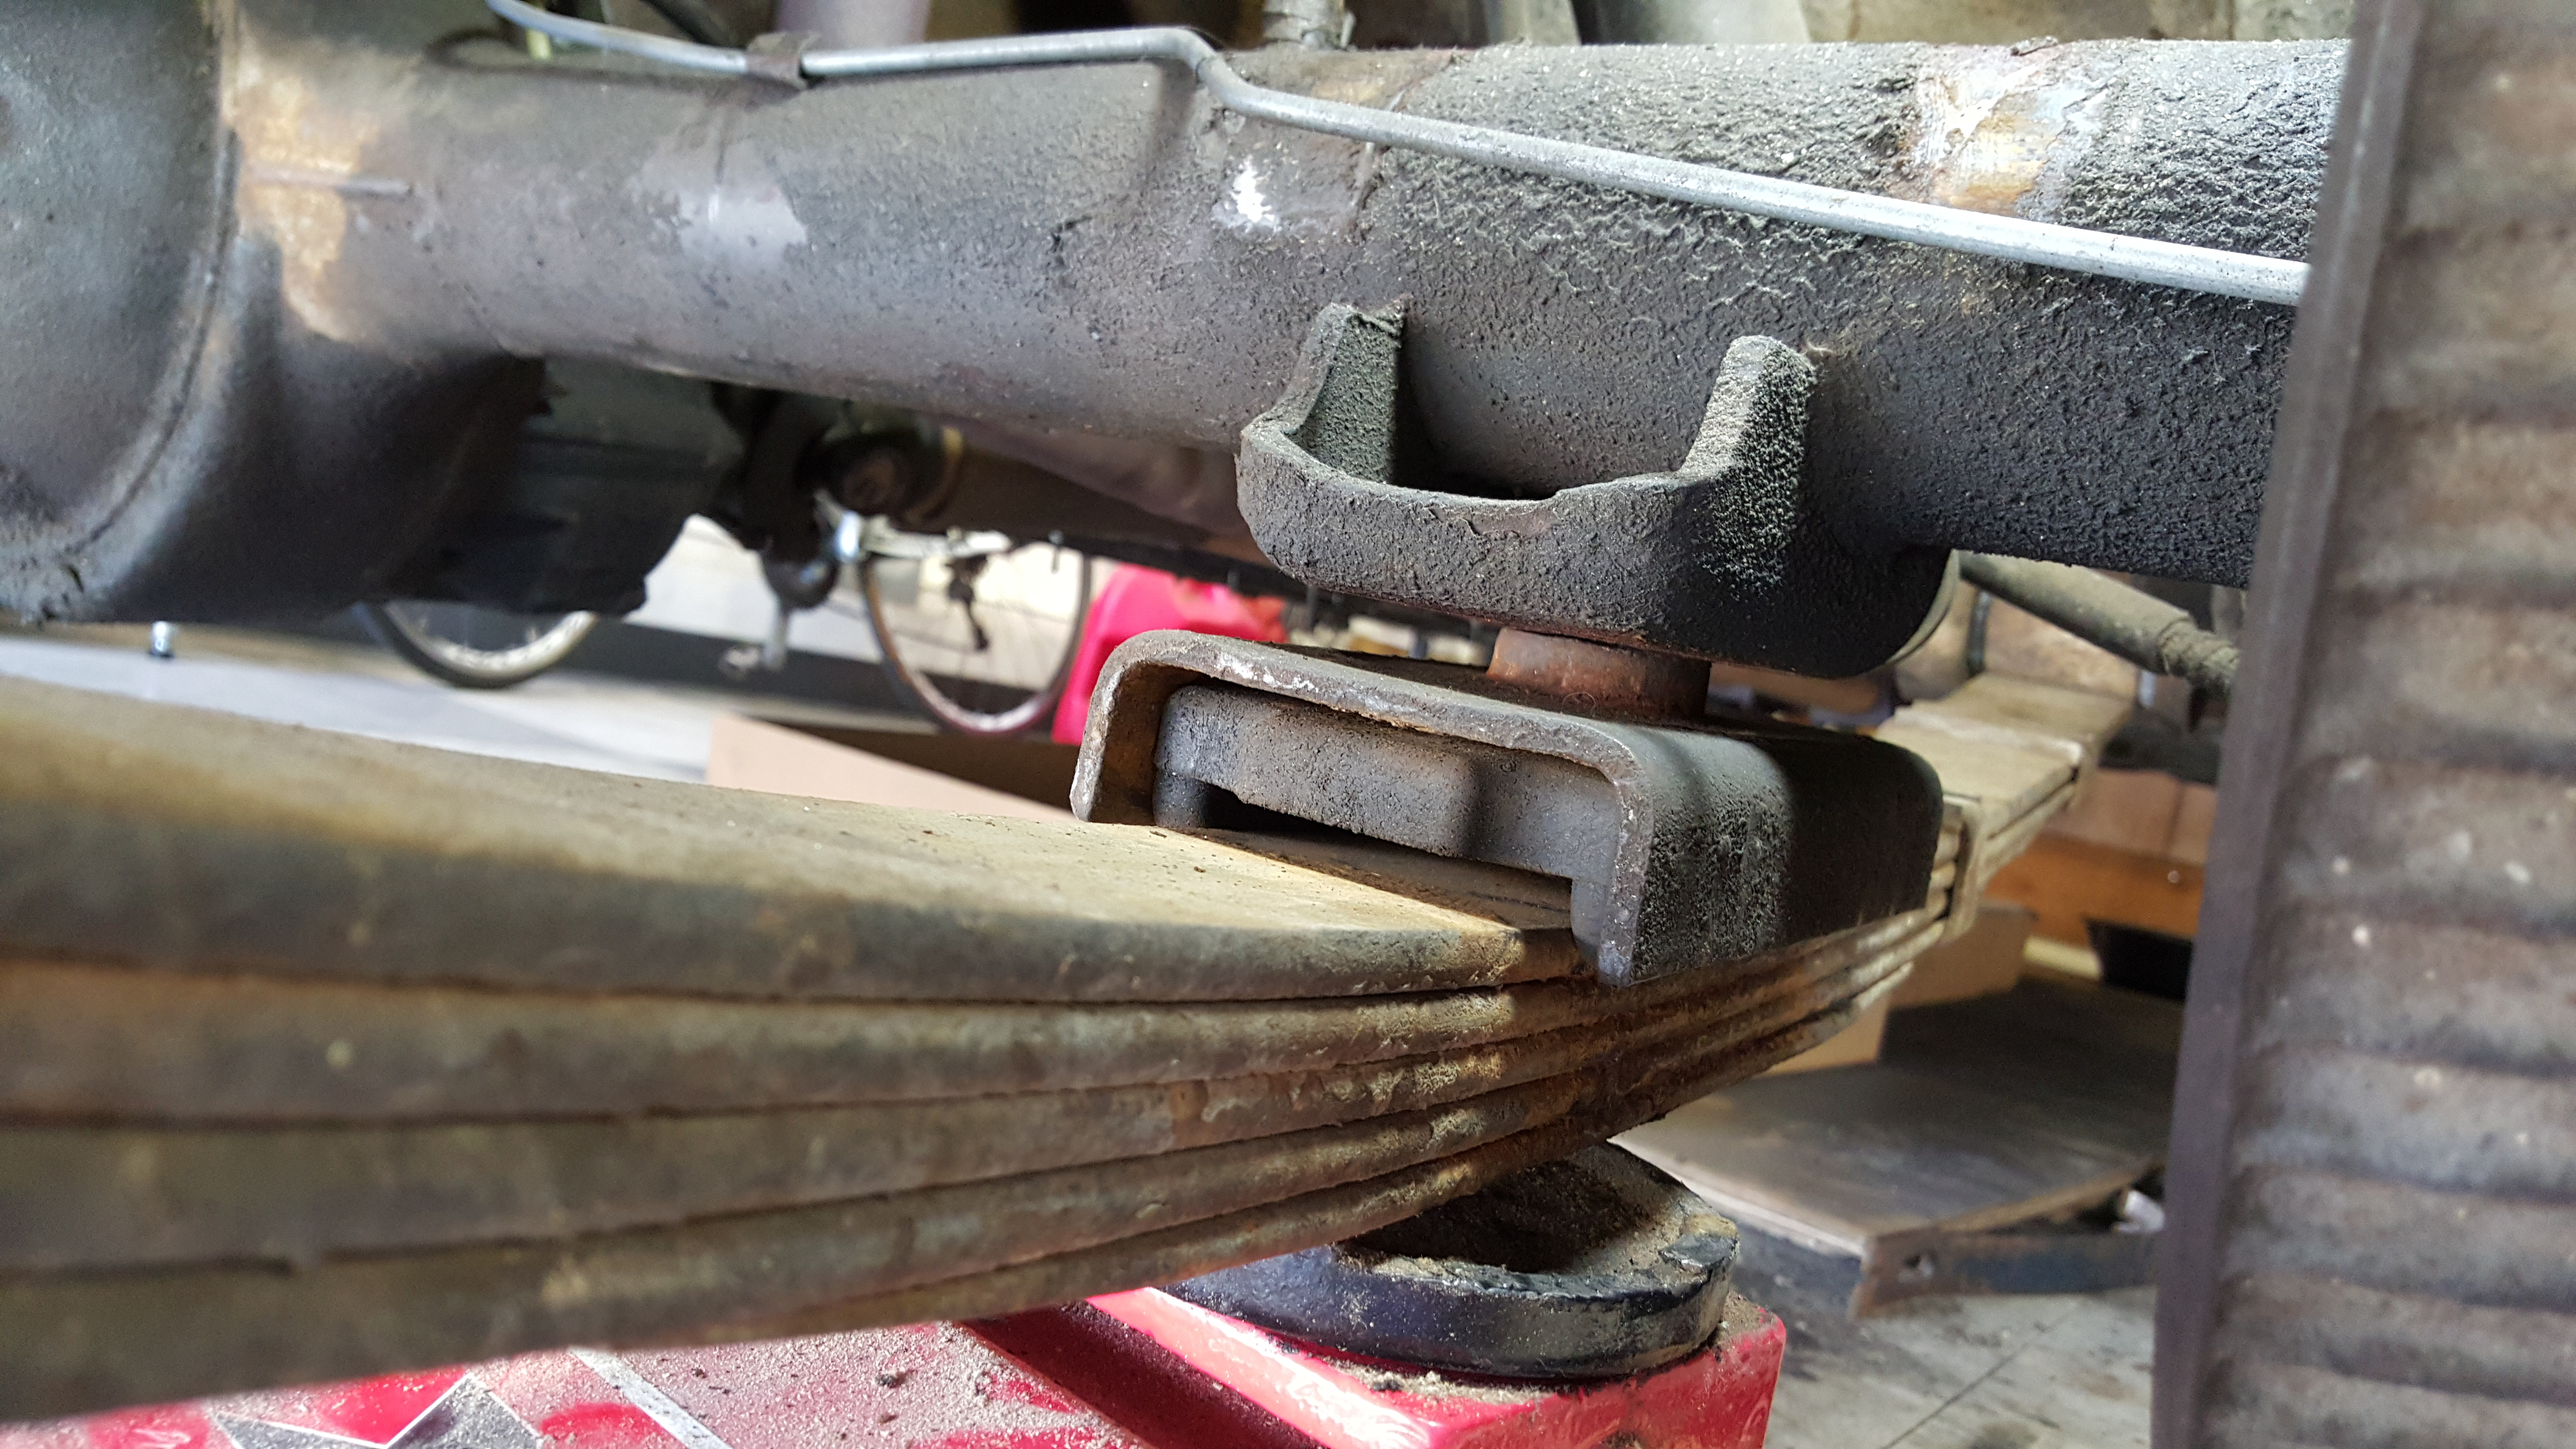
It’s hard to say for sure, but wear marks on top of the axle lead me to believe that the clunking noise was coming from the U-bolts walking around the axle over bumpy stretches (the rubber insulators having degraded and shrunk so badly.) If the new bushings don’t quiet things down, the next step would be to replace the springs and mounting pads. For the moment, though, except for replacing lock washers, I reused all the non-rubber parts. Despite some rust and corrosion, everything still appeared sound, and the ride height is ok.
How the final assembly looked, torqued and ready to go. At the top of the axle, some of the wear marks are visible.
I don’t yet know how the new bushings feel because the new fuel pump is not yet installed. I discovered that with the car up on jacks, tires hanging, the anti-sway bar in front interferes with its removal. (Having the car up in the air did make an oil change super easy, though). The pump came right out when the bird landed. With luck, I’ll have everything buttoned up in a day or two.
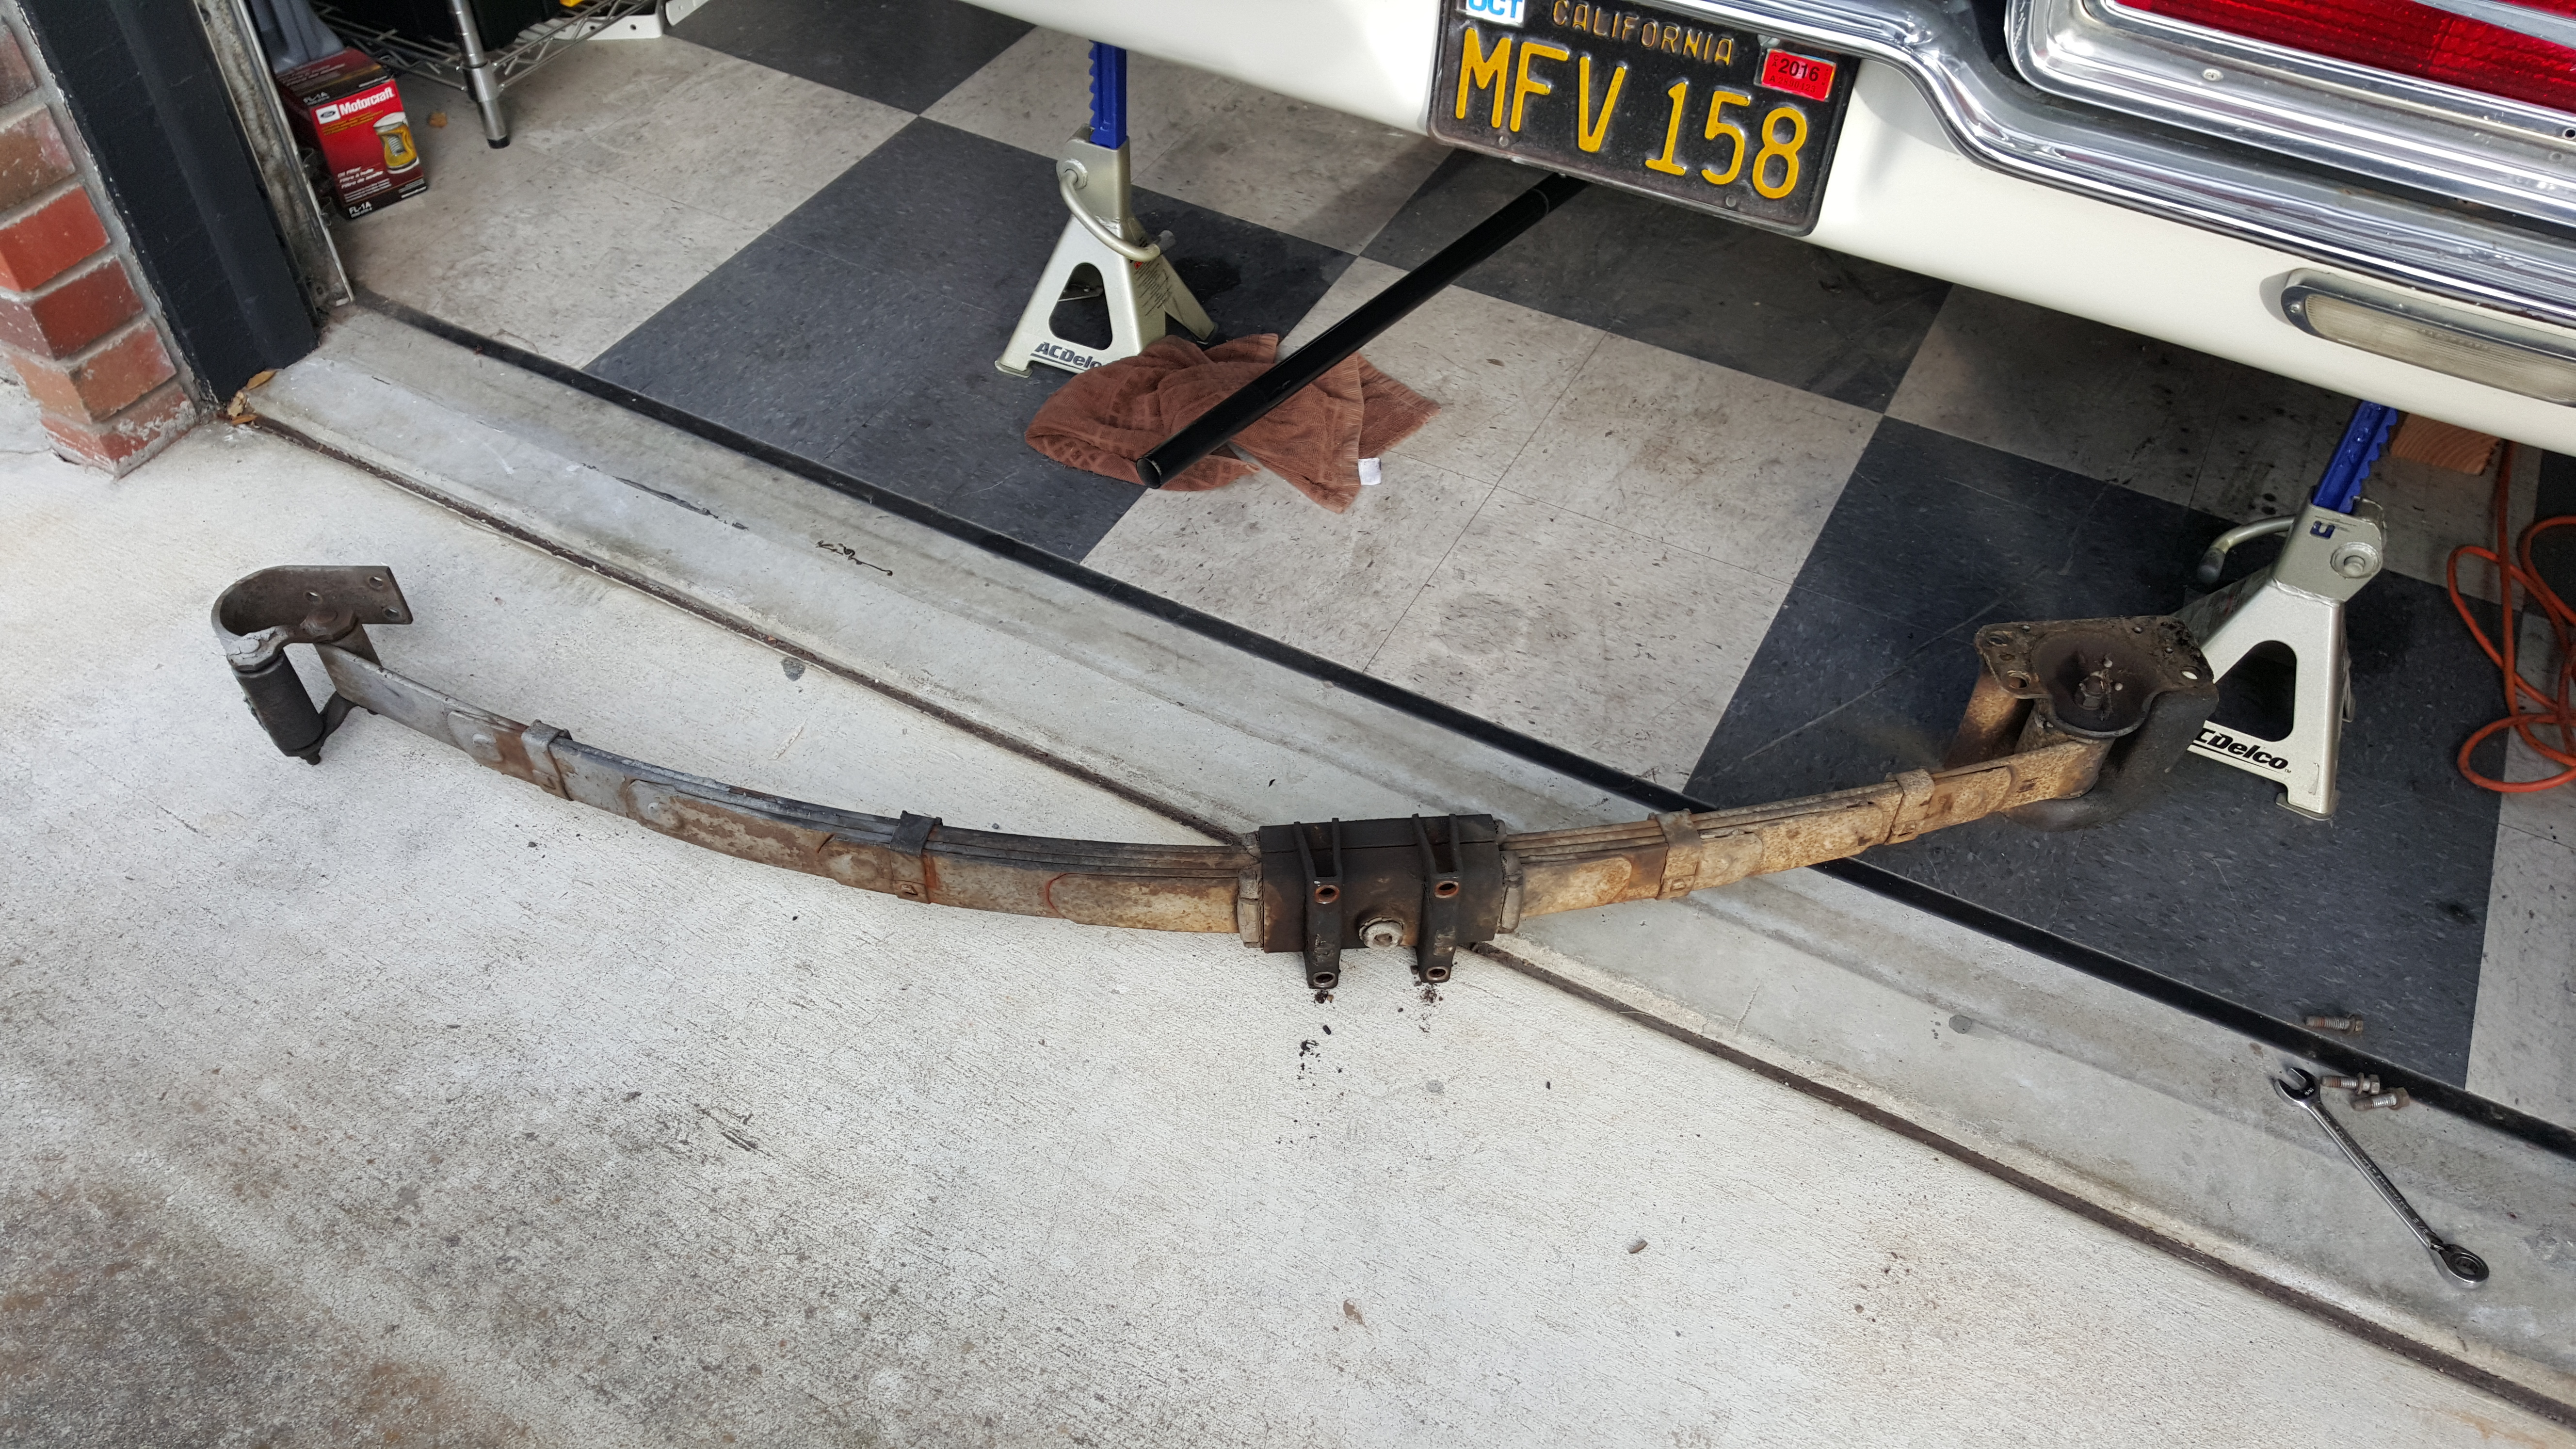
I took advantage of a lazy Sunday afternoon to finally crawl under the back end of the ‘Bird and attack the leaf springs. I’d had penetrating oil on the shackles and pivots for about a week, but it’s hard to say if that helped or not. In any case, I was able to move the bolts on the shackles with some effort using a breaker bar. (I tried an air-powered impact wrench, but it didn’t have enough power, sadly.)
The passenger side leaf spring, liberated.
The three bolts for the rear bracket—like so many on this car—are awkward to reach, but were not difficult to turn. There are four very large bolts holding the bracket at the front, and they gave me a bit of a scare—I thought I felt the tell-tale pop of a caged nut breaking free on a couple. (Always a disaster!) That was not the case, fortunately. With the last front bolt, the spring came off gracelessly, in a shower of rust and dirt.
Disassembly of the spring was pretty straightforward after a glance at the drawing in the manual.
The mounting pads: old vs. new.
I had ordered new bushings for this project well over a year ago (maybe two, even…) and it was quickly clear that I got the wrong type for the front eyelet and the bottom of the rear bracket. These are now on order. Unless there is a surprise waiting on the other side, I should be able to get both springs done in less than a weekend.
Before I can test drive it, though, I’ll need to swap out the fuel pump (the new pump is already on my bench) and reinstall the spacer under the carb. Hopefully, I can carve out an hour or two for that sometime this week.