It’s spring, the weather is warm, rain has stopped and it’s time to be out driving.
I’ve put a couple hundred miles on the car in the last weeks; by and large, it’s running well. My nemesis, vapor lock, still haunts me though. After a longish drive, at speed, the motor refused to fire up until I shot a few doses of starting fluid into the carb. (I still don’t know why this worked, but now carry a can in the car in case of relapse.)
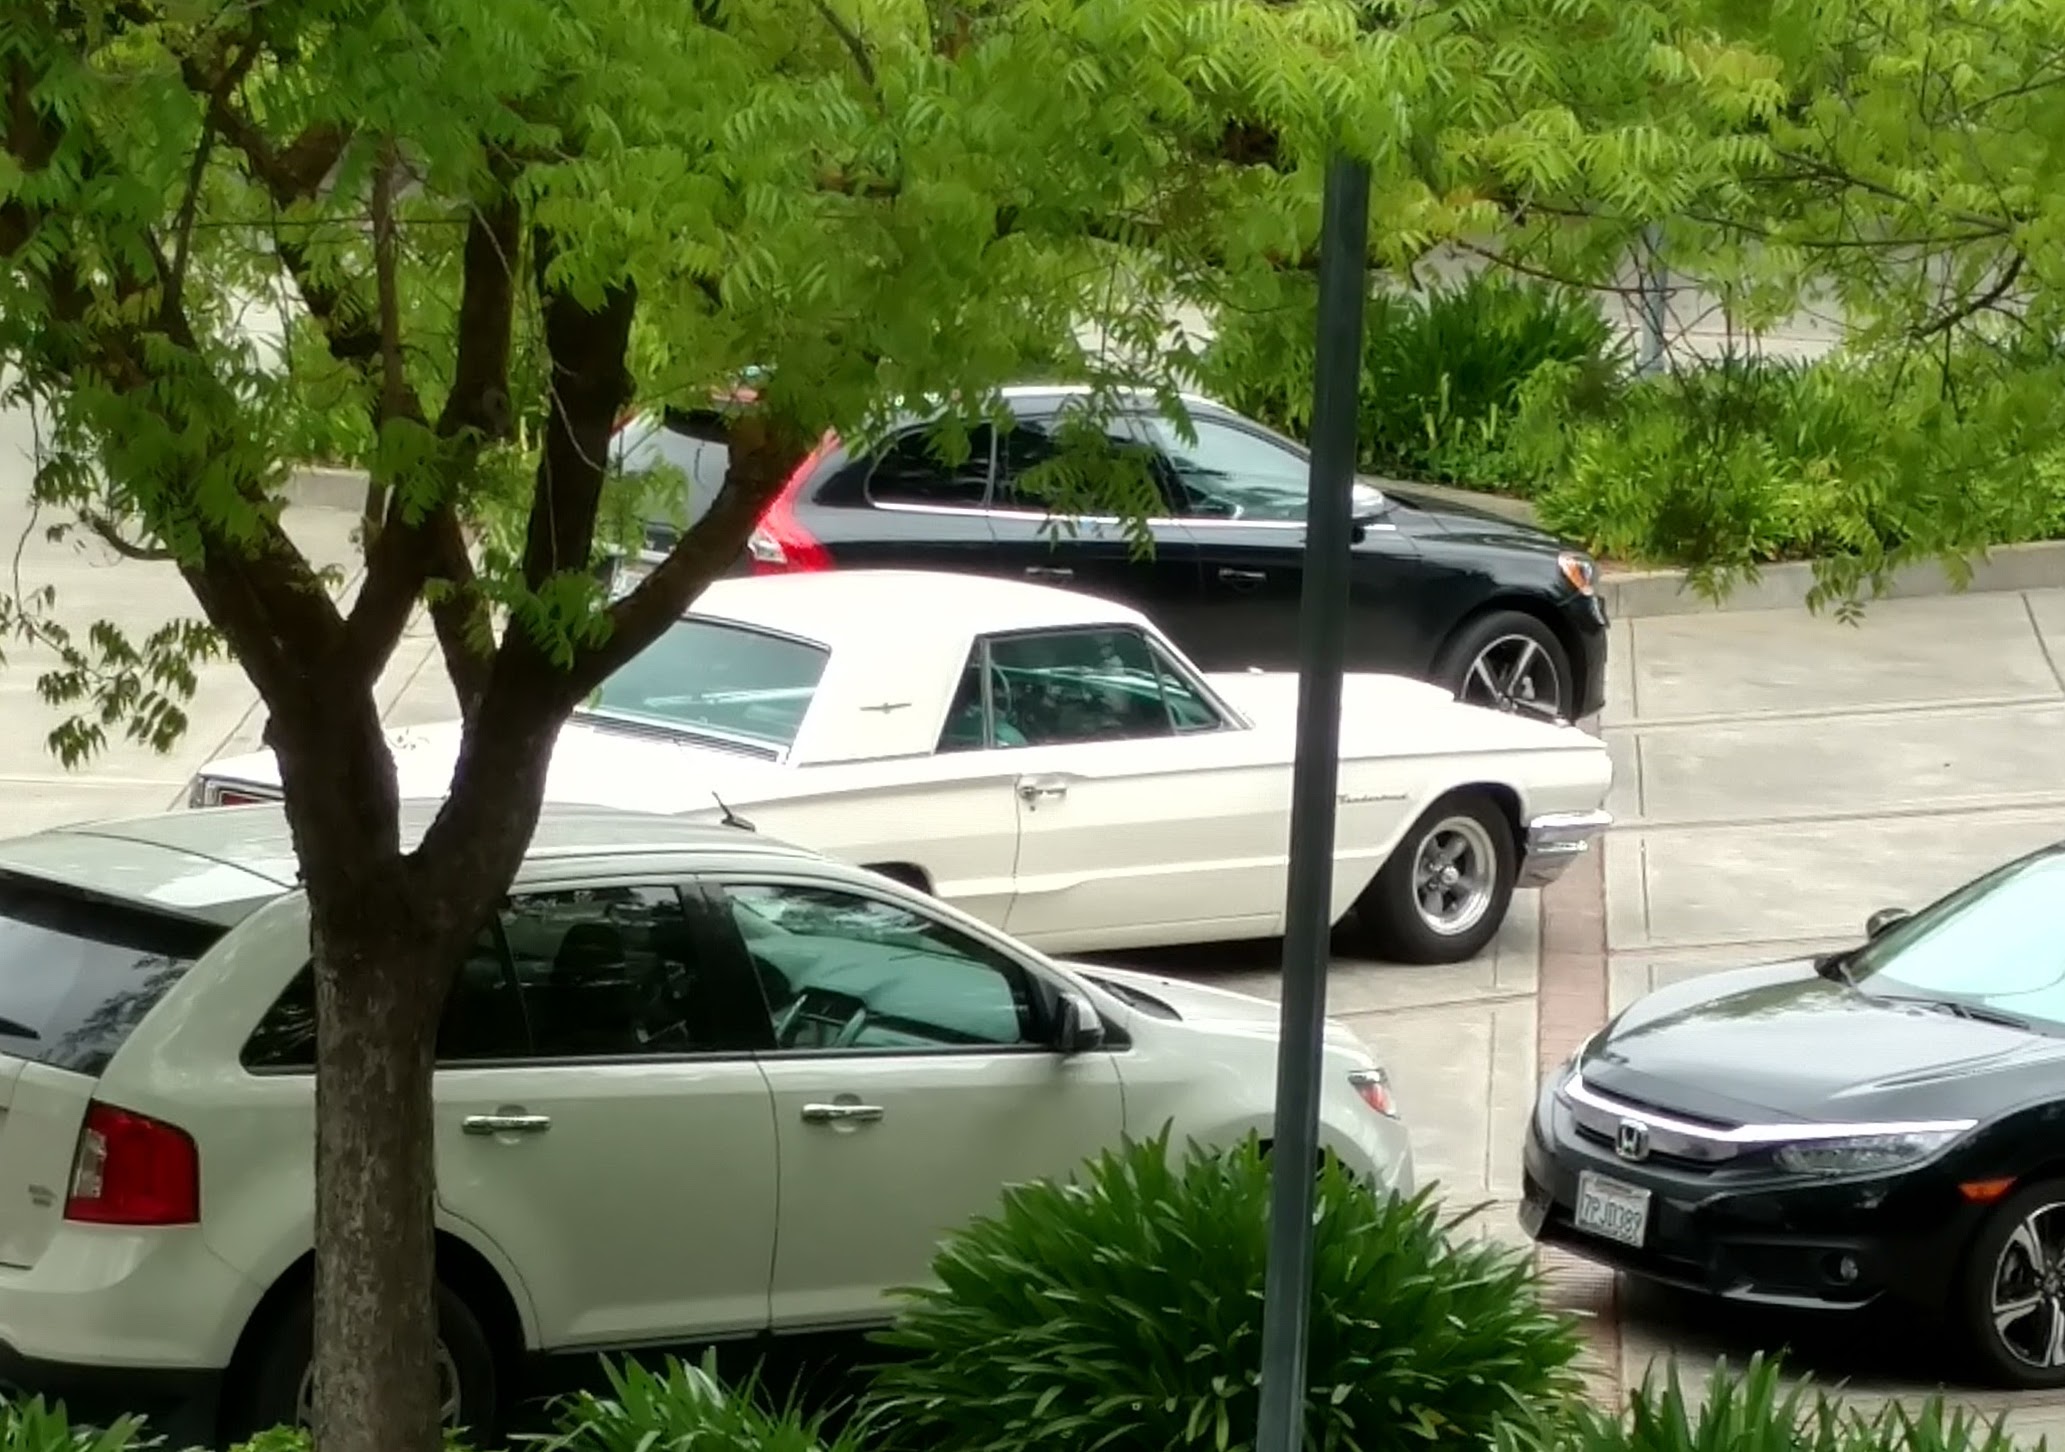
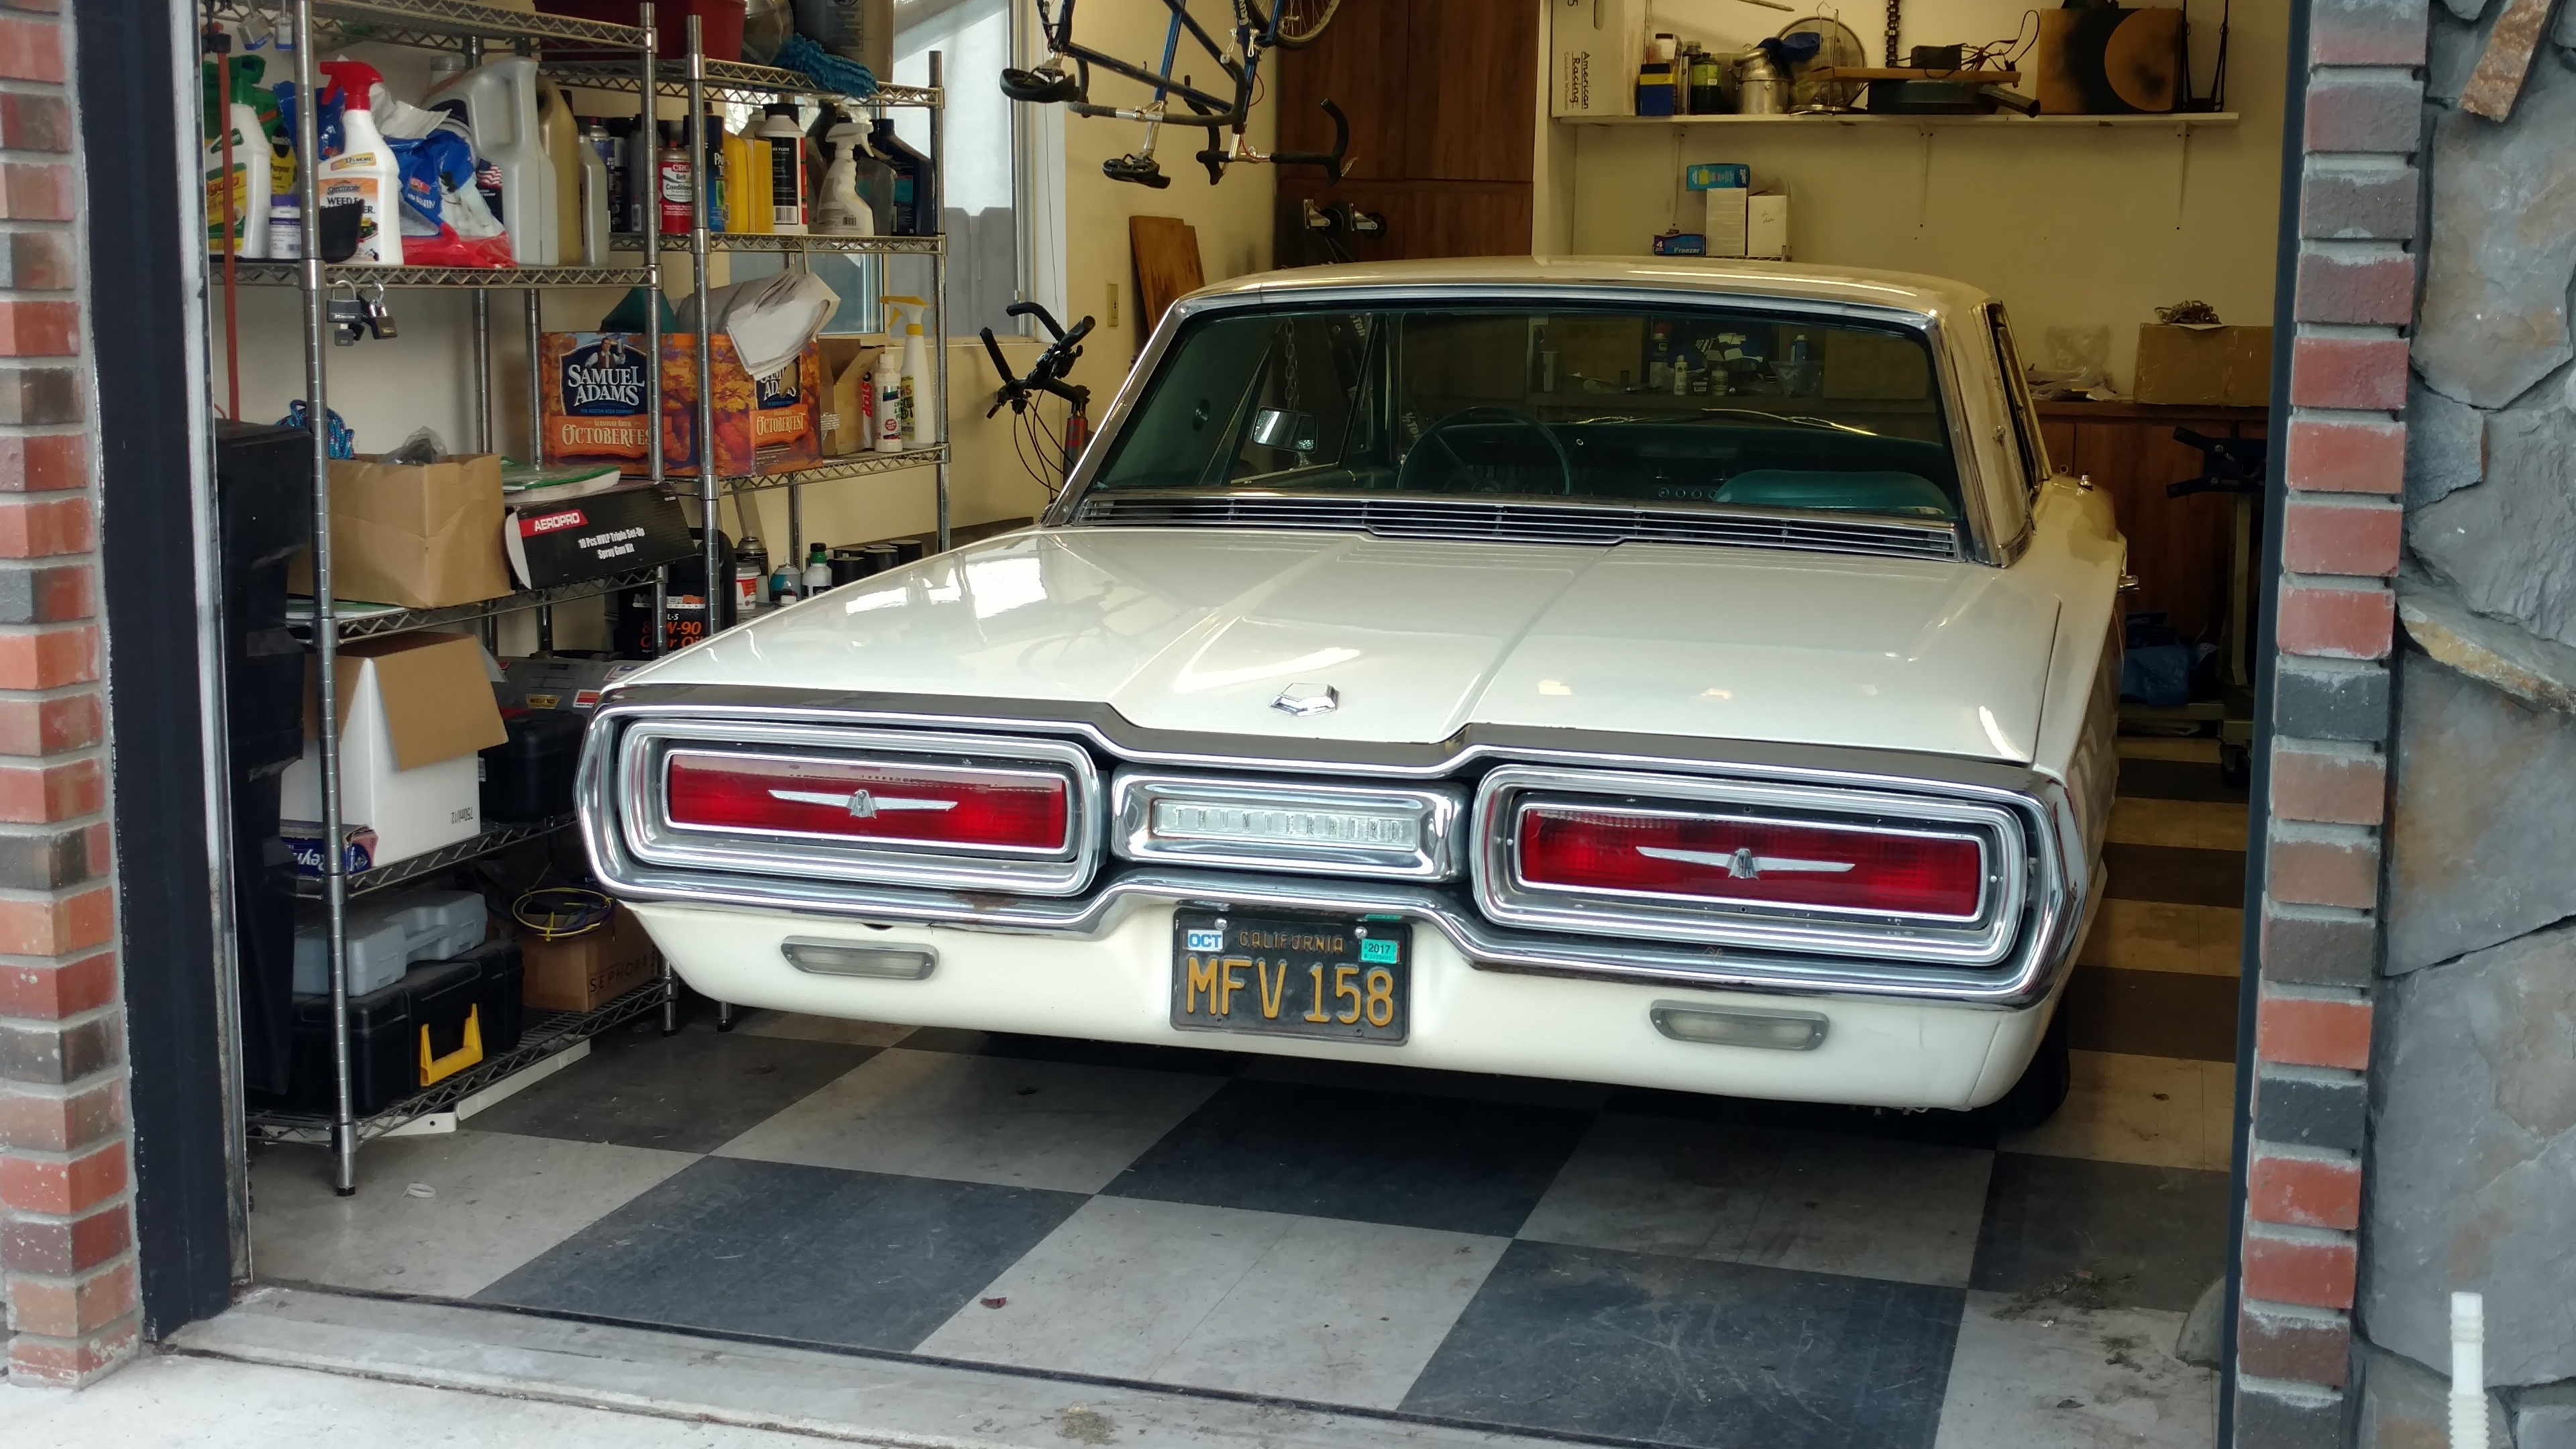
The Thunderbird is never difficult to spot in the parking lot.
I tuned up the motor a little more finely after that episode, backing the timing off a few degrees and raising the idle a bit. Since then, hot starts haven’t been an issue (though I haven’t yet tried to recreate the exact conditions of the last episode), but I am still experiencing rough running and stalling after long periods of idle (stop-and-go traffic) and after hot starts—classic vapor lock symptoms.
Researching the topic: EFI, electric pumps and recirculating fuel delivery systems appear to be the only real solution—none of them in the budget in the foreseeable future. Long time readers will know that I already run with a phenolic spacer under the carb to fight heat soak. Other, less costly, remedies to try include an electric fan (which I’m resisting as a matter of Thunderbird purity) and an insulated metal fuel line from the pump to the carb (probably my first step).
My tune up was inspired by an observation that the distributor vacuum advance line was plugged into the wrong port on the carb.
A friend following behind me last weekend noted that the right rear brake light cluster is not coming on when I stop. (The highway patrol officer who followed me for a while yesterday did not stop to mention this, thankfully!) I believe the issue is with the turn signal switch. I also believe I have a spare aftermarket switch in a box somewhere.
The current switch is original and was salvaged from another car when I did my dashboard swap. Frankly, I won’t be sad to see it go. The horn brush is stuck in it (so no horn) and recently it stopped canceling right turn signals (always embarrassing). If I get really enthusiastic, I may even tackle the back-up lamps (which have never worked) while I’m replacing the switch.
Our rainy season is finally beginning to wind down, so I’ve been out and about with the ’Bird on a regular basis—just enough for little stuff to start bothering me.
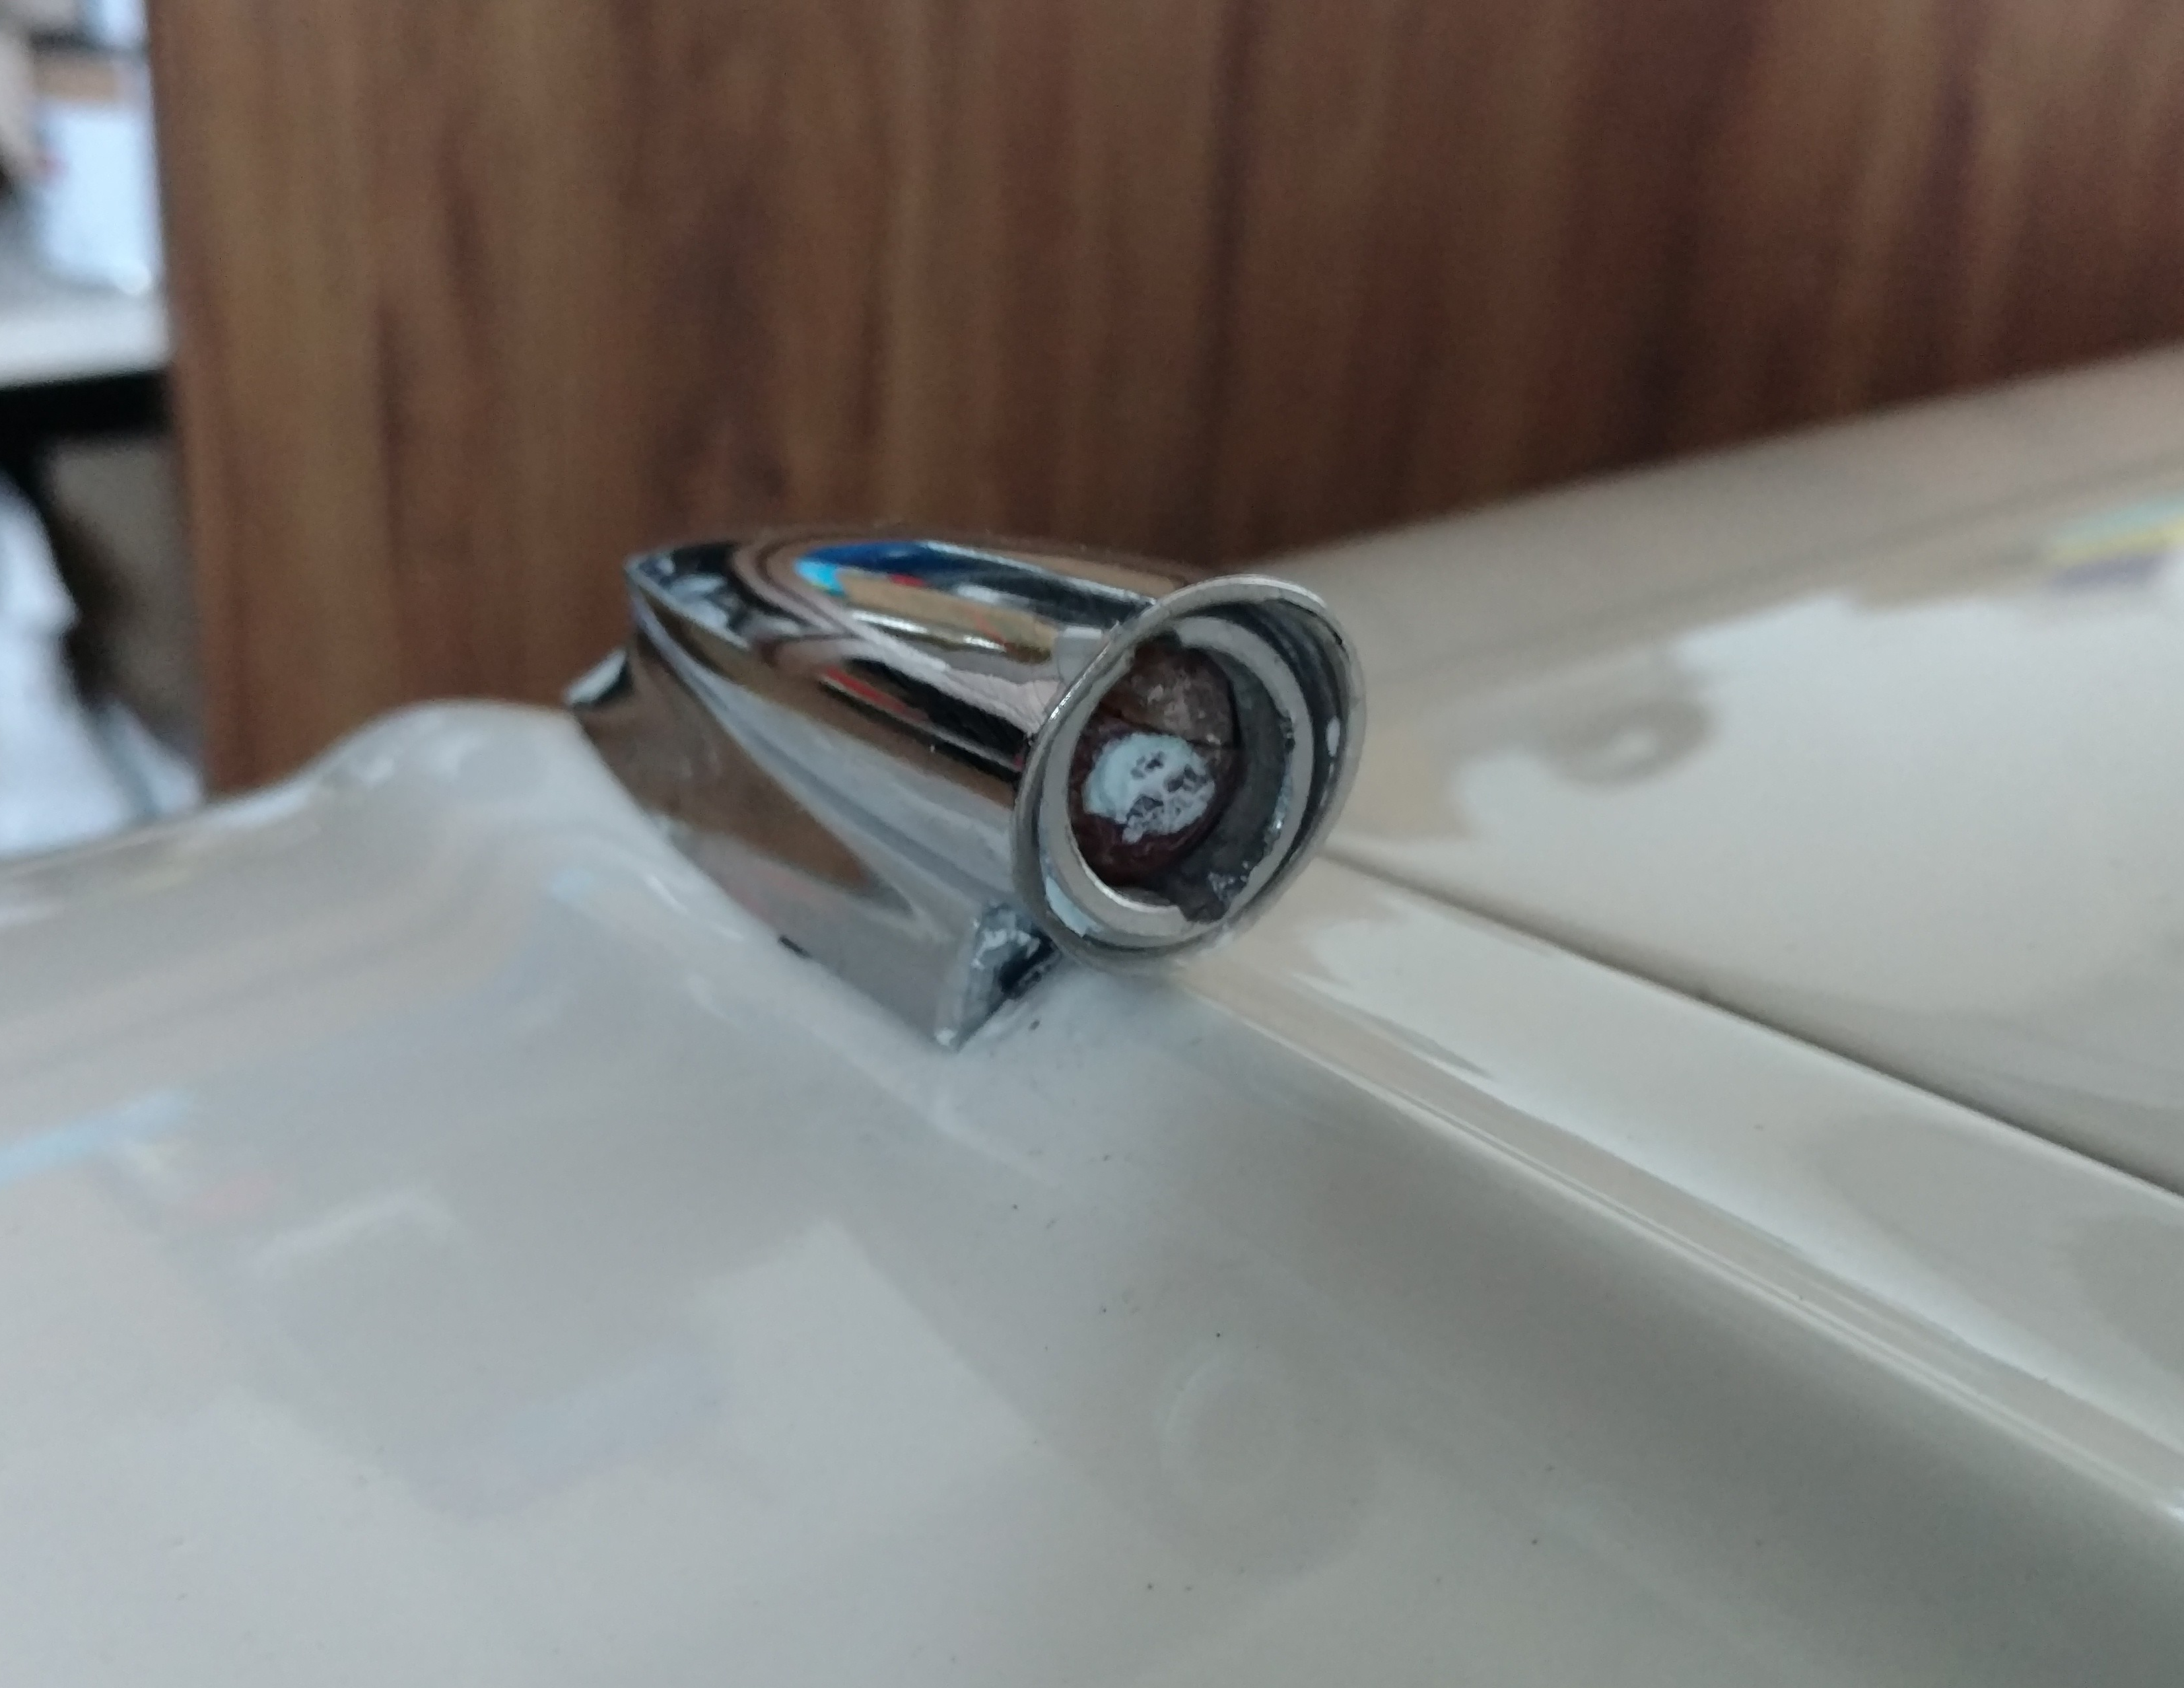
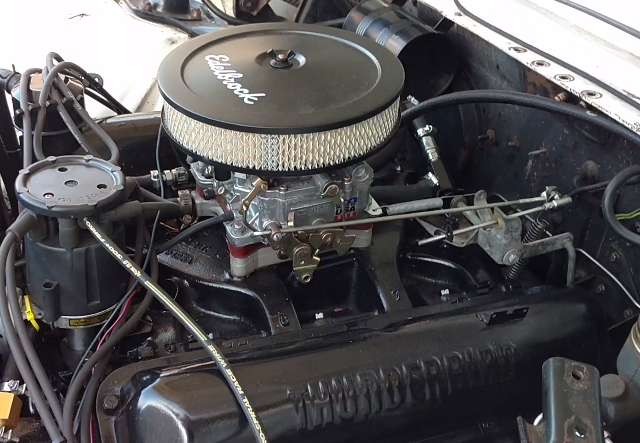
You can tell when it’s on, but it sure isn’t pretty.
At the top of that list was the right turn fender indicator. It was working intermittently, but finally stopped altogether a month or two ago. I picked up a couple of good used units from eBay, stripped them for parts and learned a great deal about how they go together.
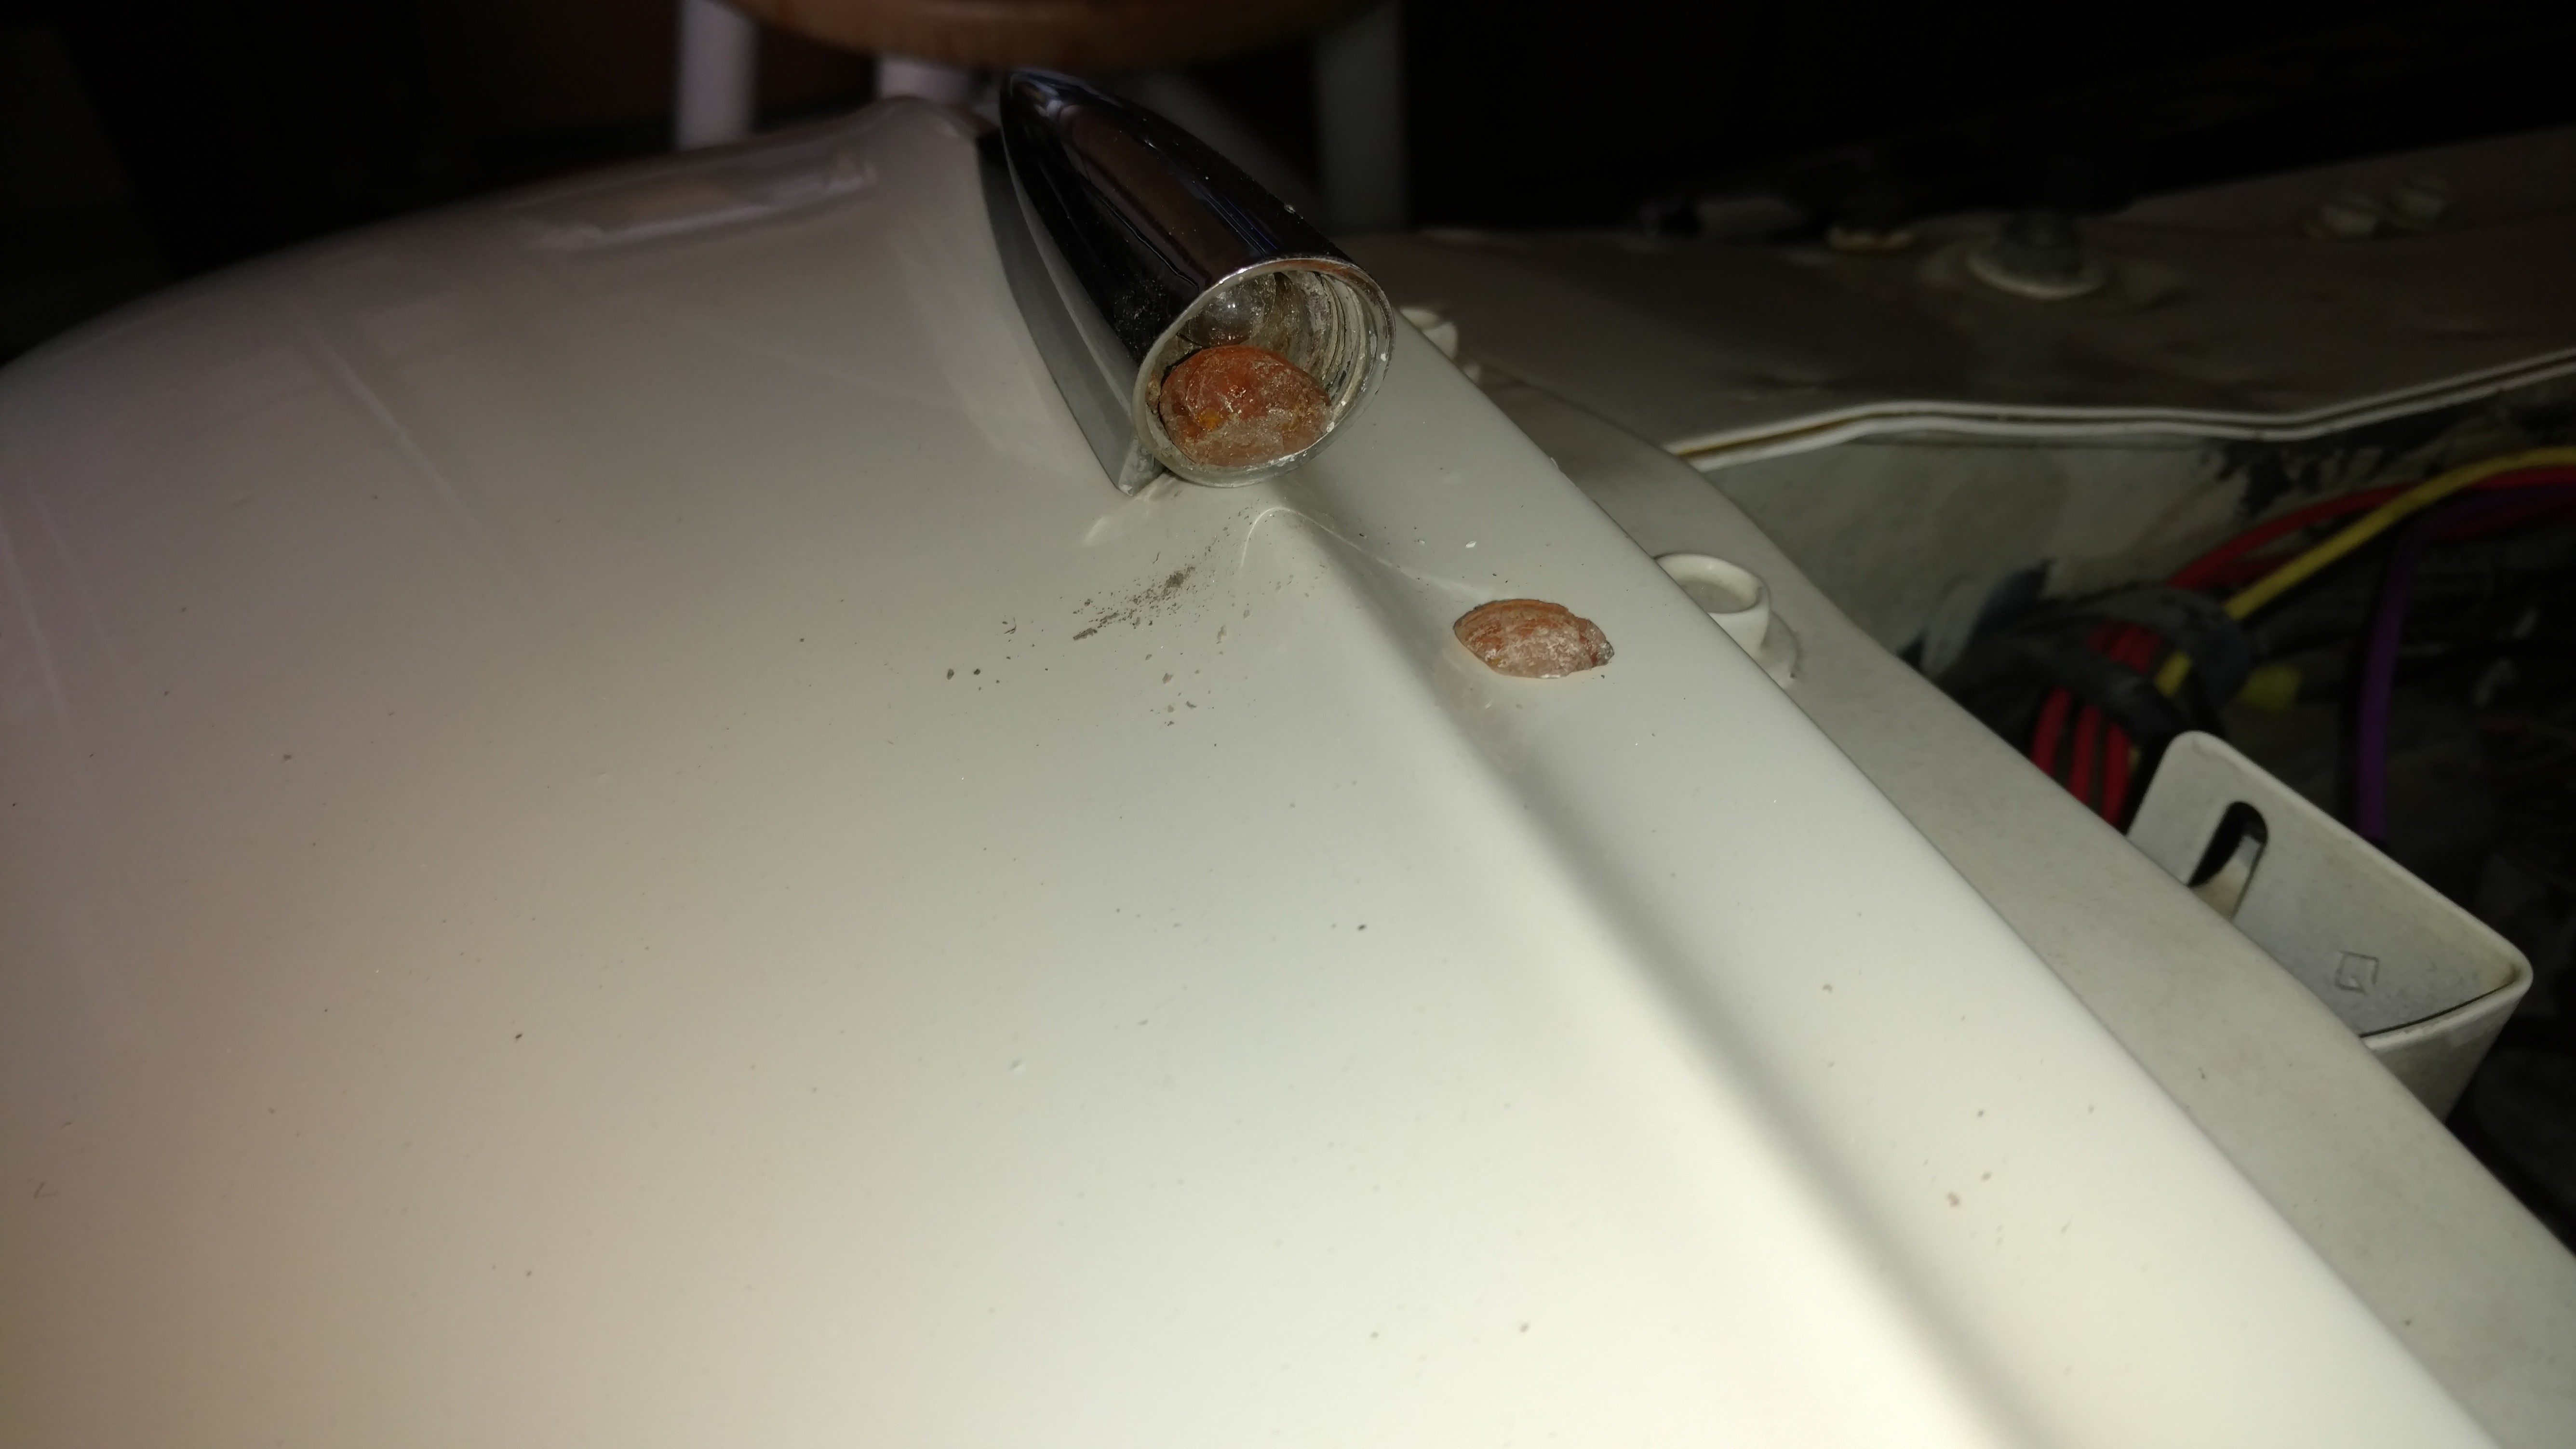
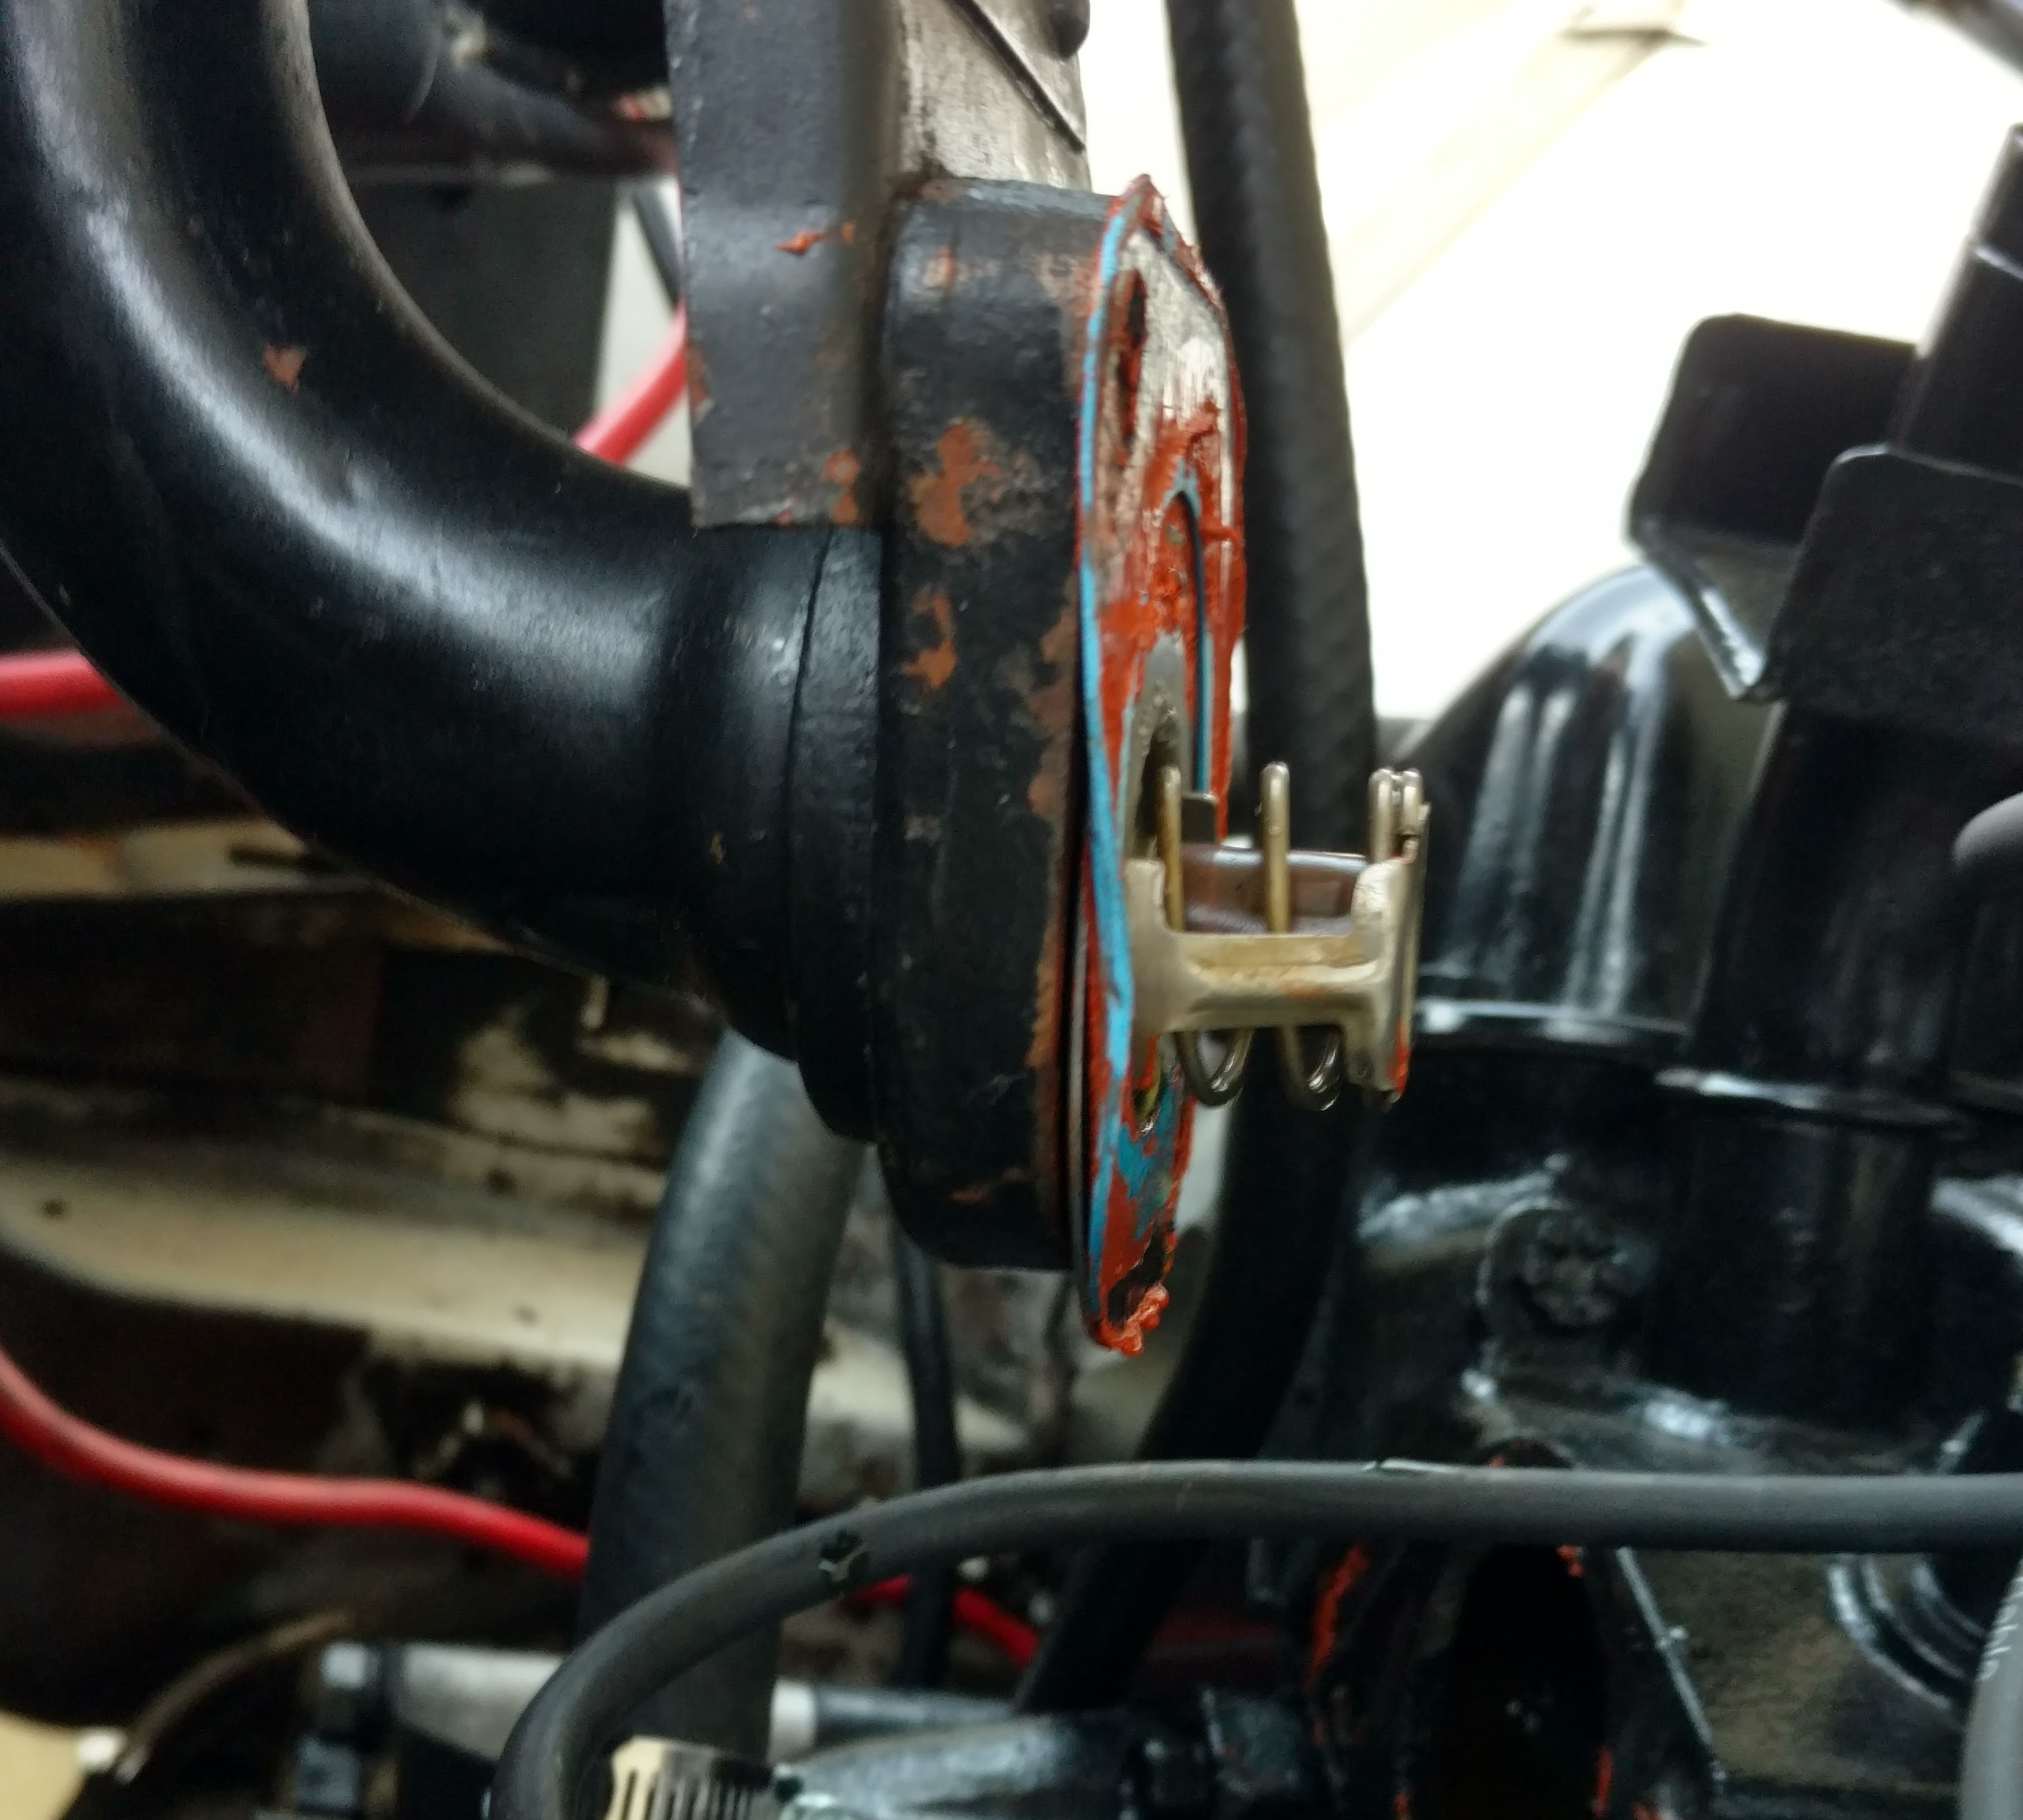
The left lens had completely disintegrated
I made a tool from an old washer and used it to unscrew the bezel. Inside the bulb, socket, lens and gasket are all spring loaded. The spring is pretty strong, but I had to use a pick to scrape out dirt, corrosion and lens fragments to free everything up and allow the spring to work.
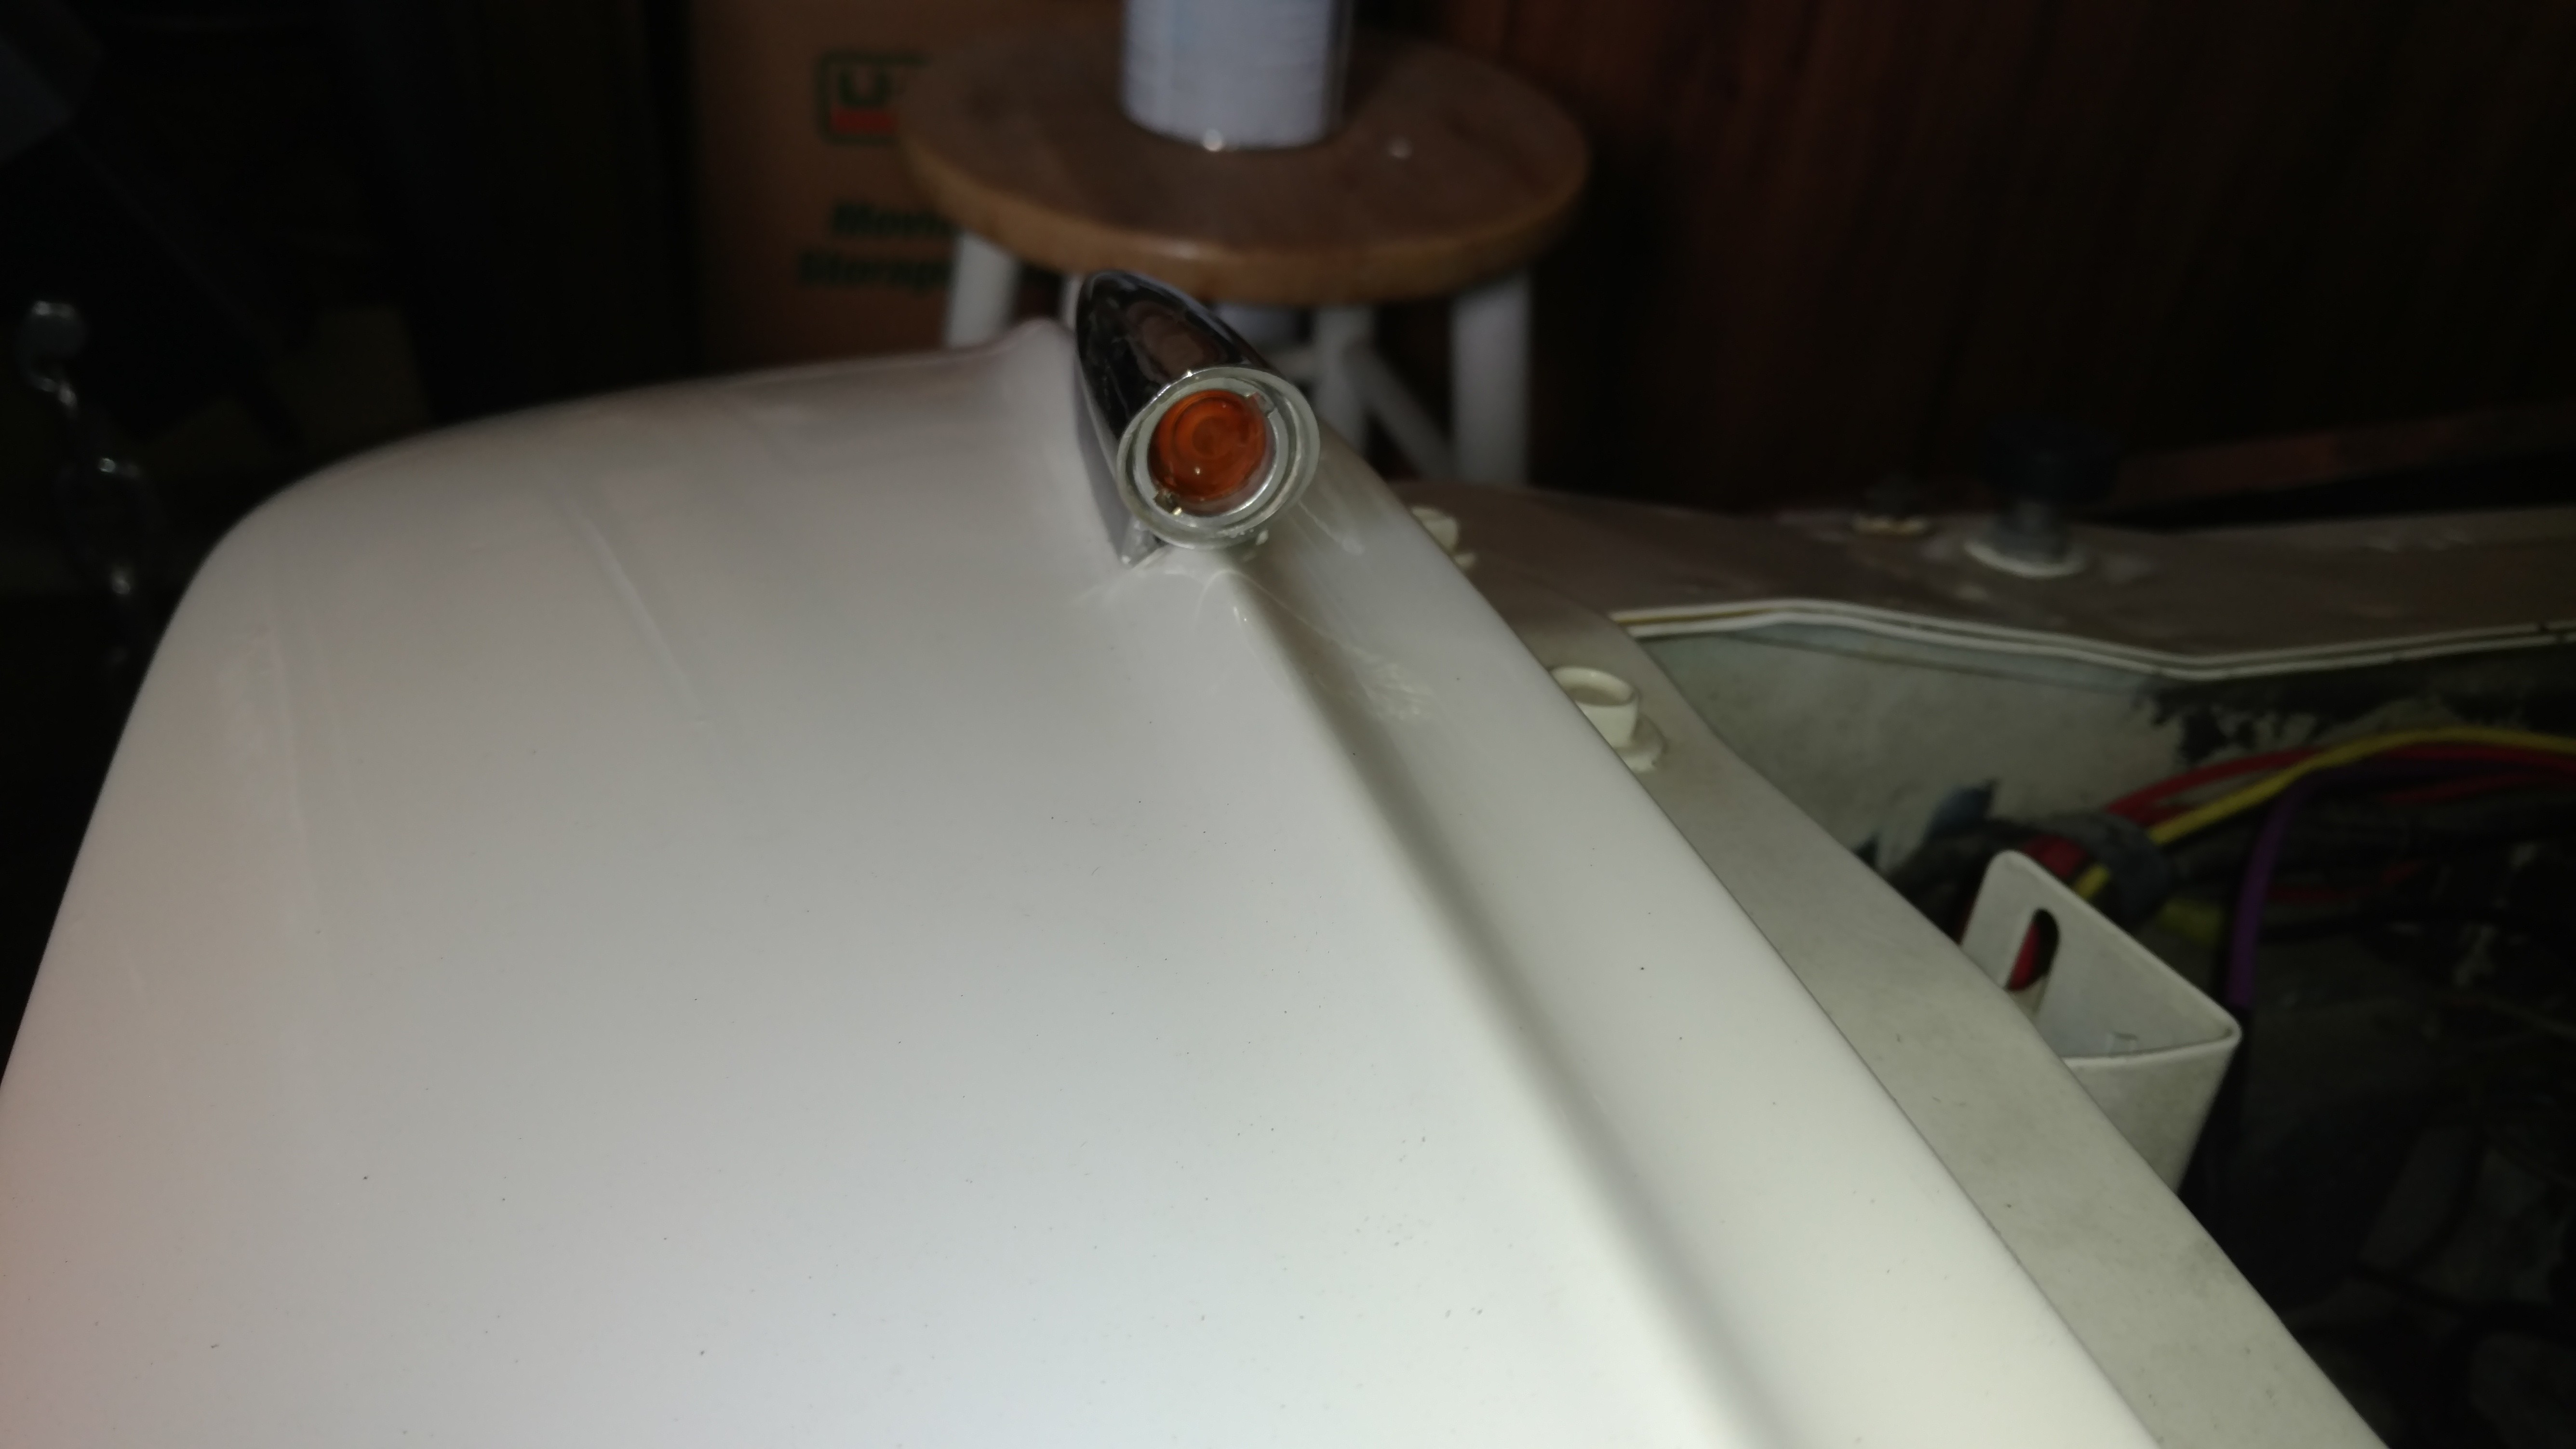
A bright and shiny new/old lens. Spiffy!
On the right, the bulb was still good (a surprise), but the corrosion apparently kept the unit from grounding properly. Once cleaned, functionality was restored.
The indicator bulb on the right surprised me by lighting right up on the test bench.
On the left side, I only had to replace the lens. The most difficult part of this job is getting the assembly back together against the pressure of the spring. I used a small stick to push the lens and socket into the housing, then did my best to get the threads on the bezel started by hand.
The small, fragile lenses have a small plastic tab meant to key into a slot in the housing. In a perfect world, the tab and key would keep the lens properly oriented. In my world, the tab was broken off one lens and barely registered on the other, so both lenses spun during assembly.
Still, I have bright, clean indicators now (and can stop driving around with the right indicator mindlessly blinking away).
…but the corrosion in the housing, spring and socket was severe. I replaced all these parts with good used.
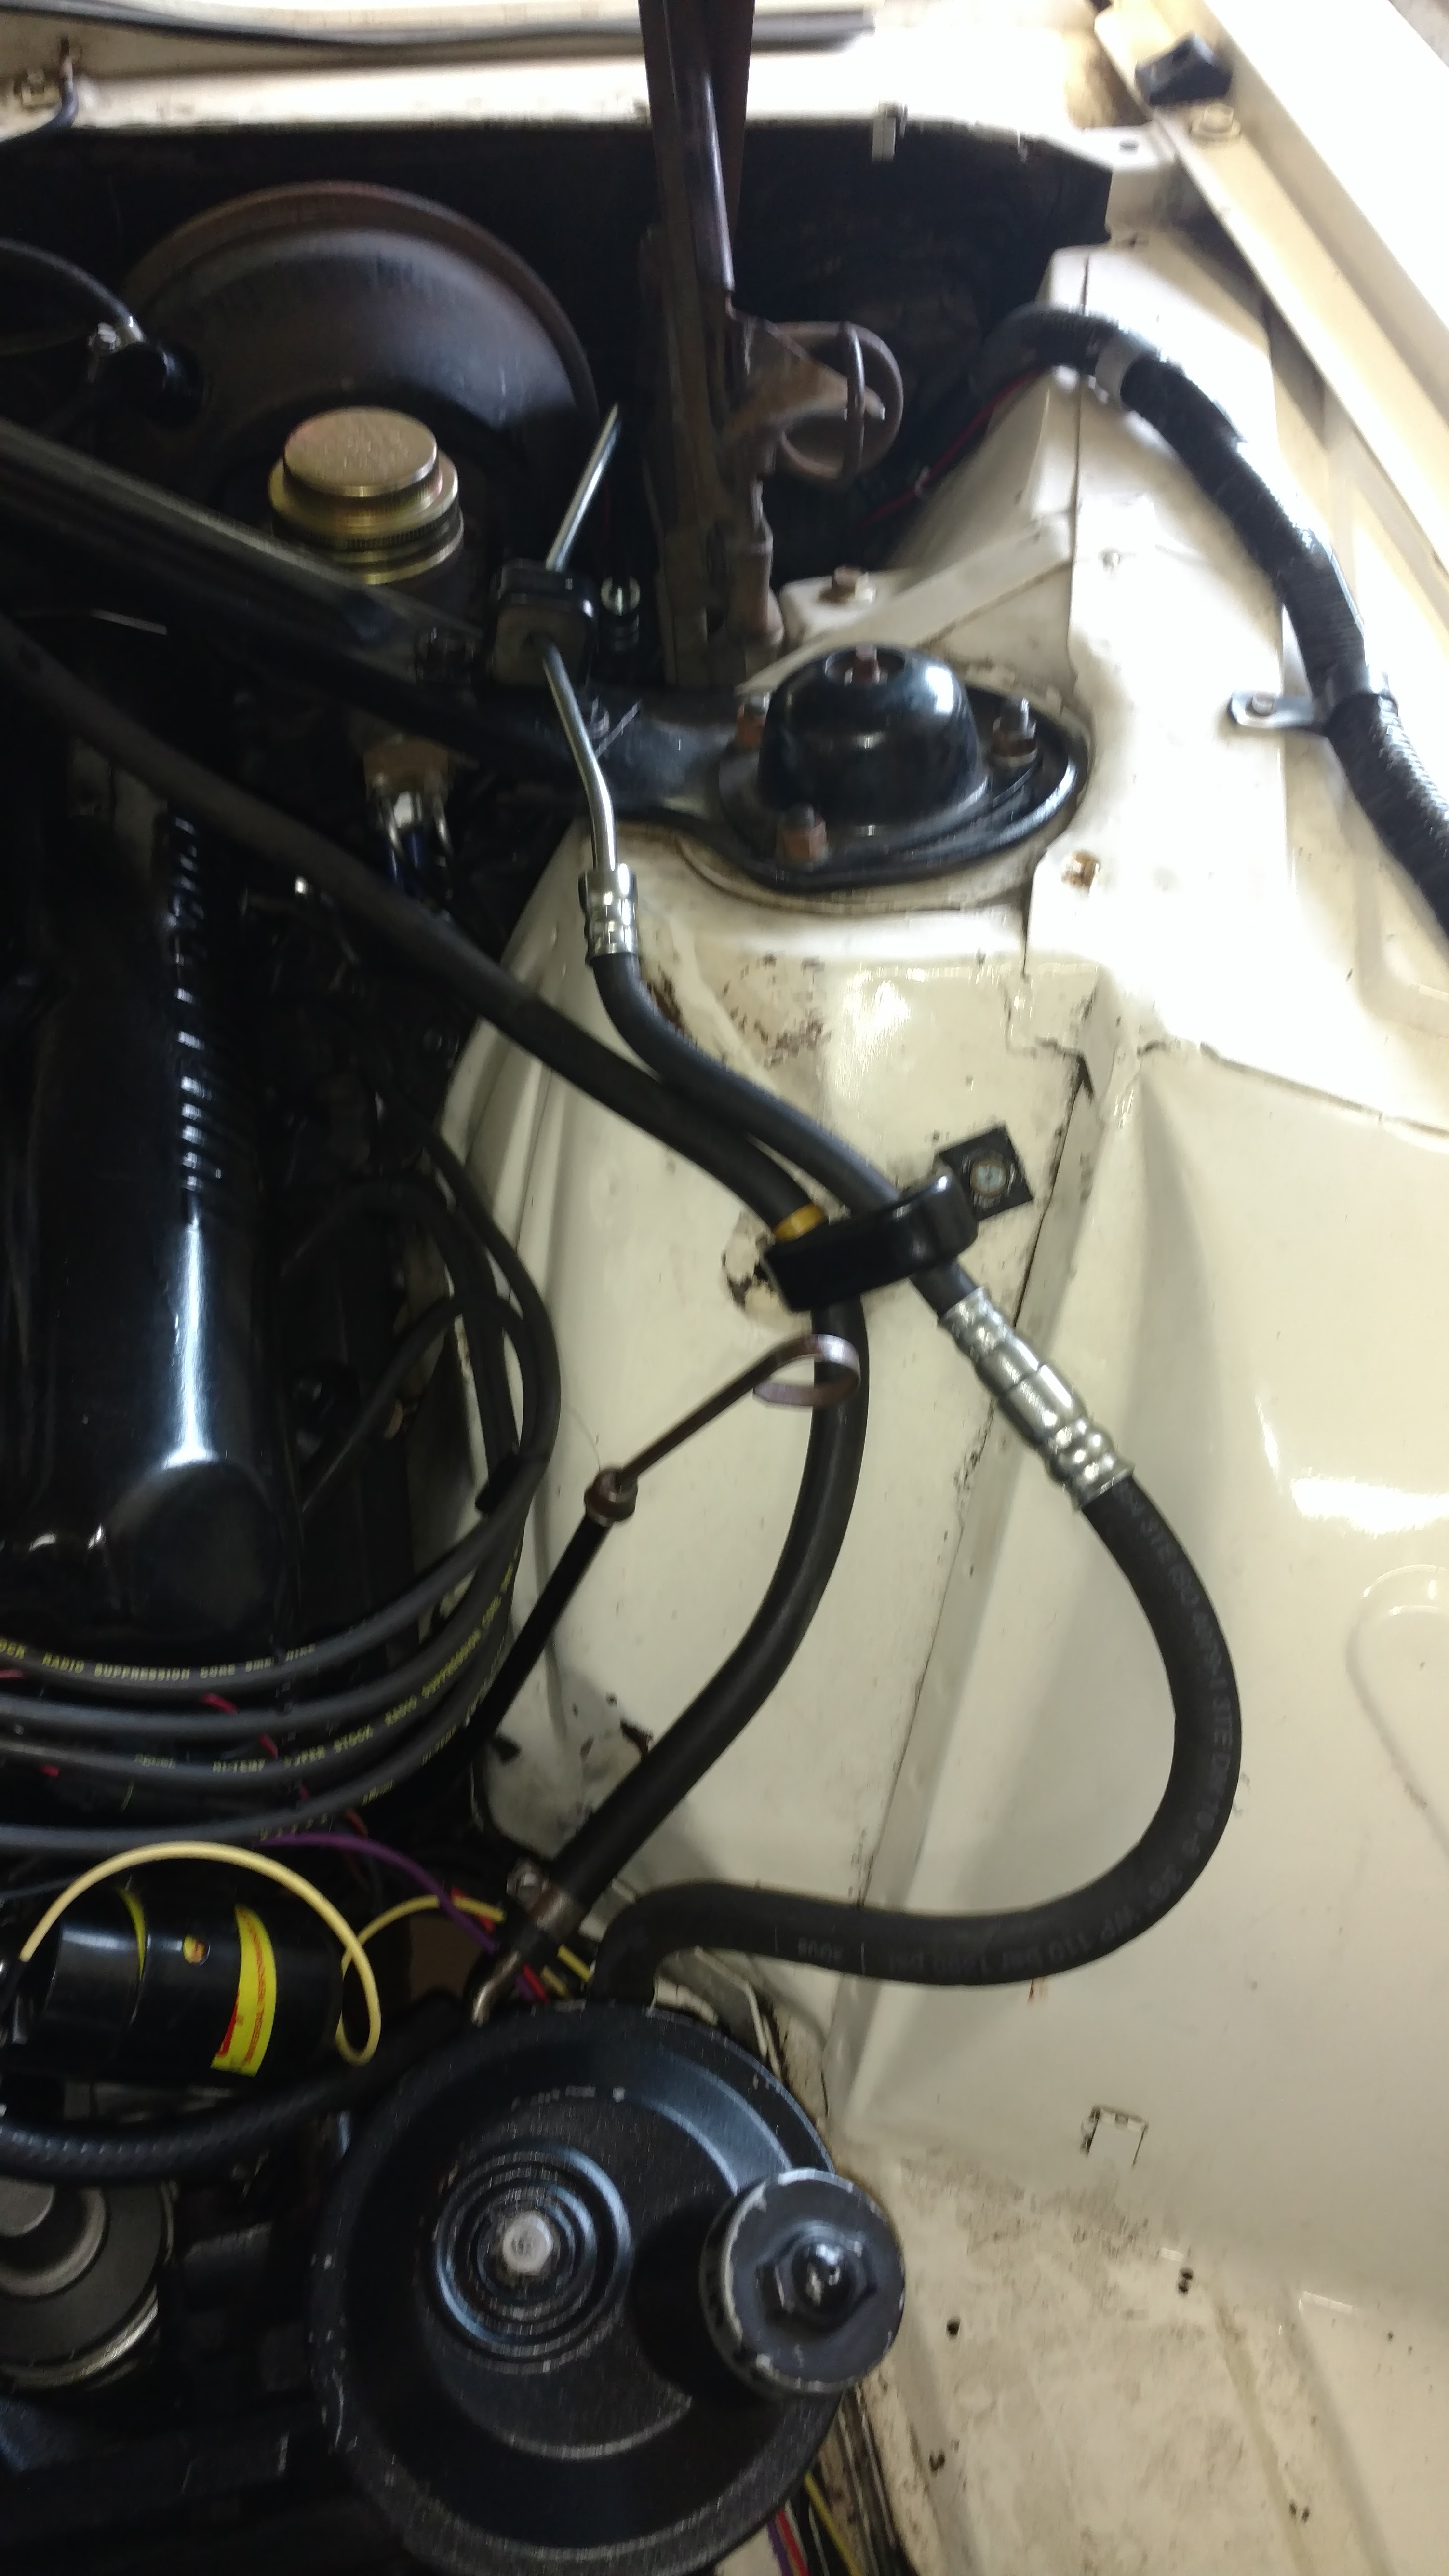
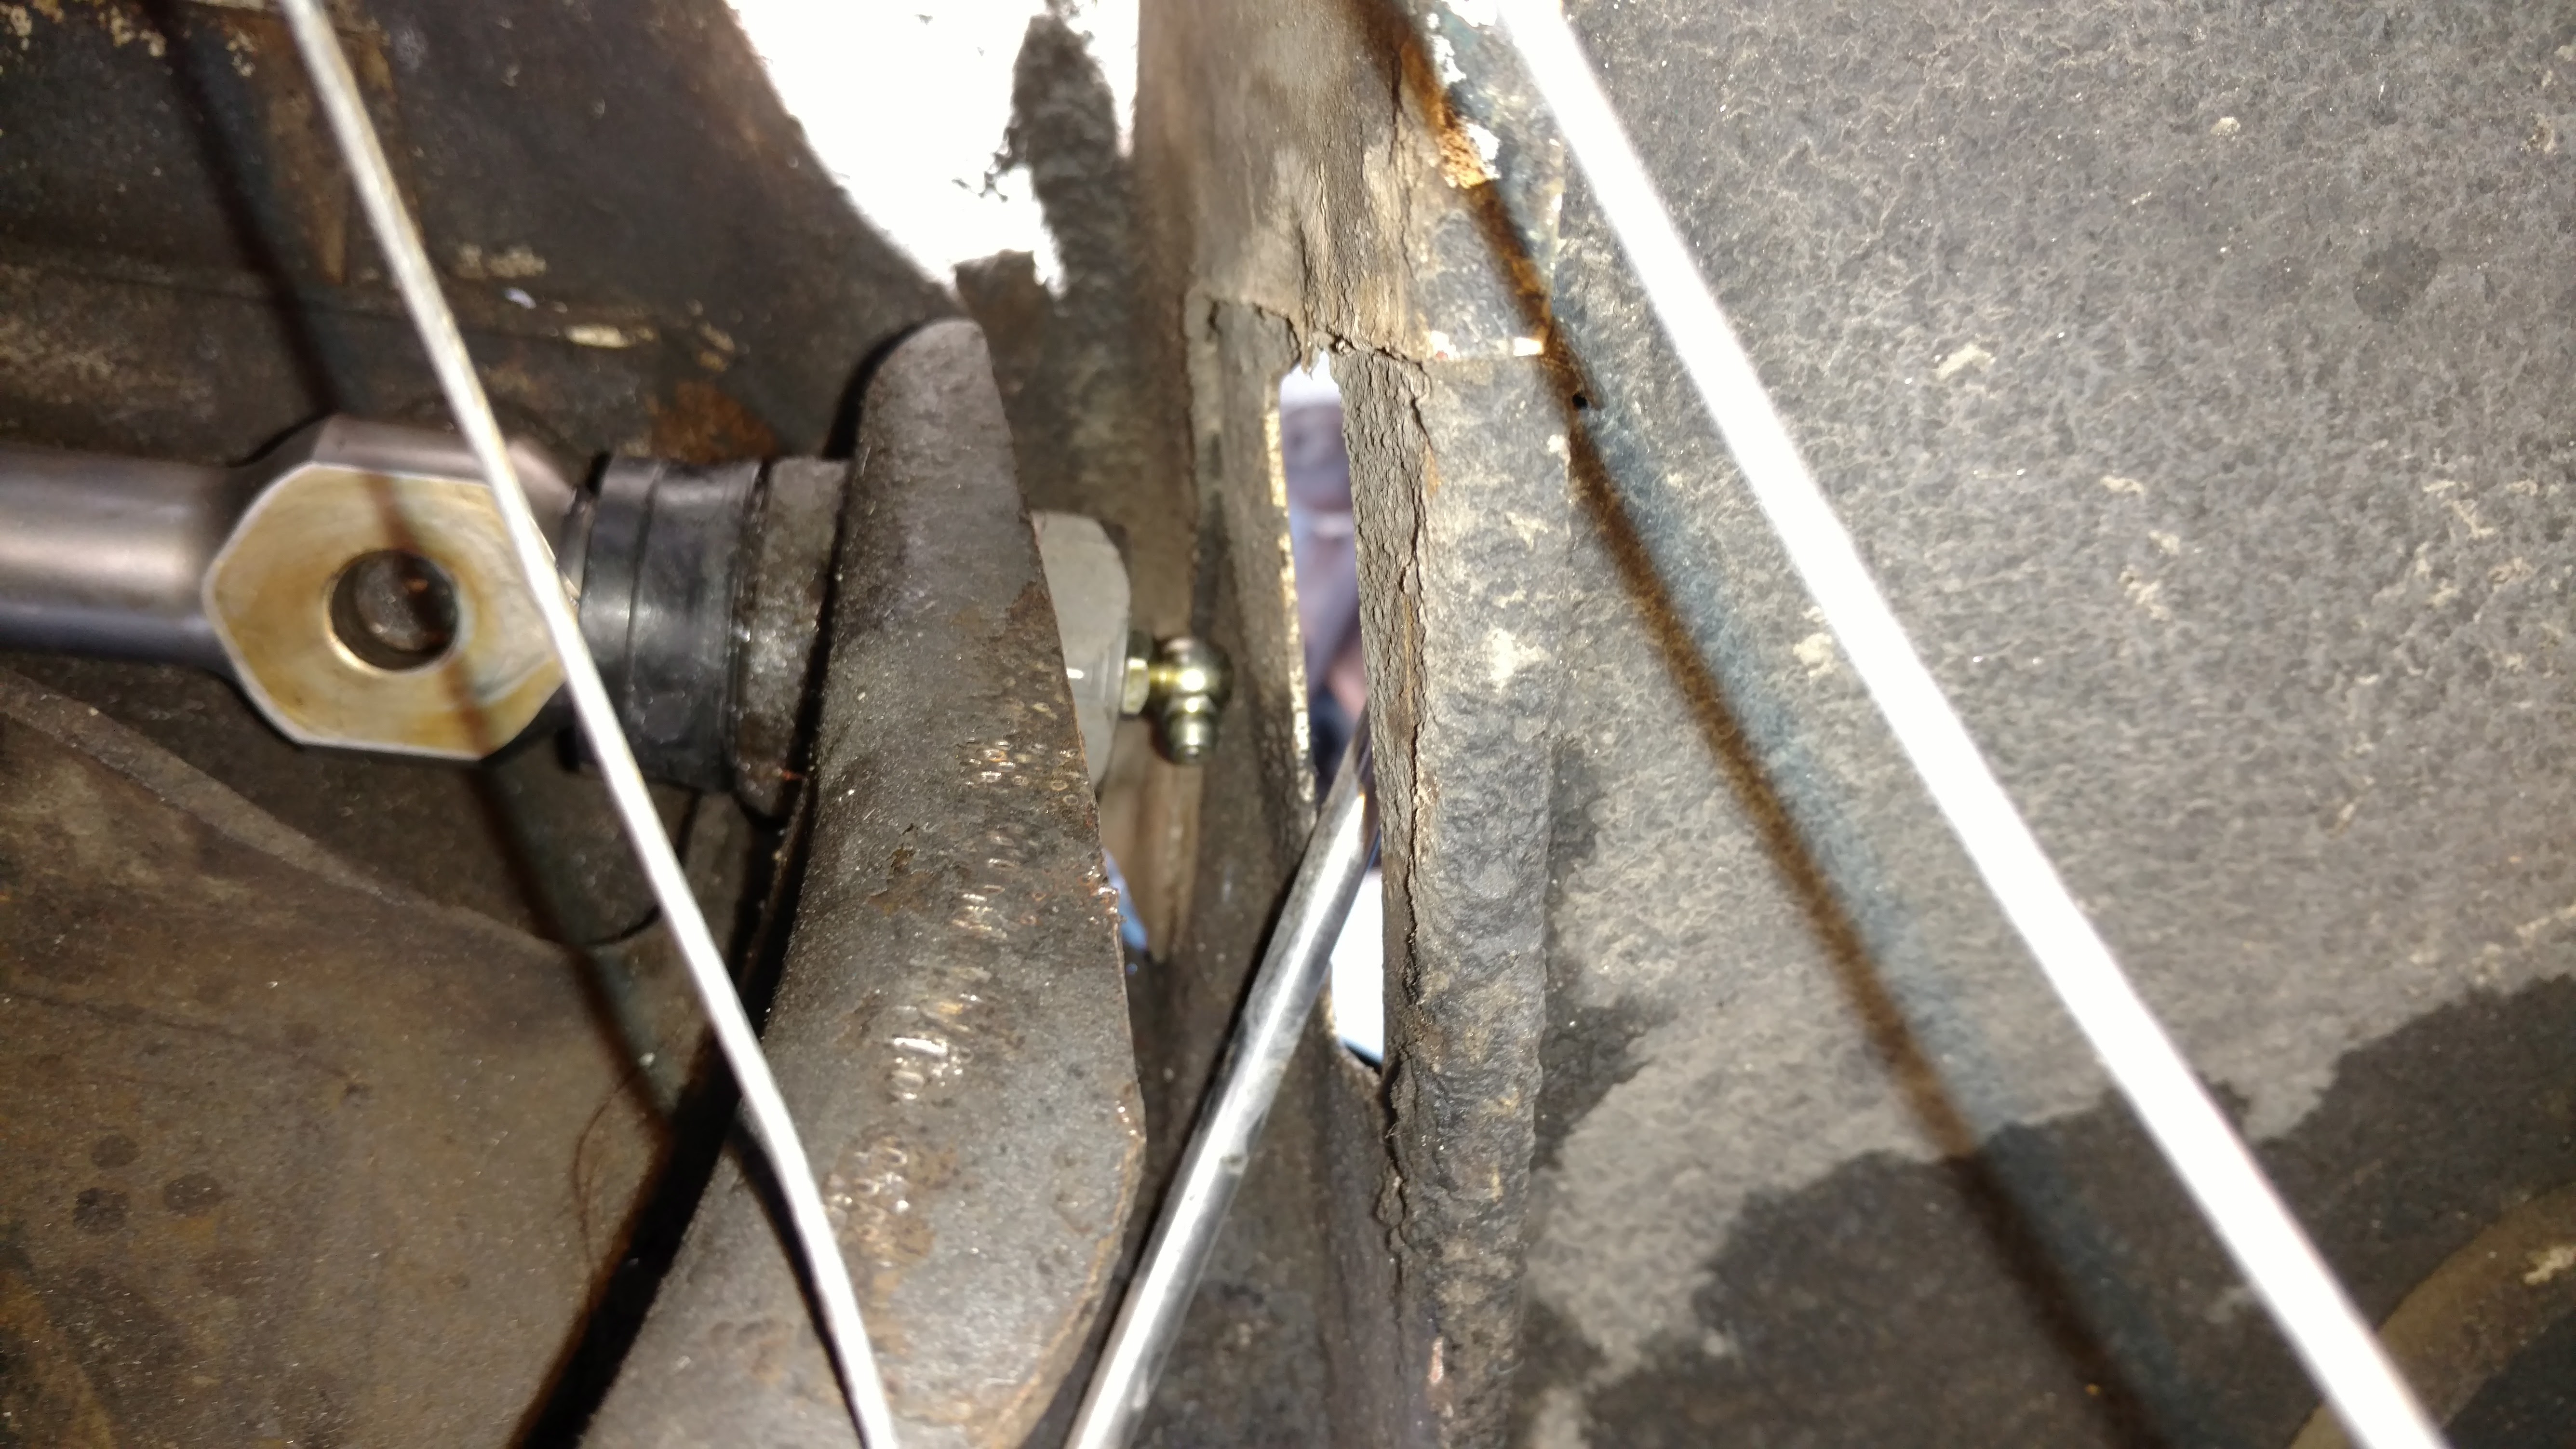
Under the hood, I noticed a while back that I had mis-routed the pressure hose from the power steering pump to the steering box. It should run outboard of the master cylinder, but it was on the wrong side. In that position, it can’t be clamped down securely without the hose rubbing on something.
Clamped down and done.
Getting to the fitting on the steering box is not easy, and it’s one of those operations where you have to move the nut, flip the wrench over, move it slightly again, flip the wrench…etcetera. Ug. I was there for a while, and when it was done, my lower back was acutely aware that I had dropped the front end of the car an extra inch.
I lost a little fluid in the process (messing up my pristine rebuilt steering box a bit), but once it was in place, I was finally able to secure the hose to the brace and inner fender—the final, final step to the engine removal and refresh project.
Lastly, I replaced a missing snap ring on the kickdown linkage. Fun fact: if the kickdown linkage comes apart at speed, it can jam the throttle open. Go check yours right now.
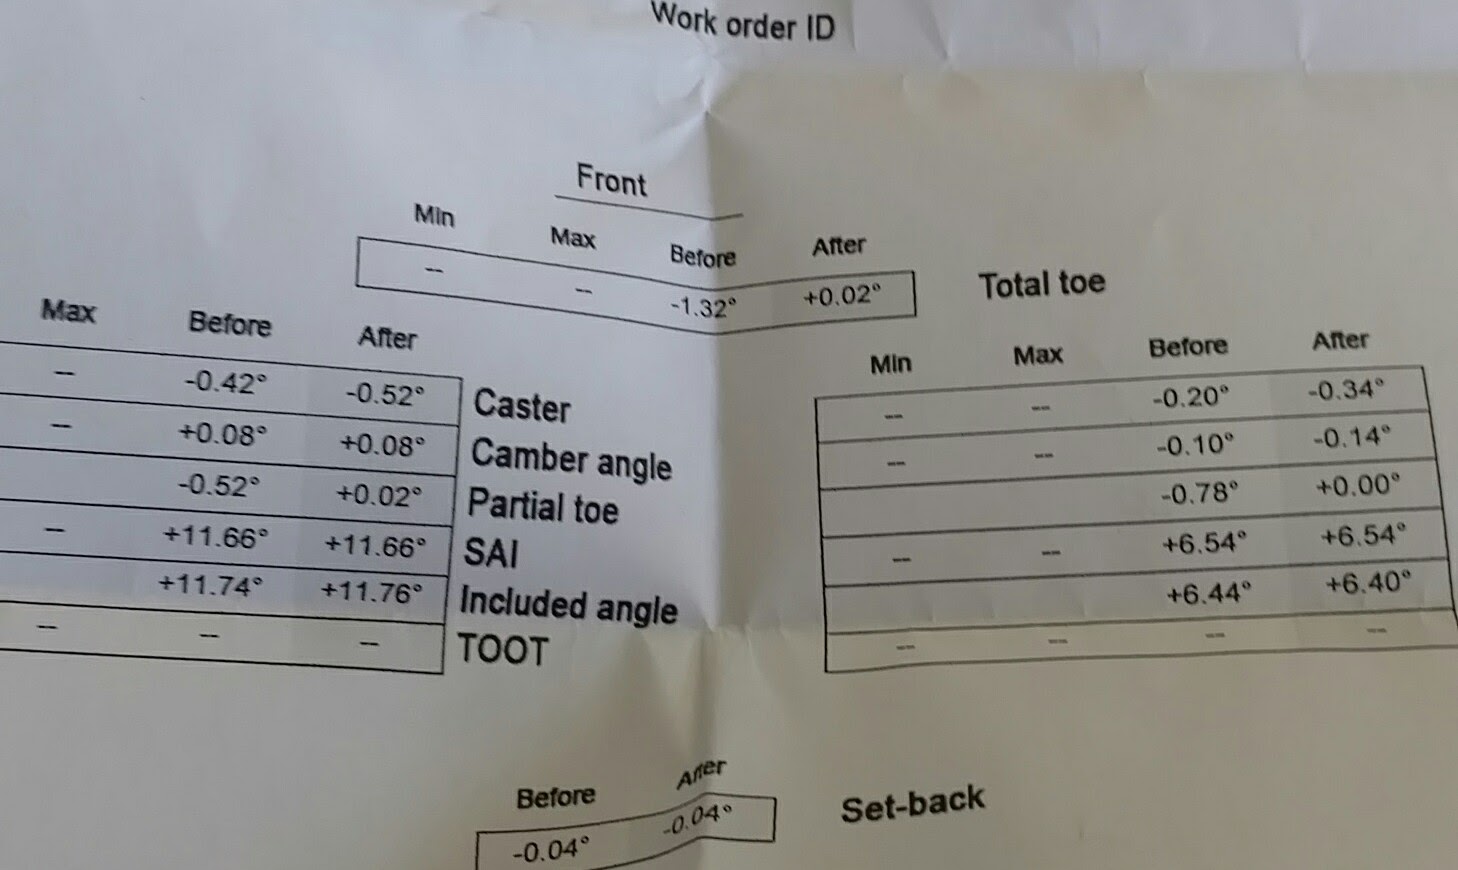
I’ve been around the block with the car a number of times now, trying to diagnose the high-speed engine miss and finally decided that it’s not something that will tune out. Nonetheless, it does ok at slow speeds, so I figured I wouldn’t have any trouble getting across town for an alignment.
I took it slow, stopped for gas and brought along the center link I bought but never put on. They got the car done in about an hour. Since I replaced the shims under the lower arms exactly as they were, my “eyeball” alignment was pretty close—saving them some time and me some money.
Cost to install the center link: $25. (I would have happily paid twice that.)
Alignment specs
I chatted with the shop owner, who happened to have a few vintage cars himself, about my engine woes. The usual culprits came up: carb, plug wires, distributor. Since there’s no easy way to test any of these individually, the only recourse is to start swapping parts. Plug wires are the cheapest, so I put a set on order.
For the moment though, I can still manage a slow cruise around town, now and again, which makes me happy.
It was briefly and unexpectedly dry today, so I fired up the T-Bird and broke out the timing light.
Back when I bought this car, it was a bear to start. Things improved over time, but it never lit up as easily, the way the Y-Block did, when I had my old truck. Before the refresh, a week long sit would have meant a few minutes of cranking, with possibly a few cough-sputter-try-agains thrown in for good measure.
Ol Red wasn’t pretty, but oh so reliable.
After the refresh, it fired after about 20 seconds of cranking—just long enough to get the gas flowing—and it stayed running, nice and strong. My sense is that, yeah, that was one tired old cam, and it was good to get it replaced.
I’m also getting the sense that in the time-honored Thunderbird tradition, there were multiple overlapping problems with the motor when I started this project. Solving one, as usual, has just uncovered another.
While the motor warmed, I poured in a couple gallons of gas from a 5-gallon jug. (Not an easy thing, they way that fill tube is arranged.) With a tach and timing light, I set the idle to 800 rpm and dropped the timing down to about 8 degrees advance. There was still some vibration at high revs, but overall, things were smoother than before.
I took it out for a 2 mile spin and what felt like vibration in the garage was more like an occasional misfire or hesitation under moderate acceleration. At cruise, around 40 or less (I didn’t go any faster) it seemed smoother than it ever had. Looking back over my notes, I had bucking, heavy misfiring and even some backfires, not to mention a suspicious ticking sound in the motor prior to this evolution. Most of that is gone, so the work was not without some reward.
I’ll be trading in the ‘Bird for an ark shortly.
The ride, with the new suspension, was sweet. And the lowered stance is pretty much perfect—exactly what I wanted. Oddly enough, it tracks arrow straight, at least at low speeds. (I have no idea how that happened.)
For now, at least, everything seems ok for cruising around town. Rain is forecast for, well . . . pretty much forever, but when it breaks, I’ll run in for an alignment. After that, it may take some new parts, but I’m pretty certain I can tune out the last of the misfire. It looks to be a fun summer with the car.
I actually took the car out for a spin yesterday—not far, and not fast, but still a good feeling to feel it moving again.
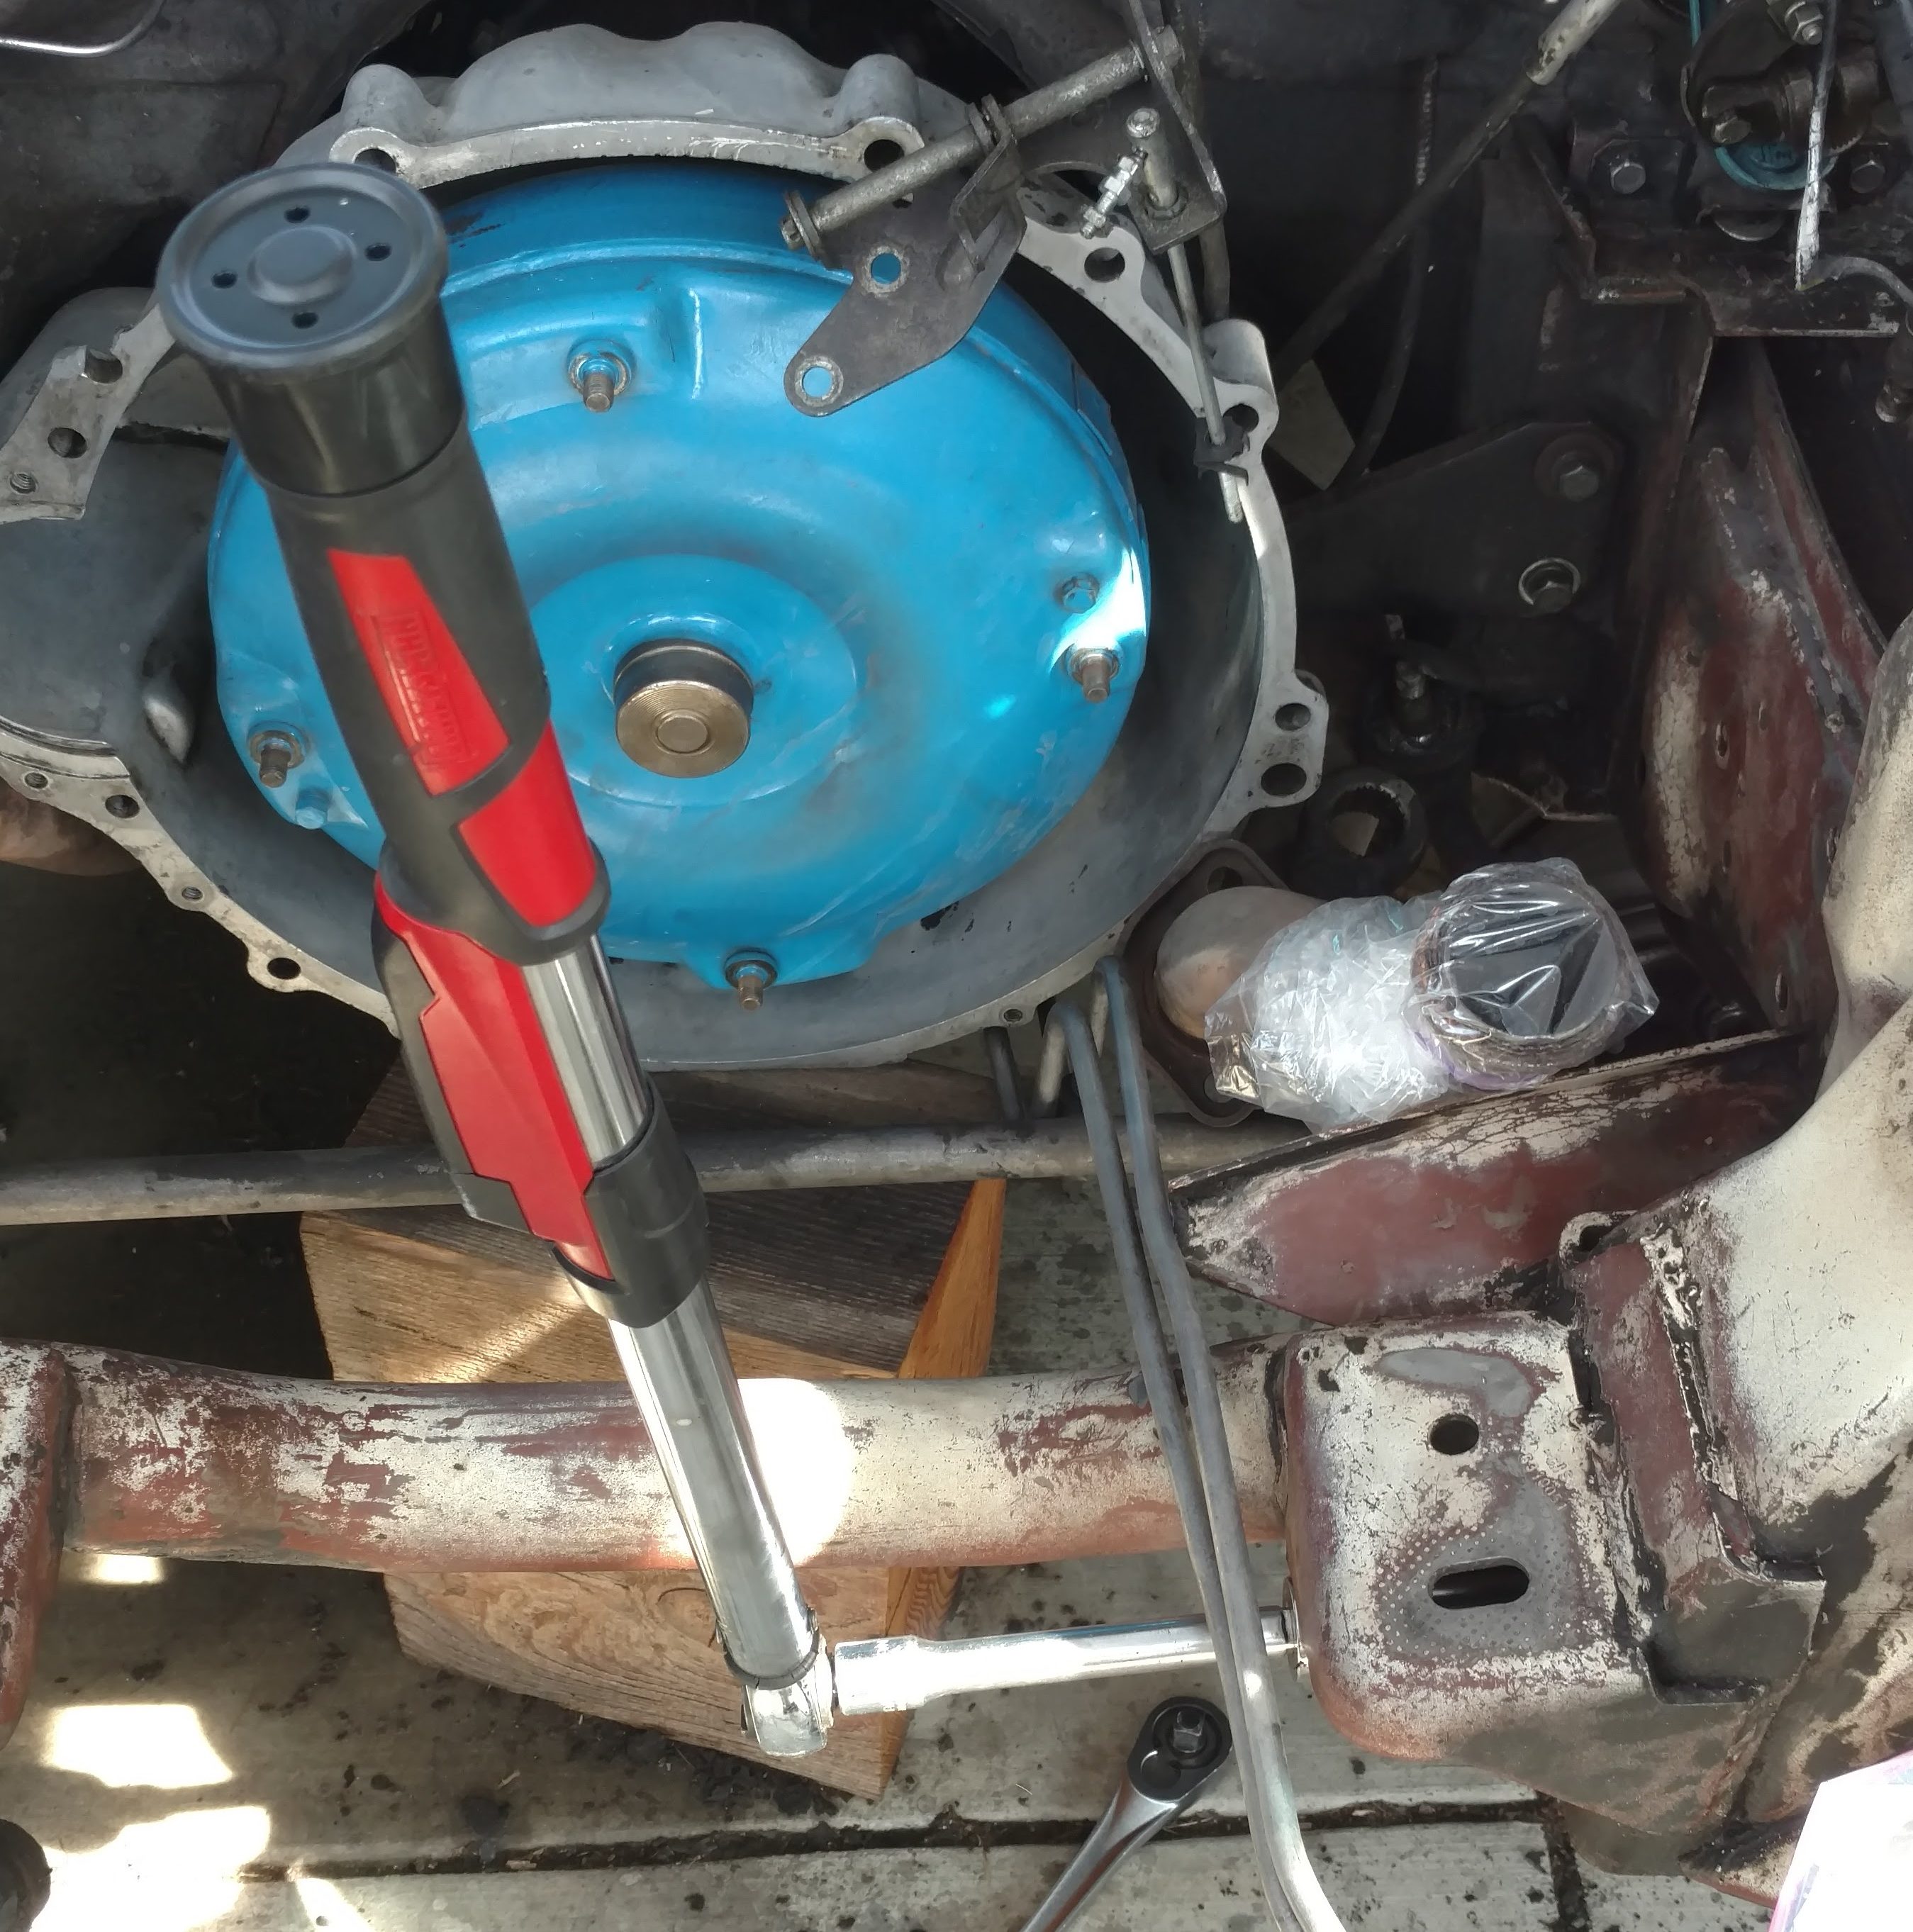
It took the better part of the afternoon to get the last bits and pieces in place. Earlier in the week, I installed a new solenoid, fixed some broken wires at the alternator and lubed the new suspension pieces. Yesterday, with my son helping, we located TDC and installed the distributor with a few degrees(more or less) of advance. Those were the bigger hurdles.
Looking around, there was still plenty to do: throttle linkage, vacuum hoses, coolant, etc. For most of these, the hardest part was actually finding the bits and pieces in the shop. It was about 3:00 when we stood up and realized there was nothing else left to do but crank it over.
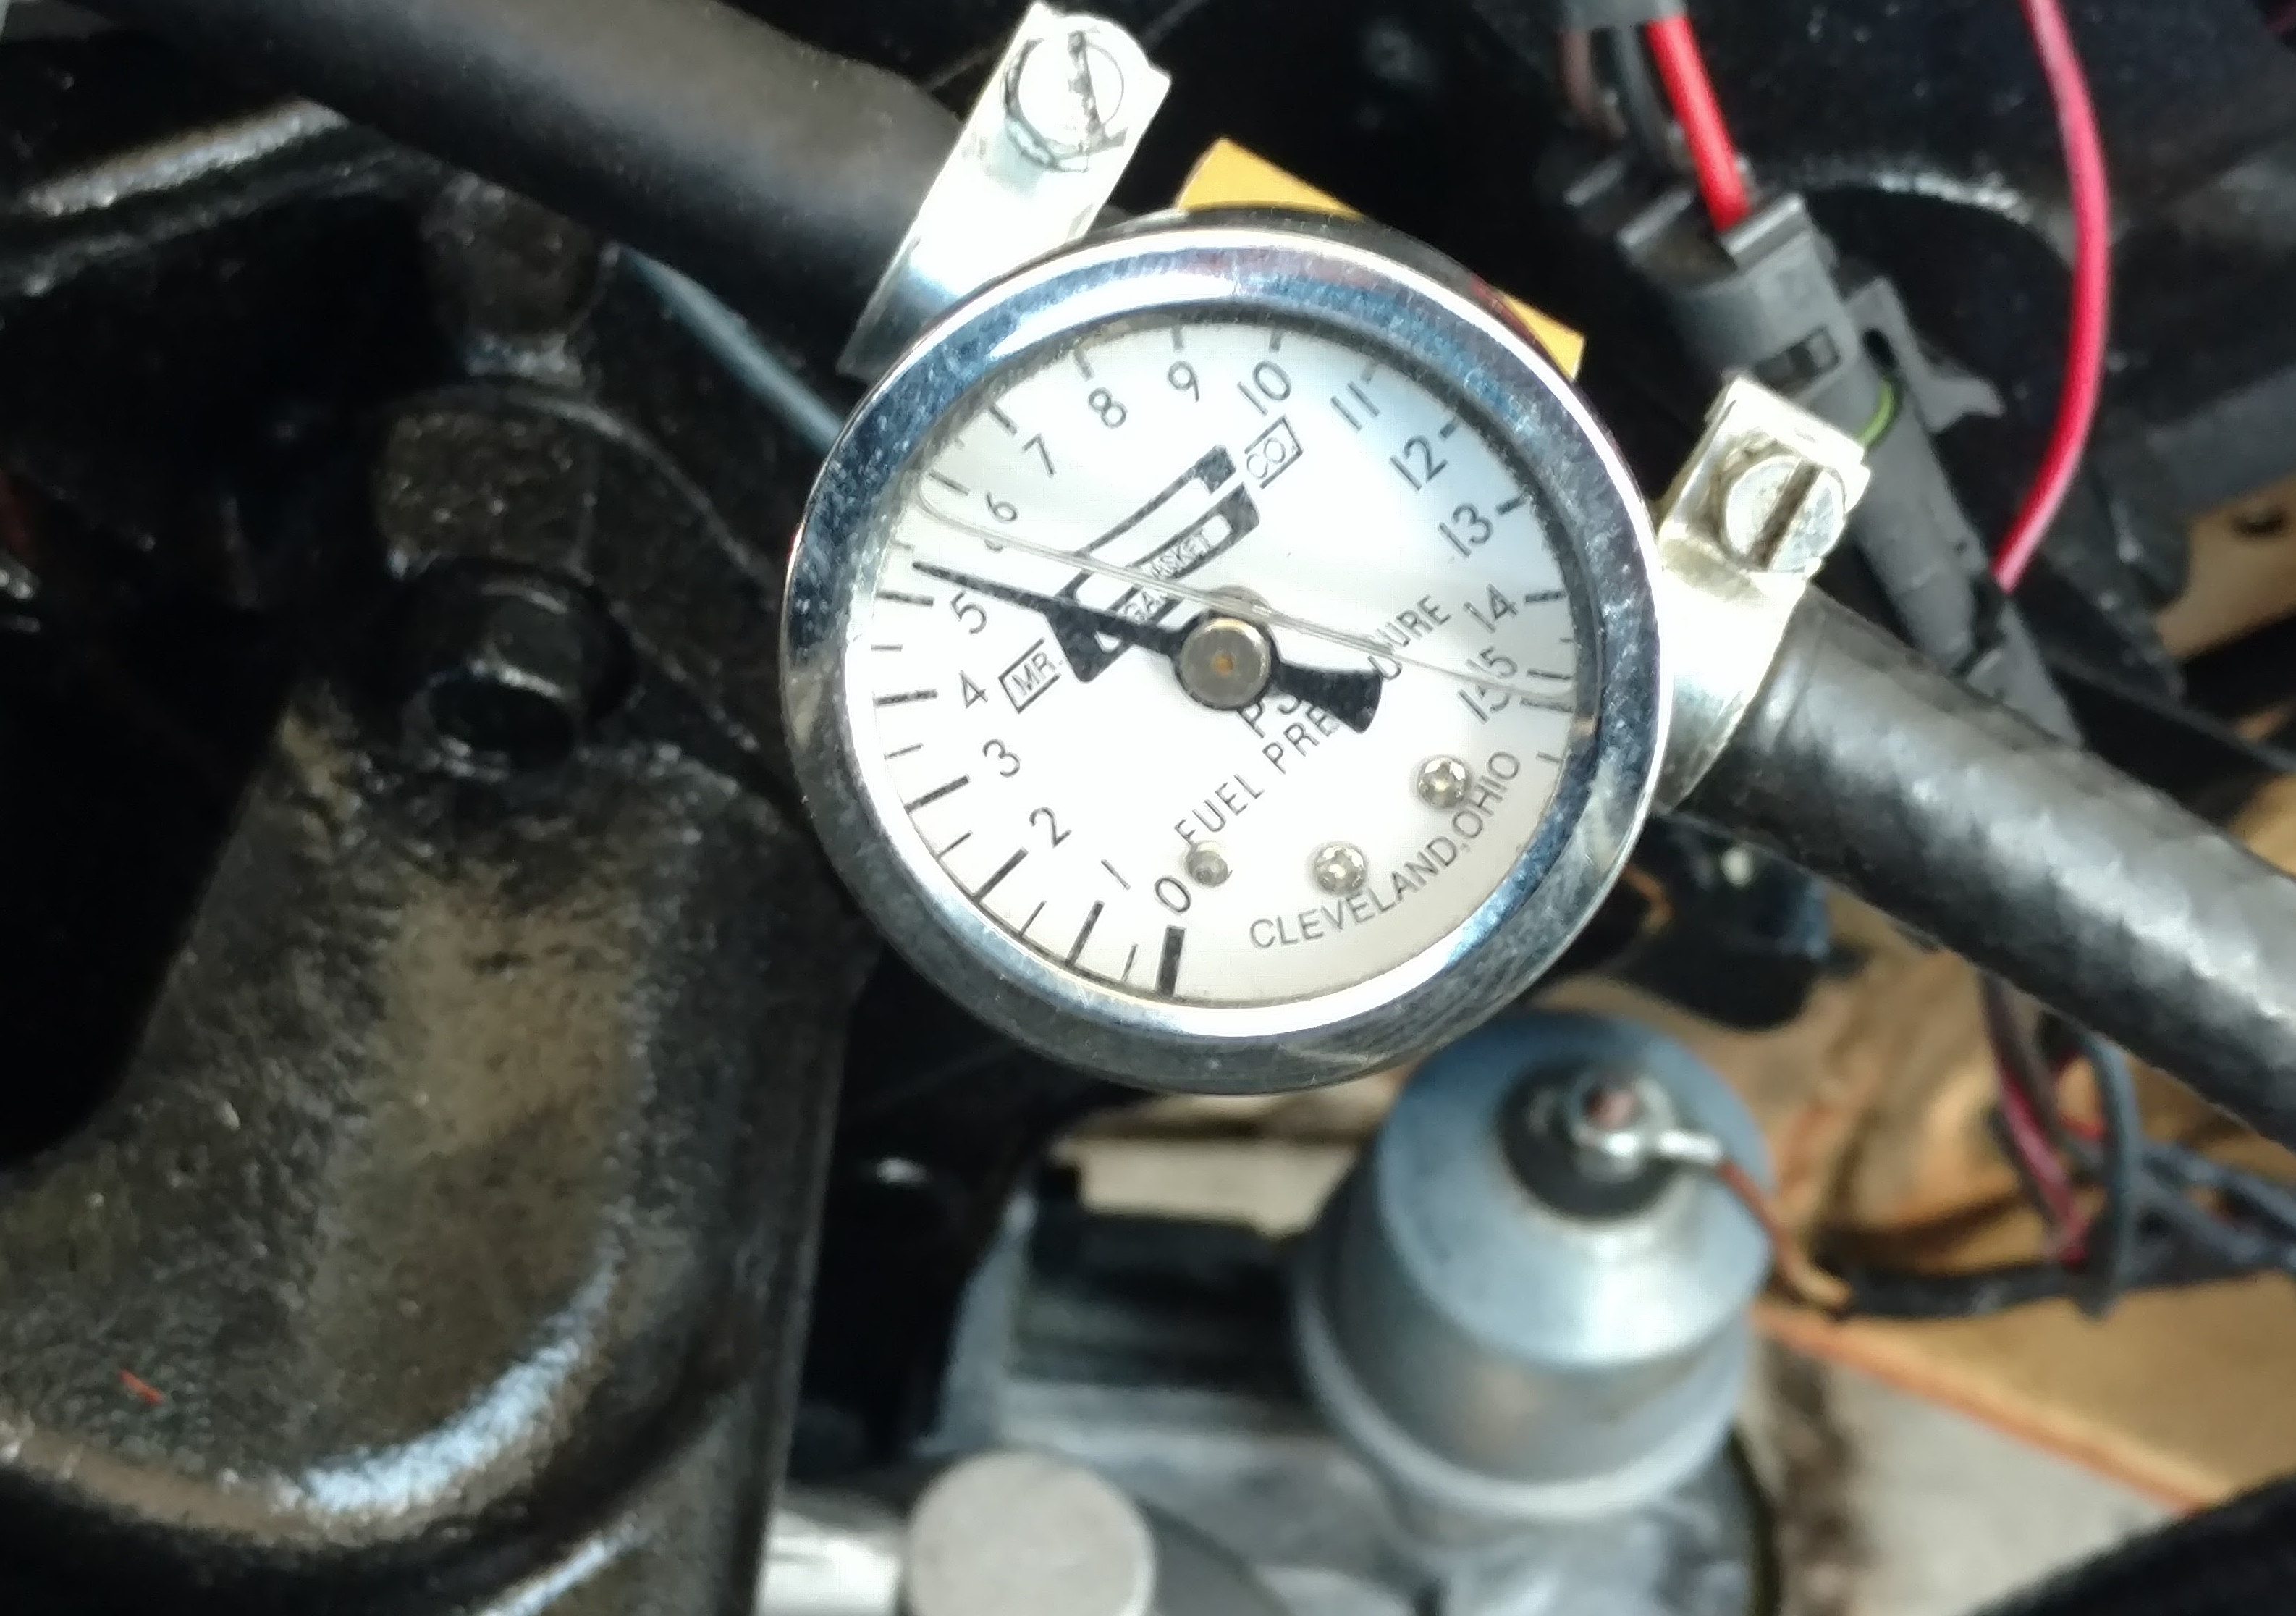
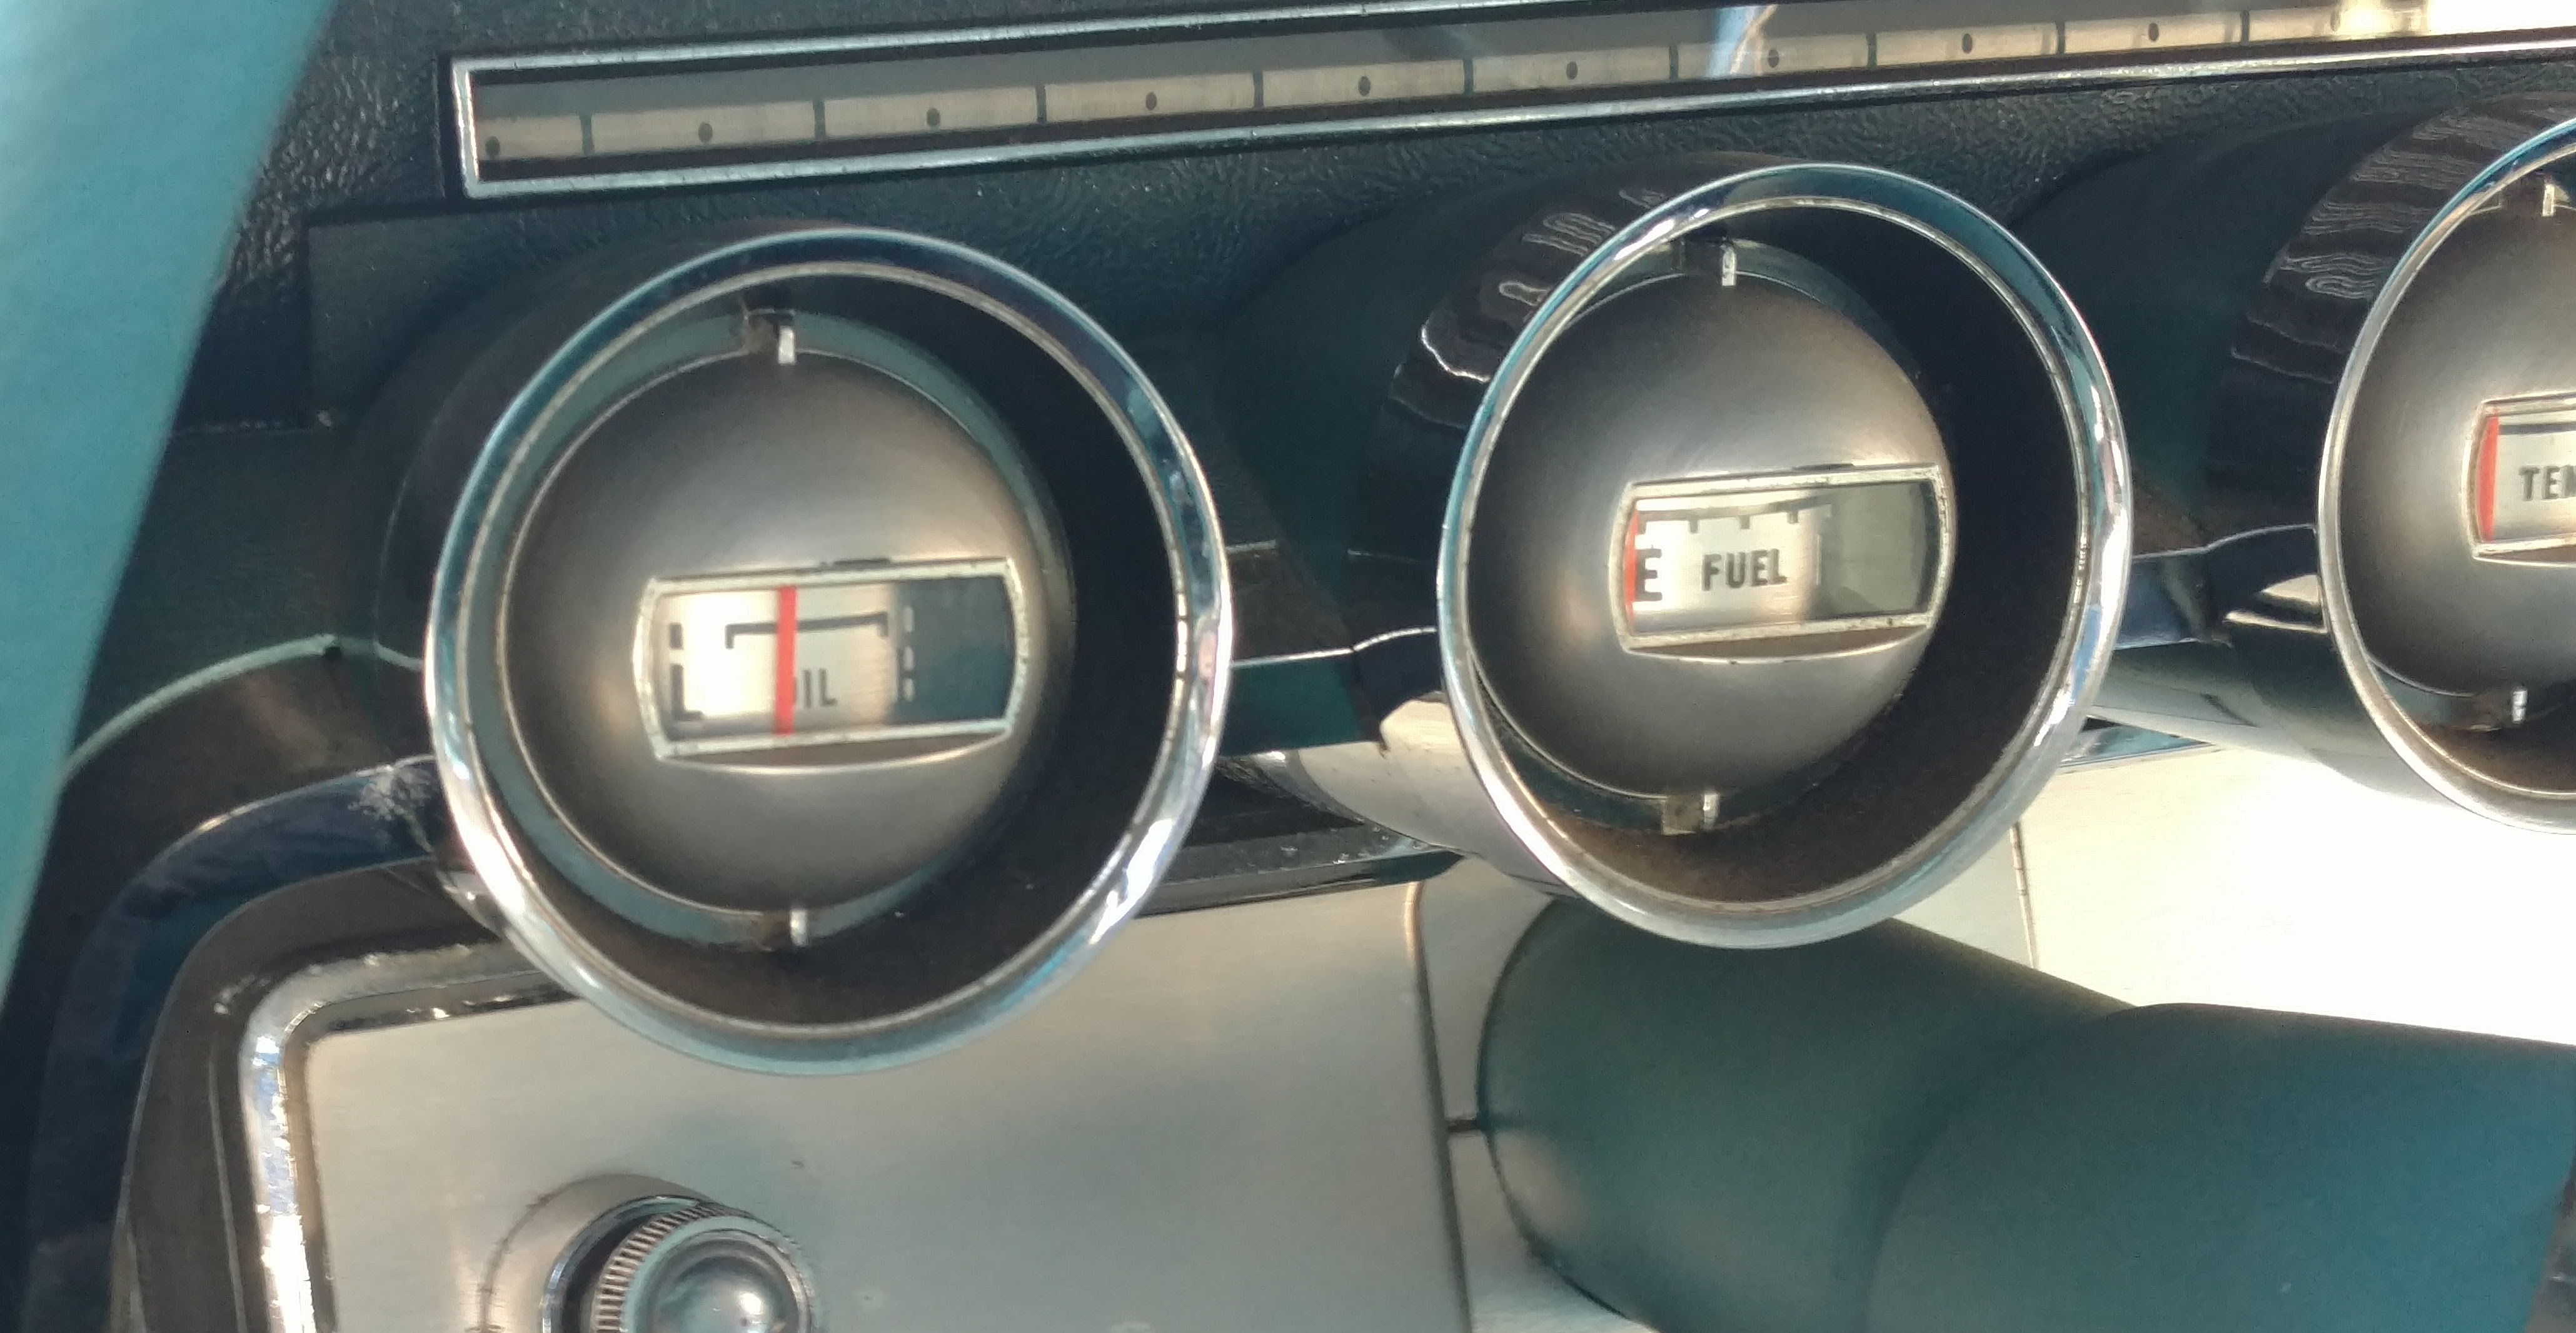
Fuel pressure—right on the mark.
A few shots of starting fluid in the carb, turn the key and—it caught on the first revolution. It took a few starts to get fuel flowing, but within a minute or two, the motor was purring at idle. Oil and fuel pressure were both good, so I set the timing around 18° and let it warm up.
Once up to temp, I revved it up to moderate rpm’s, where it stumbled, shook and backfired—similar, but not identical to the symptoms I had before starting this project.
The oil pressure gauge isn’t accurate by any stretch, but a needle in the range indicates that all is well.
A little dismayed, we shut it down and installed the power steering pump and the new hydraulic lines I bought months ago. The car was still on jacks in front, so it was a simple matter to start the motor up and bleed the system. (It took about two quarts of fluid before the wipers and power assist were working normally.)
Motor back off, jacked the front end down, kicked the chocks away from the rear wheels and down the driveway we went. The brakes were a little grabby at first—not a surprise—but otherwise the ride was smooth (and it even tracked straight). I took it a couple of blocks up and down the street at parade speed before tucking it into the garage.
Out of the weather, finally.
It’s pretty remarkable how much went right. From the camshaft to the radiator to the steering box and suspension—a lot of parts were replaced or refurbished. Except for the high-speed stumble (which is a big except), I’m pretty pleased.
I now know that, mechanically, the motor is sound, so the stumble has to be an issue of fuel, or (more likely) ignition. In any case, the goal is to have it sorted out by the time spring rolls around.
It’s a busy season for me, work-wise, so the Thunderbird has been sitting quietly for a while. It’s been damp, so I’ve had some concerns about moisture condensing in the motor, leading potentially to rust.
My plan today was to crank the motor over with the plugs out (i.e. as fast as it would spin) to see if I can get oil flowing. I’m still not convinced that the distributor fully seated on the oil pump drive shaft, so as a test, I figured I’d crank it a while, then pull the oil filter to check that the system is working.
I began by tightening up the coolant lines and adding coolant to the system, just for good measure. I got about 2 gallons in before water started to leak. Swearing, I flowed the flow of water up to the thermostat housing. The stat didn’t seat properly, so coolant was pouring out freely where the surge tank bolts to the block. (This is exactly what happened to me the last time I had this thing off. Ug.)
I’m blaming my multiple failures with this thing on a poor design.
Daylight was fading, and I figured I could still give the motor a spin even without coolant. I hooked up the battery (fresh from the trickle charger) and turned the key.
The motor spun freely, but I wanted to be able to see what I was doing. Under the hood, I jumped the contacts on the solenoid, a trick I remembered from my youth.
Memory is strange, though. I must have gotten something wrong. Instead of cranking the motor, I fried the solenoid—killed it, in fact.
At the end of the day, some barfed up coolant and not much closer to running.
So, a bad day with the car. I’ve got a short shopping list: gaskets, solenoid, thermostat (in case the old one is bent), more coolant, and some fuel line. Tomorrow will hopefully be better.
I was a little anxious about the upper control arm shafts, as the manual is uncharacteristically detailed about their assembly: making sure that they are exactly centered, then using a spacer to hold the ends of the arm apart while bringing everything to the final torque specifications.
As is often the case when using aftermarket parts, the instructions in the manual didn’t really apply. As I understand it, the two nuts at the ends have complementary threads that are the same pitch for both the control arm and the shaft. As you thread the nuts into the arm, you are also turning the nut on the shaft at the same rate.
Over the years, at least on my car, the stamped steel arm has developed rust and pitting, so the threads are rough and degraded. Even after cleaning the arm, lubricating the threads and buying a 1 3/8″ socket (for a firm grip on the nuts), I still needed extra leverage—beyond the 100 ft/lb torque spec—to get the control arms shafts installed.
Getting the shafts centered wasn’t an issue; if you start with them in the center, even if they shift, they can be threaded back into place. Before installation, I just made sure that they were centered properly in the arms.
Perhaps this is why Ford didn’t include zerks here. They just don’t fit.
I did make a spacer from ¾” pipe, but only used it once. The aftermarket shafts have longer threads than stock, so installing the nuts on the ends does not compress or distort the arm—or so it appeared to me.
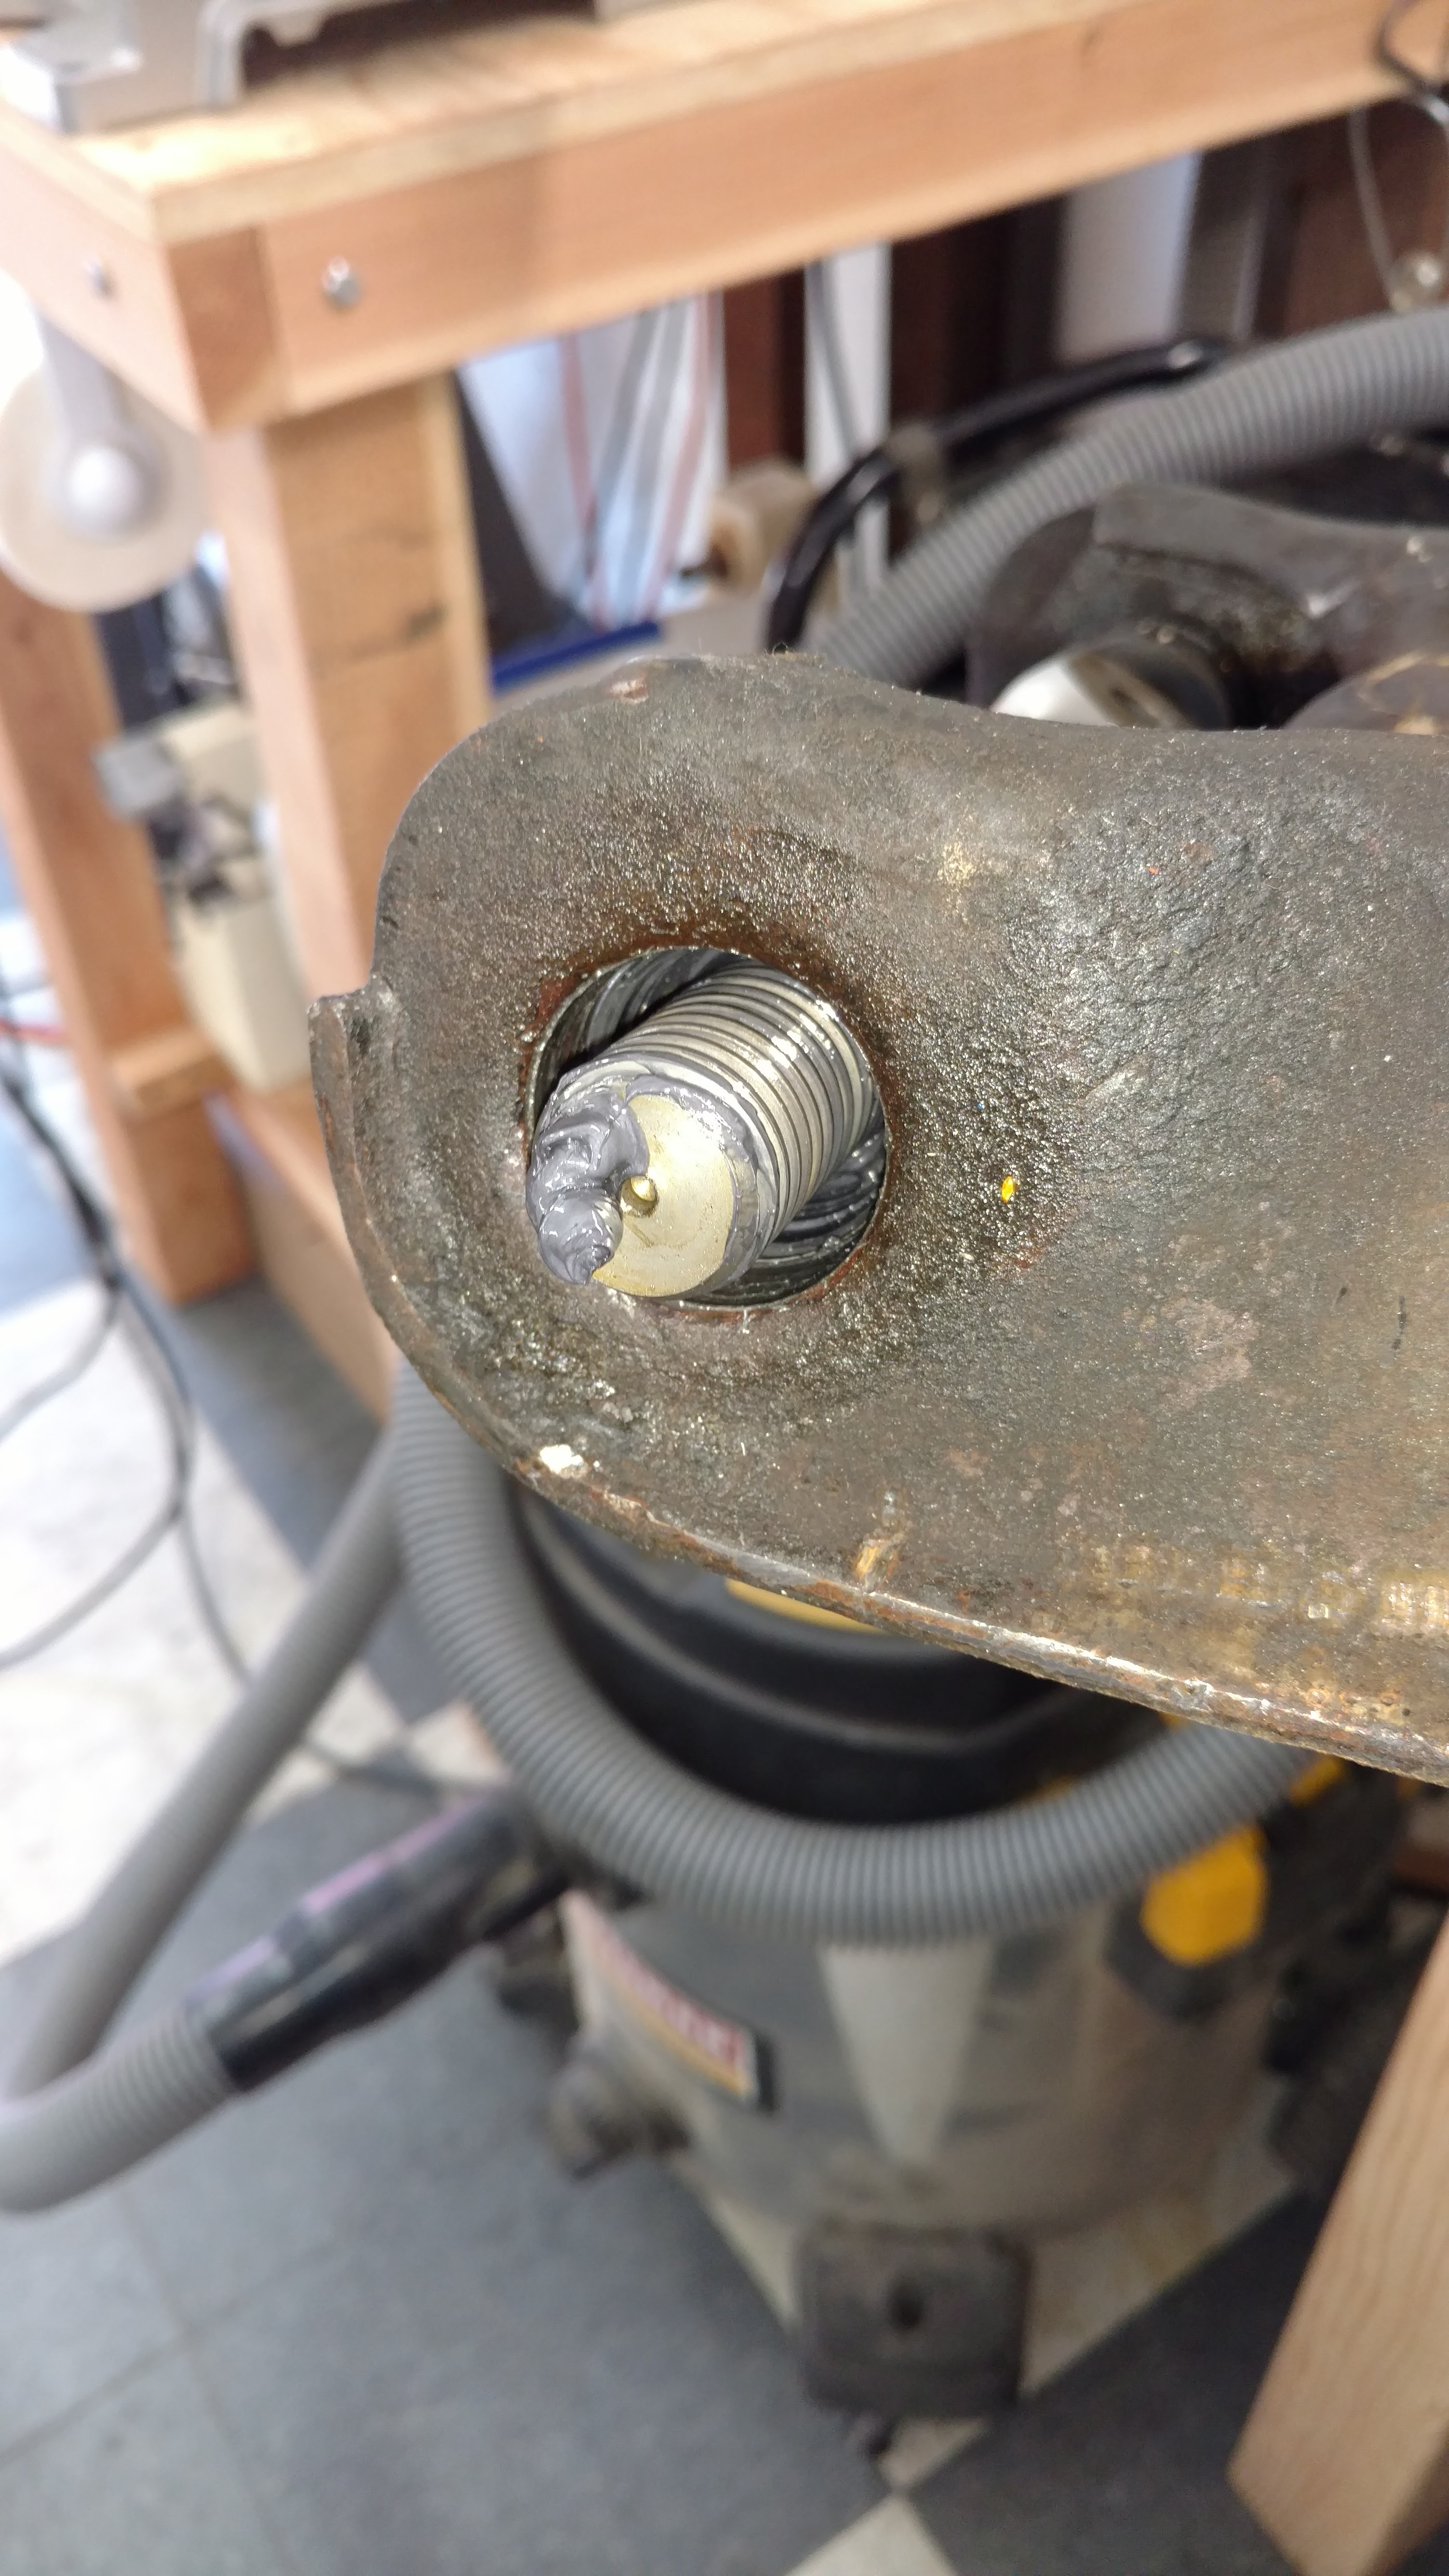
Before I compressed the springs, I did a quick test fit in the car to make sure the upper arm went in ok. Unlike the original, the new shafts include 90° grease zerks, screwed on to the ends of the nuts. I thought these were a good idea, until I realized that on one end, the zerk interferes with the shock tower.
This is how much grease I was able to force into this joint with a grease gun. Pitiful, isn’t it? (Photo taken after disassembly. I added more grease and put it all back together.)
I hadn’t put grease on the threads of the shaft during assembly, thinking that I would lube the entire suspension after installation. I swapped out the 90° fitting for a straight one (which is shorter, and does clear the tower). Knowing that I could never get a grease gun on this fitting once the arm was installed in the car, I tried to inject some grease into the shaft.
It turns out, I wasn’t able to get much grease in there. I’m guessing that the threads seal tightly, so the grease won’t flow into the fitting. It’s lucky, I guess, that I found this before the springs were in and the assembly all together. At least this way, I could disassemble the shafts from the arms, grease them thoroughly, reassemble, the proceed with fitting it all together in the car—without having to remove the springs a second time!
But it was a lot of extra work. And someday, someone (possibly me), will wonder why there’s a grease fitting in there that no one can reach.
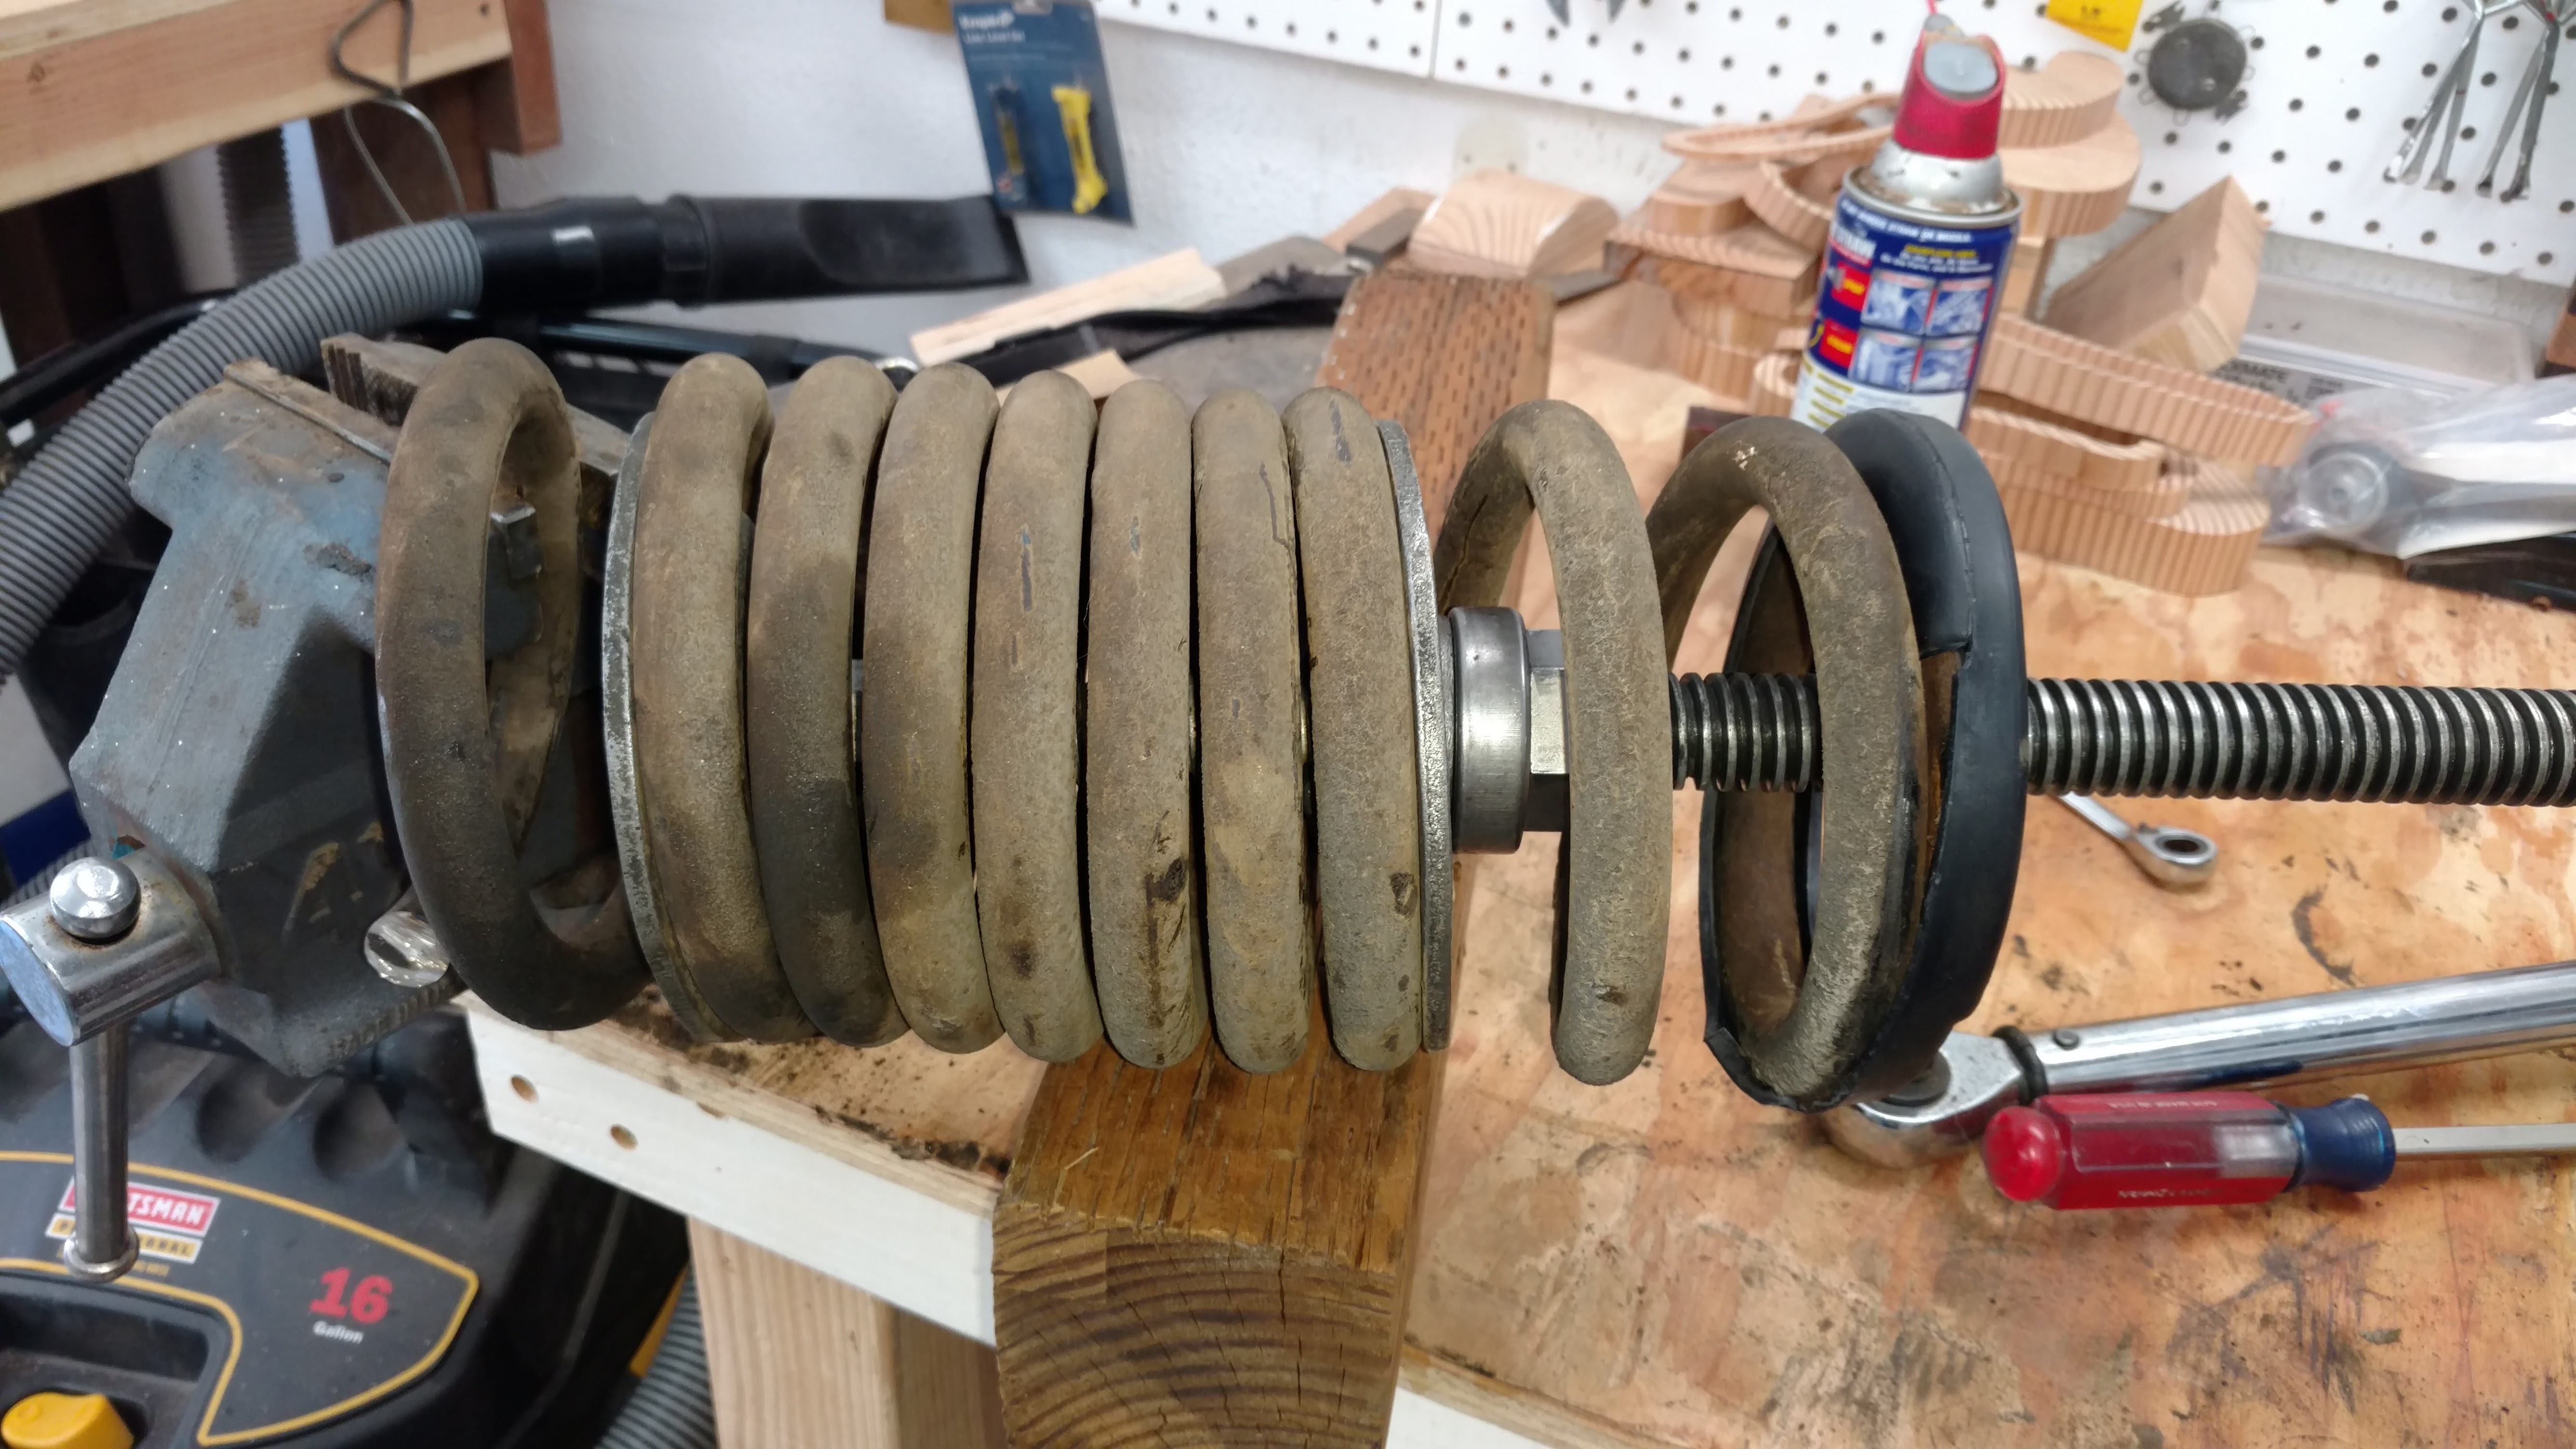
I cut a single coil from each spring to lower the car about an inch.
Once the upper arms were assembled, I loosely attached the upper ball joint to the knuckle, set the upper arm more-or-less in place, then compressed the spring. (Earlier, I had cut a coil from each spring; not to make installation easier—though it did!—but to change the stance of the car a bit.)
This time around, I used a vintage Moog compressor, which I spent a fortune to buy off of eBay.
It was worth every penny.
The compression went smoothly, and though I never feel truly safe around a compressed spring, I was able to install it in the car, lift the upper arm into place, and bolt it in securely while never feeling that the compressor was going let loose on me.
Full compression for installation. Terrifying to look at, but about as safe as it gets.
I clamped a pair of lock pliers on the spring to keep it from spinning during decompression, which worked about as well as you’d guess—just when you need them the most, they slip off and everything falls out of kilter. With patience, though, I was able to get the springs decompressed and in place. I used a jack under the lower arms to put some test weight on the suspension, and everything appeared to work normally.
By the end of the day, everything was torqued to spec, the backing plate, hub and drum were on, and all I had left to do under the car was the steering components.
I just might get this all done before the rains after all.
I disassembled the right side suspension a few days ago. With some experience under my belt (and a better spring compressor), the entire process only took 2-3 hours, most of that spent on the spring. (It took some time to figure out the compressor operation. It’s a vintage tool, and the original instructions were long gone.)
Original factory grease on the control arm shafts on the passenger side.
When I took apart the right side upper control arm, I was a little surprised to find it in pretty decent shape. Both ends still had a considerable amount of the factory grease and there was little wear.
Standing over the car to do a job is always better than crawling underneath.
With the lower arms refurbished (new ball joints and bushings) I bolted them back into the car today. Having the engine out was a bit of a help, especially when it came to torquing some of the nuts down. (More details about reassembly are on the repair journal for this job.)
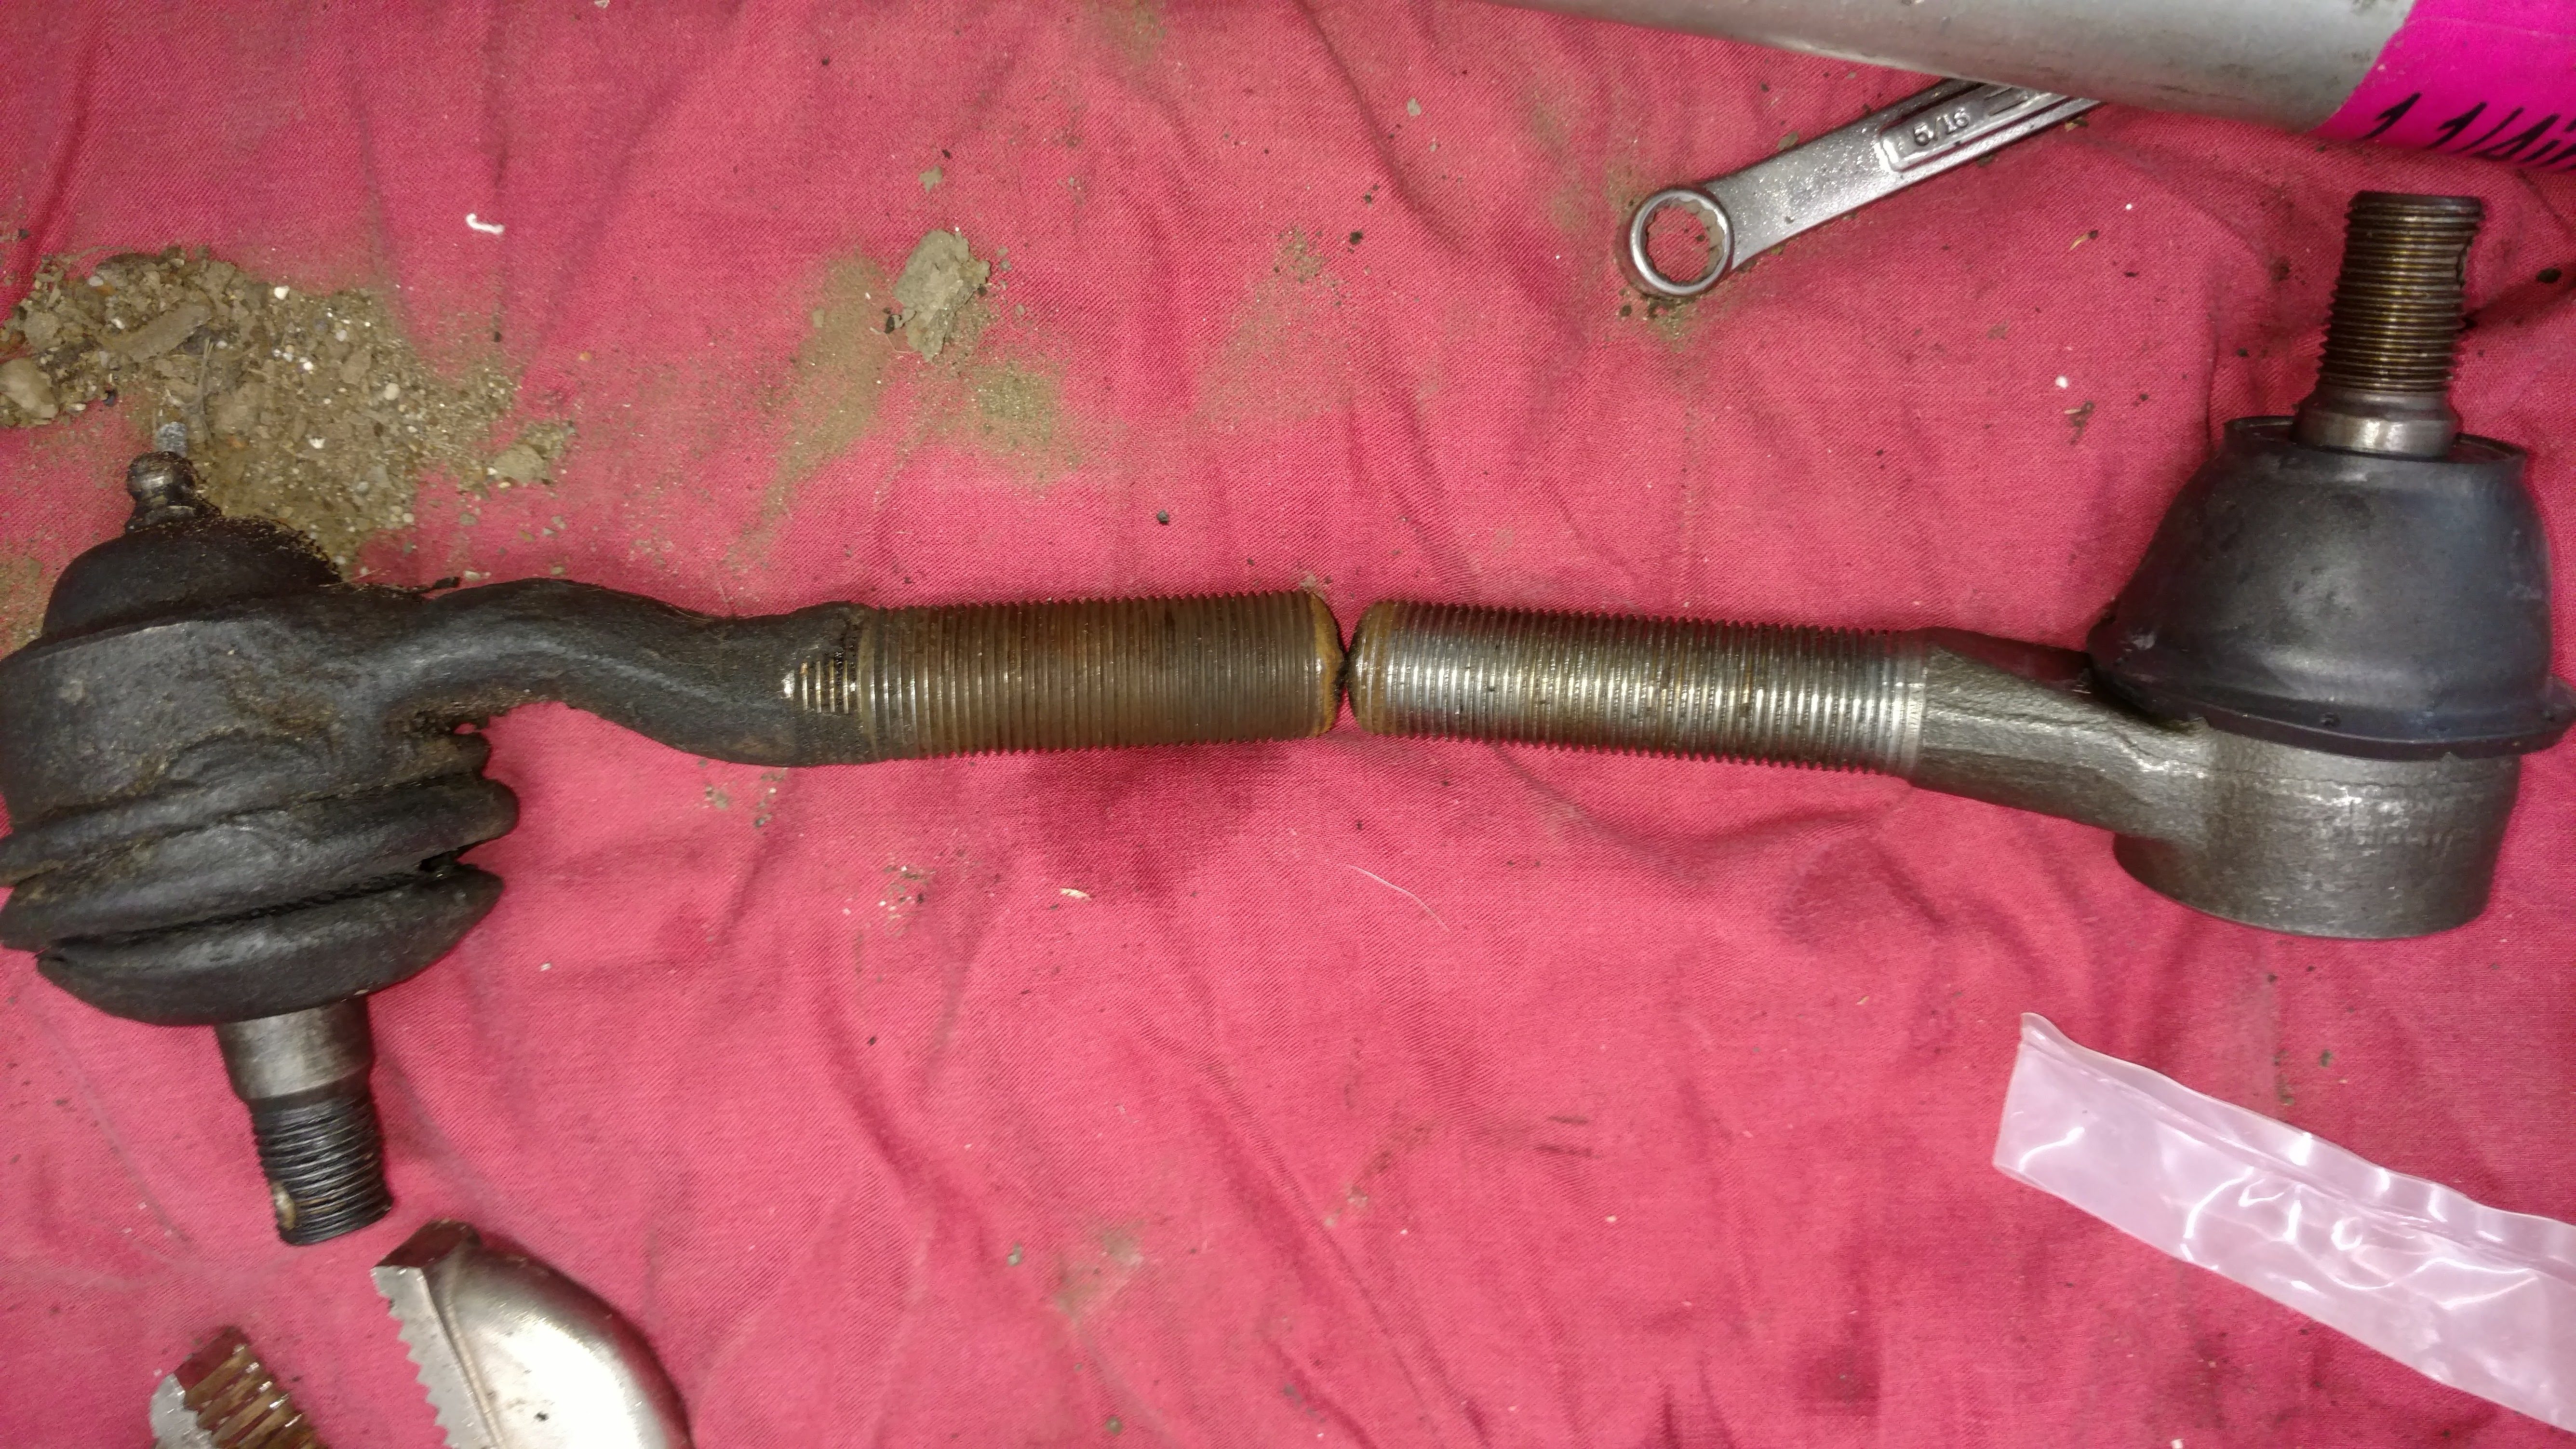
Old vs. new tie-rod ends. Just slightly different.
I’ll be replacing the tie-rod ends before everything is said and done, but need to order a few more parts. The new ends are slightly smaller and were loose in the existing adjusting sleeve, which I thought I could re-use. I’ll have to order a couple of these before the steering goes back together.
If I can get the new control arm shafts installed tomorrow, there’s some chance the rest of the suspension reassembly will get done over the holiday weekend, on schedule.
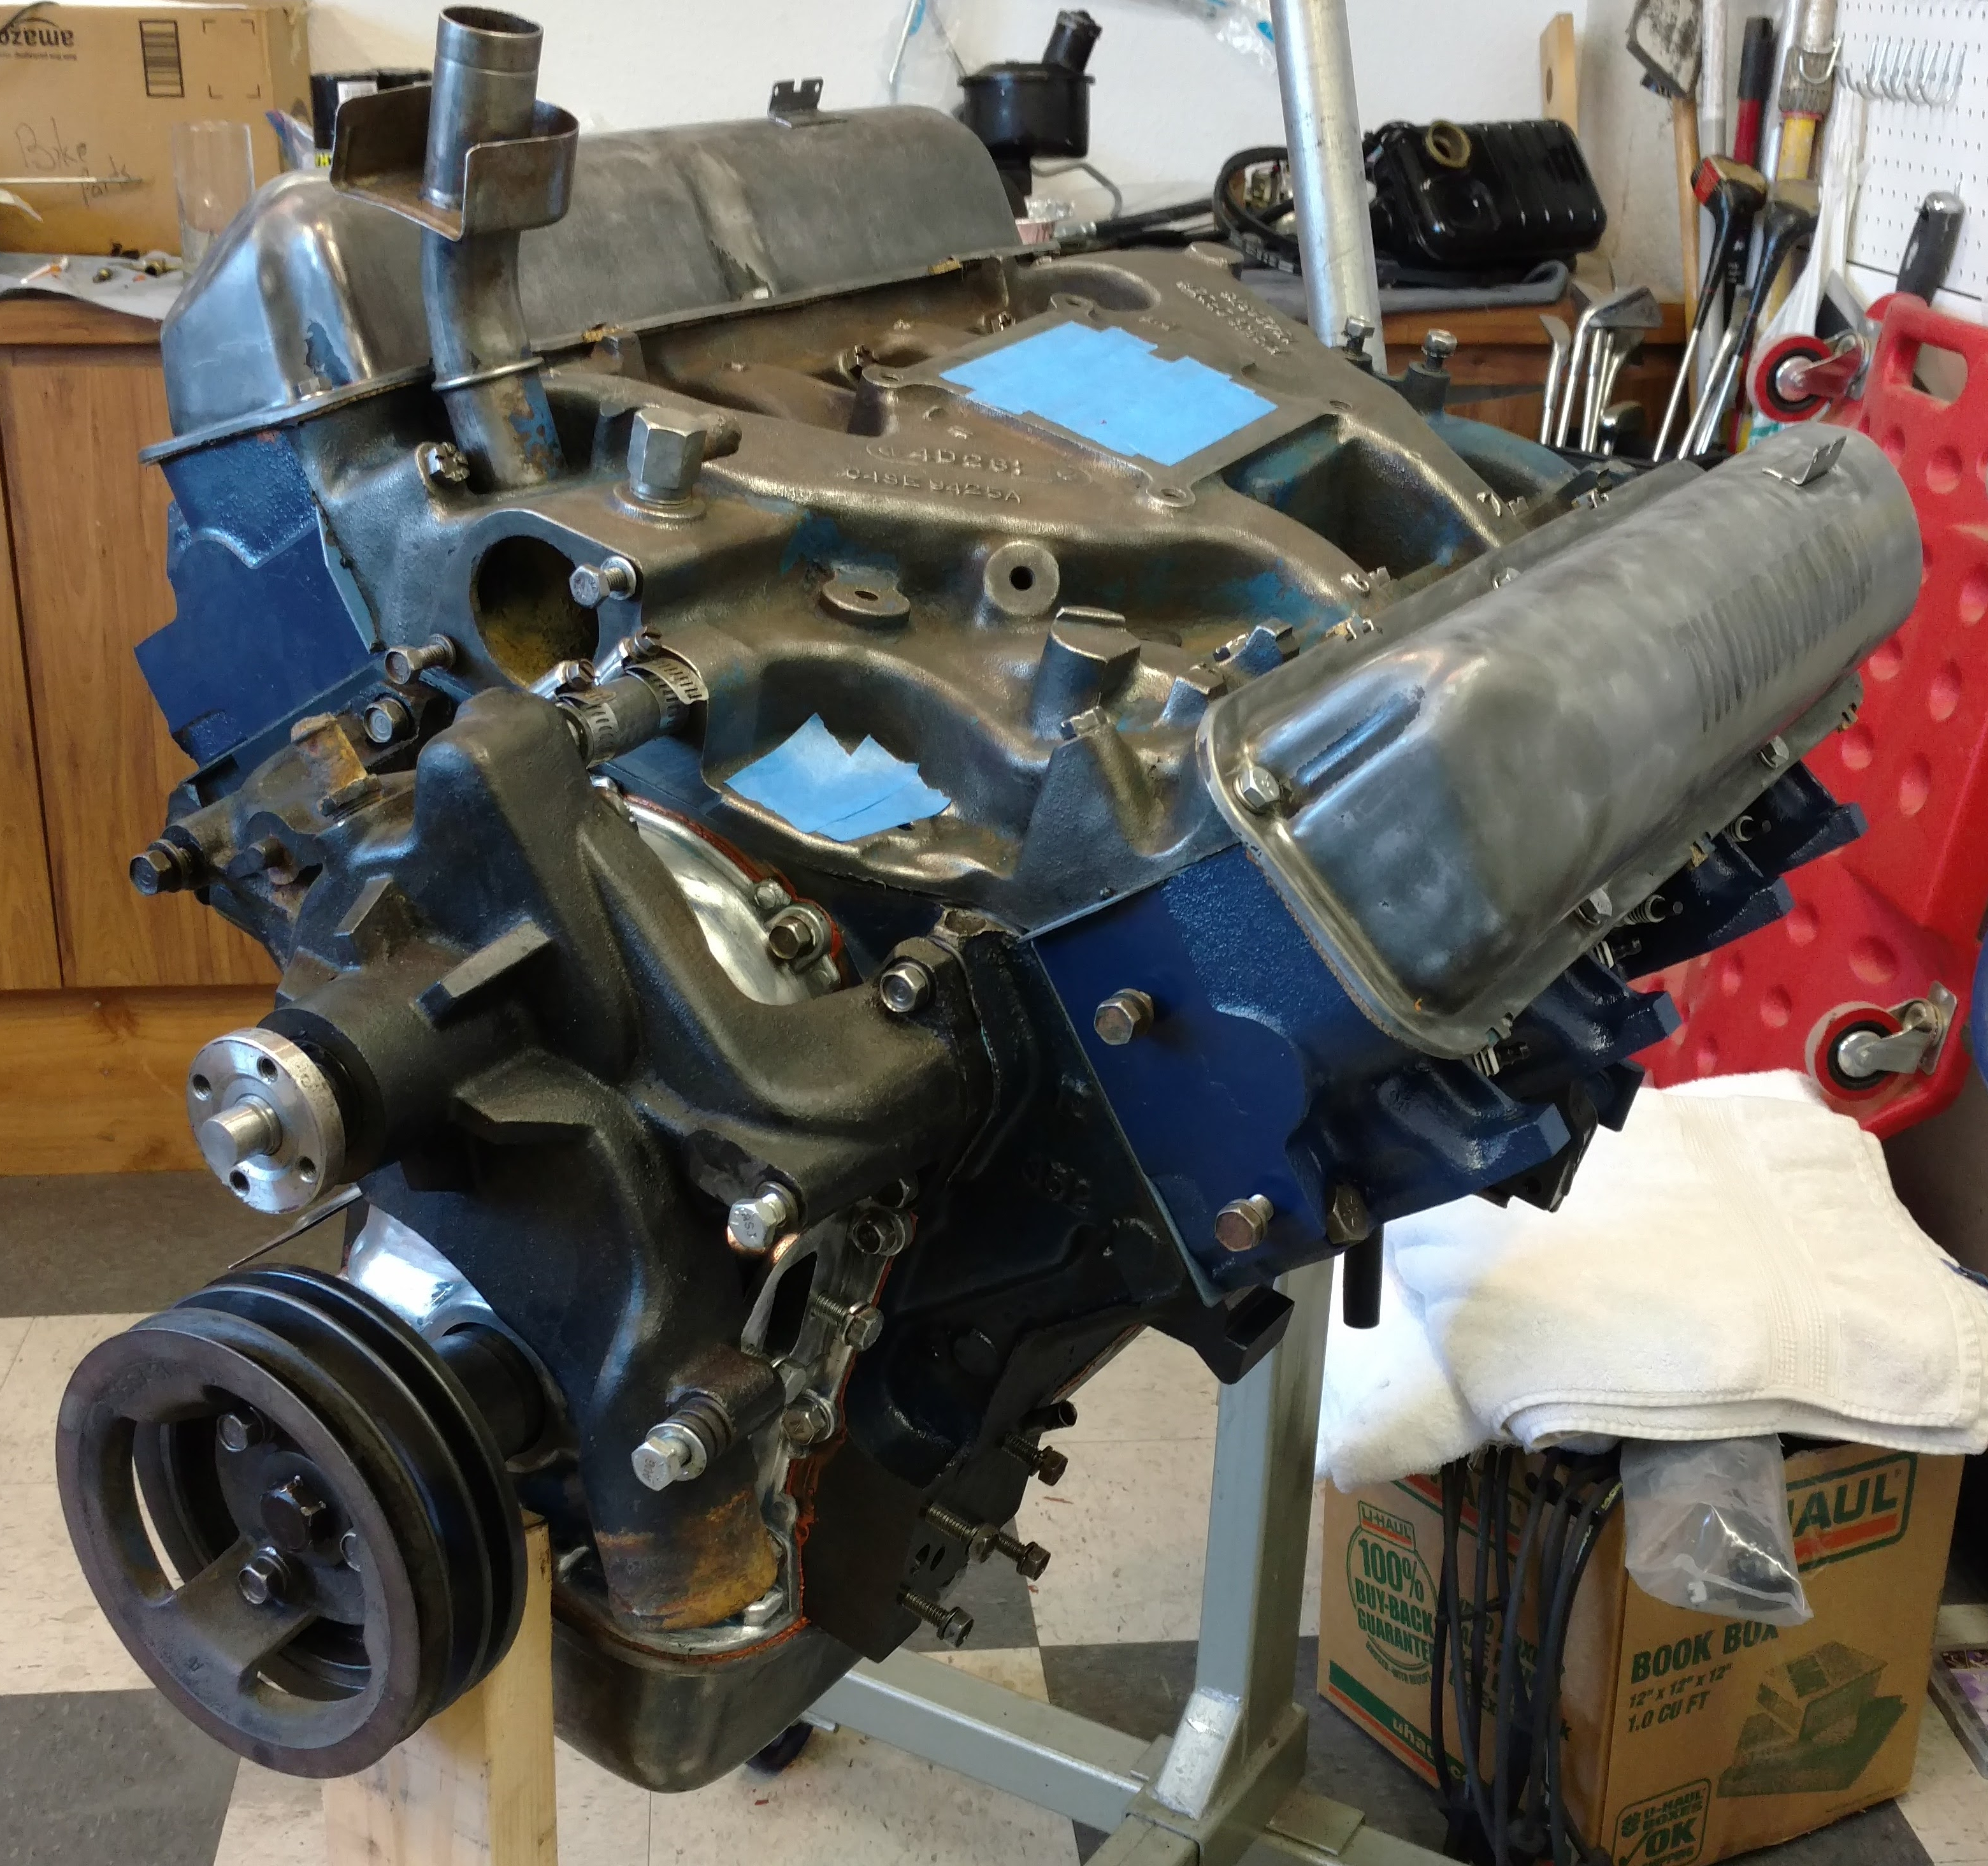
I’ve got most of the motor back together and ready to go. I’ve had the valve covers off a couple of times when the motor was in the car, and it was always a bit of a mess trying to get the gasket to stay in place and keep sealant from spreading everywhere. The job is, of course, far easier with the motor out, and I think I’ve got a nice, tight, leak-free seal on both banks.
Just about ready for paint.
I did the job twice, it turns out. After I got them installed, I couldn’t recollect if I had cleaned the covers on the inside before they went on. Rather than risk running dirt, wire wheel splinters and the like through my refreshed motor, I pulled them off to check. Sure enough, they were dirty inside, so time and money well spent.
The water pump is also on, so now I just need to do a final degreasing, masking and painting.
While this has been going on, I’ve disassembled the driver’s side front suspension, a process I detailed in a photo journal yesterday.
At this point in the project, I’ve got a lot of loose parts, new and used, floating around.
Except for the bushing on the lower control arm, which I farmed out, I’ll be reassembling this side of the suspension myself the next couple of days with plans to have both sides done by the end of this weekend.
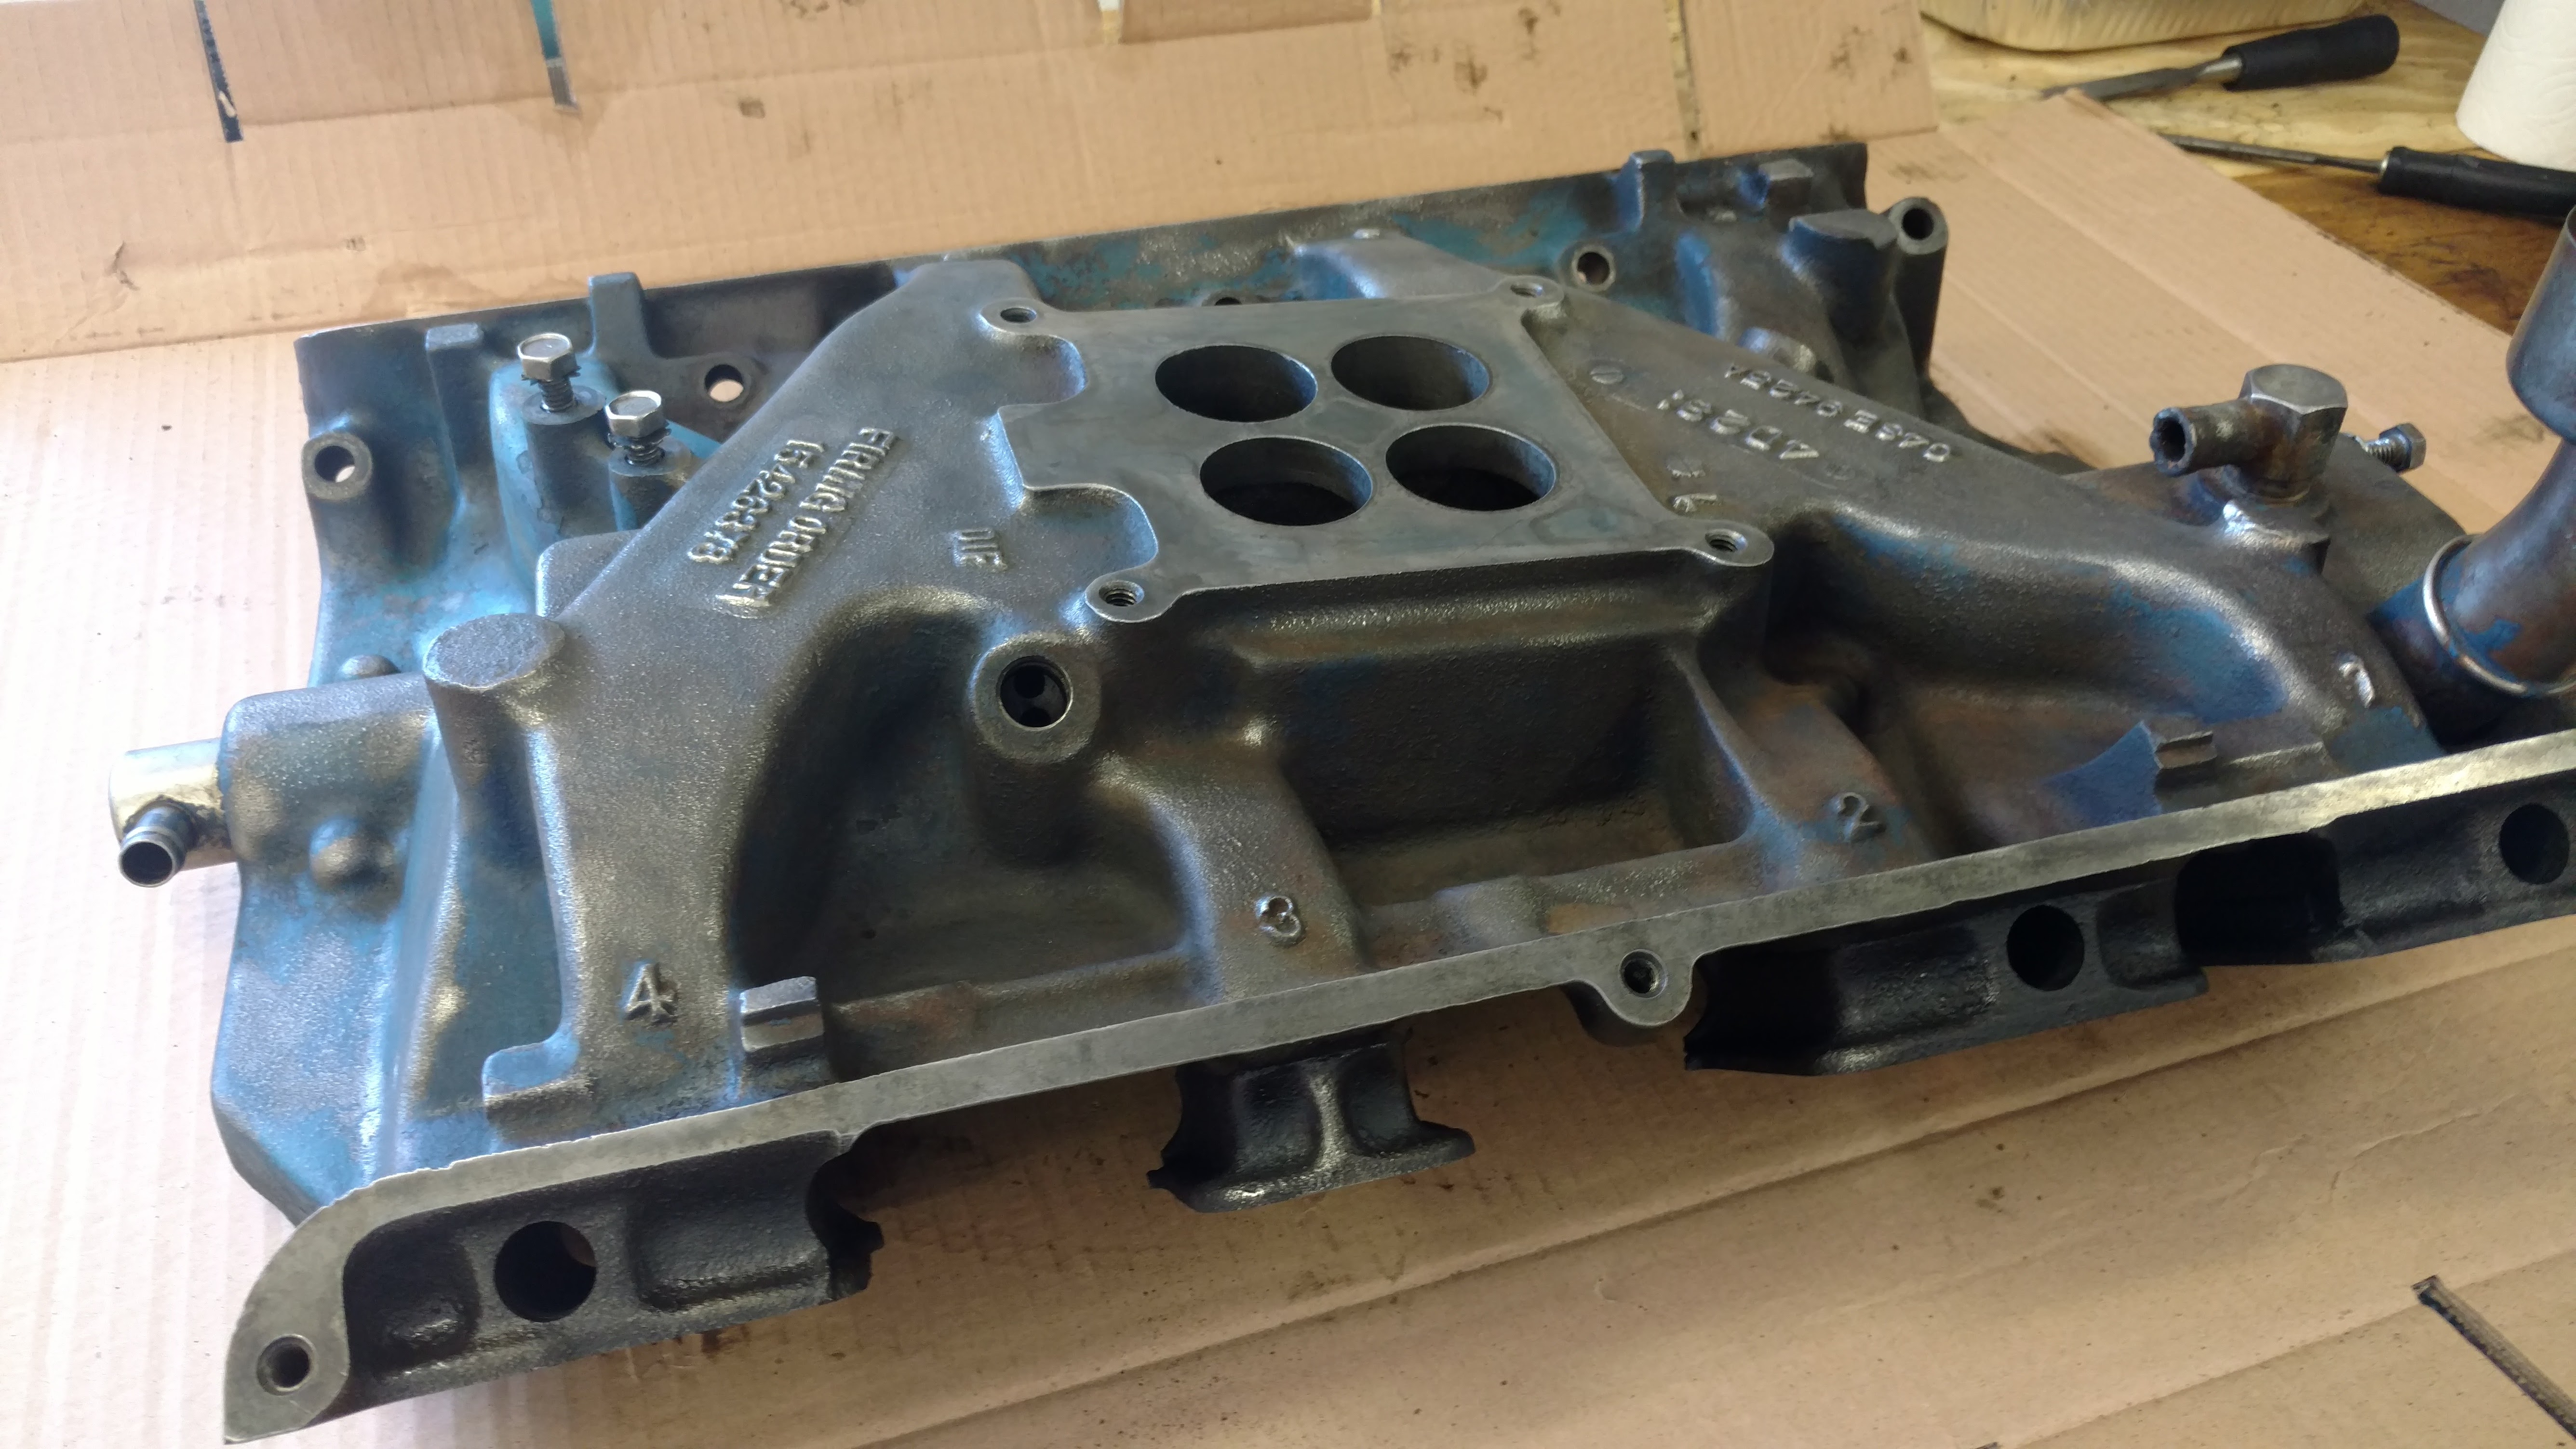
I’ve been making slow, steady process on the motor over the last few weeks, cleaning up parts and taking my time with the assembly. (I would really like to end up with a motor that doesn’t leak!) I had been putting off the daunting task of cleaning the rusty, greasy intake manifold. When I did dive into the project (with wire wheels, acetone, steel wool and lots of gloves) it took about 6 hours to finish. There are still a few nooks and crannies that could be better. If I had to do it over again, I’d pay a shop to clean it up for me. As it is, I think paint will stick ok.
I’ll be using my hoist to reinstall this now that it’s cleaned up.
Once I have it reinstalled , I can proceed to the rocker arm shafts and valve covers. At that point, I’ll be just about ready to paint.
With the calendar slipping into August, though, I realized I need to pick up the pace. Since I’m using the garage as an engine assembly shop and paint booth, the car is outside on jack stands. It doesn’t rain during the summer here, but it would not be a shock to have some precipitation in September. It would be great to have the ‘Bird back in the garage before that happens.
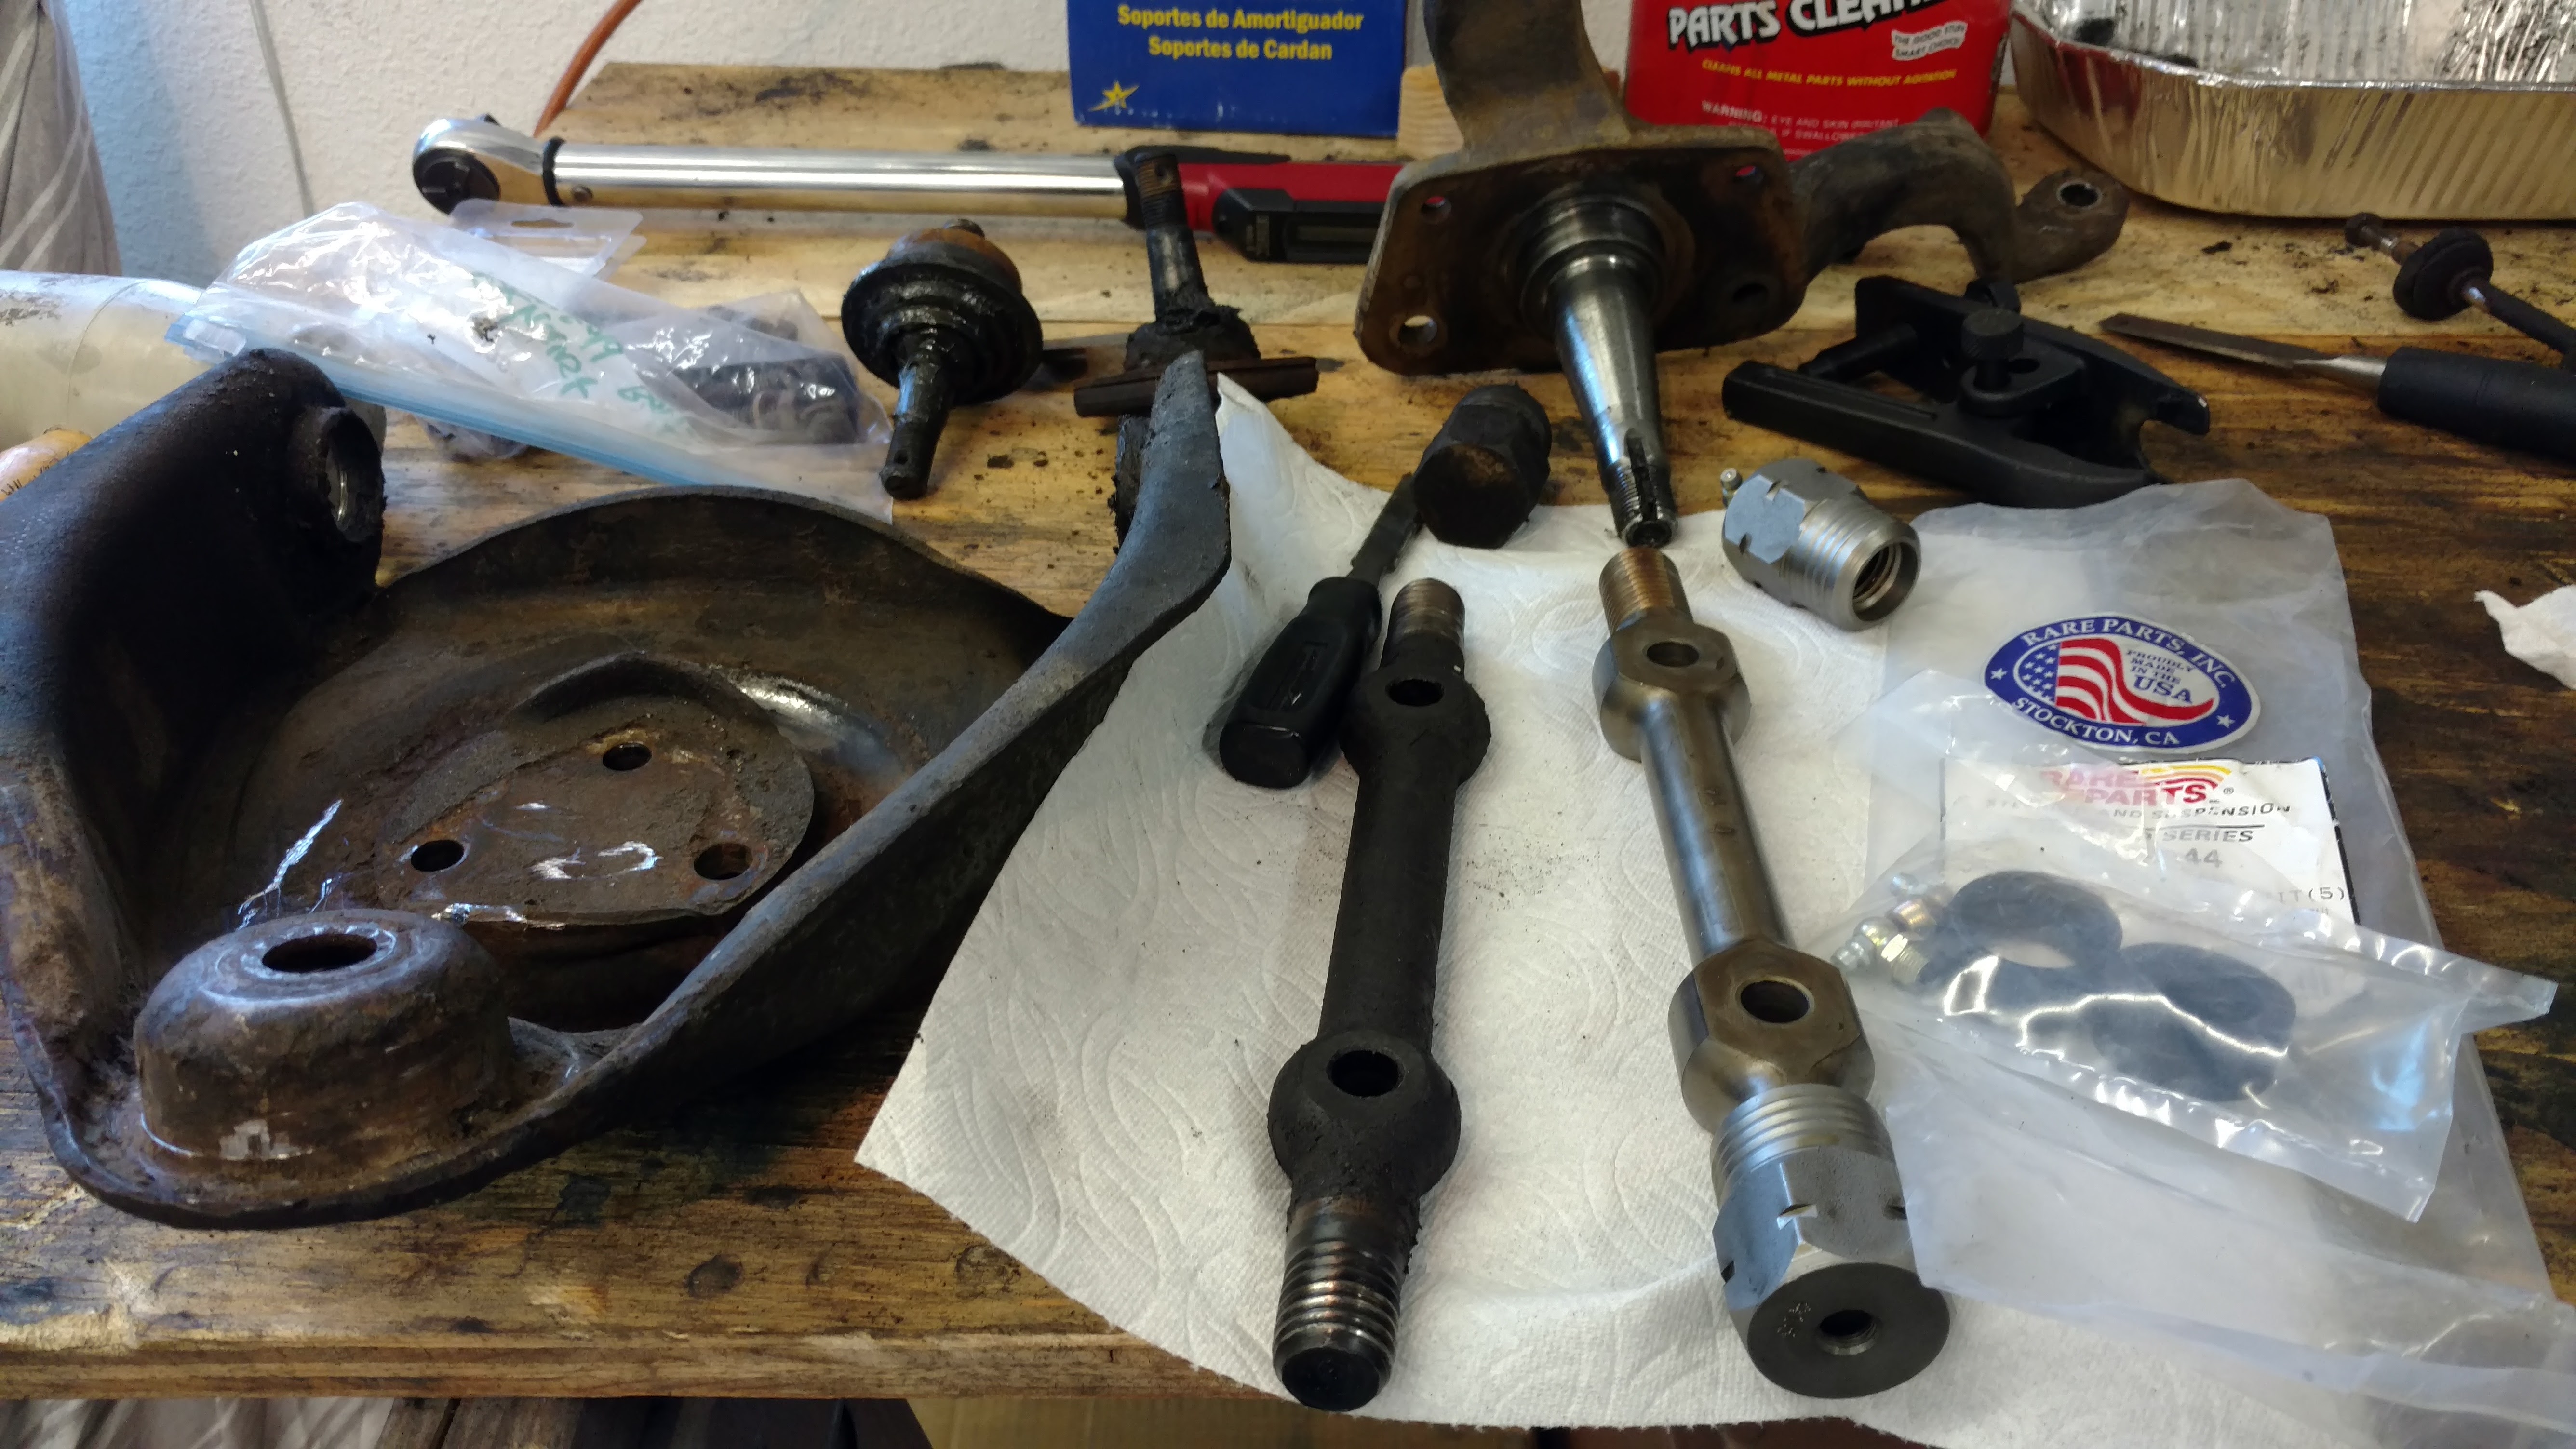
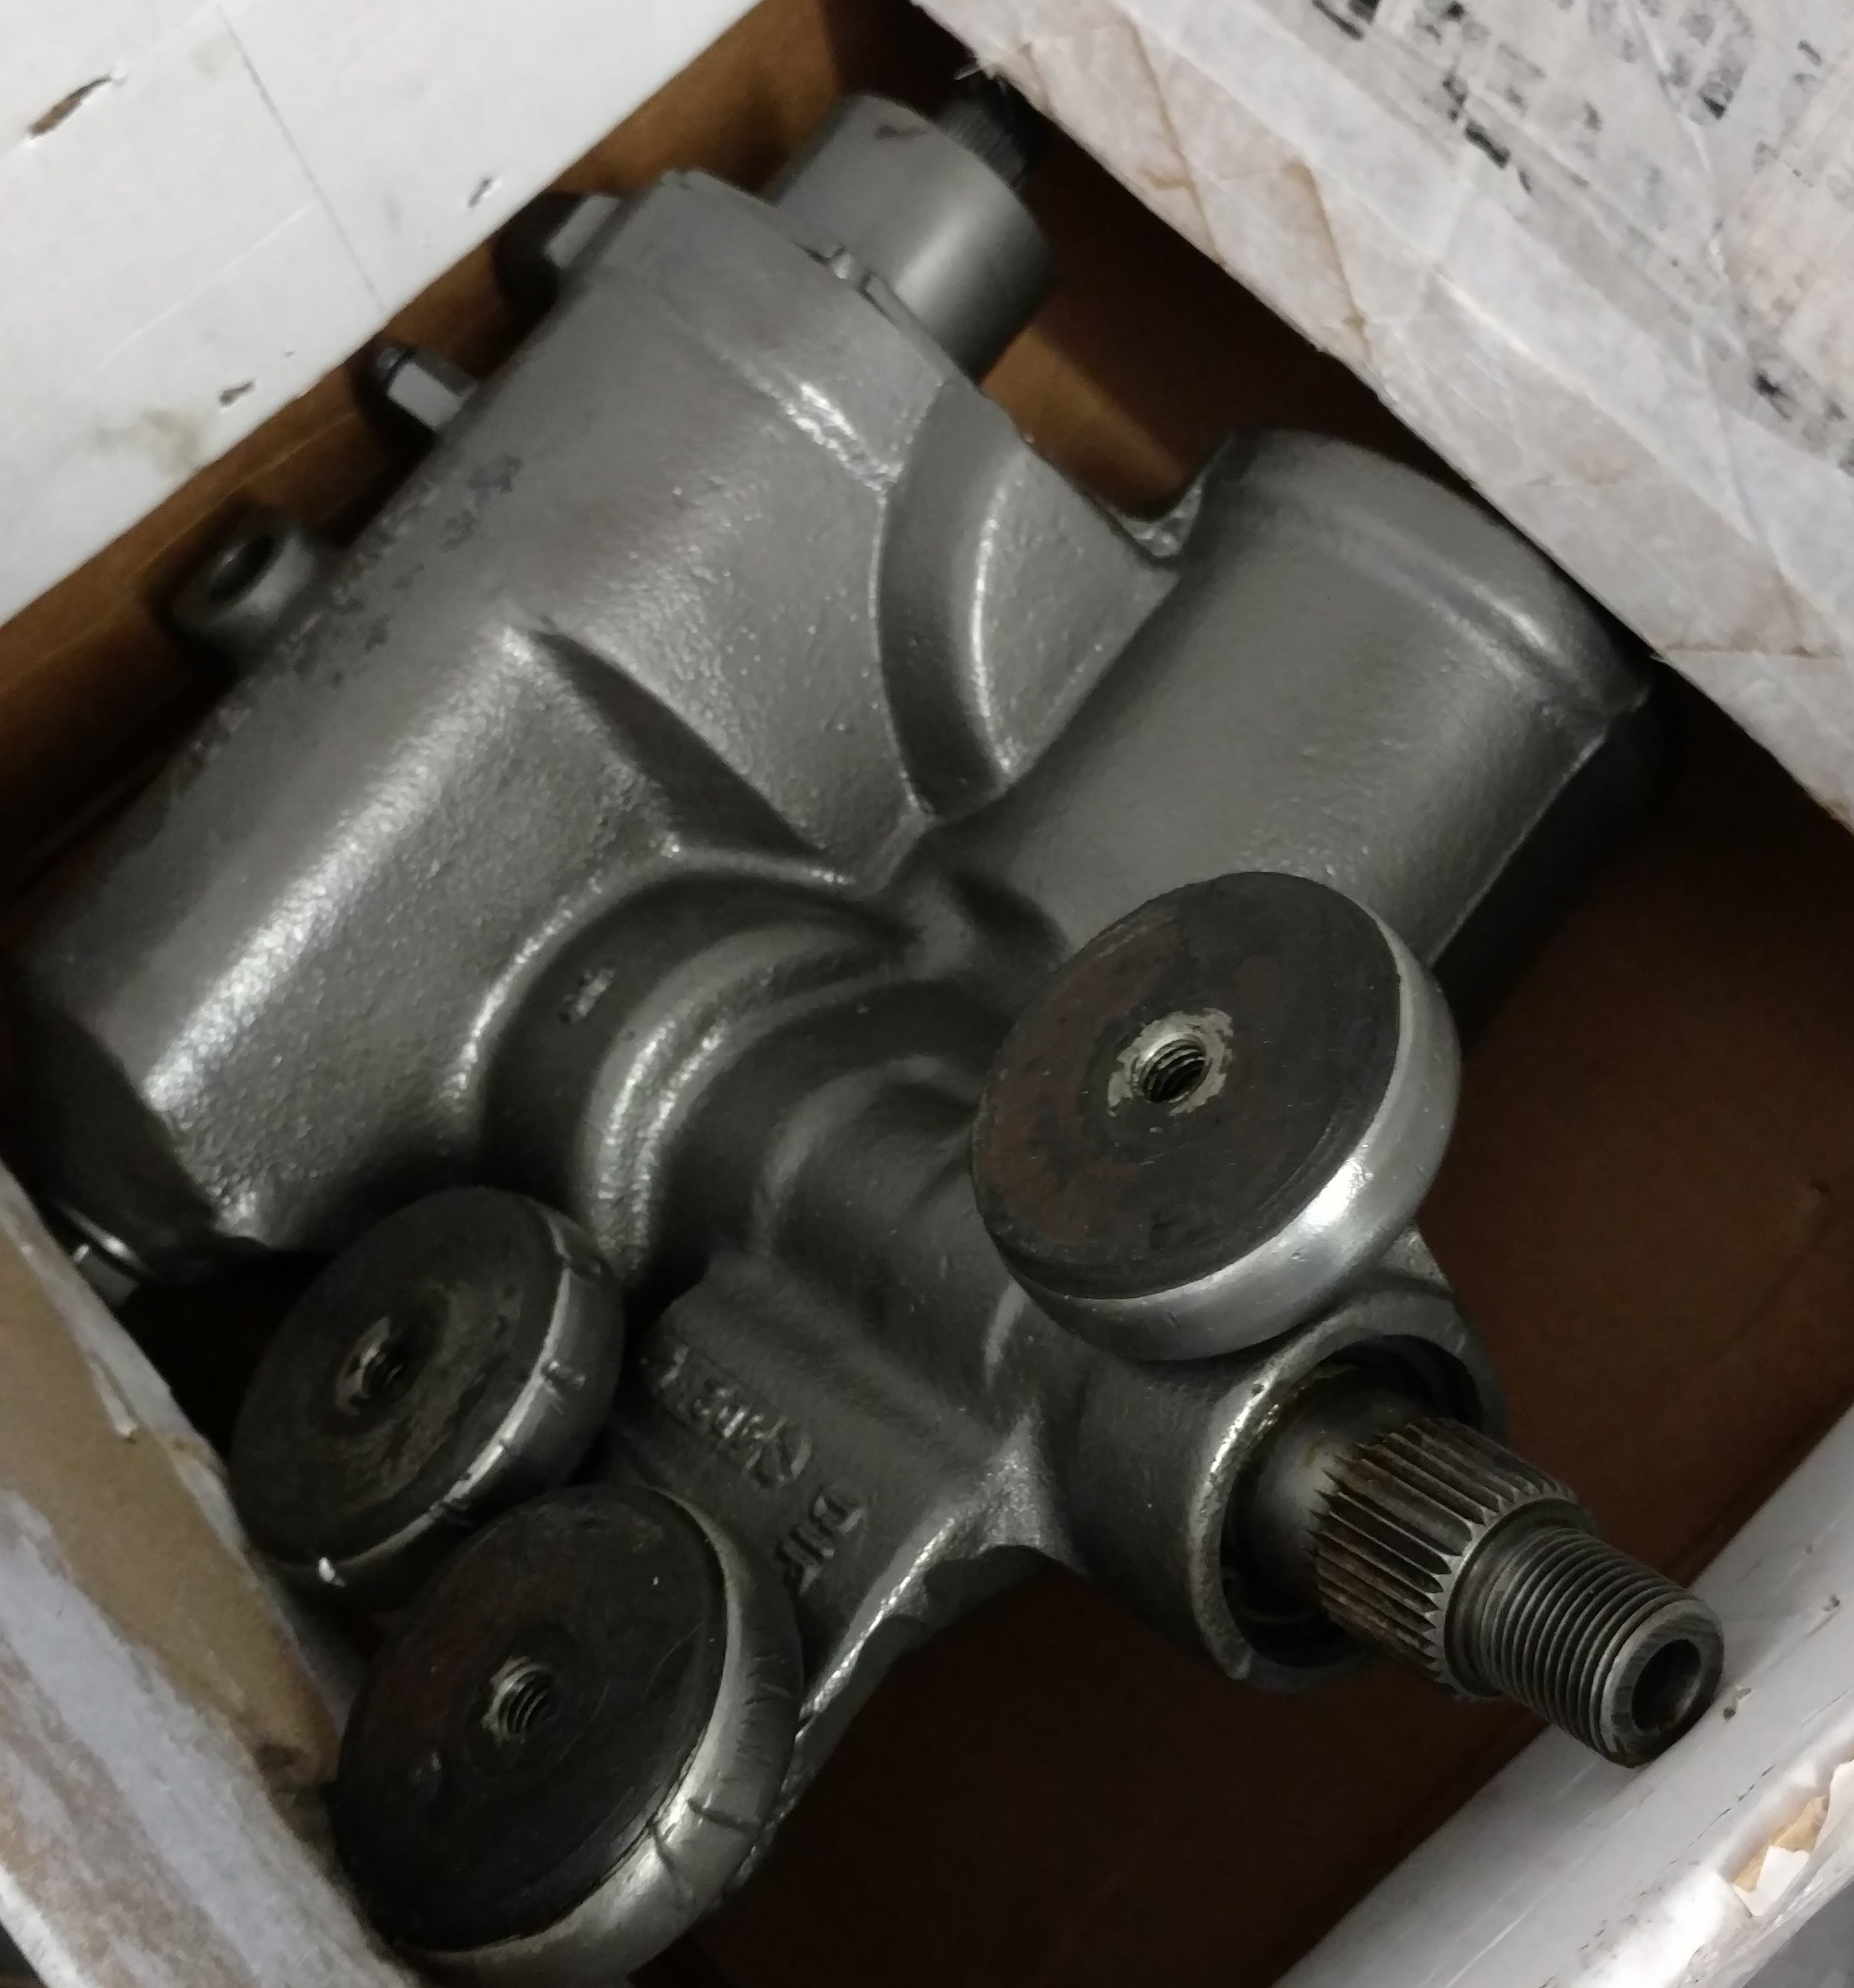
The rebuilt steering box. I was able to reuse the isolators, which was a nice surprise.
So, this morning I ordered up a whole bunch of front suspension and steering components: upper and lower control arm shafts and bushings, tie rod ends, ball joints and a center link. I’m told (and whole-heartedly believe) that replacing these parts will be far easier with the motor out. The steering box came back some weeks ago, cleaned, sealed and rebuilt; when done, the front end should be like new.