Heavy Lifting

About half way--all the easy parts have been removed.
About half way–all the easy parts have been removed.

Last week I performed some thorough diagnostics on the motor: checked the vacuum, tweaked the tune on the carburetor, looked at the timing, etc. In the end, the high rpm hot misfire persisted—maybe even got a little worse, as I managed to coax a backfire during one test run.

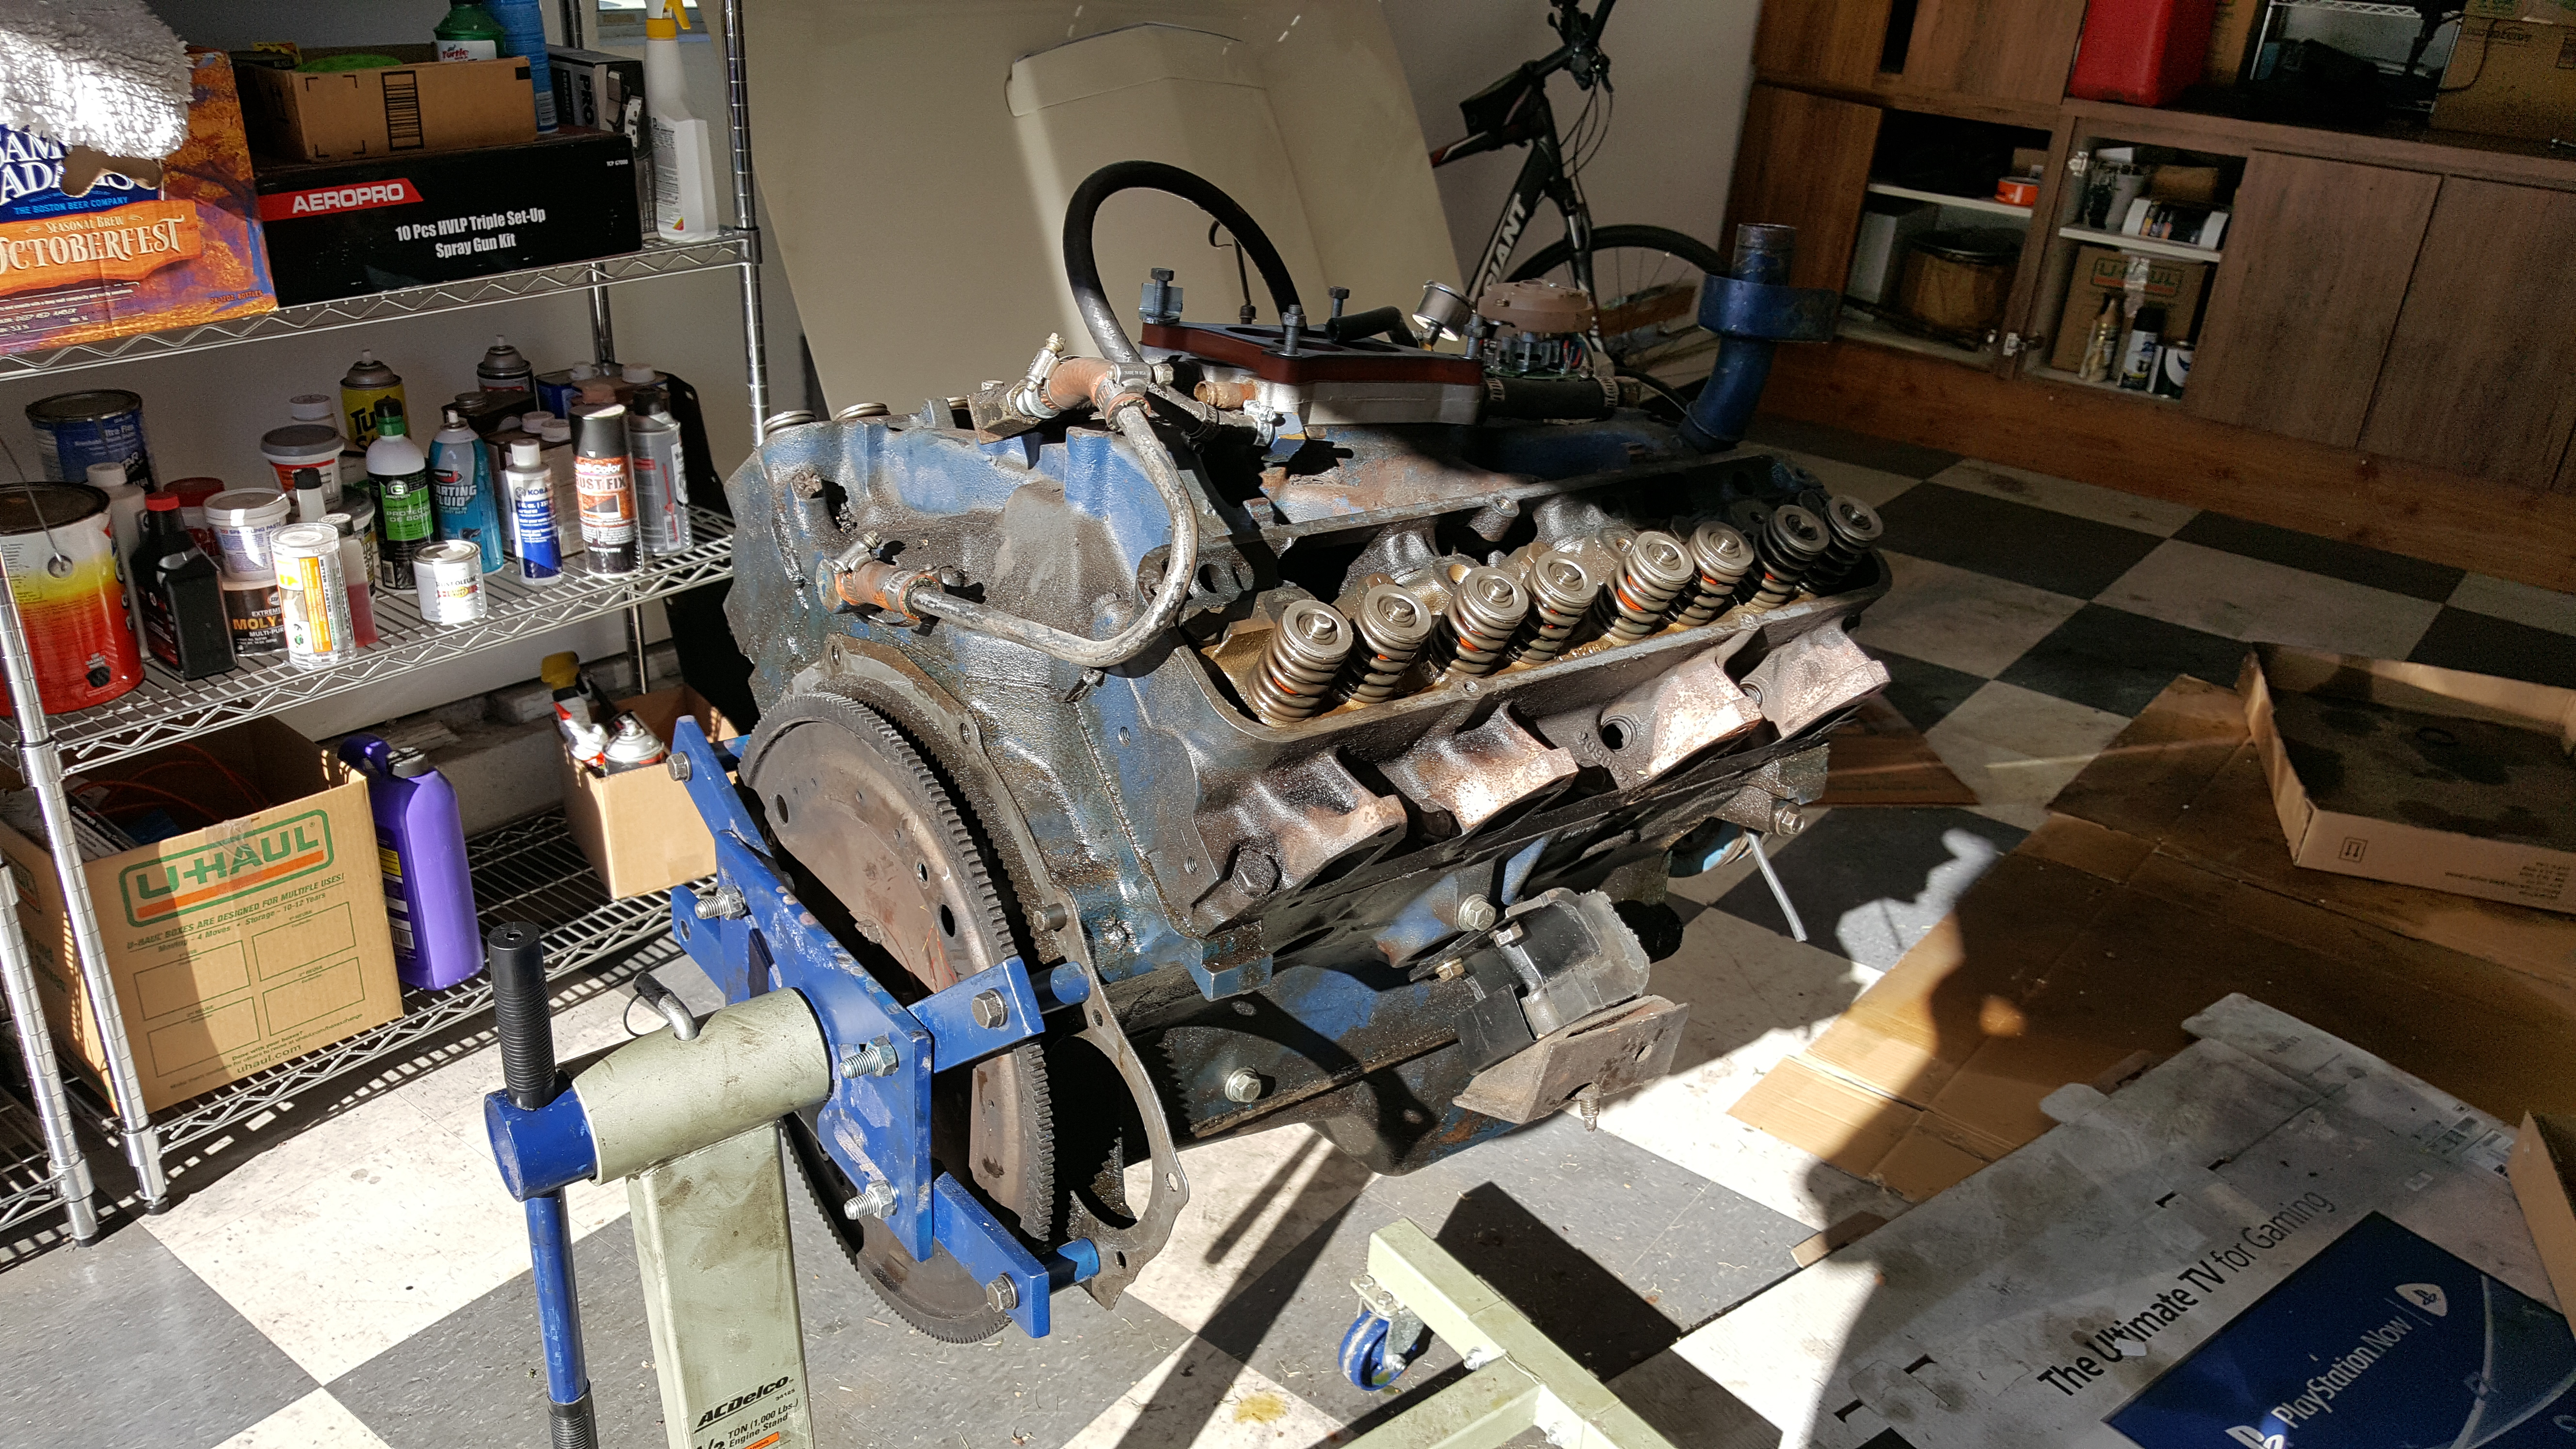
While I’m not 100% convinced it’s an internal engine issue, I strongly suspect it. (It’s unlikely, but it could still be an ignition issue in the distributor or plug wires.) Digging deeper, I pulled the valve covers and the rocker arm assemblies. There were no bent pushrods and nothing looked terribly amiss at this level, except perhaps an odd wear pattern on the rocker for the #8 exhaust valve. That cylinder was also the low outlier when I did a compression test some years back.

A little corrosion, but nothing terribly amiss here.
A little corrosion, but otherwise nominal.

The diagnostic flowchart goes down the rabbit hole at this point, but one strong possibility is an out-of-spec camshaft. So, with help from my son, the engine came out of the car yesterday.

I’ve pulled engines from at least 5-6 cars over the years, and each one of them has been a challenge in some way. The tight fit in the Thunderbird engine compartment had me relying on every bit of that experience. (And I gained even more in this evolution.)

The FE is heavy; right at the limits of my engine stand.

Getting the hood and accessories off was routine, and with the radiator out, the front of the engine is remarkably easy to access. Likewise when the hood came off things like the throttle arm and bellhousing bolts—notoriously difficult to reach—were right there for the taking.

Underneath, the exhaust flange bolts are buried in deep, greasy recesses, and even though these had been removed a few years back when the transmission came out, they were completely frozen. I ended up removing the 16 exhaust manifold bolts instead. (Many were, surprisingly, only finger tight! I guess the exhaust guy I used doesn’t believe in lockwashers).

Lots of cleanup to do here. At this point, the fluid leaking from the transmission is just a trickle.

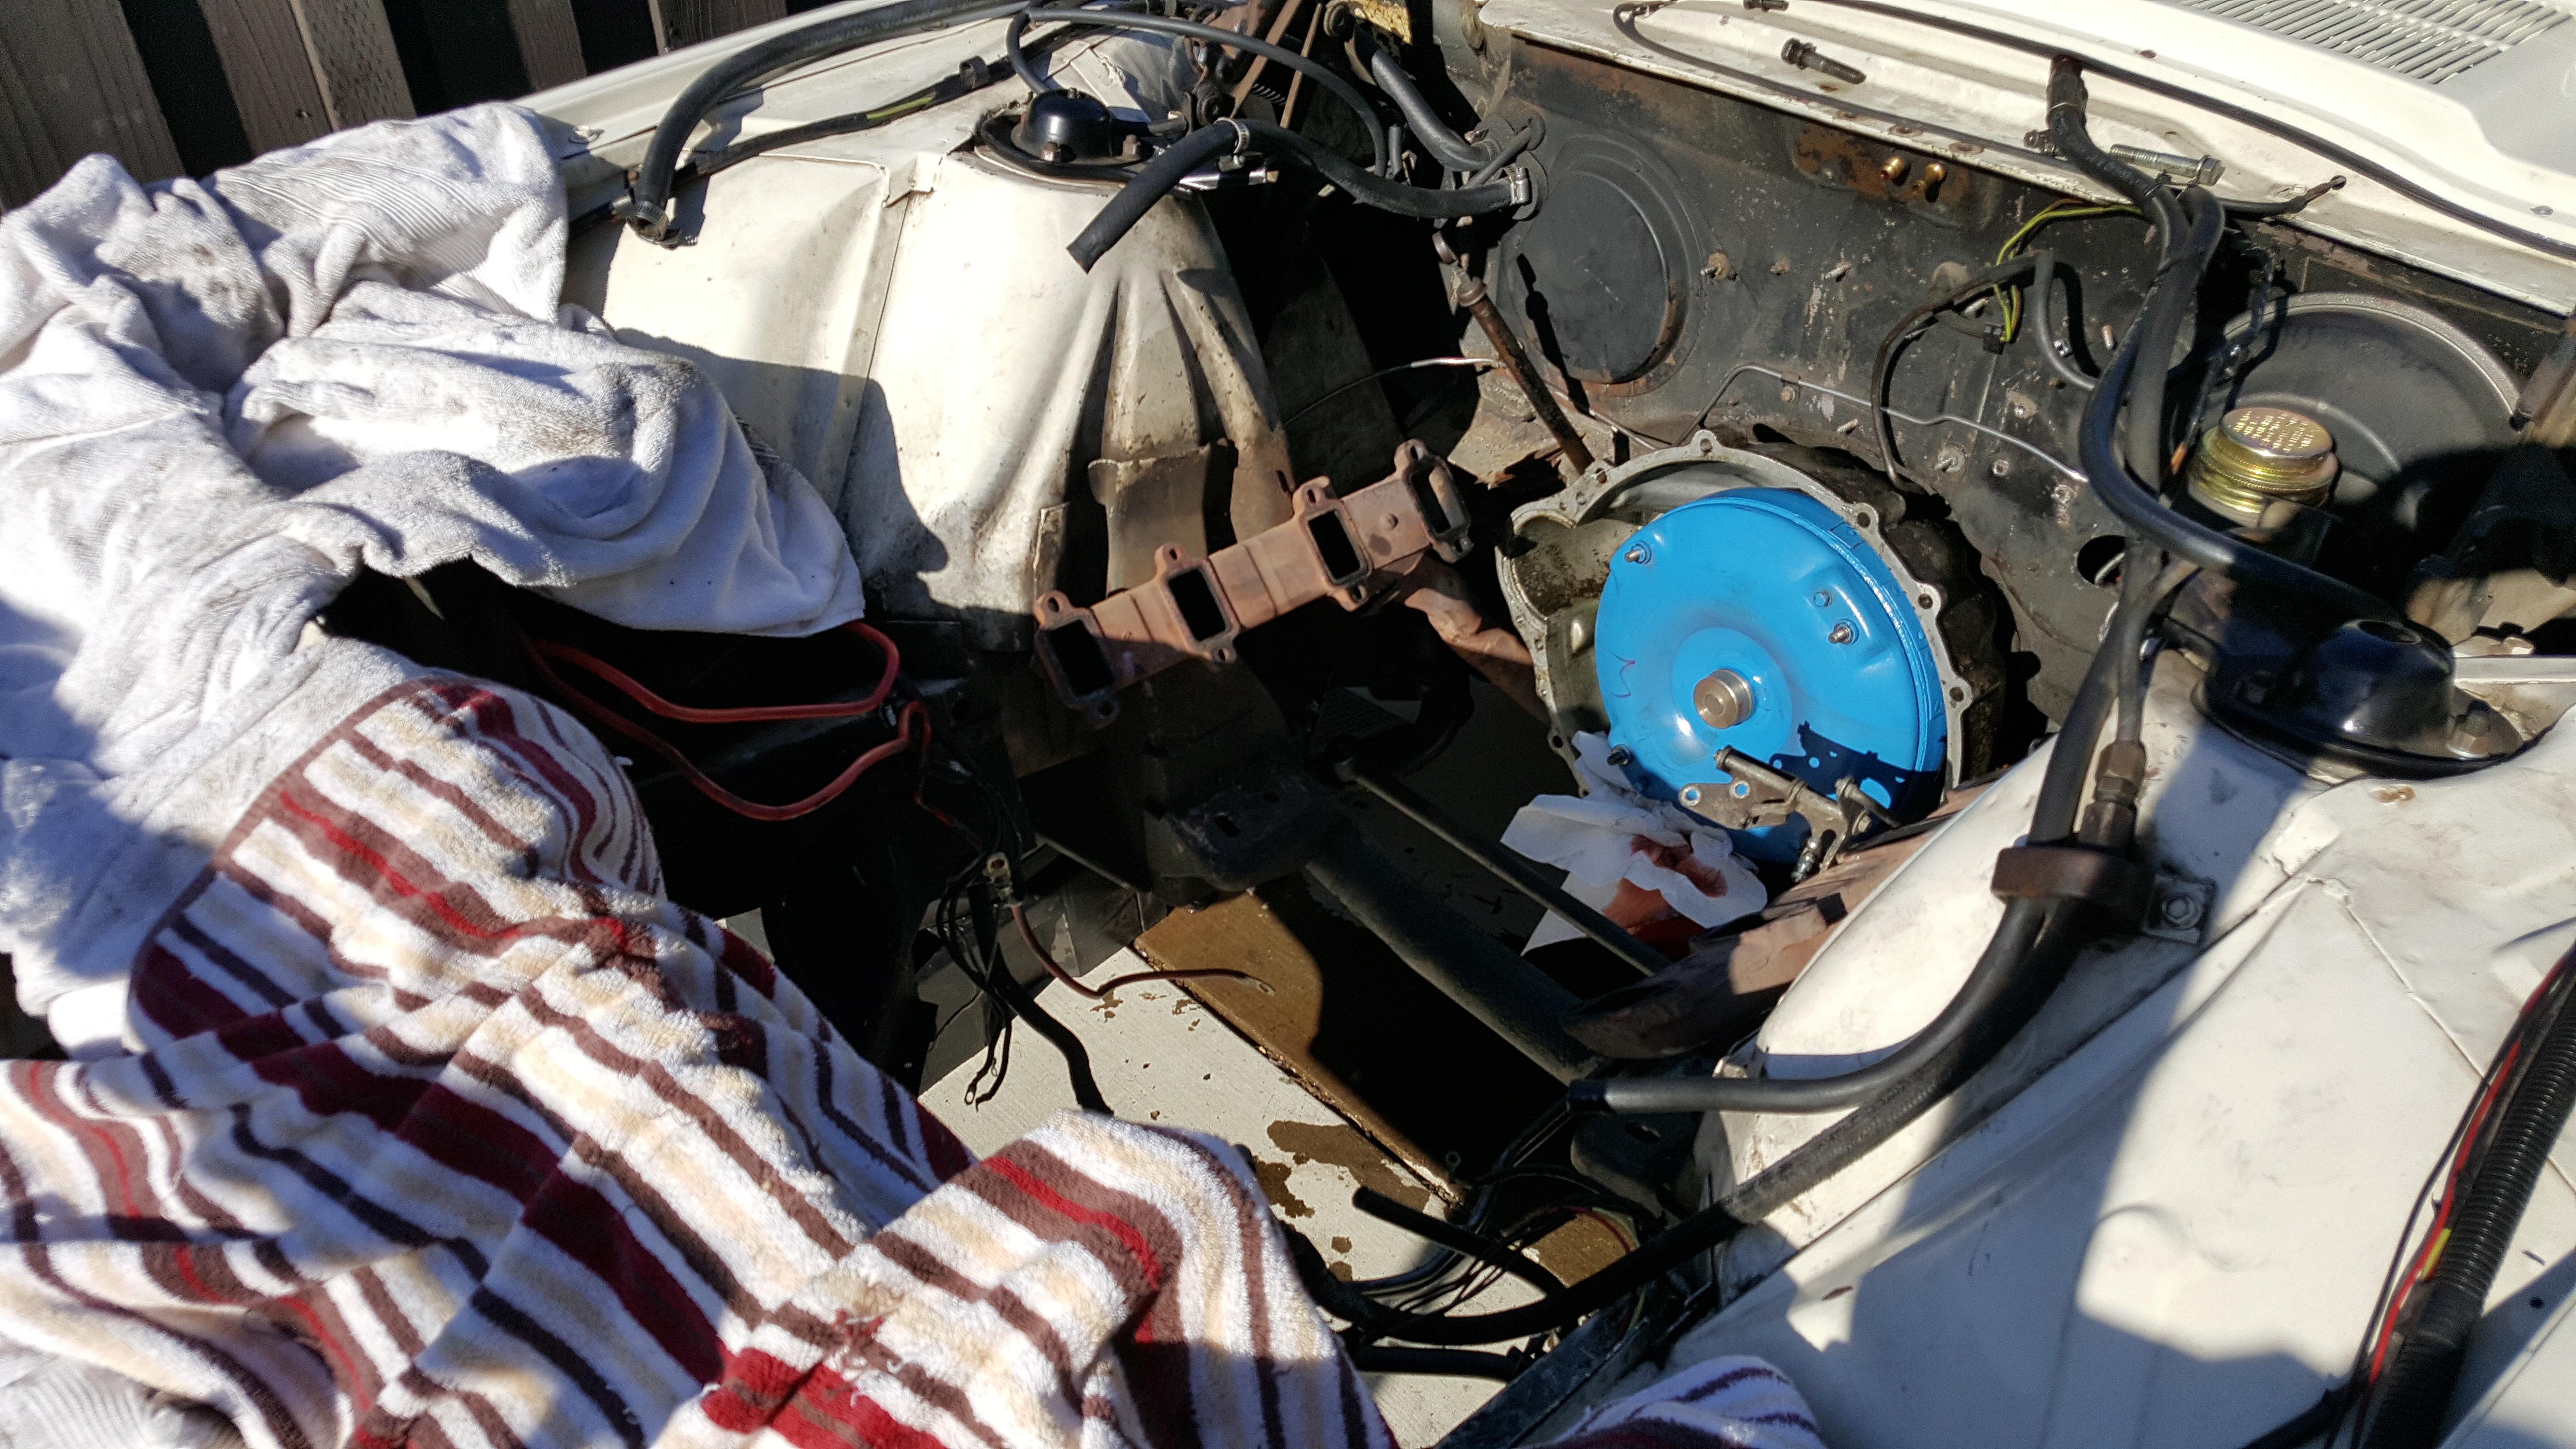
While lifting the motor, we got hung up on the transmission cooler lines (hate those things, but no damage done) and the motor mounts snagged on the now free-floating (but unremovable) exhaust manifolds. After some head-scratching, we worked it free and the lift had just enough height to clear the radiator support. (The car being up on ramps to facilitate work underneath.)

There’s a paradox to the engine removal in the T-Bird. The motor has to come up  a few inches to clear the motor mount studs, but it has to come forward an inch or so at the same time in order to clear the studs on the torque converter. It’s difficult to do both at once. In my case, the converter came partway with the motor and some 4 quarts of transmission fluid poured out the bellhousing until I pushed it back in. I’m not sure if that’s normal on a COM transmission or if I mucked up the front transmission seal.

In any event, with the lifting out of the way, the real work is just beginning.


Duct, Duct . . .

I still figure to be about two weeks away from backing down the driveway.

The three remaining ducts, all with some problem or another
The three surviving ducts, all with some problem or another

Space in the garage is gradually clearing out as parts are being assembled, but the real change will come when the dash goes back into the car. That monster has been lurking in the garage for far too long–as has the old doppelganger, which is heading for the scrapyard when this is all done.

Moving the old dash around the garage, I managed to damage both the defroster ducts, which were made from cardboard originally, but have transformed into a brittle, crumbly substance. The new dash had one duct left on it, also damaged. Reproductions are produced, but they are about $100(!) new, about a third of that for good used, so I’m making an attempt to restore what I have. They are hidden, so don’t have to look pretty.

A little paranoid about moving the wiring from one dash to the other.

My initial thought was to reinforce the ducts with fiberglass and resin–which would probably work, but I was steered in the direction of epoxy instead of resin, potentially thinned down with acetone. In theory, it will penetrate the old cardboard and bond better.

The same person also directed me to TAP plastics for materials. I stopped by to get some epoxy in bulk and discovered it was a DIY candy store: full of tools and materials for projects I hadn’t even thought of yet. I left with epoxy . . . and a few “extras.”

Over the last week the new dash was painted/dyed, the instrument cluster was installed and the stainless trim was snapped back on. I also pulled the wiring harness off the old dash. I will replace the light bulbs and repair the wiring at the alternator gauge, then tap into the harness for power to a modern radio/head unit. With the restored ducts and the replaced wiring, the dash will be ready to go back in the car.

Masking, dying and painting the dash.

Throttle Stopper

When I purchased the T-Bird–wow, almost a year ago now–the double-jointed throttle linkage was flopping around under the hood and the gas pedal didn’t connect properly with the linkage under the dash. I cobbled together a fix and left the matter for another day.

Today, in fact.

Missing from the linkage equation was a throttle stop plate, which attaches to the upper bellhousing bolt. It doesn’t connect to the linkage, just gives it something to bang up against. (Why it was designed this way, I don’t know; it seems overly complex to me.) I got a replacement from Thunderbird Headquarters after confirming with the helpful folks on the VCTI forum that I was on the right track.The Throttle Stop

Turns out, this is a lesson in the dangers of non-stock modifications. The top bellhousing bolt came off easily, even with the linkage in place, but I couldn’t get the stop plate to fit at all. The transmission on my car is not original, and while it belongs in the same family as the one that should be there, it’s a poor fit. Like everything else that bolts to the tranny, the stop plate needed to be modified. I removed a substantial bit of metal to clear the bellhousing and install the plate. Modified Throttle Stop

I installed and removed both the plate and the linkage assembly a few times before getting the fit right. It’s a long stretch down there behind the motor. Even with long arms, it was a tiring reach.5/8th Wrench on the bellhousing bolt


The finished assembly.Thorttle Stop, Installed

Once correctly in, there was the matter of a connection to the carburetor. It’s a straight rod from the end of the linkage to the throttle actuator, but it has to be the right length. Too short and the gas pedal doesn’t properly connect. Too long and you can’t open the throttle all the way.

I “fabricated” a new connector rod from straight aluminum rod; basically cutting it to length and notching it where the set screws attach to provide a little extra security to those connections.Throttle Connection

The throttle response on my test drive was vastly improved. I was just going to go around the block, but I realized immediately that before, even with the gas pedal all the way down, I was at half-throttle at best.

To the expressway!

Wow. This car is fast. Much faster than I thought. Next stop, though, the gas station.

. . . While you Wait

I sent a photo of the brake line mis-match to the seller and got a quick response: “We’ll make it right.” All the lines, old and new, went into a box and in the mail. They should be delivered to the dealer tomorrow. Having the new ones in my hands within the week is unlikely, but possible. In any case, I have a week, probably two, with the car on jacks, brakeless.

Toys
Toys to keep me occupied.

The forced downtime and some found money mean I can play a little bit. I ordered up some replacement skirt pins and seals (Someone apparently threw the old pins away! Who does that?) and bought a car audio system.

I like the look of the car without the fender skirts, and I’ll admit to a little worry about theft in keeping the skirts on. But at the moment, the skirts have no real home and it’s just a matter of time before they go crashing to the floor from some high, teetering, “temporary” storage place. Better to have them on the vehicle.

The old AM radio in the ‘Bird still works. With an aftermarket antenna on the car, it is able to pick up exactly one station, a local news outlet. I’ve heard enough reports on local fires (“I can see smoke coming from the building!”) and am dying for something more upbeat. I don’t want to cut up the interior, so after a great deal of thought, I’m planning to mount the head unit under the passenger seat. I’ll control it, somewhat blindly, with a remote. For the speakers, I’m borrowing an idea I saw in college and used in a truck I had years ago: loose speaker enclosures.

Speaker Enclosures
Speaker enclosures, in the rough.

Most modern car stereos have removable faceplates that connect via a simple 20-pin plug and socket. I spent quite a bit of time in the last few days looking for a cable that would allow a remote installation of the faceplate from the unit itself, but no such thing exists. On-line, I saw that a few folks have soldered network cabling to both ends, but the end result looks more experimental than functional. If I can figure out a way to do a remote mount, the ideal location for the faceplate would be in the center console “glovebox.” For now, anything would be better than another local fire report, so I’ll start with the unit under the seat and keep looking for a remote solution.

Lastly, a colleague on the VTCI forum solved a long-running idle problem I’ve had. He suggested, and I completely agree, that the idle is poor when the engine is hot due to fuel vaporization in the carburetor. He used a Holley heat shield to solve the issue on his car, and I’ve ordered one as well. In addition, I picked up a good used water jacket / carb spacer to replace the clogged up one I’m using.

Fun stuff, but what I’d really like are shiny new brake lines that fit.