The next time I begin restoration work on a vintage car, I will completely revamp the brakes, booster-to-shoes, at the very beginning. Though they never failed me, until this week, it seemed like the brakes were never right.

I spent a good portion of my time early this week replacing the drums and shoes on the front axle. Getting the old drums off the hubs is an adventure in hammering–trying to get just enough force to break them apart while not quite enough force to damage the parts that are still useful. I got some great advice from the forum, which made the job manageable, if not all that fun.
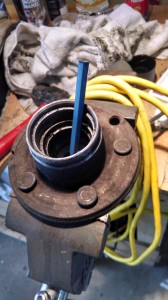
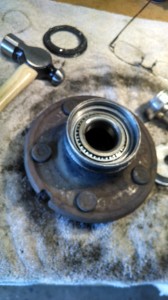
Replacing the races in the hubs also required a heavy hammer–I got quite a workout this week–and a lot of patience. I was dreading this job, fearing that the hubs would get damaged or that the old races would prove immovable. As it turned out, it was one of the most satisfying jobs I’ve done on this car. Once the races get moving, the pop out pretty easily. The new races were easy to drive in (with a race driving tool borrowed from the local parts store), and from there the assembly goes together very neatly.
The new drums need to be pressed or drawn onto the hubs. It’s possible to do this on the car when installing the wheel. I tried this on one side, but it’s a process you have to take on faith–there’s no real knowing whether or not everything is drawn up tight unless everything is taken apart to check again. I figured I’d give it a couple of miles at slow speed, then disassemble to see if it’s working properly.

I paid extra–about double–to get a new master cylinder that was really new (not rebuilt), then bench bled it exactly as the instructions stated. It installed easily, and I enlisted the aid of my son to help bleed out the brake.
One. More. Time.
I have bled the brakes so many times and with so many poor results that I didn’t even dare test them when we were done. Instead, I walked away for an hour to work out how I might handle it if they didn’t work. When I finally got up the courage to get back in the car and press the pedal, they were nice and firm–better than they had ever been, which was a tremendous relief.
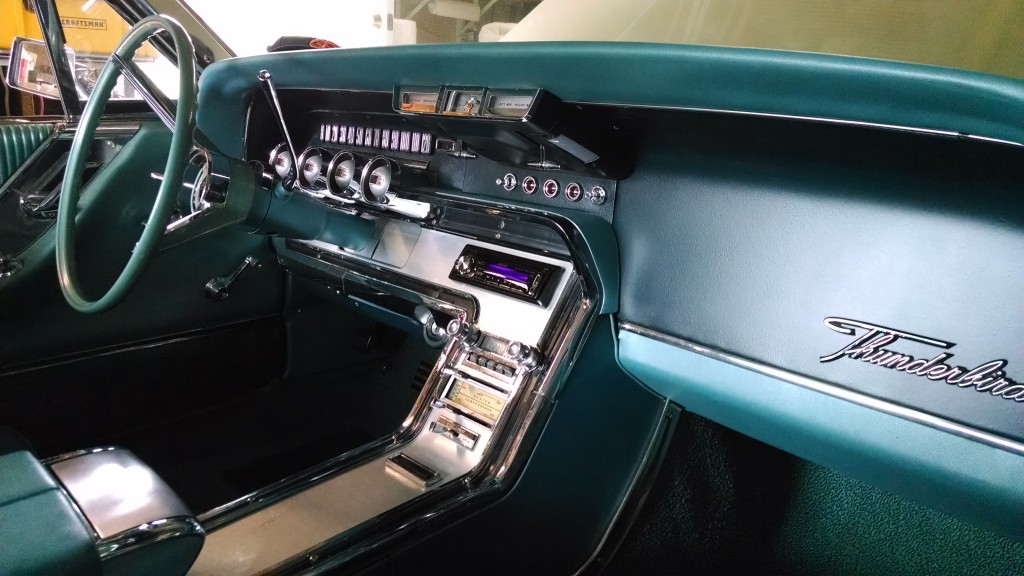
Somewhere in the middle of the week, I took the time to install the three panel “flipper” fascia on the steering column for the swing-away mechanism. I should have put this in much earlier, as it’s a real pain to manipulate into place once the dash is assembled. I had to pull the left radio access and loosen the lower trim on the dash to get enough room to work.
With it finally in place, I installed the last trim panel and the aftermarket stereo, buttoned the dash back up (not for the last time, though, I’m sure), and went for a short drive, music blasting.
It was awesome. Still.

More things work now than they did before I started the project: all the gauges, the heater/defroster, left and right side vents, not to mention the audio system, improved turn signal and a vastly better looking interior.
A few things can be made to work now that the dash is in good order: the central door locks, door ajar warning light and the rear, vacuum-operated vent. When I get around to them.
Still, there are a few things that should be working, but don’t. Fortunately, I can tackle these minor issues one-by-one on a “let’s have some fun working on the car” basis instead of “sheesh, what’s it going to take to get this thing running”?
Most important is a water leak. Somewhere in the dash (dis-)assembly process, the seal around windshield was compromised. When I washed the car, a lot of water ended up on the driver’s side floor. (That’s something I plan to have fixed professionally this week.) Of lesser importance, the fender-mounted turn signal indicators don’t light up (though the regular signals work), the stereo needs to be wired to a different source (can’t run the heater blower and the music at the same time on the same circuit), and the horn brush needs to be installed (which I can do when I pull the steering wheel to center it.) Oh, and it couldn’t hurt to change the oil.
As a punch list goes, that’s a lot less than I expected. Right now, though, I’m going out for a drive.

I’ve done just about everything on my 64 ‘bird as you’ve done on yours. Some things not quite as in depth, and some things much more. I freshened up my engine last year which didn’t require boring, just a nice hone and ring job along with new bearings. Not a piece was bolted back on the engine, or even in the entire engine compartment for that matter, without repainting it first. Just waiting for warm weather to get it out and fire it up for the first time in a year and a half. About 2 yrs ago I disassembled the entire exterior of the car for a complete repaint, which also necessitated removing just about the entire interior to get at certain pieces. It all needed a good cleaning again anyway. Neat to see you going thru this car the way you have!
Regarding the water leak on your driver’s floor. When I washed my ’64, I have had the same thing for years. After pulling my engine and trans for a rebuild, I decided to remove the cowl to get a really close look inside, since I could now stand in the engine compartment. I used a wet/dry vac and vacuumed out a large amount of junk, probably decayed leaf material from its first life. Found a rust pin hole under that, used a crevice tool to get all the way to each air tower at the left and right air towers. I could feel that the body sealer was loose and coming out. A friend of mine that does body work helped me with this, since he has longer arms and thinner fingers. He used a stubby flat screw driver, reached in there, felt around and cleaned out the old sealer, vacuumed this out. Then wiped this out using lacquer thinner. Then resealed all this with body seam sealer from a tube. He had nitrile gloves on, would put the sealer on the tip of his finger, reach in and smear the edge of the air tower, including where the air tower screws come through. After the entire plenum was cleaned out completely, we por15’d it all. Then I flat black painted everything to look correct. I forgot to mention, that we also had to remove the hydra wipe and wiper arm linkages to be able to do all of this. This will take a lot of time, but well worth the effort. When we were done, we fogged the corners with a rust preventative spray por15, that we couldn’t reach with a brush. Had to remove the cowl drain tubes and put shop towels in there to catch anything that might run out from this. Allow to dry overnight. Hope this all helps. Mike
Thanks, Mike. I know that rust and leaks in that area are a common issue. In my case, the dash removal disturbed the seal around the lower part of the windshield. I had a local body shop remove and reseal it. Since then, all has been well.